
PARTPHONER PA1159WS-White
PARTPHONER Dusk to Dawn White Outdoor Post Light
Model: PA1159WS-White
Brand: PARTPHONER
Introduction
This manual provides detailed instructions for the installation, operation, and maintenance of your PARTPHONER Dusk to Dawn White Outdoor Post Light. This fixture is designed for outdoor use, featuring a built-in photocell sensor for automatic operation and durable construction to withstand various weather conditions.
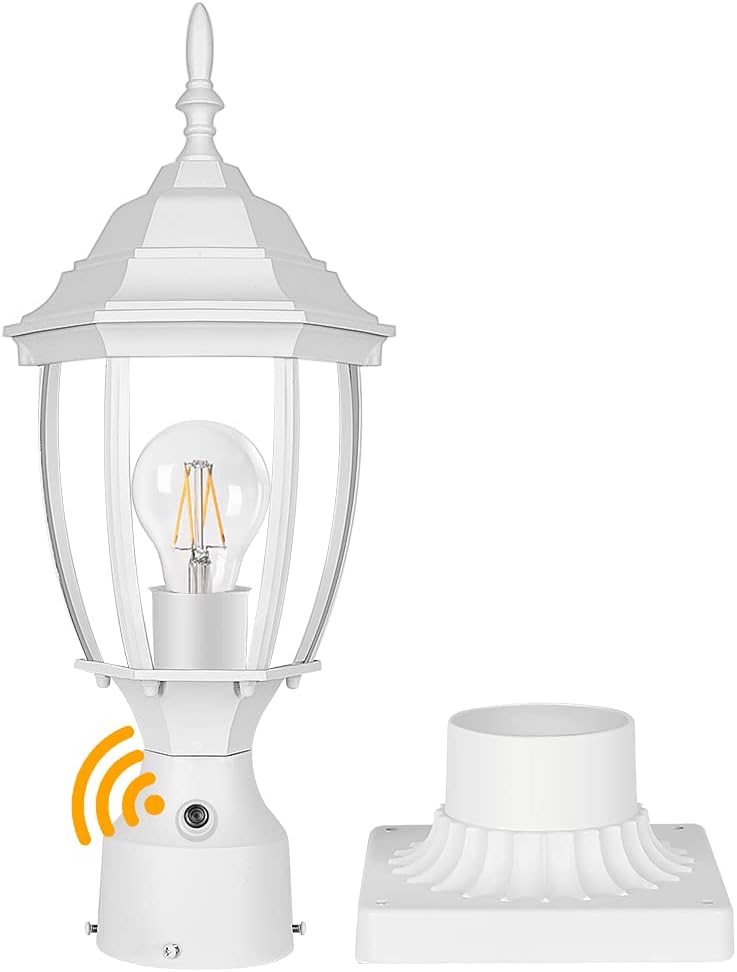
Image of the PARTPHONER Dusk to Dawn White Outdoor Post Light with its pier mount base.
Important Safety Information
Please read and understand all instructions before beginning installation. Failure to do so may result in electric shock, fire, or other hazards that could cause injury or property damage.
- WARNING: Risk of electric shock. Disconnect power at the circuit breaker or fuse box before installation or servicing.
- All electrical connections must be in accordance with local codes, ordinances, or the National Electric Code (NEC). Consult a qualified electrician if you are unfamiliar with proper electrical wiring connections.
- Ensure the fixture is properly grounded.
- Do not install this fixture on a surface that is not stable or capable of supporting its weight.
- Use only bulbs of the specified type and wattage.
- Keep flammable materials away from the light fixture.
Package Contents
Verify that all components are present before proceeding with installation:
- Outdoor Post Light Fixture
- Pier Mount Base
- Mounting Hardware (screws, wire nuts)
Note: Bulb is not included.
Setup and Installation
This post light fixture is designed for hardwired 120V electrical systems. It offers two primary mounting methods: pole mount or pier mount.
Tools Required (Not Included):
- Screwdriver
- Wire Strippers
- Pliers
- Electrical Tape
- Safety Glasses
Installation Steps:
- Turn Off Power: Before starting any electrical work, ensure the power supply to the installation area is turned off at the circuit breaker or fuse box.
- Prepare Mounting Surface:

Diagram showing two mounting options: pole mount for a 3-inch lamp post and pier mount using the included base.
- For Pole Mount: The fixture is designed to fit a standard 3-inch diameter lamp post. Ensure your existing pole is compatible.
- For Pier Mount: Use the included pier mount base. Secure the base to a flat, stable surface (e.g., a pillar or column) using appropriate screws (not always included, depending on surface material).
- Wiring Connections:
- Connect the white wire from the fixture to the white (neutral) wire from your power supply.
- Connect the black wire from the fixture to the black (hot) wire from your power supply.
- Connect the green or bare copper (ground) wire from the fixture to the green or bare copper (ground) wire from your power supply.
- Secure all connections with wire nuts and electrical tape.
- Mount the Fixture: Carefully place the light fixture onto the prepared pole or pier mount base. Secure it using the provided screws or mounting hardware.
- Install Bulb: Insert an E26 base bulb, up to a maximum of 100 Watts, into the socket. Ensure the bulb is securely tightened.

Image showing the compatible bulb type (E26 base) and maximum wattage (100W) for the post light.
- Restore Power: Once installation is complete and all connections are secure, restore power at the circuit breaker.
Operating Instructions
This post light features a built-in photocell sensor for automatic dusk-to-dawn operation.
- Automatic On/Off: The integrated photocell sensor detects ambient light levels. The light will automatically turn on when it gets dark (dusk) and turn off when it becomes light (dawn).
- No Manual Control: There is no manual switch for this feature. Ensure the sensor is not obstructed by objects, dirt, or debris, as this can interfere with its operation.

Image illustrating the dusk-to-dawn sensor functionality, showing the light off during the day and on at night in an outdoor setting.
Maintenance
Regular maintenance helps ensure the longevity and optimal performance of your post light.
- Cleaning: Periodically clean the fixture with a soft, damp cloth. Do not use abrasive cleaners or solvents, as they may damage the finish or glass. Ensure the photocell sensor is clean and free of obstructions.
- Bulb Replacement: Before replacing the bulb, ensure the power is turned off at the circuit breaker. Allow the old bulb to cool completely. Unscrew the old bulb and replace it with a new E26 base bulb, not exceeding 100 Watts.
- Inspection: Periodically inspect the wiring and connections for any signs of wear, damage, or corrosion.

Image of the post light installed outdoors during rain and lightning, highlighting its IP65 waterproof rating.
The fixture is constructed from die-cast aluminum and sturdy clear glass, designed for durability and weather resistance.

Close-up image detailing the die-cast aluminum construction, clear glass panels, and the integrated dusk-to-dawn sensor of the post light.
Troubleshooting
| Problem | Possible Cause | Solution |
|---|---|---|
| Light does not turn on at night. |
|
|
| Light stays on during the day. |
|
|
| Light flickers. |
|
|
Specifications
| Feature | Detail |
|---|---|
| Brand | PARTPHONER |
| Model Number | PA1159WS-White |
| Color | White |
| Material | Aluminum, Glass |
| Product Dimensions | 18"L x 6.5"W x 5.7"H |
| Item Weight | 2.61 pounds (1.19 Kilograms) |
| Power Source | Corded Electric |
| Voltage | 120 Volts |
| Bulb Base | E26 |
| Maximum Wattage | 100 Watts |
| Special Feature | Waterproof (IP65 rating) |
| Installation Type | Hardwired Installation |
| Indoor/Outdoor Usage | Outdoor |
| Control Method | Photocell Sensor (Dusk to Dawn) |
Warranty and Support
PARTPHONER products are manufactured to high-quality standards. For information regarding product warranty, returns, or technical support, please refer to the official PARTPHONER brand store or contact their customer service directly.
Visit the PARTPHONER Store for more information.
Ask a question about this manual
Ask about setup, troubleshooting, compatibility, parts, safety, or missing instructions. Manuals+ will review the question and use this page’s manual context to help answer it.