
iTOMA CKS207
iTOMA CKS207 Alarm Clock Radio User Manual
Model: CKS207
Brand: iTOMA
1. Introduction
Thank you for purchasing the iTOMA CKS207 Alarm Clock Radio. This device combines a digital alarm clock with a 15W ultra-fast wireless phone charger, Bluetooth speaker, USB charging port, FM radio, and a dimmable LED display. This manual provides detailed instructions for setup, operation, and maintenance to ensure optimal performance and longevity of your product.

Figure 1.1: iTOMA CKS207 Alarm Clock Radio with wireless and wired charging capabilities.
2. Important Safety Information
Please read and understand all safety instructions before using this product. Keep this manual for future reference.
- Do not expose the unit to dripping or splashing water.
- Do not place objects filled with liquids, such as vases, on the unit.
- Ensure proper ventilation; do not block any ventilation openings.
- Only use attachments/accessories specified by the manufacturer.
- Unplug the unit during lightning storms or when unused for long periods.
- Do not attempt to disassemble or modify the unit. Refer all servicing to qualified service personnel.
- Keep the unit away from direct sunlight, heat sources, and strong magnetic fields.
3. Product Overview
3.1 Package Contents
Verify that all items are present in the package:
- iTOMA CKS207 Alarm Clock Radio Unit
- Power Adapter (Corded Electric)
- User Manual
3.2 Device Layout
Familiarize yourself with the buttons and ports on your iTOMA CKS207 unit.

Figure 3.1: Top panel controls and display of the iTOMA CKS207.
- SNOOZE/VOL- Button: Press to snooze alarm; long press to decrease volume.
- VOL+ Button: Long press to increase volume.
- TUNE-/TUNE+ Buttons: Adjust FM frequency; navigate menus.
- CLOCK SET Button: Enter time setting mode.
- AL1/AL2 Buttons: Set Alarm 1 and Alarm 2.
- ON/OFF Button: Power on/off the unit.
- SLEEP/TIME ZONE Button: Set sleep timer; adjust time zone.
- FM MEM/BT PAIR Button: Save FM presets; initiate Bluetooth pairing.
- FM STO/BT MII Button: Auto-scan and store FM stations; play/pause Bluetooth.
- WEEK Button: Select alarm days.
- DIMMER Button: Adjust display brightness.
- LED Button: Control night light.
- MODE Button: Switch between FM Radio and Bluetooth modes.
- Wireless Charging Pad: Top surface for wireless charging compatible devices.
- USB Charging Port (Type-A): Rear port for wired device charging.
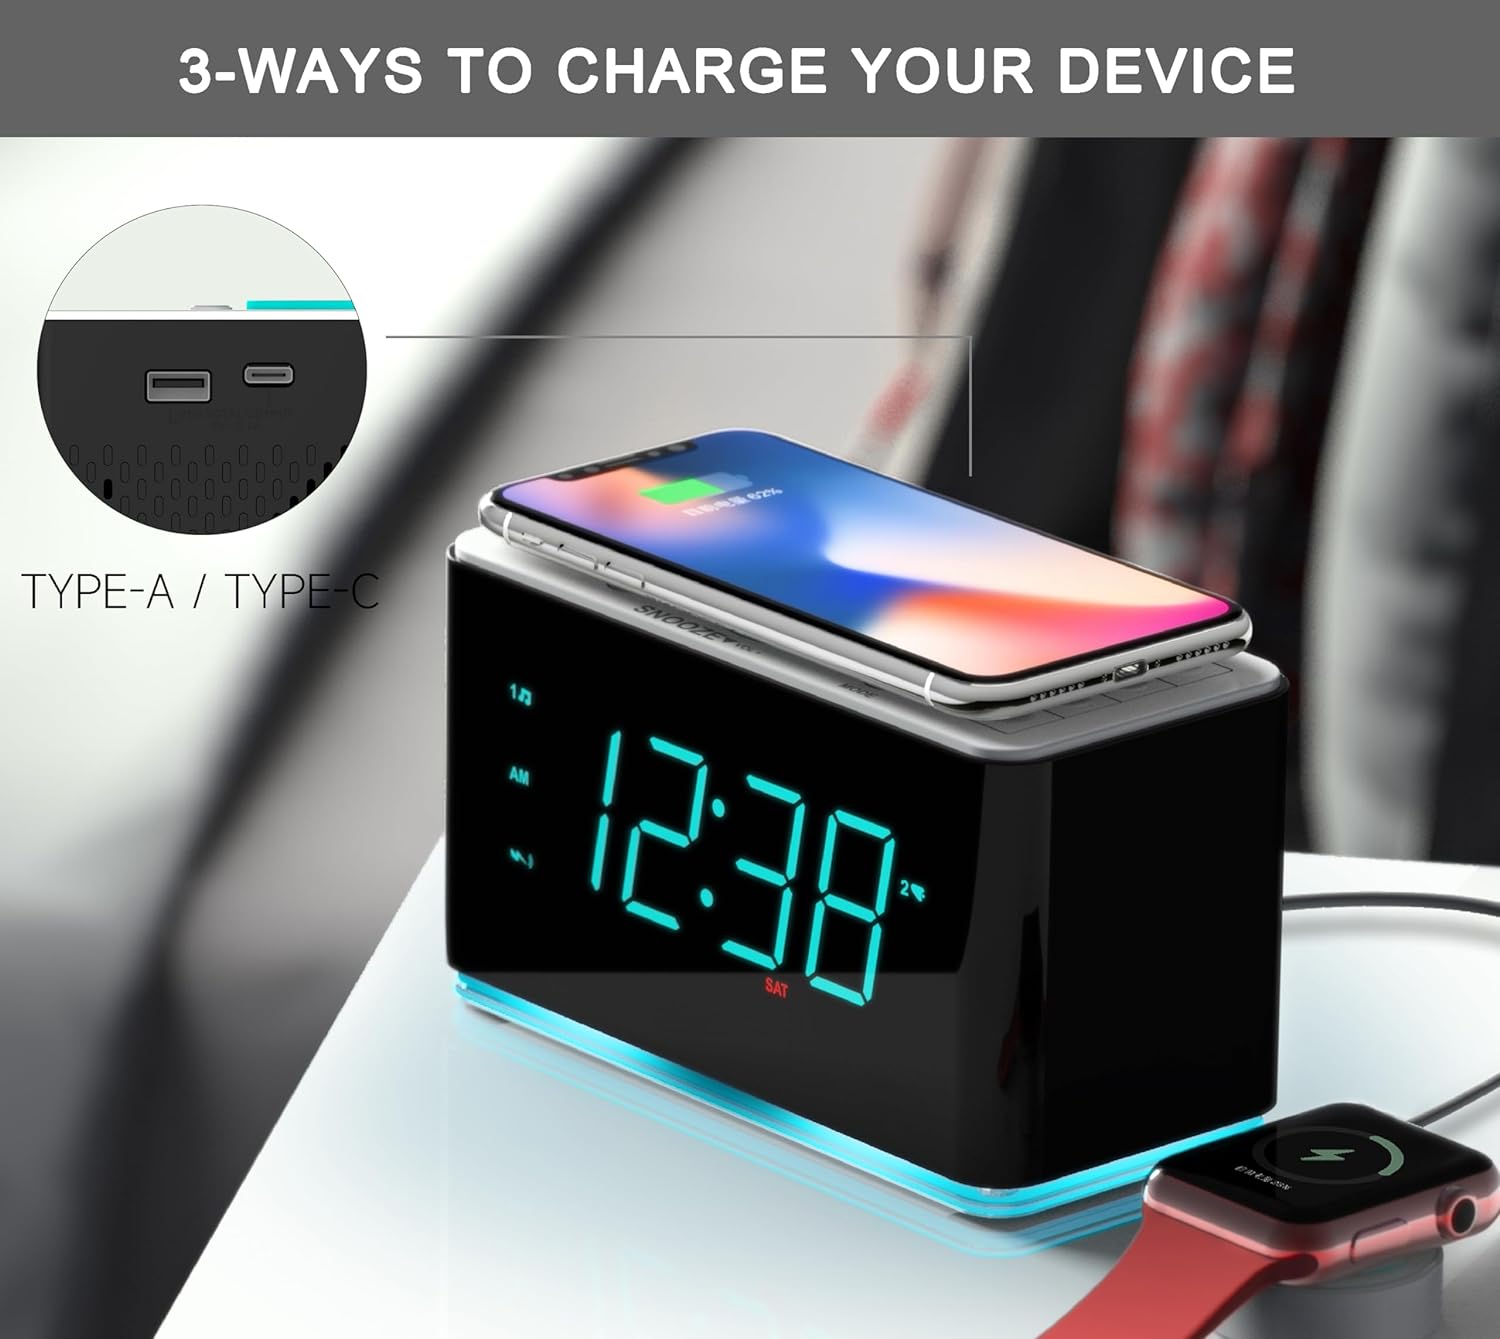
Figure 3.2: Multiple charging options including wireless and USB ports.
4. Setup
4.1 Power Connection
Connect the provided power adapter to the DC IN jack on the back of the unit and then plug it into a standard wall outlet. The unit will power on and the display will illuminate.
4.2 Initial Time Setting
Upon initial power-up, the clock may automatically set the time. If not, or if you need to adjust it:
- Press and hold the CLOCK SET button. The hour digits will flash.
- Use the TUNE- or TUNE+ buttons to adjust the hour.
- Press CLOCK SET again to confirm the hour. The minute digits will flash.
- Use the TUNE- or TUNE+ buttons to adjust the minutes.
- Press CLOCK SET to confirm the minutes. The year digits will flash.
- Repeat the process to set the year, month, and day.
- Press CLOCK SET one last time to exit time setting mode.
4.3 Battery Backup
The unit includes a memory battery backup to retain time and alarm settings during a power outage. This battery is for backup purposes only and does not power the display or functions of the clock.
5. Operating Instructions
5.1 Setting the Time and Date
Refer to section 4.2 for detailed instructions on setting the time and date.
5.2 Alarm Settings
The iTOMA CKS207 features dual alarms with four alarm modes.

Figure 5.1: Dual alarm functionality.
- Press and hold the AL1 or AL2 button. The alarm hour digits will flash.
- Use TUNE- or TUNE+ to adjust the alarm hour. Press AL1/AL2 to confirm.
- Adjust the alarm minutes using TUNE- or TUNE+. Press AL1/AL2 to confirm.
- Select the alarm source (FM Radio or Buzzer) using TUNE- or TUNE+. Press AL1/AL2 to confirm.
- Choose the alarm mode (Single Day, Every Day, Weekdays Only, Weekends Only) using WEEK button. Press AL1/AL2 to confirm.
- To activate/deactivate an alarm, short press AL1 or AL2. The alarm icon will appear/disappear on the display.
5.3 FM Radio Operation
- Press the MODE button to switch to FM Radio mode.
- Use TUNE- or TUNE+ to manually tune to a desired frequency.
- To auto-scan and store stations, press and hold the FM STO/BT MII button. The radio will scan and save available stations to presets.
- To recall saved presets, short press the FM MEM/BT PAIR button, then use TUNE- or TUNE+ to cycle through presets.
5.4 Bluetooth Pairing and Playback
Connect your smartphone or other Bluetooth-enabled device to the alarm clock.

Figure 5.2: Bluetooth connectivity for audio streaming.
- Press the MODE button to switch to Bluetooth mode. The Bluetooth icon will flash on the display.
- On your device, enable Bluetooth and search for
Related documentsCKS207


Ask a question about this manual
Ask about setup, troubleshooting, compatibility, parts, safety, or missing instructions. Manuals+ will review the question and use this page’s manual context to help answer it.