
visiPower TY100
visiPower TY100 1080P Pan/Tilt WiFi IP Camera User Manual
Model: TY100
Your guide to setting up, operating, and maintaining your security camera.
1. Introduction
Thank you for choosing the visiPower TY100 1080P Pan/Tilt WiFi IP Camera. This camera is designed to provide high-definition surveillance with advanced features such as humanoid motion detection, automatic tracking, and two-way audio. This manual will guide you through the installation, operation, and maintenance of your new security camera.
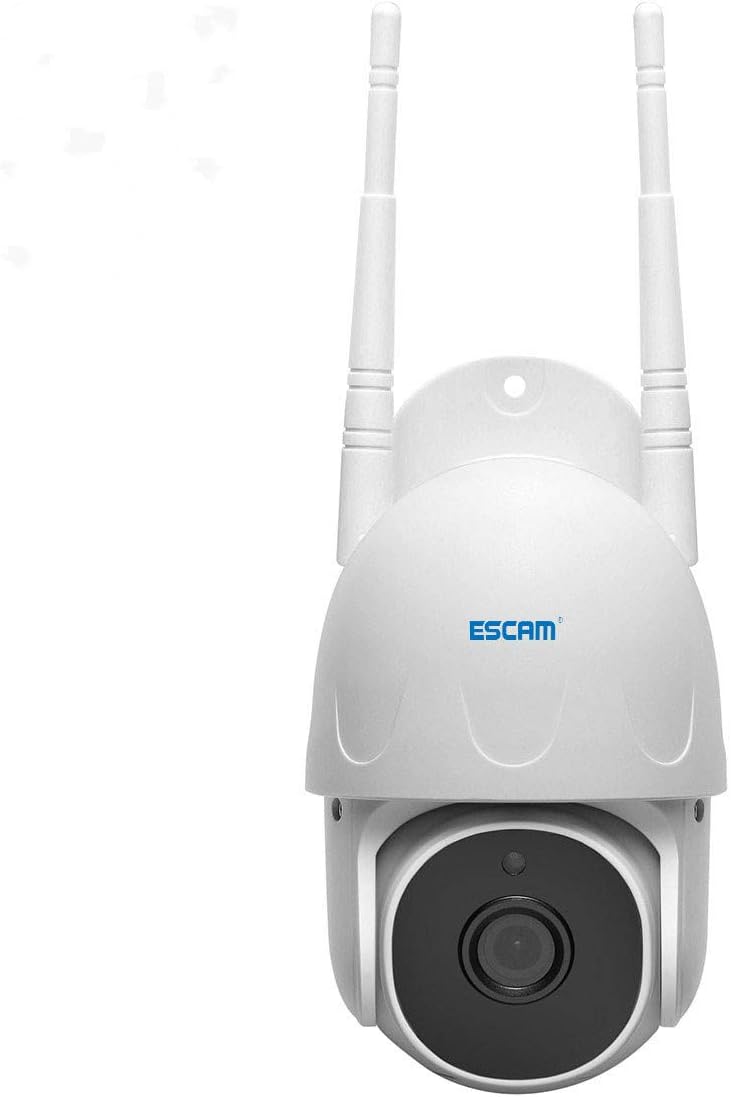
Figure 1.1: visiPower TY100 IP Camera
The visiPower TY100 camera features a sleek design with dual antennas for enhanced Wi-Fi connectivity.
2. Product Overview
The visiPower TY100 camera is equipped with a 2 Megapixel progressive scan CMOS sensor and a 3.6mm lens, providing clear 1080P resolution. It supports Pan (355°) and Tilt (100°) functions for wide area coverage.

Figure 2.1: Product Details and Component Identification
This diagram illustrates the dimensions and key components of the camera, including antennas, microphone, speaker, photosensitive sensor, IR LEDs, lens, reset button, Micro SD card slot, and power cable port.
Key Components:
- Antenna: For Wi-Fi connectivity.
- Microphone: For audio input and two-way communication.
- Speaker: For audio output and two-way communication.
- Photosensitive Sensor: Detects ambient light for automatic day/night mode switching.
- IR LEDs: 8pcs IR leds for night vision up to 20 meters.
- 3.6mm Lens: Provides a 75.7° angle of view.
- Reset Button: Used to reset the camera to factory settings.
- Micro SD Card Slot: Supports up to 128 GB for local storage.
- 5V2A Power Cable: For power supply.
3. What's in the Box
Before you begin, please check the package contents to ensure all items are present and in good condition.

Figure 3.1: Package Contents
This image displays all items included in the product packaging, ensuring you have everything needed for installation.
Package List:
- IP Camera x 1
- Power Adapter x 1
- Screws Package x 1
- Reset Needle x 1
- Quick Start Guide x 1
4. Setup
Follow these steps to set up your visiPower TY100 camera:
4.1 Power Connection
- Connect the provided power adapter to the camera's power input port.
- Plug the power adapter into a standard electrical outlet. The camera will power on and initiate its self-test.
4.2 App Download and Account Registration
- Download the recommended mobile application (e.g., Tuya Smart or Smart Life, as the camera is powered by Tuya) from your smartphone's app store (App Store for iOS, Google Play Store for Android).
- Open the app and register a new account if you don't have one, or log in with an existing account.
4.3 Network Connection
The camera supports Wi-Fi 802.11b/g/n (2.4G band) and AP Connection.
- Wi-Fi Connection (Recommended):
- In the app, tap 'Add Device' or the '+' icon.
- Select 'Security & Video Surveillance' > 'Smart Camera'.
- Follow the on-screen instructions to connect the camera to your home Wi-Fi network. This typically involves scanning a QR code displayed on your phone with the camera, or entering your Wi-Fi password.
- AP Connection (Access Point Mode):
- If you do not have a router or prefer direct connection, the camera can create its own Wi-Fi hotspot.
- In the app, select AP Mode connection.
- Connect your phone directly to the camera's Wi-Fi hotspot (usually named 'SmartLife-XXXX' or similar) from your phone's Wi-Fi settings.
- Return to the app to complete the connection.

Figure 4.1: Camera Installation Example
The camera can be mounted on a wall or ceiling using the provided screws, suitable for indoor use.
5. Operating
Once your camera is set up and connected to the app, you can begin utilizing its features.
5.1 Live View and Pan/Tilt Control
- Open the app and select your camera from the device list to access the live view.
- You can manually control the camera's pan (355°) and tilt (100°) movements by sliding your finger across the screen in the live view interface.

Figure 5.1: Pan/Tilt Monitoring
Control the camera's viewing angle remotely through the mobile application, allowing for comprehensive area coverage.
5.2 Humanoid Motion Detection and Tracking
- The camera features advanced humanoid motion detection. When a human figure is detected, the camera will automatically trigger an alarm and push notifications to your phone.
- The camera will also automatically track the detected human, keeping them in the frame.
- You can adjust sensitivity settings and notification preferences within the app.
5.3 Night Vision
- Equipped with 8 IR LEDs, the camera automatically switches to night vision mode in low-light conditions.
- It provides clear black and white images up to 20 meters in complete darkness.
5.4 Two-Way Audio
- Use the built-in microphone and speaker to communicate with people on the camera's side.
- Tap the microphone icon in the app's live view to speak, and listen through the speaker.
5.5 Storage Options
- TF Card (Micro SD): Insert a Micro SD card (up to 128 GB, not included) into the designated slot for local video recording.
- Cloud Storage: The camera offers a free 1-month cloud storage experience. You can subscribe to cloud storage plans for continuous recording and secure off-site backup.
6. Maintenance
Regular maintenance ensures optimal performance and longevity of your camera.
6.1 Cleaning
- Gently wipe the camera lens and body with a soft, dry cloth.
- Do not use harsh chemicals, cleaning solvents, or aerosol cleaners as they may damage the camera's surface or internal components.
6.2 Firmware Updates
- Periodically check the mobile app for available firmware updates.
- Firmware updates can improve performance, add new features, and enhance security. Follow the in-app instructions carefully when performing updates.
6.3 Resetting the Camera
- If you encounter persistent issues or need to reconfigure the camera, you can perform a factory reset.
- Locate the reset button (refer to Figure 2.1). Use the provided reset needle or a thin pin to press and hold the reset button for approximately 5-10 seconds until you hear a prompt or see an indicator light change.
- After resetting, the camera will return to its default settings and you will need to re-add it to the app.
7. Troubleshooting
If you experience issues with your camera, refer to the following common problems and solutions:
| Problem | Possible Cause | Solution |
|---|---|---|
| Camera offline/Cannot connect to Wi-Fi | Incorrect Wi-Fi password; Camera too far from router; Router 5GHz only; Network congestion. | Ensure correct 2.4GHz Wi-Fi password. Move camera closer to router. Ensure router supports 2.4GHz. Restart router and camera. |
| Poor image quality | Dirty lens; Insufficient lighting; Network bandwidth issues. | Clean the lens with a soft cloth. Ensure adequate lighting or check night vision. Check internet speed. |
| Motion detection not working | Detection sensitivity too low; Detection area not set; Notifications disabled. | Adjust motion detection sensitivity in the app. Define detection zones. Enable push notifications for the app. |
| Two-way audio not working | Microphone/speaker muted; App permissions. | Check mute settings in the app. Ensure the app has microphone permissions on your phone. |
| SD card not recording | SD card full/corrupted; Incorrect recording settings. | Format the SD card in the app. Check recording schedule and mode settings. Replace SD card if corrupted. |
If the problem persists after trying these solutions, please contact customer support.
8. Specifications
Detailed technical specifications for the visiPower TY100 IP Camera:
| Feature | Specification |
|---|---|
| Model | TY100 |
| Sensor | 1/2.9” 2 Megapixel progressive scan CMOS |
| Electronic Shutter Speed | Auto/Manual, 1/50~1/10000s |
| Minimum Illumination | Color: 0.1Lux@F1.2, B/W: 0.01Lux@F1.2 |
| Focal Length | 3.6mm |
| Angle of View | 75.7° |
| Pan/Tilt Function | Pan: 355°, Tilt: 100° |
| Day/Night Switch | 8pcs IR LEDs, IR distance 20m |
| Video Compression | H.264 |
| Resolution | Mainstream: 1080P (1920*1080), Substream: 720P (1280*720) |
| Video Frame Rate | 20fps (50HZ), 20fps (60HZ) |
| Wireless Connectivity | WIFI 802.11b/g/n, 2.4G band |
| IP Type | Dynamic IP |
| Network Protocol | TCP/IP, NTP, DHCP, DNS |
| Client Support | iPhone, iPad, Android |
| Alarm Detection | Humanoid detection and automatically tracking, Motion detection and automatically tracking |
| Alarm Action | Alarm recording, alarm capture, APP push |
| Audio Input | Built-in microphone |
| Audio Output | Built-in speaker |
| TF Card Storage | Support max to 128 GB TF card (micro SD) |
| Cloud Storage | Free 1 month cloud storage experience |
| Power Supply | DC5V |
| Power Consumption | <5W |
| Working Environment | -10°C~+50°C, 10%~85% humidity |
| Dimension | 160mm * 90mm * 140mm |
| Weight | 0.38kg |
| Package Dimension | 200mm * 175mm * 110mm |
| Package Weight | 0.56kg |
| UPC | 784136172311 |
| ASIN | B08Z711ZWP |
9. Warranty and Support
For warranty information, please refer to the terms and conditions provided at the time of purchase or contact your retailer. If you require technical assistance or have questions not covered in this manual, please contact visiPower customer support.
You can also visit the official visiPower store for more information and support resources: visiPower Store on Amazon
Ask a question about this manual
Ask about setup, troubleshooting, compatibility, parts, safety, or missing instructions. Manuals+ will review the question and use this page’s manual context to help answer it.