
1. Introduction
Thank you for choosing the BONSEN A3 Laminator L3402. This device is designed to protect and preserve your important documents, photos, and creative projects with ease and efficiency. Featuring advanced anti-jam technology, precise NTC temperature control, and rapid lamination capabilities, it is ideal for use in homes, schools, and offices. Please read this manual thoroughly before operation to ensure safe and optimal performance.
2. Safety Instructions
To prevent injury or damage to the laminator, always follow these safety guidelines:
- Do not insert empty laminating pouches into the machine.
- Always insert the sealed edge of the laminating pouch first.
- Ensure the pouch is aligned parallel to the laminator's entry slot.
- Center the item within the pouch, leaving a border on each side.
- Do not join multiple pouches together.
- Do not cut laminating pouches before lamination.
- Avoid using deformed or damaged pouches.
- Laminate only one pouch at a time.
- Keep hands and loose clothing away from the entry and exit slots during operation.
- Unplug the laminator when not in use or before cleaning.

3. Package Contents
Verify that all items are present in the package:
- 1 x BONSEN A3 Laminator L3402
- 50 x A4 Laminating Pouches
- 25 x A5 Laminating Pouches
- 25 x A6 Laminating Pouches
- 1 x Paper Cutter
- 1 x Corner Rounder
4. Product Overview
The BONSEN A3 Laminator L3402 is designed for user-friendly operation. Key features include a wide entry for various document sizes, precise temperature control, and an anti-jam release function.


5. Setup
Follow these steps to set up your laminator:
- Place the laminator on a stable, flat surface.
- Ensure there is enough space around the machine for proper ventilation and for documents to pass through freely.
- Plug the power cord into a suitable electrical outlet.
- Turn on the laminator using the ON/OFF switch.
Video 1: Unboxing and Initial Setup of the Laminator
6. Operating Instructions
6.1. Power On and Preheating
- Turn on the laminator using the ON/OFF switch.
- Wait approximately 3 minutes for the machine to preheat. The indicator light will change from red to green when ready.

6.2. Selecting Lamination Mode
The laminator offers flexible heating levels for various materials:
- 80mic: For standard documents.
- 125mic: For thicker documents or enhanced durability.
- Photo: Optimized setting for laminating photographs.
- Cold: For heat-sensitive documents using self-adhesive cold laminating pouches.
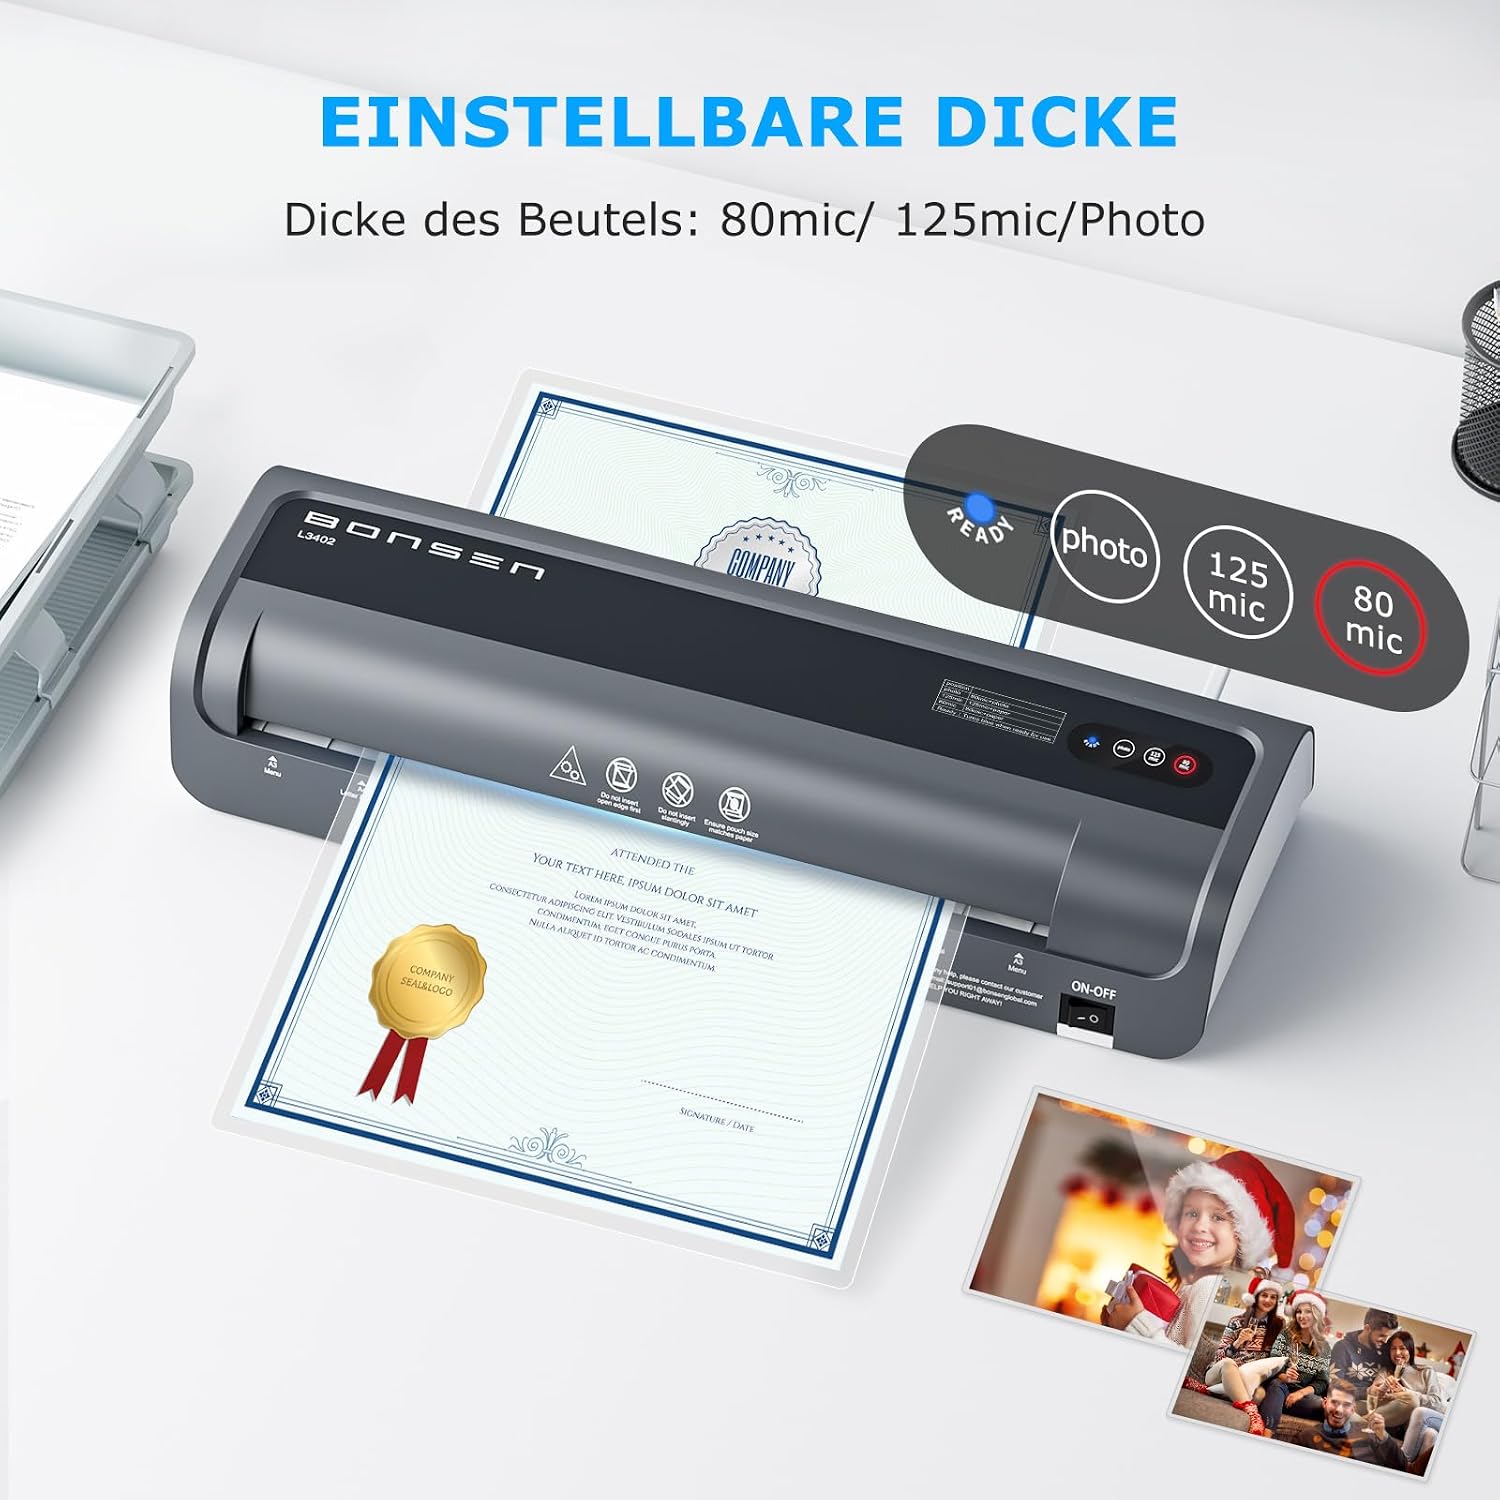
6.3. Laminating a Document
Once the laminator is preheated and the correct mode is selected:
- Place your document or photo inside a laminating pouch of the appropriate size.
- Insert the sealed edge of the pouch into the laminator's entry slot, ensuring it is straight and centered.
- The machine will automatically feed the pouch through. Do not pull or push the pouch.
- Once the lamination process is complete, remove the laminated document from the exit slot.

Video 2: Demonstrating the Lamination Process and ABS Release
6.4. Anti-Jam (ABS) Release
In case of a paper jam, the laminator is equipped with an ABS release function:
- If a pouch gets stuck, immediately press and hold the ABS lever located on the side of the machine.
- Gently pull the jammed pouch out of the entry slot.
- Release the ABS lever once the pouch is removed.

6.5. Using the Paper Cutter and Corner Rounder
The included accessories enhance your laminated documents:
- Paper Cutter: Use the paper cutter to trim excess laminating film or to cut documents to desired sizes after lamination. Place the laminated document under the cutting guide and slide the blade for a clean cut.
- Corner Rounder: For a professional finish and to prevent sharp edges, use the corner rounder on your laminated documents. Insert the corner of the document into the rounder and press down.
Video 3: Lamination Process and Use of Accessories
7. Maintenance
Proper maintenance ensures the longevity of your laminator:
- Always unplug the laminator before cleaning.
- Wipe the exterior of the machine with a soft, dry cloth. Do not use abrasive cleaners or solvents.
- Regularly check the entry and exit slots for any debris or adhesive residue. Clean gently if necessary.
- Store the laminator in a cool, dry place when not in use.
8. Troubleshooting
If you encounter issues with your laminator, refer to the following common problems and solutions:
| Problem | Possible Cause | Solution |
|---|---|---|
| Pouch is jammed | Incorrect insertion, pouch too thick, or foreign object. | Press and hold the ABS release lever and gently pull out the pouch. Ensure correct insertion and appropriate pouch thickness. |
| Poor lamination quality (bubbles, wrinkles) | Incorrect temperature setting, old pouches, or uneven insertion. | Ensure the correct temperature mode (80mic, 125mic, Photo) is selected. Use fresh, high-quality pouches. Insert pouches straight and centered. |
| Laminator does not heat up | Not plugged in, power switch off, or internal fault. | Check power connection and ensure the ON/OFF switch is in the 'ON' position. If the issue persists, contact customer support. |


9. Specifications
| Feature | Specification |
|---|---|
| Brand | BONSEN |
| Model | L3402 |
| Color | Dark Grey |
| Max. Lamination Width | 33 cm (13 inches) |
| Compatible Sheet Sizes | A3, A4, A5, A6 |
| Preheating Time | Approx. 3 minutes |
| Lamination Speed | 300 mm/min |
| Pouch Thickness Settings | 80mic, 125mic, Photo, Cold |
| Anti-Jam Feature | ABS Release Button |
| Product Dimensions (L x W x H) | 42.6 x 15.7 x 8.1 cm |
| Item Weight | 2.4 kg |
10. Warranty and Support
The BONSEN A3 Laminator L3402 comes with a 2-year protection period, ensuring peace of mind regarding product quality and performance. For any technical assistance, troubleshooting beyond this manual, or warranty claims, please contact BONSEN customer support through your retailer or the official BONSEN website. Please have your product model and purchase information ready when contacting support.