
PXN A9
PXN-A9 Steering Wheel Stand Instruction Manual
Model: A9
1. Introduction
Thank you for choosing the PXN-A9 Steering Wheel Stand. This stand is designed to enhance your racing simulation experience by providing a stable and adjustable platform for your steering wheel, pedals, and shifter. It is compatible with a wide range of popular racing peripherals, including Logitech G25, G27, G29, G920, G923, and Thrustmaster T300RS, T300GT, T500RS, TGT, TS models. The PXN-A9 features a foldable design for convenient storage and offers multiple adjustment options to suit various user preferences and driving postures.

Image 1.1: The PXN-A9 Steering Wheel Stand fully assembled with a steering wheel, pedals, and shifter.
2. Safety Information
- Ensure all bolts and knobs are securely tightened before use to prevent instability.
- Do not exceed the maximum weight capacity of the stand.
- Keep hands and fingers clear of moving parts during adjustment to avoid pinching.
- Place the stand on a flat, stable surface to prevent tipping.
- Children should only use the stand under adult supervision.
- Avoid exposing the stand to extreme temperatures or moisture.
3. Package Contents
Please verify that all the following components are included in your package:
- PXN-A9 Steering Wheel Stand Frame
- Steering Wheel Mounting Plate
- Pedal Mounting Plate
- Shifter Mounting Plate
- Assembly Hardware (screws, nuts, washers)
- Adjustment Knobs
- Instruction Manual

Image 3.1: The PXN-A9 stand components as they appear out of the box, highlighting its quick installation design.
4. Setup & Assembly
The PXN-A9 stand is designed for quick and straightforward assembly. Follow these steps to set up your racing wheel stand:
- Unfold the Main Frame: Carefully unfold the main frame of the stand until it locks into its open position. Ensure all hinges are fully extended and stable.
- Attach the Steering Wheel Plate: Secure the steering wheel mounting plate to the top section of the stand using the provided screws and adjustment knobs. Ensure it is firmly attached.
- Install the Pedal Plate: Position the pedal mounting plate at the base of the stand. Use the designated attachment points and hardware to secure it.
- Mount the Shifter Plate: Attach the shifter mounting plate to either the left or right side of the main frame, depending on your preference. Secure it with the appropriate hardware.
- Mount Your Peripherals:
- Steering Wheel: Place your racing steering wheel onto the steering wheel plate and secure it using its integrated clamps or mounting points.
- Pedals: Position your pedal set on the pedal plate and secure it using the provided straps or screws, if applicable.
- Shifter: Mount your shifter onto the shifter plate.
- Final Adjustments: Once all components are mounted, proceed to the "Adjustments" section to customize the stand to your preferred height and angle.

Image 4.1: Identification of key components: Steering wheel table, hanging lever plate (shifter mount), and foot pedal plate.
5. Compatibility
The PXN-A9 Steering Wheel Stand is designed for broad compatibility with popular racing simulation peripherals. It supports direct mounting for the following brands and models:
- Logitech: G25, G27, G29, G920, G923
- Thrustmaster: T300RS, T300GT, T500RS, TGT, TS-PC, T248X, T248, TX, T150, T80, Ferrari 458, TMX, TMX PRO
- Fanatec: Supports various Fanatec models (specific mounting patterns provided)
Note: Steering wheel, pedals, and shifter are not included with the stand.

Image 5.1: Compatibility overview with specific mounting patterns for various racing wheel brands.
6. Adjustments
The PXN-A9 stand offers several adjustment points to optimize your racing setup for comfort and performance.
6.1. Height Adjustment
The main frame allows for telescopic height adjustment to accommodate users of different heights. To adjust the height:
- Locate the adjustment knobs on the vertical support bars.
- Unscrew the knobs to loosen the locking mechanism.
- Extend or retract the upper section of the stand to your desired height (up to approximately 36 cm / 14.17 inches of extension).
- Securely tighten the knobs to lock the stand in place.

Image 6.1: Demonstration of the telescopic height adjustment feature.
6.2. Pedal Angle Adjustment
The pedal plate can be adjusted to various angles to provide a comfortable and ergonomic foot position.
- Locate the adjustment points at the base of the pedal plate.
- Loosen the fasteners that secure the pedal plate.
- Adjust the pedal plate to your desired angle (up to 45 degrees).
- Tighten the fasteners to secure the pedal plate in position.

Image 6.2: Visual guide for adjusting the pedal plate angle.
6.3. Shifter Position Adjustment
The shifter mounting plate is universal and can be installed on either the left or right side of the stand to accommodate different driving preferences.
- Determine your preferred side for the shifter (left or right).
- Attach the shifter mounting plate to the corresponding side using the provided hardware during initial assembly.
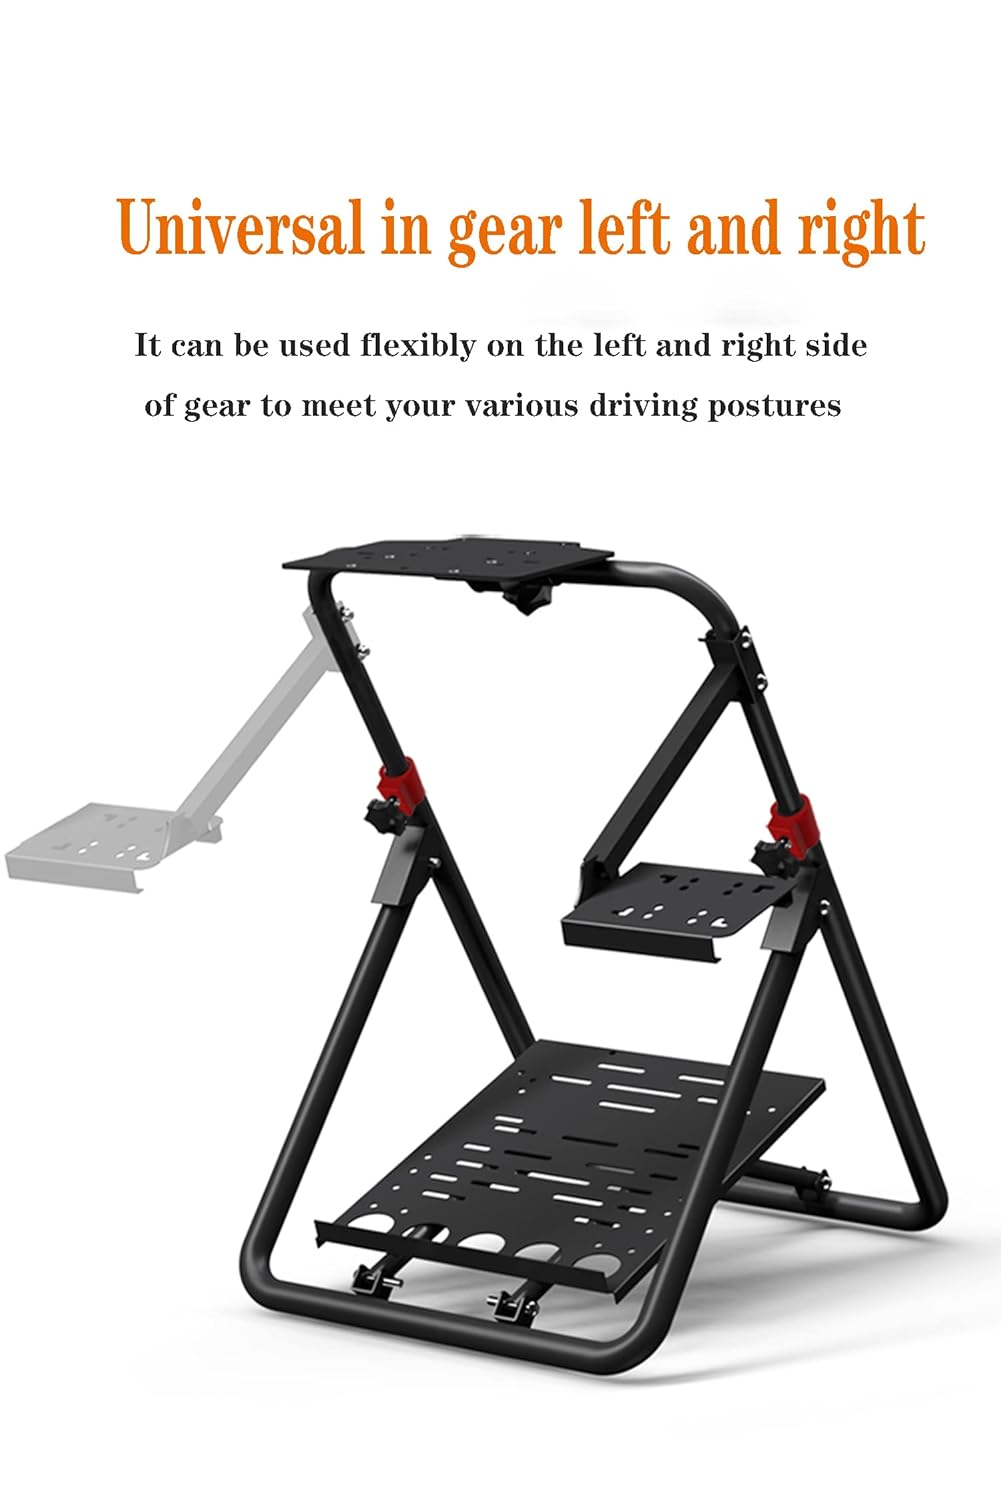
Image 6.3: Illustration of the shifter plate's flexible left or right mounting.
7. Folding & Storage
The PXN-A9 stand features a quick-folding design for convenient storage when not in use, minimizing space occupation.
- Remove Peripherals: Detach your steering wheel, pedals, and shifter from the stand.
- Loosen Adjustment Knobs: Loosen any tightened adjustment knobs on the stand.
- Fold the Frame: Carefully fold the main frame of the stand. The design allows for a compact folded form.
- Secure for Storage: Ensure the stand is fully folded and stable before moving it for storage.

Image 7.1: The stand before and after folding, demonstrating its space-saving design.

Image 7.2: The folded stand stored compactly, not occupying significant space.
8. Specifications
| Feature | Detail |
|---|---|
| Model | PXN-A9 |
| Material | Carbon Structural Steel Q235 |
| Product Dimensions (Unfolded) | Approx. 56cm (W) x 86cm (H) / 22in (W) x 33.9in (H) |
| Product Dimensions (Folded) | Approx. 60 x 68 x 12 cm (Package size) |
| Net Weight | Approx. 8.4 kg / 18.52 lbs |
| Height Adjustment Range | 22-33 inches / 56-86 cm (Telescopic extension up to 36 cm) |
| Pedal Angle Adjustment | 0-45 degrees |
| Shifter Mount | Universal left/right mounting |

Image 8.1: Detailed dimensions of the PXN-A9 Steering Wheel Stand.
9. Troubleshooting
If you encounter any issues with your PXN-A9 Steering Wheel Stand, please refer to the following common problems and solutions:
- Stand feels unstable:
- Ensure all adjustment knobs and bolts are securely tightened.
- Verify the stand is placed on a flat, level surface.
- Check that the main frame is fully unfolded and locked.
- Peripherals (wheel, pedals, shifter) are loose:
- Confirm that your peripherals are correctly mounted to their respective plates using their original clamping mechanisms or screws.
- Ensure the mounting plates themselves are securely attached to the stand frame.
- Difficulty adjusting height or angle:
- Loosen the adjustment knobs sufficiently before attempting to move the components.
- Do not force adjustments; if a part is stuck, re-check for any obstructions or misalignments.
10. Warranty & Support
PXN products are manufactured to high-quality standards. For specific warranty details, please refer to the warranty card included with your product or visit the official PXN website. If you require technical assistance or have questions not covered in this manual, please contact PXN customer support through their official channels.
Official PXN Website: www.pxn.cn
Please retain your proof of purchase for warranty claims.
Related documentsA9


Ask a question about this manual
Ask about setup, troubleshooting, compatibility, parts, safety, or missing instructions. Manuals+ will review the question and use this page’s manual context to help answer it.