
1. Introduction
Thank you for choosing the tectake Portable Air Cooler, Humidifier, and Fan. This manual provides essential information for the safe and efficient operation of your device. Please read it thoroughly before use and keep it for future reference.
2. Safety Instructions
To ensure safe operation, always follow these basic precautions:
- Ensure the power supply matches the voltage specified on the appliance.
- Do not immerse the appliance, cord, or plug in water or other liquids.
- Keep the appliance out of reach of children and pets.
- Unplug the appliance from the power outlet when not in use, before cleaning, or before moving.
- Do not operate the appliance with a damaged cord or plug.
- Do not block air inlets or outlets.
- Use only original accessories and spare parts.
- Place the appliance on a stable, flat surface.
- Do not use the appliance near flammable materials or in humid environments.
3. Package Contents
Verify that all items are present in the package:
- 1 x tectake Portable Air Cooler
- 1 x Remote Control
- 2 x Ice Packs (eutectic plates)
- Mounting Hardware (for optional wall mounting)
- User Manual (this document)
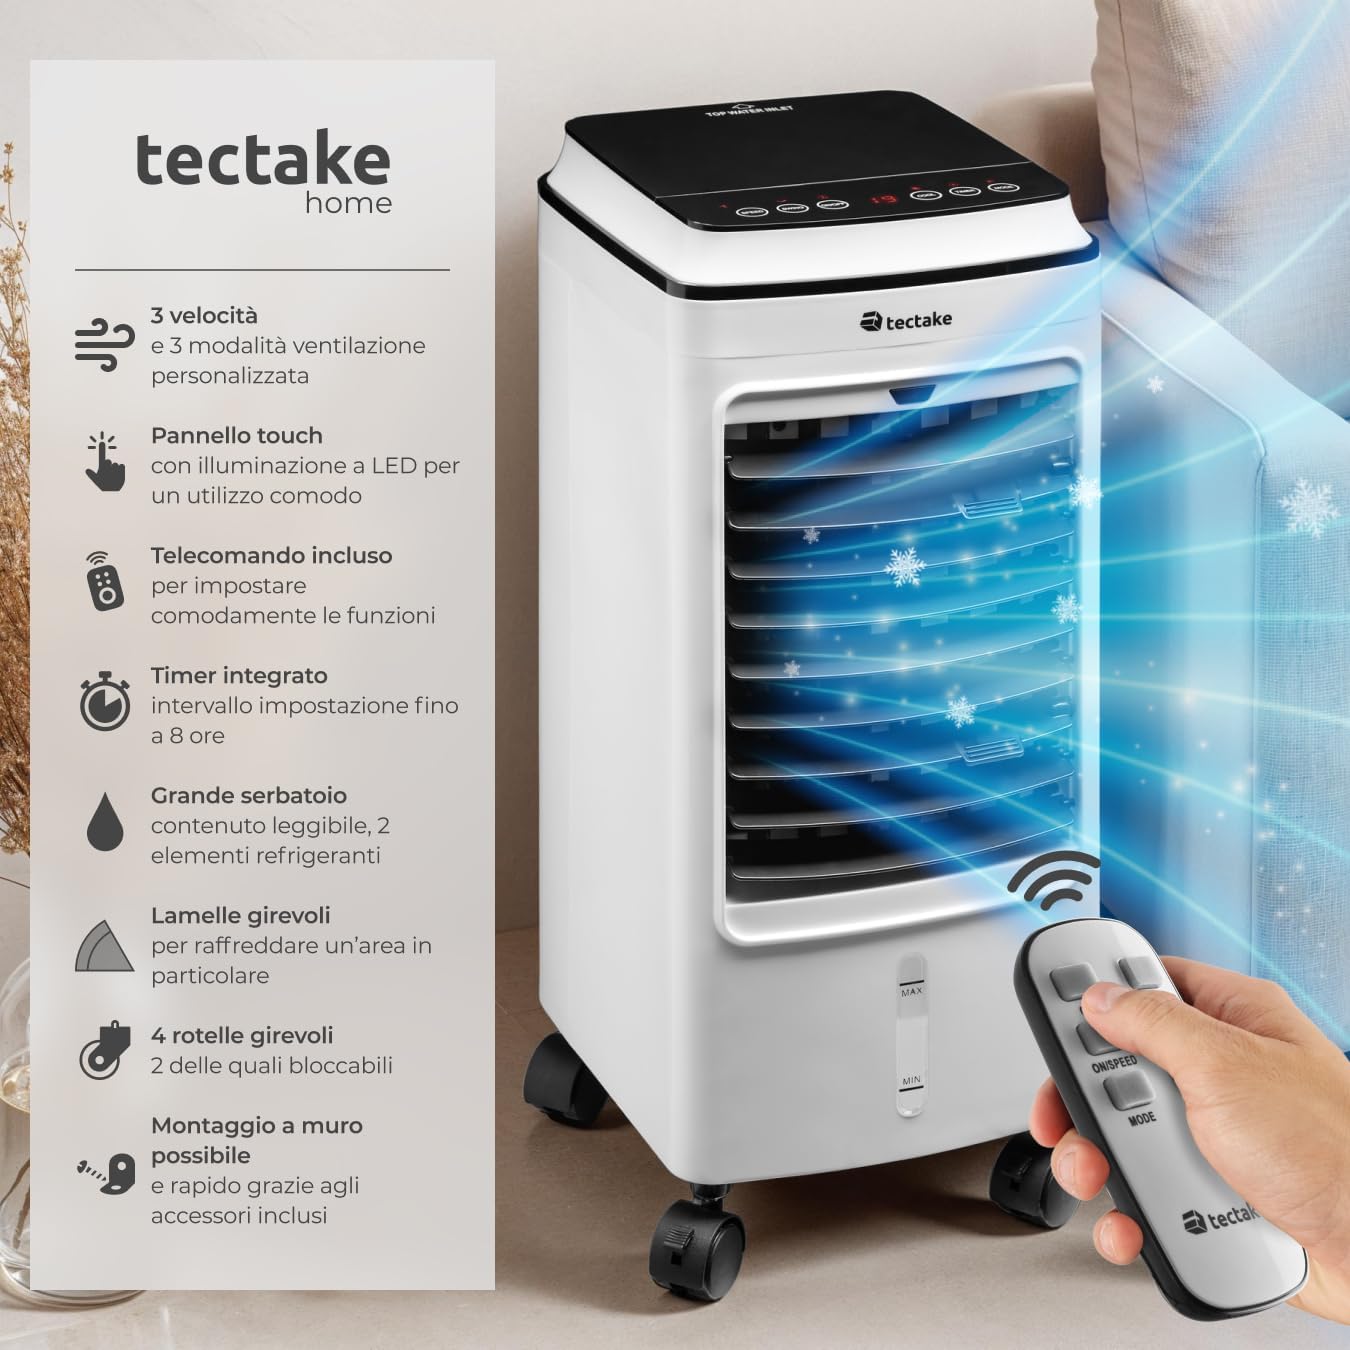
Image: The tectake Portable Air Cooler, showing its main unit, remote control, and a list of key features.
4. Product Overview
Familiarize yourself with the components of your air cooler:
- Control Panel: Touch-sensitive panel with LED illumination for easy operation.
- Air Outlet: Front grille where cooled air is expelled. Features oscillating vertical louvers.
- Water Tank: 4-liter capacity, located at the bottom, with a visible level indicator.
- Ice Pack Compartment: Located at the top, for inserting the included ice packs to enhance cooling.
- Air Filter: Removable and washable filter located at the rear.
- Wheels: Four swivel wheels for easy mobility, two of which are lockable.
- Remote Control: For convenient operation from a distance.

Image: The tectake Portable Air Cooler positioned in a living room, demonstrating its compact design.

Image: Detailed view of the water tank with level indicator and the top compartment for ice packs.
5. Setup
- Unpacking: Carefully remove the air cooler and all accessories from the packaging. Retain packaging for future storage or transport.
- Positioning: Place the air cooler on a firm, level surface. Ensure there is adequate space around the unit for proper airflow (at least 20 cm from walls or furniture). The swivel wheels allow for easy movement. Lock two of the wheels to secure the unit in place.
- Filling the Water Tank:
- Pull out the water tank from the bottom rear of the unit.
- Fill the tank with clean water, ensuring the level is between the 'MIN' and 'MAX' indicators.
- For enhanced cooling, place the two included ice packs in a freezer until frozen. Once frozen, place them into the designated compartment at the top of the water tank.
- Carefully slide the water tank back into the unit until it clicks into place.
- Power Connection: Plug the power cord into a suitable electrical outlet (220-240V, 50/60Hz).

Image: Close-up showing the touch control panel, manual adjustment of external louvers, removable air filter, and swivel wheels with locking mechanism.
6. Operating Instructions
The air cooler can be operated using the touch control panel on the unit or the remote control.
6.1 Control Panel and Remote Control Functions
| Button/Function | Description |
|---|---|
| ON/OFF | Powers the unit on or off. |
| SPEED | Adjusts fan speed: Low, Medium, High. |
| MODE | Selects operating mode: Normal, Natural, Sleep.
|
| TIMER | Sets the auto-off timer for up to 8 hours. Press repeatedly to cycle through time settings. |
| SWING | Activates or deactivates the automatic oscillation of the vertical louvers for wider air distribution. The internal louvers oscillate automatically up to 70°, while external louvers can be adjusted manually. |
| COOL (on remote) | Activates the cooling/humidifying function by pumping water from the tank. |

Image: The touch control panel with LED indicators and the wireless remote control, highlighting ease of use.
6.2 Initial Operation
- Press the ON/OFF button to turn on the unit.
- Select your desired fan speed using the SPEED button.
- Choose an operating mode (Normal, Natural, Sleep) with the MODE button.
- To activate cooling, press the COOL button (on remote) or the snowflake icon on the touch panel. Ensure the water tank is filled.
- Activate the SWING function for wider air distribution.
- To set a timer, press the TIMER button until the desired duration (1-8 hours) is displayed.
Video: Demonstration of the Cecotec EnergySilence 3500 Cool Compact Smart air cooler, showing the ice pack insertion and touch panel operation. Note: This video is from a different brand but illustrates similar functionality for an air cooler.
7. Maintenance
Regular maintenance ensures optimal performance and extends the life of your air cooler.
7.1 Cleaning the Air Filter
- Always unplug the unit before cleaning.
- Locate the air filter at the rear of the unit.
- Gently pull out the filter.
- Wash the filter with mild soap and water. Rinse thoroughly and allow it to air dry completely before reinserting.
- Reinsert the dry filter into its slot.
7.2 Cleaning the Water Tank
- Unplug the unit.
- Remove the water tank.
- Empty any remaining water.
- Clean the tank with a soft cloth and mild detergent. Rinse thoroughly to remove any residue.
- Allow the tank to dry completely before refilling or storing.
7.3 General Cleaning
- Wipe the exterior of the unit with a soft, damp cloth. Do not use abrasive cleaners or solvents.
- Ensure no water enters the internal electrical components.
8. Troubleshooting
If you encounter issues with your air cooler, refer to the following table:
| Problem | Possible Cause | Solution |
|---|---|---|
| Unit does not turn on. | No power supply; Power cord not properly plugged in. | Check power outlet; Ensure power cord is securely plugged in. |
| No cooling effect. | Water tank empty; Cooling function not activated; Ice packs not frozen or used. | Fill water tank; Activate COOL function; Use frozen ice packs. |
| Weak airflow. | Air filter clogged; Air inlets/outlets blocked. | Clean the air filter; Ensure clear space around the unit. |
| Unusual noise. | Unit not on a level surface; Obstruction in fan. | Place unit on a flat surface; Check for and remove any obstructions (unplug first). |
| Remote control not working. | Batteries depleted; Obstruction between remote and unit. | Replace batteries; Ensure clear line of sight to the unit's receiver. |
9. Specifications
| Feature | Detail |
|---|---|
| Brand | tectake |
| Model Number | 403915-3 |
| Material | Polypropylene (PP), ABS plastic, copper, steel |
| Color | White |
| Mounting Type | Freestanding (optional wall mounting) |
| Special Features | Timer, Humidifier, Touch Control Panel, Remote Control, Oscillating Louvers |
| Control Type | Touch, Remote Control |
| Water Tank Capacity | 4 Liters |
| Item Weight | 5.2 Kilograms |
| Dimensions (DxWxH) | 23.5 x 26.5 x 60 cm |
| Power | 75 Watts |
| Noise Level | 60 Decibels |
| Number of Speeds | 3 |
| Voltage | 220-240 Volts |
| Frequency | 50 Hz / 60 Hz |
| Timer Range | 1 - 8 hours |
| Oscillation Angle | Approx. 70° (vertical louvers) |
| Smart Home Compatibility | Not compatible |
| Operating Mode | Manual |
| Manufacturer | TecTake GmbH |

Image: Product information diagram detailing dimensions, technical data, and package contents.
10. Warranty and Support
For warranty information and customer support, please refer to the documentation provided with your purchase or contact tectake customer service directly. The product warranty details are typically included in the purchase receipt or on the manufacturer's official website.
Manufacturer: TecTake GmbH
Model Number: 403915-3
For further assistance, visit the tectake Store on Amazon.

