
1. Introduction
This manual provides essential instructions for the safe and efficient operation, installation, and maintenance of your Voltas Minimagic SPRING R Floor Mounted Water Dispenser. Please read this manual thoroughly before using the appliance and retain it for future reference.

Image 1: Front view of the Voltas Minimagic SPRING R Water Dispenser.
2. Safety Information
Important Safety Instructions:
- Read all instructions before using the appliance.
- This appliance is for indoor use only.
- Ensure the power supply matches the rating label on the back of the dispenser.
- Do not operate the unit if it is filled with oxygen or nitrogen gas. This may lead to an explosion.
- Always ensure there is water inside the tank before switching on the heating or cooling functions.
- Keep the dispenser away from direct sunlight and heat sources.
- Do not immerse the appliance, cord, or plug in water or other liquids.
- Unplug the dispenser before cleaning or performing any maintenance.
- Supervise children to ensure they do not play with the appliance. Hot water can cause severe burns.
- Do not block ventilation openings.
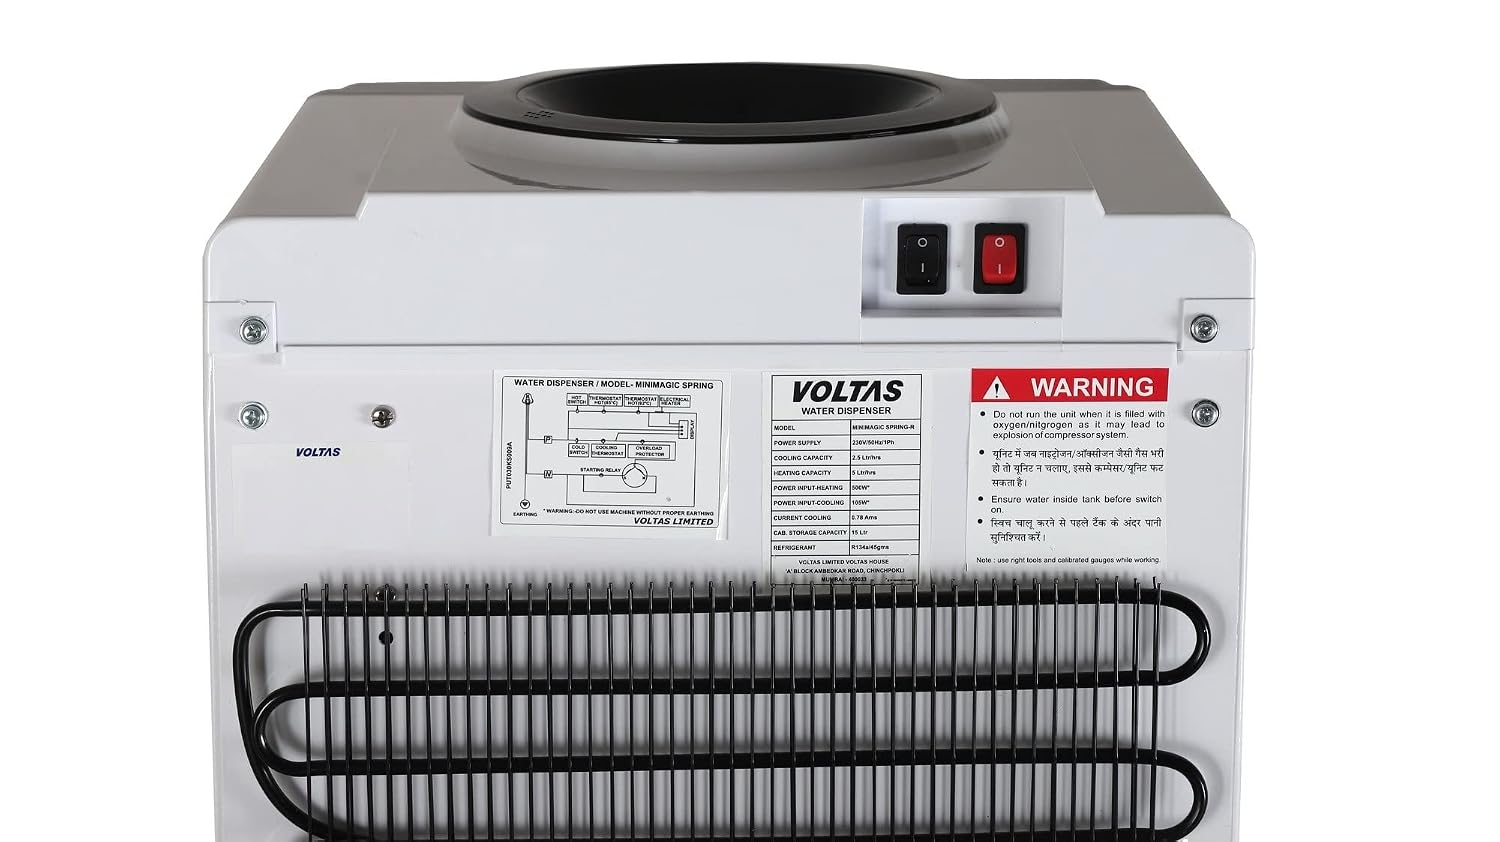
Image 2: Back panel of the dispenser showing the warning label and specifications.
3. Package Contents
Upon unpacking, please verify that all items are present and in good condition:
- Voltas Minimagic SPRING R Water Dispenser Unit
- Instruction Manual
4. Setup
- Unpacking: Carefully remove the dispenser from its packaging.
- Placement: Place the dispenser on a flat, stable, and level surface. Ensure there is adequate space (at least 10-15 cm) around the back and sides for proper ventilation. Avoid placing it in direct sunlight or near heat-generating appliances.
- Initial Cleaning: Before first use, clean the water tank and dispensing area. Refer to the "Maintenance" section for detailed cleaning instructions.
- Water Bottle Installation:
- Remove the cap from a standard 20-liter water bottle.
- Invert the water bottle and carefully place it onto the bottle support on top of the dispenser. Ensure it is seated firmly and water begins to flow into the internal tanks.
- Power Connection: Plug the power cord into a grounded electrical outlet.
- Initial Water Flow: Before switching on the heating or cooling, dispense water from all three taps (hot, normal, cold) until water flows continuously. This purges air from the system and ensures tanks are filled.
- Power On: Switch on the power buttons located at the back of the unit for cooling and heating functions. Allow approximately 15-30 minutes for the water to reach desired temperatures.

Image 3: Top view of the dispenser, illustrating the water bottle receptacle.
5. Operating Instructions
Your Voltas water dispenser provides hot, normal, and cold water. The front panel features three distinct taps, each with an indicator light.

Image 4: Front panel with hot, normal, and cold water dispensing taps.
- Hot Water: Press the red hot water tap. A safety lock mechanism may be present to prevent accidental dispensing of hot water. Always exercise caution. The red indicator light will illuminate when heating.
- Normal Water: Press the blue normal water tap. The blue indicator light will illuminate.
- Cold Water: Press the snowflake cold water tap. The snowflake indicator light will illuminate when cooling.
Place your cup or glass under the desired tap and press the lever. Release the lever to stop the water flow.
6. Maintenance
Regular cleaning and maintenance ensure optimal performance and hygiene of your water dispenser.
- External Cleaning: Wipe the exterior of the dispenser with a soft, damp cloth. Do not use abrasive cleaners or solvents.
- Drip Tray Cleaning: The drip tray should be emptied and cleaned regularly to prevent overflow and bacterial growth. Remove the tray, wash it with mild soap and water, rinse thoroughly, and replace.
- Internal Tank Cleaning (Descaling):
- Unplug the dispenser from the power outlet and remove the water bottle.
- Drain all water from the hot and cold tanks using the drain plugs located at the back of the unit (if available) or by dispensing through the taps until empty.
- Prepare a cleaning solution (e.g., a mixture of water and food-grade citric acid or white vinegar).
- Pour the cleaning solution into the water reservoir.
- Allow the solution to sit for 15-30 minutes.
- Drain the solution completely through all taps.
- Rinse the tanks thoroughly by filling with clean water and draining several times until no cleaning solution residue remains.
- Replace the water bottle and plug in the dispenser.
Caution:
- Always unplug the unit before cleaning.
- Do not use harsh chemicals or abrasive materials that could damage the dispenser's surfaces or internal components.
7. Troubleshooting
| Problem | Possible Cause | Solution |
|---|---|---|
| No hot or cold water |
|
|
| Water not dispensing |
|
|
| Water leakage |
|
|
| Slow water flow |
|
|
8. Specifications
| Model Number | WDNEW2 |
| Brand | Voltas |
| Colour | WHITE |
| Material | Steel |
| Capacity | 15 Liters (Output Capacity) |
| Product Dimensions (D x W x H) | 38.5D x 37W x 101H Centimeters |
| Wattage | 105 Watts |
| Installation Type | Freestanding |
| Power Source | Electric |
| Item Weight | 10000 Grams |
| Country of Origin | India |

Image 5: Product dimensions of the water dispenser.
9. Warranty and Support
Manufacturer Warranty: The Voltas Minimagic SPRING R Water Dispenser comes with a 1-year warranty on the product from the date of purchase.
For warranty claims, technical assistance, or service requests, please contact Voltas customer support. Refer to the contact information provided with your purchase documentation or visit the official Voltas website.
Manufacturer: VOLTAS