
SKYBASIC B08YJ5RQJK
SKYBASIC Wireless Digital Microscope Instruction Manual
Model: B08YJ5RQJK
1. Introduction
Thank you for purchasing the SKYBASIC Wireless Digital Microscope. This portable handheld microscope offers 50X-1000X magnification, allowing for detailed observation of various objects. It features WiFi connectivity for smartphones and tablets, and USB connectivity for Windows and Mac computers. Equipped with 8 adjustable LED lights, it provides clear imaging in diverse lighting conditions. This manual provides comprehensive instructions for setup, operation, maintenance, and troubleshooting to ensure optimal performance and longevity of your device.
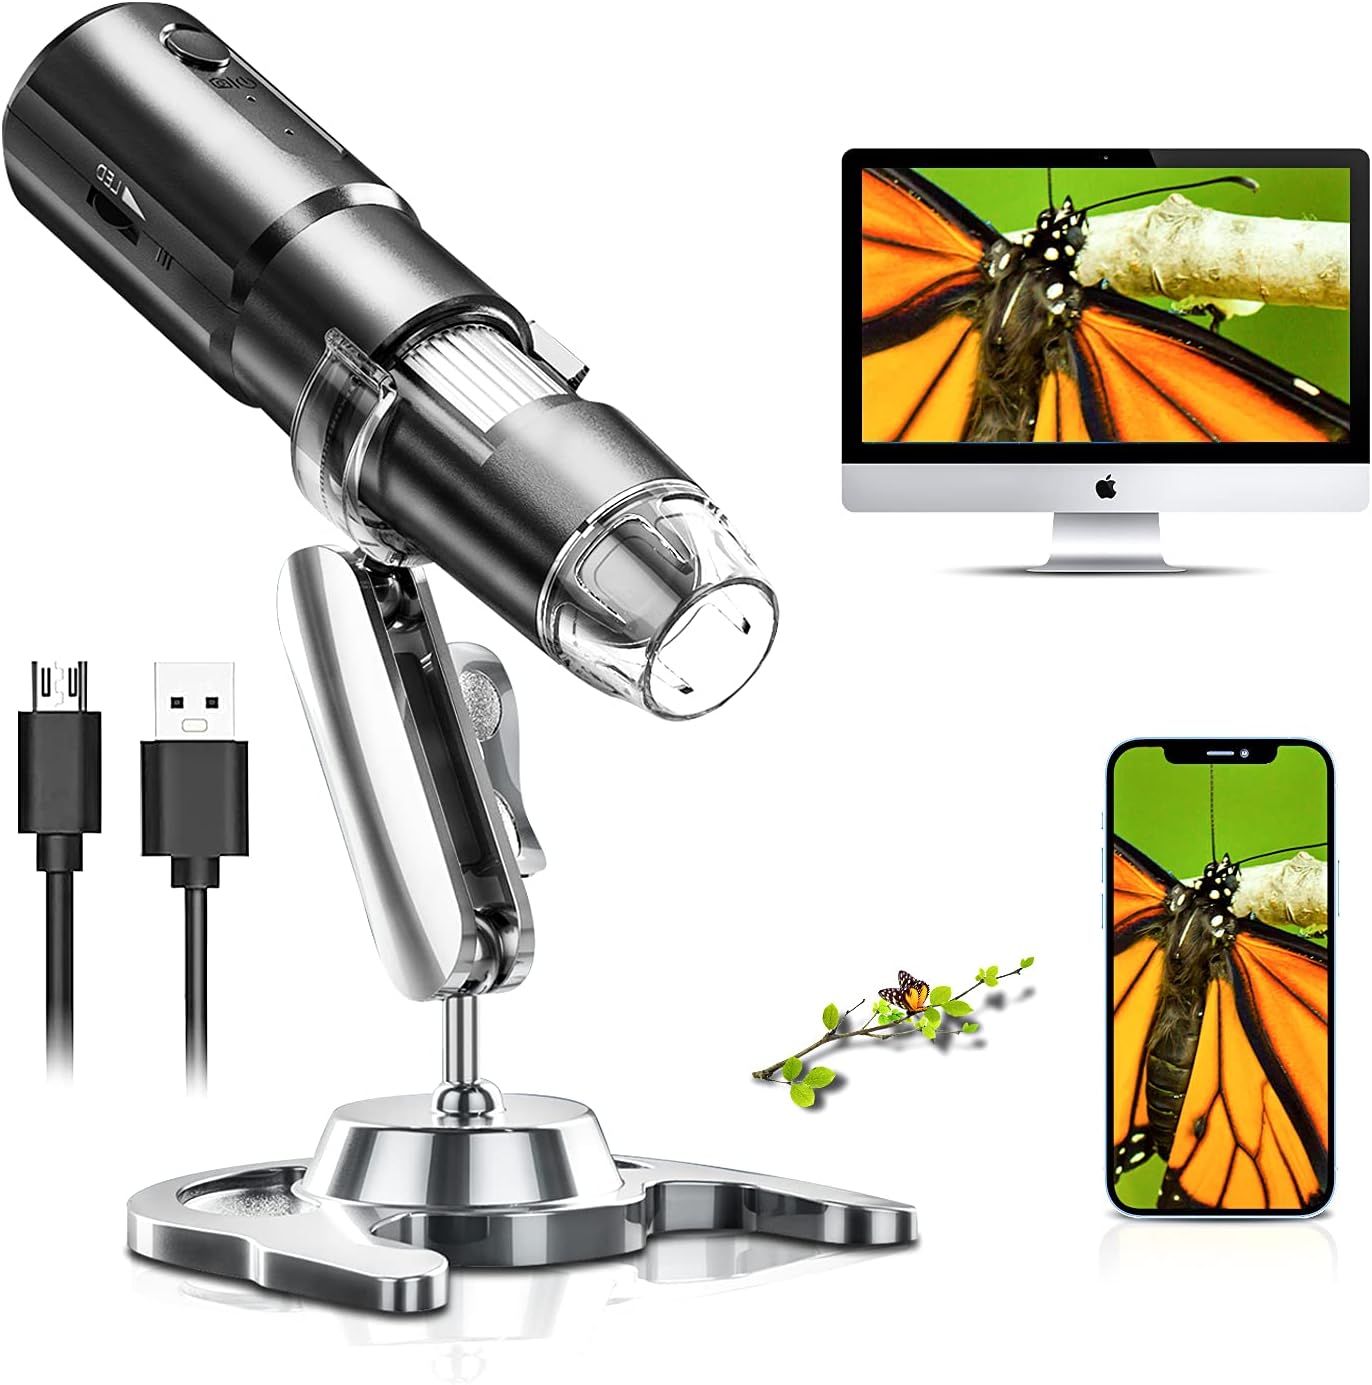
Figure 1.1: SKYBASIC Wireless Digital Microscope in use, showing connectivity options.
2. Package Contents
Please verify that all items listed below are included in your package. If any items are missing or damaged, please contact customer support.
- 1x SKYBASIC Wireless Digital Microscope
- 1x USB Charging Cable (adapter not included)
- 1x Adjustable Stand Bracket
- 1x Stand Base
- 1x User Manual
3. Product Overview
Familiarize yourself with the components of your SKYBASIC Wireless Digital Microscope.

Figure 3.1: Main components of the Wireless Digital Microscope.
- Microscope Body: Contains the lens, LED lights, and internal electronics.
- Focus Wheel: Used to adjust the focus for clear images.
- LED Lights: 8 built-in adjustable LED lights for illumination.
- LED Brightness +/-: Buttons to control the intensity of the LED lights.
- Power Button: Turns the microscope on/off and can also function as a photo/video capture button.
- Work Indicator: Light indicating the device's operational status.
- Charging Indicator: Light indicating charging status.
- USB Port: For charging and connecting to a computer.
- Dust Cover: Protects the lens when not in use.
- Adjustable Stand: Allows for stable positioning and observation at various angles and heights.
4. Setup
4.1 Charging the Microscope
Before first use, fully charge the microscope. A full charge provides approximately 2 hours of continuous use.
- Connect the small end of the USB charging cable to the microscope's USB port.
- Connect the other end of the USB cable to a standard USB power adapter (not included) or a computer's USB port.
- The charging indicator light will illuminate during charging and turn off when fully charged.

Figure 4.1: The microscope features a USB rechargeable design for portability.
4.2 Assembling the Stand
The adjustable stand provides stability and allows for precise positioning of the microscope.
- Insert the adjustable bracket into the stand base.
- Secure the microscope into the bracket. Ensure it is firmly seated.
- Adjust the height and angle using the rotating joints and stand lock as needed for your observation.

Figure 4.2: The 360° rotating stand allows for flexible observation.
5. Operating Instructions
5.1 Connecting to a Mobile Device (iOS/Android) via WiFi
This method allows you to view images and videos on your smartphone or tablet.
- Download the App: Search for "Max-see" in the Apple App Store (for iOS) or Google Play Store (for Android) and install it.
- Power On Microscope: Long press the power button on the microscope for 3 seconds to turn it on. The work indicator light will illuminate.
- Connect to WiFi: On your mobile device, go to Wi-Fi settings and connect to the Wi-Fi network named "Max-see_xxxx" (where xxxx is a unique identifier). No password is required.
- Open App: Launch the "Max-see" app. The microscope's live view should appear on your screen.
- Remove Dust Cover: Before observing, remove the transparent dust cover from the microscope lens.
- Adjust Focus and LED Lights: Use the focus wheel on the microscope to achieve a clear image. Adjust the LED brightness using the +/- buttons on the microscope body to optimize illumination.

Figure 5.1: Mobile device connection steps.
5.2 Connecting to a Computer (Windows/Mac) via USB
This method allows you to use the microscope with your desktop or laptop computer.
- For Windows Users: Download and install the "Smart Camera" software. The download link is typically provided in the physical user manual or can be found on the manufacturer's support website (e.g., www.linskam.com/download/camera.zip).
- For Mac Users: Use the pre-installed applications "Photo Booth" or "QuickTime Player" directly.
- Power On Microscope: Long press the power button on the microscope for 3 seconds to turn it on.
- Connect via USB: Connect the microscope to your computer using the provided USB cable.
- Launch Software:
- For Windows: Open the "Smart Camera" software.
- For Mac: Open "Photo Booth" or "QuickTime Player".
- Select Device: In the software, select the microscope as the video input device (it may appear as "GENERAL-UVC" or similar).
- Remove Dust Cover: Before observing, remove the transparent dust cover from the microscope lens.
- Adjust Focus and LED Lights: Use the focus wheel on the microscope to achieve a clear image. Adjust the LED brightness using the +/- buttons on the microscope body to optimize illumination.

Figure 5.2: Computer connection steps.
5.3 Adjusting Magnification and LED Lights
The microscope offers 50X-1000X magnification and adjustable illumination.
- Magnification: The magnification level is primarily controlled by the distance between the microscope lens and the object, and by the focus wheel. Move the microscope closer to the object for higher magnification and further away for lower magnification. Then, fine-tune the image clarity using the focus wheel.
- LED Lights: The 8 built-in LED lights ensure proper illumination. Use the LED brightness +/- buttons on the microscope body to increase or decrease the light intensity. This is crucial for obtaining clear images, especially in dark environments or when observing reflective surfaces.

Figure 5.3: Magnification and focusing capabilities.

Figure 5.4: Adjustable LED illumination for optimal viewing.
5.4 Capturing Images and Recording Videos
Once connected, you can capture still images and record videos through the "Max-see" app or "Smart Camera" software.
- Using the App/Software: Look for dedicated buttons within the application interface for "Take Photo" or "Record Video".
- Using the Microscope Button: The power button on the microscope can often be used as a quick capture button. A short press typically takes a photo, while a long press might start/stop video recording (refer to app/software specific settings for confirmation).
- Captured media will be saved to your device's gallery or the software's designated folder.
6. Maintenance
Proper care and maintenance will extend the life of your digital microscope.
- Cleaning the Lens: Use a soft, lint-free cloth specifically designed for optical lenses to gently wipe the microscope lens. Do not use abrasive cleaners or solvents.
- Cleaning the Body: Wipe the microscope body with a soft, dry cloth. If necessary, a slightly damp cloth can be used, but ensure no moisture enters the device.
- Storage: Store the microscope in a cool, dry place away from direct sunlight and extreme temperatures. Always replace the dust cover on the lens when not in use to prevent dust accumulation.
- Battery Care: To maintain battery health, avoid fully discharging the battery frequently. If storing for a long period, charge the battery to about 50% every few months.
7. Troubleshooting
If you encounter issues with your microscope, refer to the following common problems and solutions.
| Problem | Possible Cause | Solution |
|---|---|---|
| Microscope does not turn on. | Low battery; Power button not pressed long enough. | Charge the microscope fully. Press and hold the power button for at least 3 seconds. |
| Cannot connect to Wi-Fi (mobile device). | Microscope not powered on; Incorrect Wi-Fi network selected; App not launched. | Ensure microscope is on. Select "Max-see_xxxx" network. Open the "Max-see" app after connecting Wi-Fi. |
| No image on computer (USB connection). | Microscope not powered on; USB cable faulty; Software not installed/launched; Incorrect device selected in software. | Ensure microscope is on. Try a different USB port/cable. Install/launch "Smart Camera" (Windows) or "Photo Booth/QuickTime Player" (Mac). Select "GENERAL-UVC" or similar as the camera source. |
| Image is blurry or out of focus. | Focus wheel not adjusted; Lens dust cover still on; Incorrect distance to object. | Rotate the focus wheel until the image is clear. Remove the transparent dust cover from the lens. Adjust the distance between the microscope and the object. |
| Image is too dark or too bright. | LED brightness not adjusted. | Use the LED brightness +/- buttons on the microscope to adjust illumination. |
8. Specifications
| Feature | Detail |
|---|---|
| Brand | SKYBASIC |
| Model | B08YJ5RQJK |
| Magnification Range | 50X - 1000X |
| Light Source | 8 Adjustable LED Lights |
| Connectivity | WiFi (for iOS/Android), USB (for Windows/Mac) |
| Compatible Devices | Personal Computer, Smartphone, Tablet |
| Battery Type | 1 Lithium Polymer battery (included) |
| Battery Life | Approx. 2 hours continuous use (fully charged) |
| Item Weight | 10.2 ounces |
| Package Dimensions | 6.46 x 4.61 x 1.93 inches |
| Color | Black-2 |
| Date First Available | March 10, 2021 |
9. Warranty and Support
SKYBASIC offers a worry-free guarantee and a 1-year replacement or return service for this product. If you have any questions regarding your digital microscope camera or require technical support, please do not hesitate to contact SKYBASIC customer service. They are available to assist you 24/7.
For support, please refer to the contact information provided on the product packaging or the official SKYBASIC website.
Related documentsB08YJ5RQJK

Ask a question about this manual
Ask about setup, troubleshooting, compatibility, parts, safety, or missing instructions. Manuals+ will review the question and use this page’s manual context to help answer it.