
1. Introduction and Overview
This manual provides essential instructions for the safe and effective operation of your DIOSMIO 1.25 cubic foot Fireproof Safe Box. Designed for securing important documents, valuables, and personal items, this safe features a digital combination lock, backup key access, and robust construction for enhanced protection against fire and water.
Please read this manual thoroughly before setting up and using your safe. Keep it for future reference.
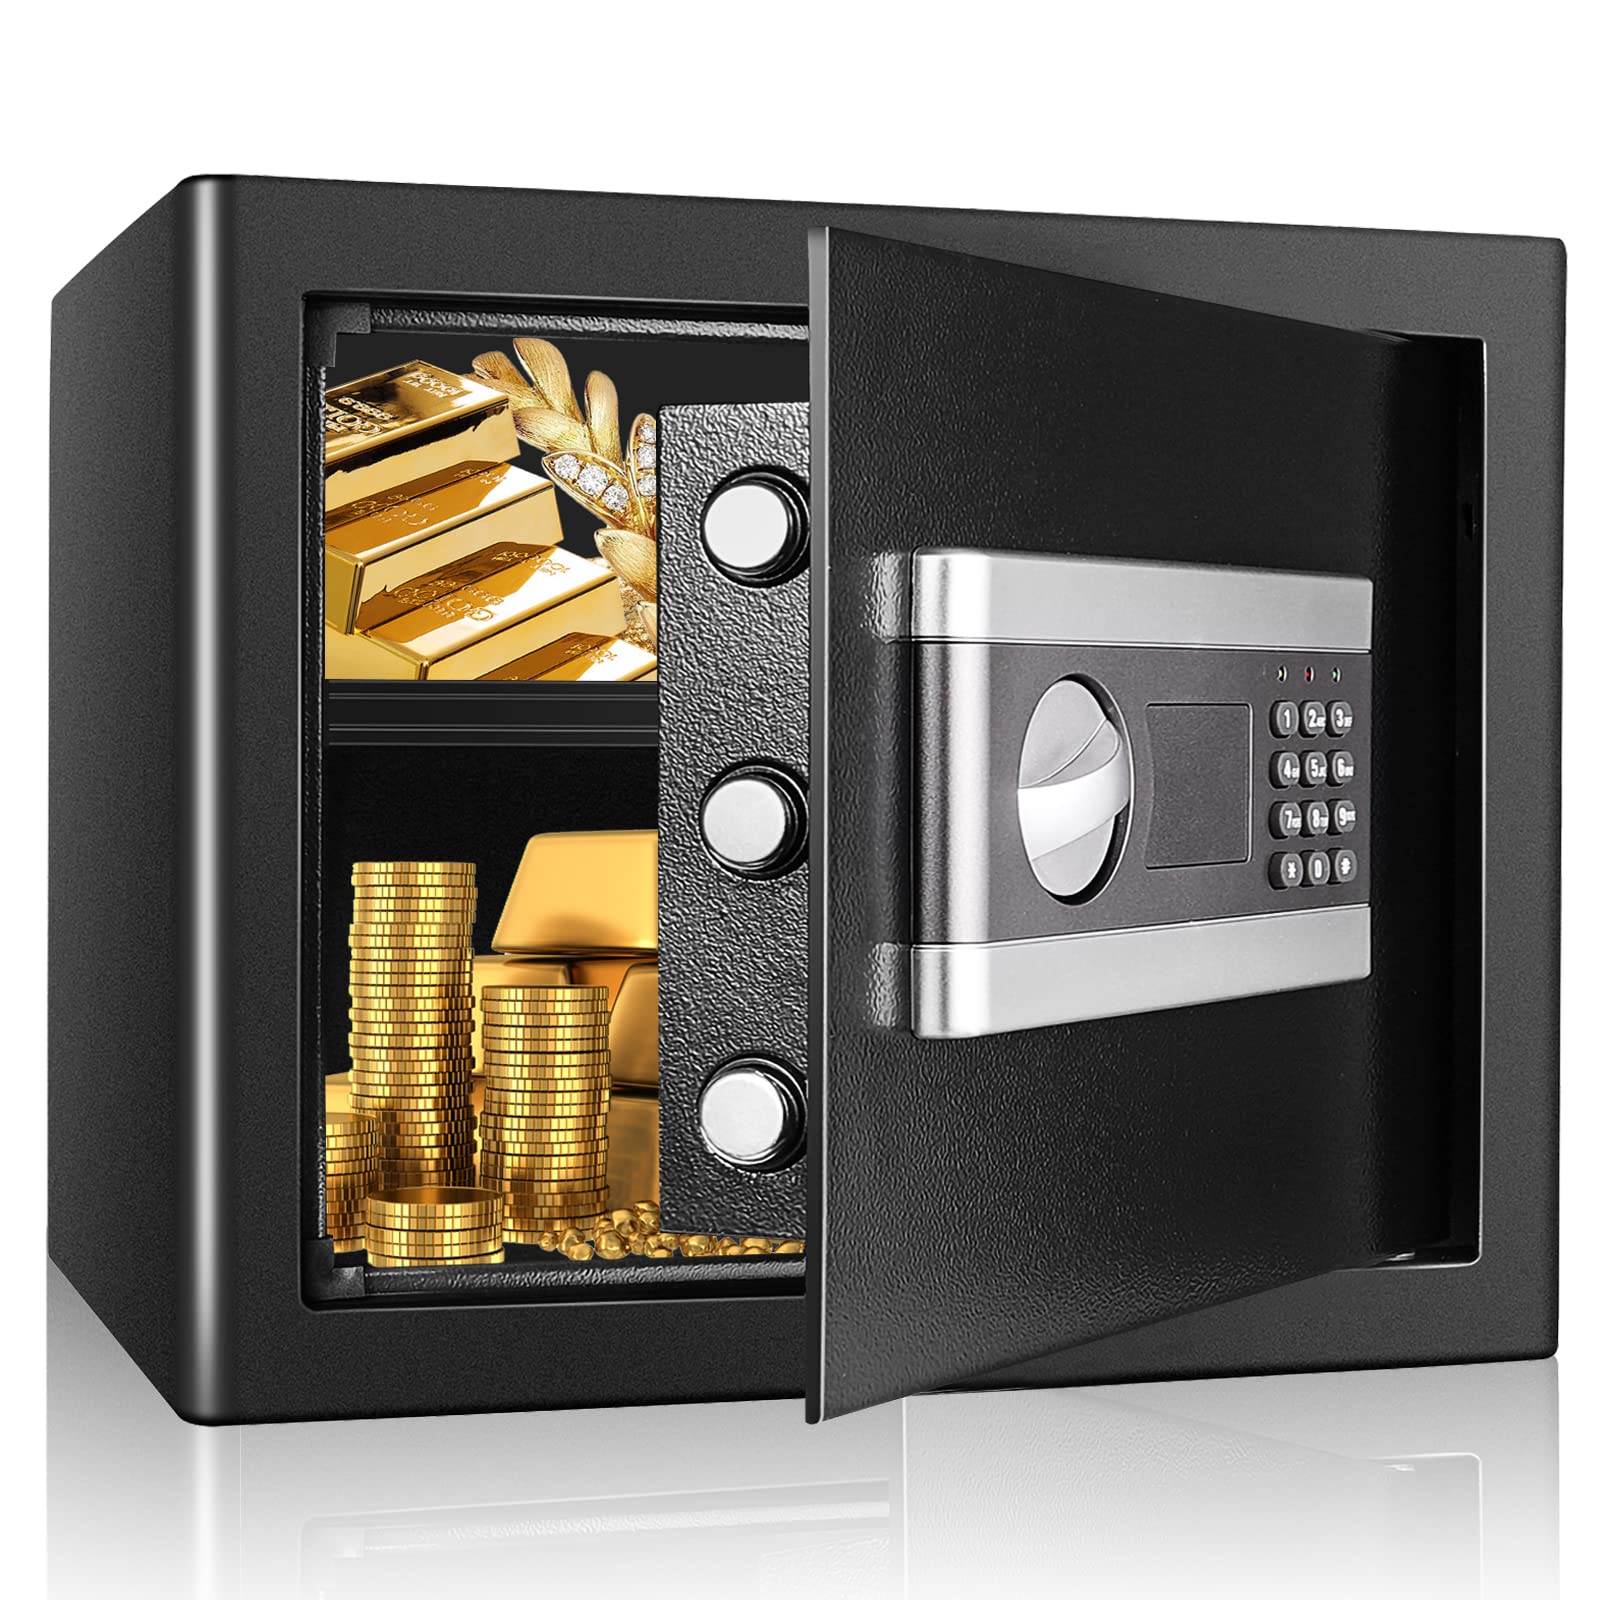
Image 1.1: The DIOSMIO Fireproof Safe Box, highlighting its fire prevention capabilities.
2. Safety Information
- Always store emergency keys in a secure location away from the safe. Do not store them inside the safe.
- Ensure the safe is placed on a stable, level surface. For maximum security, bolt the safe to the floor or wall using the provided mounting hardware.
- Keep the safe door closed and locked when not in use to prevent unauthorized access.
- Do not expose the safe to extreme temperatures or direct sunlight for prolonged periods.
- Keep children away from the safe and its operating mechanisms.
3. Package Contents
Verify that all items are present in the package:
- DIOSMIO Fireproof Safe Box (1 unit)
- Emergency Keys (2 units)
- Mounting Hardware (bolts and anchors)
- Instruction Manual (this document)
- Removable Shelf (1 unit)
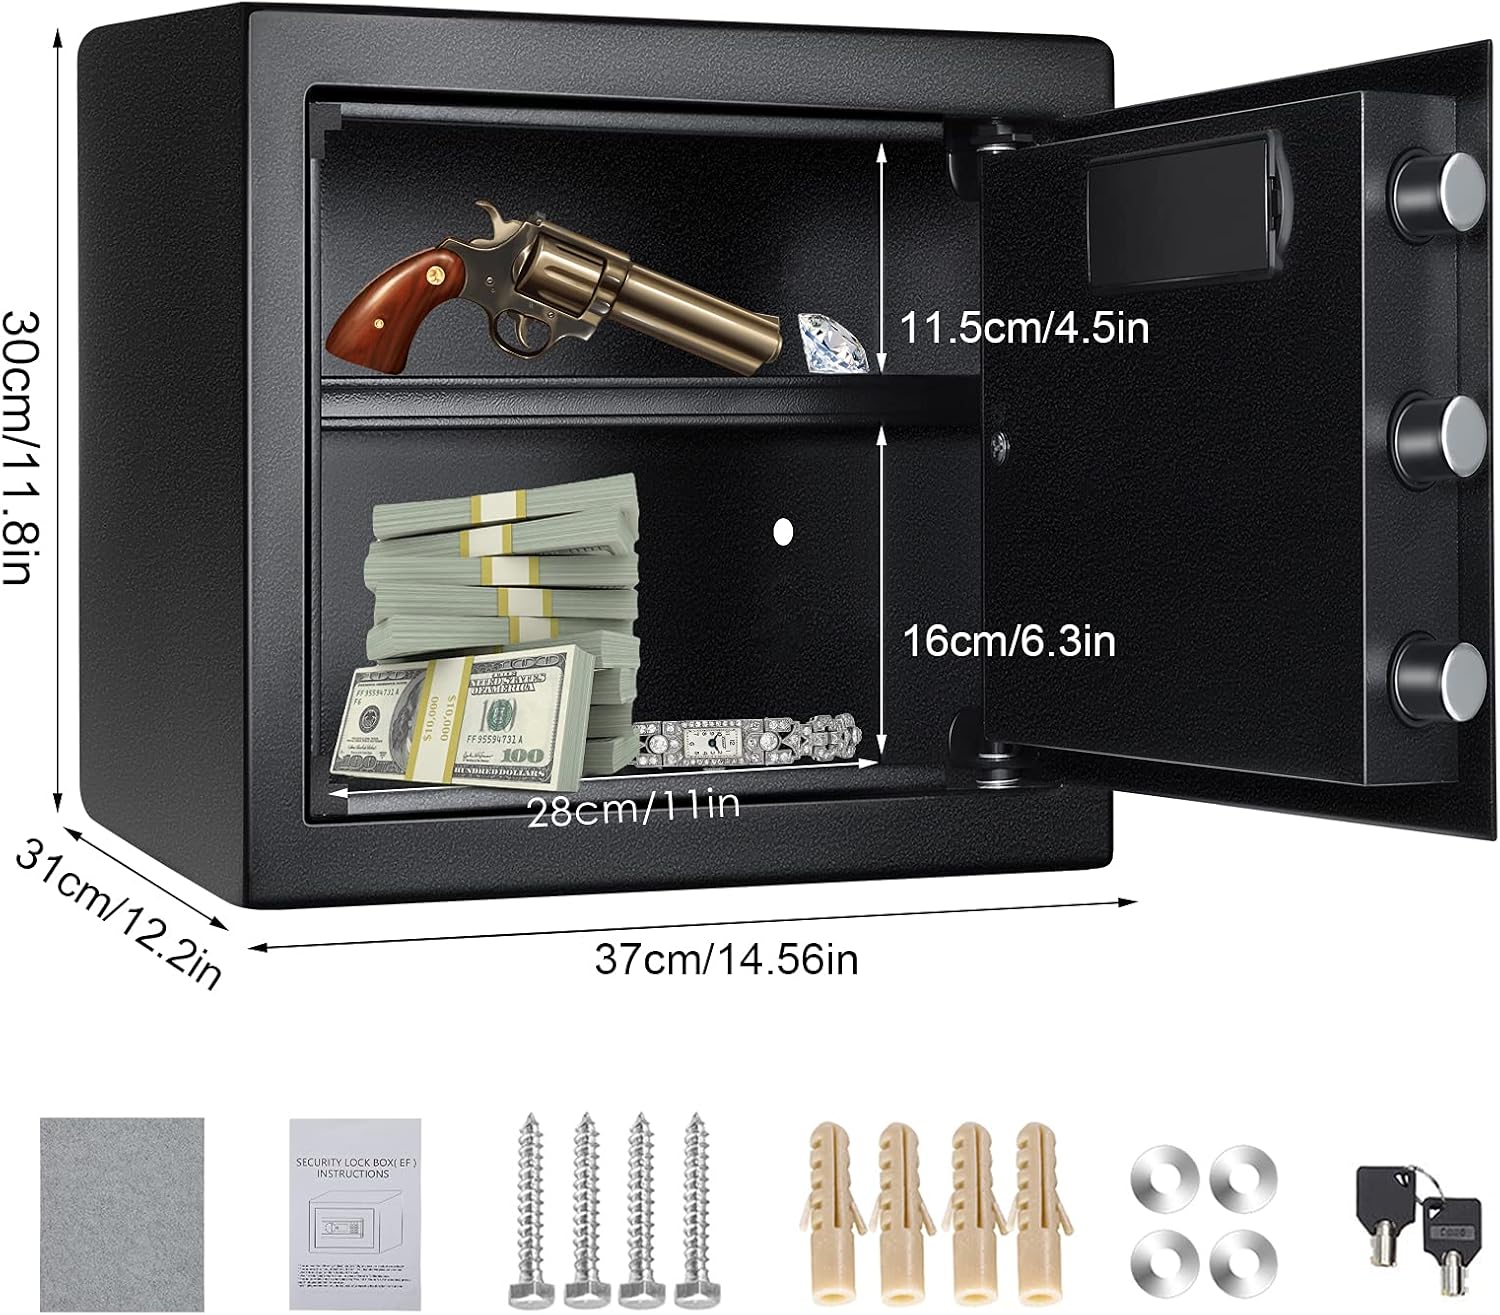
Image 3.1: Overview of the safe's dimensions and included accessories.
4. Setup
4.1. Battery Installation
- Open the safe door using one of the emergency keys. Insert the key into the keyhole located behind the keypad cover, turn it, and then turn the knob to open the door.
- Locate the battery compartment on the inside of the safe door.
- Insert four (4) AA batteries (not included) into the compartment, ensuring correct polarity (+/-).
- Close the battery compartment cover.

Image 4.1: Digital keypad with emergency key access.
4.2. Setting Your Personal Combination
- With the safe door open, locate the red reset button on the inside of the door, near the hinge.
- Press the red reset button. The yellow indicator light on the keypad will illuminate.
- While the yellow light is on, enter your desired personal combination (3 to 8 digits) on the keypad.
- Confirm your combination by pressing the '#' button. The yellow light will turn off, and a double beep will confirm the new code is set.
- Test your new combination with the door open before closing it. Enter your code, press '#', and turn the knob. The green light should illuminate, allowing the knob to turn.
5. Operating Instructions
5.1. Opening the Safe with Digital Combination
- Enter your personal combination (3 to 8 digits).
- Press the '#' button. The green indicator light will illuminate.
- Within 5 seconds, turn the knob clockwise to open the safe door.
5.2. Opening the Safe with Emergency Key
If you forget your combination or the batteries are depleted, use the emergency key:
- Remove the keypad cover to expose the emergency keyhole.
- Insert the emergency key into the keyhole and turn it counter-clockwise.
- Turn the knob clockwise to open the safe door.
- Once open, you can replace batteries or reset the combination as needed.
5.3. Closing and Locking the Safe
- Close the safe door.
- Turn the knob counter-clockwise to engage the locking bolts. The safe is now locked.
5.4. Alarm System
The safe is equipped with an alarm system. If an incorrect combination is entered three consecutive times, the alarm will sound for 60 seconds. To stop the alarm, enter the correct combination or use the emergency key.

Image 5.1: The safe's 60-second alarm feature activates after three incorrect entries.
6. Mounting Instructions
For enhanced security, it is recommended to bolt the safe to a floor or wall. The safe includes pre-drilled holes and mounting hardware.
- Choose a suitable location for your safe, ensuring it is on a solid surface.
- Open the safe door and remove the removable shelf and any floor matting to access the pre-drilled mounting holes.
- Mark the drilling points on the floor or wall through the holes in the safe.
- Drill pilot holes at the marked locations using an appropriate drill bit for your surface type.
- Align the safe with the drilled holes and secure it using the provided mounting bolts and anchors. Tighten all bolts firmly.
- Replace the shelf and matting inside the safe.

Image 6.1: The safe features 3x20mm solid locking bolts for enhanced security.
7. Maintenance
- Battery Replacement: Replace batteries annually or when the low battery indicator (red light) illuminates during operation.
- Cleaning: Clean the exterior of the safe with a soft, damp cloth. Avoid abrasive cleaners or solvents.
- Keypad Care: Keep the keypad dry and free from dust or debris.
- Internal Storage: The safe includes a removable shelf for organizing contents. The interior is lined with a soft felt material to protect valuables from scratches.

Image 7.1: The removable shelf allows for flexible storage of various items.
8. Troubleshooting
| Problem | Possible Cause | Solution |
|---|---|---|
| Safe does not open with combination. | Incorrect combination entered; depleted batteries. | Re-enter correct combination carefully. Replace batteries. Use emergency key. |
| Alarm sounds unexpectedly. | Three incorrect combination entries. | Enter correct combination or use emergency key to disarm. |
| Keypad is unresponsive. | Depleted batteries. | Replace batteries. If still unresponsive, contact support. |
| Door does not close properly. | Obstruction in the door frame; locking bolts not retracted. | Check for obstructions. Ensure knob is turned to retract bolts before closing. |
9. Specifications
- Brand: Diosmio
- Model: B08Y6N8NCH
- Capacity: Approximately 1.25 Cubic Feet
- Lock Type: Digital Combination, Electronic, Key
- Material: Alloy Steel
- Special Features: Fireproof, Waterproof, Alarm System, 3 Solid Locking Bolts
- Mounting Type: Freestanding, Tabletop (can be bolted to floor/wall)
- Included Components: Safe, Keys, Mounting Hardware

Image 9.1: The safe's interior is suitable for securing electronic products, cash, jewelry, passports, and important documents.
10. Warranty and Support
For warranty information or technical support, please refer to the contact details provided with your purchase documentation or visit the official Diosmio website. Keep your purchase receipt as proof of purchase.

