
1. Introduction
This manual provides detailed instructions for the installation, operation, and maintenance of the SRJTEK OLED Screen Replacement for Samsung A31 series smartphones. This replacement screen is designed to restore functionality to devices with damaged or malfunctioning displays.
2. Product Overview
The SRJTEK OLED Screen Replacement is a complete display assembly, including the LCD, touch screen digitizer, and frame. It is compatible with Samsung A31 models A315, SM-A315F, SM-A315F/DS, and A315G. The screen features high sensitivity touch functionality and is manufactured under strict quality control to ensure performance.

Figure 2.1: SRJTEK OLED Screen Replacement for Samsung A31, shown with included installation tools.
Key Features:
- OLED Display Technology
- High Sensitivity Touch Screen
- Integrated Frame Assembly
- 9H Hardness for Scratch Resistance
- 3D Arc Edge Design
- HD Effect for Clear Visuals
- Waterproof properties (5HB grade toughened glass)
3. Safety Information
Important: Screen replacement requires technical skill and specialized tools. Improper installation can cause damage to the device or the replacement screen. Professional installation is highly recommended. Parts damaged during installation are not eligible for return.
- Always power off your device completely before beginning any repair.
- Disconnect the battery before removing or installing any components.
- Use anti-static precautions to prevent electrostatic discharge (ESD) damage.
- Handle flex cables with extreme care to avoid tearing or bending.
- Keep small screws and components organized to ensure correct reassembly.
4. Package Contents
Verify that all items are present and undamaged upon receipt:
- 1 x SRJTEK OLED Display with Touch Screen for Samsung A31 (A315 Series)
- 1 x Screen Protector
- 1 x Opening Tool Kit (various pry tools, screwdrivers, suction cup)
- 1 x Adhesive Strip
Figure 4.1: Contents of the SRJTEK screen replacement package.
5. Setup and Installation
This section outlines the general steps for replacing the screen. Specific disassembly and reassembly procedures for the Samsung A31 should be referenced from a reliable device repair guide.
- Preparation: Power off your Samsung A31 and remove the SIM card tray.
- Back Cover Removal: Carefully heat the edges of the back cover to soften the adhesive. Use a thin pry tool to separate the back cover from the frame.
- Disconnect Battery: Locate and disconnect the battery flex cable from the motherboard to prevent short circuits.
- Disconnect Old Display: Disconnect the flex cables connecting the old display to the motherboard.
- Remove Old Display: If the old display is still attached to the frame, carefully heat its edges and use pry tools to remove it. Clean any remaining adhesive from the frame.
- Test New Display (Crucial Step): Before fully installing, connect the new display's flex cables to the motherboard. Reconnect the battery. Power on the phone and test the display functionality (touch response, display quality, dead pixels, brightness adjustment). Power off and disconnect the battery after testing.
- Install New Display: Apply new adhesive to the phone frame. Carefully align and press the new SRJTEK display assembly into the frame. Ensure the flex cables are correctly routed and connected.
- Reassembly: Reconnect the battery, reattach the back cover (using new adhesive if necessary), and reinsert the SIM card tray.
- Final Check: Power on the device and perform a final check of all functions.
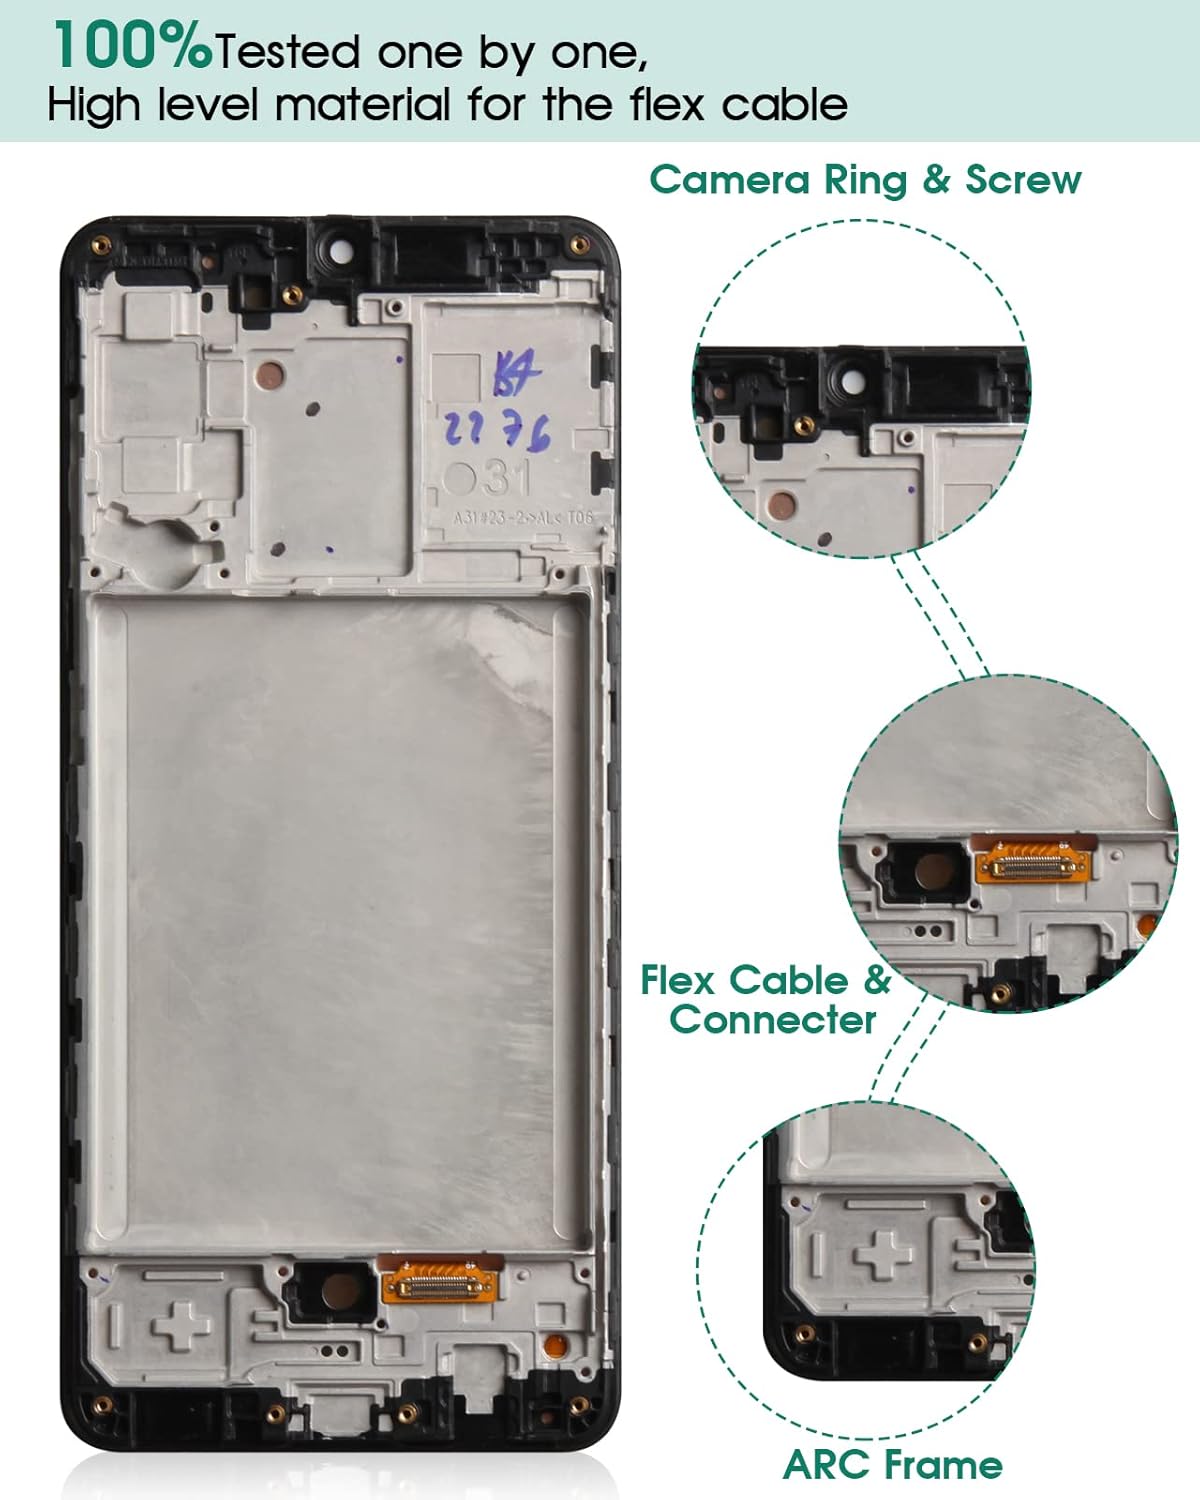
Figure 5.1: Proper connection of the flex cable to the motherboard is essential for functionality.
6. Operating (Post-Installation Testing)
After installation, it is important to thoroughly test the new screen's functionality.
- Display Check: Verify that the screen displays images clearly, without flickering, dead pixels, or discoloration.
- Touch Functionality: Test touch response across the entire screen. Open an application that allows drawing or typing to ensure all areas register touch input accurately.
- Brightness Adjustment: Confirm that the screen's brightness can be adjusted through the device settings.
- Fingerprint Sensor: If your device model supports an in-display fingerprint sensor, test its functionality. Note that some replacement screens may require recalibration or may not fully support this feature if not explicitly stated.

Figure 6.1: Testing touch screen responsiveness after installation.
7. Maintenance
To ensure the longevity and optimal performance of your new screen:
- Cleaning: Use a soft, lint-free cloth, slightly dampened with water or a screen cleaner, to gently wipe the screen. Avoid harsh chemicals or abrasive materials.
- Protection: Utilize the included screen protector to guard against scratches and minor impacts. Consider a protective case for your device.
- Avoid Pressure: Do not apply excessive pressure to the screen, as this can damage the display or digitizer.
- Temperature: Avoid exposing the device to extreme temperatures, which can affect screen performance and adhesive integrity.
8. Troubleshooting
If you encounter issues after installation, consider the following:
- No Display/Black Screen:
- Ensure all flex cables are securely connected to the motherboard.
- Verify the battery is connected and charged.
- Perform a hard reset of the device (refer to your phone's manual for specific steps).
- Unresponsive Touch:
- Check flex cable connections for damage or improper seating.
- Ensure there is no debris or liquid between the screen and the frame.
- Restart the device.
- Display Anomalies (lines, discoloration, dead pixels):
- This may indicate a faulty screen or damage during installation. Recheck flex cable connections. If the issue persists, contact customer support.
- Fingerprint Sensor Not Working:
- Ensure the fingerprint sensor component (if separate) is correctly transferred and connected.
- Attempt to re-register your fingerprints in the device settings.
- Some aftermarket screens may have varying compatibility with in-display fingerprint sensors.
If troubleshooting steps do not resolve the issue, contact SRJTEK customer service for further assistance.
9. Specifications
| Feature | Detail |
|---|---|
| Product Type | OLED Screen Replacement with Digitizer and Frame |
| Compatibility | Samsung A31 (Models: A315, SM-A315F, SM-A315F/DS, A315G) |
| Display Size | 6.4 inches |
| Display Technology | OLED |
| Color | Black |
| Item Weight | 5.6 ounces |
| Package Dimensions | 7.56 x 4.02 x 1.26 inches |
| Manufacturer | SRJTEK |
10. Warranty and Support
SRJTEK provides a 6-month after-sale service for this product. If you encounter any problems with the item received, please contact SRJTEK customer service for assistance. We are committed to providing a satisfactory solution, which may include a replacement.
Contact Information:
For support inquiries, please refer to the contact details provided with your purchase or visit the official SRJTEK store on Amazon: SRJTEK Amazon Store
Important Note: Damage incurred during the installation process is not covered under warranty. Professional installation is strongly advised.