1. Introduction
This manual provides essential information for the safe and efficient operation, installation, and maintenance of your new Zanussi ZWF50820WW Front-Load Automatic Washing Machine. Please read these instructions carefully before using the appliance and keep them for future reference.
2. Safety Information
For your safety and to ensure correct use, always observe the following precautions:
- Ensure the appliance is properly earthed.
- Do not allow children to play with the appliance.
- Never force the door open.
- Unplug the appliance before cleaning or maintenance.
- Do not install the appliance in areas exposed to extreme temperatures or humidity.
- Only use detergents and additives suitable for automatic washing machines.
3. Product Overview
Familiarize yourself with the main components of your Zanussi ZWF50820WW washing machine.

Figure 3.1: Front view of the Zanussi ZWF50820WW washing machine. This image displays the overall design, including the control panel at the top, the front-loading door, and the lower access panel for the drain filter.
3.1 Control Panel

Figure 3.2: Close-up of the control panel. The central rotary dial allows for program selection, surrounded by various wash programs such as Cottons, Synthetics, Delicates, Quick Wash, and specialized cycles like Baby Hygiene+ and Silk. Additional buttons for functions like Delay Start and Extra Rinse are also visible.
The control panel features a central program selector dial and various buttons for additional functions and settings. Refer to Figure 3.2 for a detailed view.
3.2 Detergent Dispenser
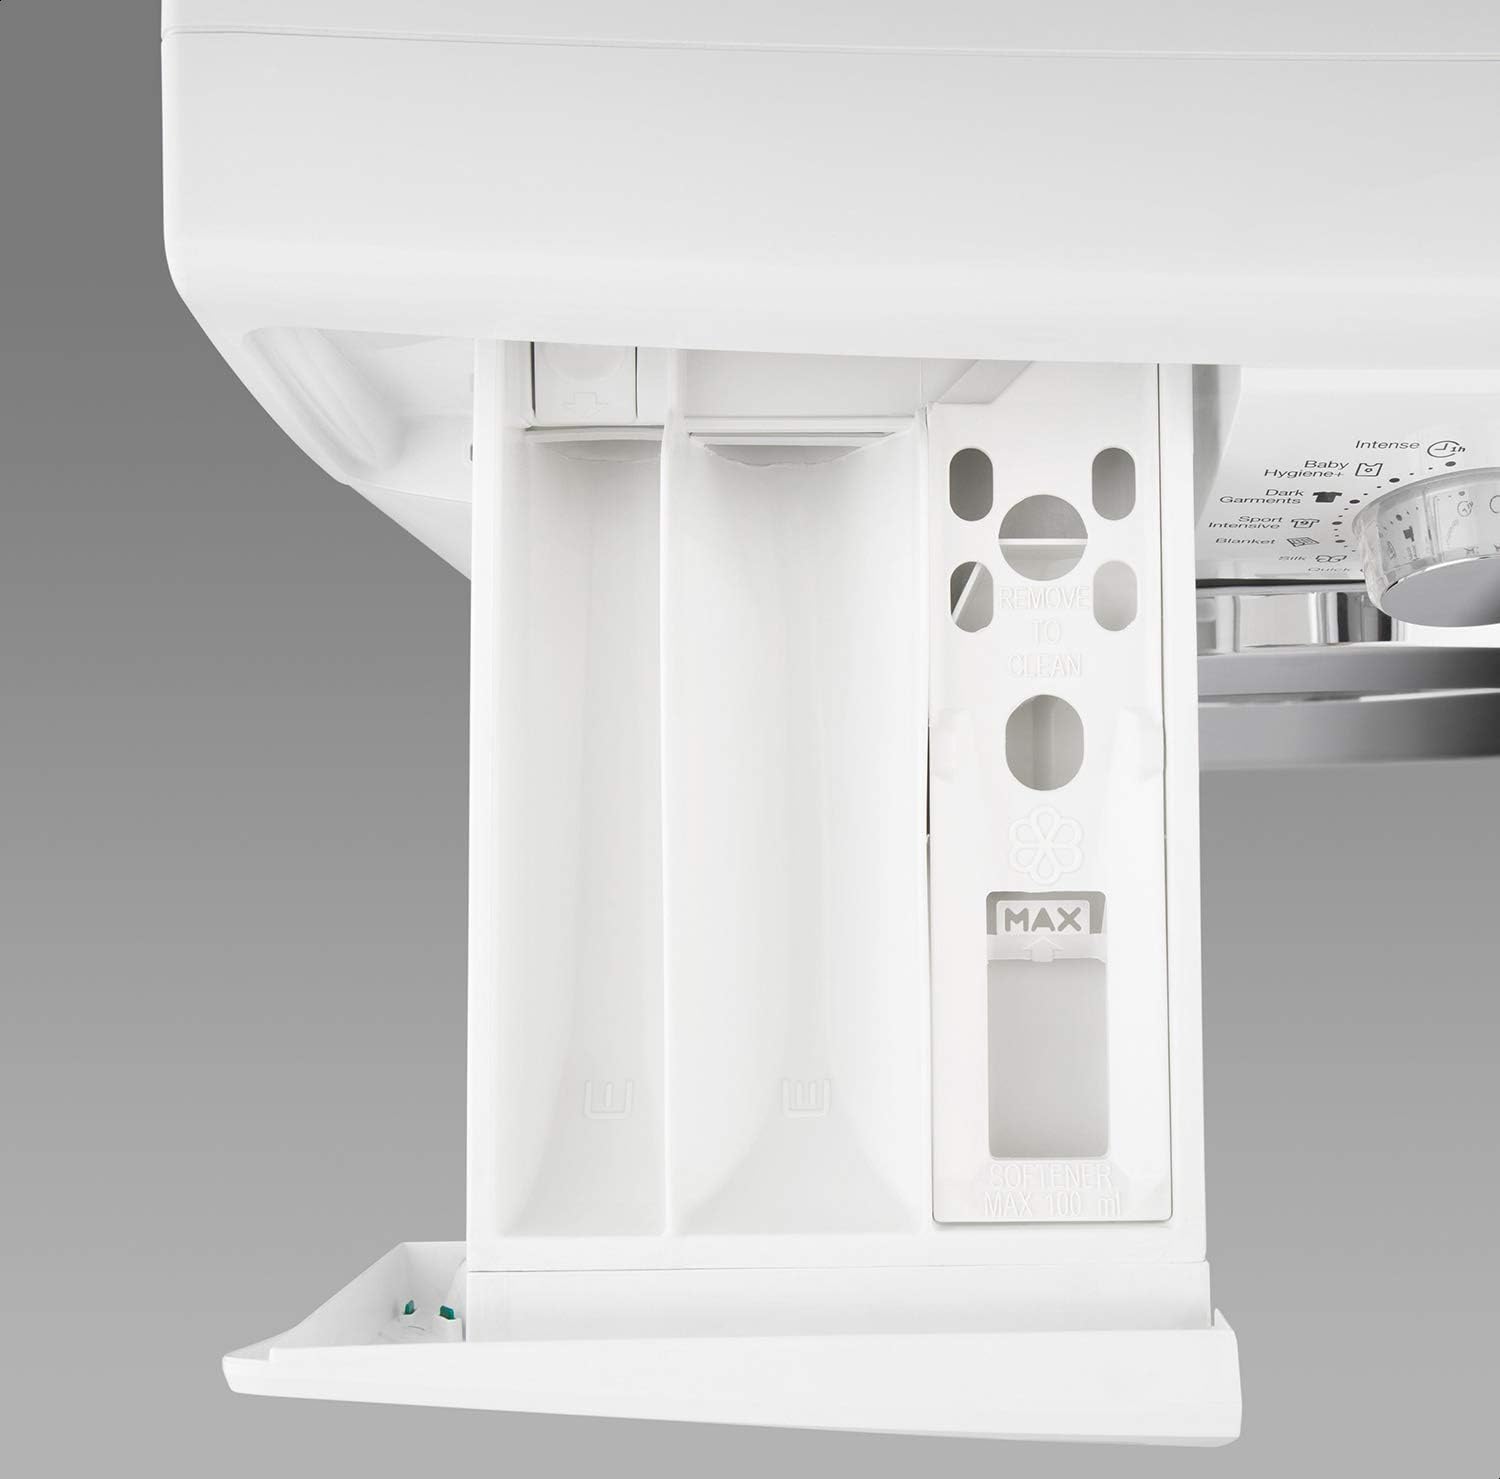
Figure 3.3: The detergent dispenser drawer. This drawer typically has compartments for pre-wash detergent, main wash detergent, and fabric softener, often marked with symbols or 'MAX' indicators for fill levels.
The detergent dispenser drawer is located on the top left of the machine. It has compartments for pre-wash, main wash detergent, and fabric softener. Always add detergent and softener to the correct compartments as indicated.
3.3 Washing Drum

Figure 3.4: The washing machine door open, revealing the stainless steel drum. The drum features numerous perforations for water circulation and internal paddles to agitate laundry during the wash cycle.

Figure 3.5: Close-up view of the washing drum interior. This image highlights the textured surface and the design of the internal paddles, which are crucial for effective garment movement and cleaning.
The washing drum is made of durable stainless steel and designed for efficient washing. It has a capacity of 5 KG.
3.4 Drain Pump Filter

Figure 3.6: The drain pump filter and its access panel located at the bottom front of the washing machine. The filter is designed to collect lint and small objects, preventing them from clogging the pump.
The drain pump filter is located at the bottom front of the appliance, behind an access panel. Regular cleaning of this filter is essential for proper drainage and machine performance.
4. Installation and Setup
4.1 Unpacking
Carefully remove all packaging materials. It is crucial to remove the transport bolts located at the rear of the machine before use. These bolts secure the drum during transit and must be removed to prevent damage during operation. Keep the bolts for future transport.
4.2 Positioning and Leveling
Place the washing machine on a firm, level floor. Adjust the adjustable feet to ensure the appliance is perfectly level and stable. An unlevel machine can cause excessive vibration and noise.
4.3 Water Connection
Connect the water inlet hose to a cold water tap with a 3/4" thread. Ensure all connections are tight to prevent leaks. Position the drain hose into a standpipe or over the edge of a sink, ensuring it is securely fixed and not kinked.
4.4 Electrical Connection
Plug the power cord into a grounded electrical outlet. Ensure the voltage and frequency match the specifications on the appliance's rating plate. Do not use extension cords or adapters.
5. Operating Instructions
5.1 Loading Laundry
Open the washing machine door and load laundry into the drum. Do not overload the machine; ensure there is enough space for clothes to tumble freely. Close the door firmly.
5.2 Adding Detergent and Softener
Pull out the detergent dispenser drawer (Figure 3.3). Add the appropriate amount of detergent to the main wash compartment and fabric softener to its designated compartment. Do not exceed the 'MAX' fill line.
5.3 Selecting a Program
Turn the program selector dial (Figure 3.2) to choose the desired wash program based on the fabric type and soil level. Refer to Section 6 for program descriptions.
5.4 Adjusting Options
Depending on the selected program, you may be able to select additional options such as:
- Extra Rinse: Adds an additional rinse cycle.
- Delay Start: Delays the start of the wash cycle by 3, 6, or 9 hours.
5.5 Starting a Cycle
Press the Start/Pause button to begin the wash cycle. The machine will automatically proceed through the selected program.
5.6 Child Lock
To activate the Child Lock, press and hold the designated button (refer to your control panel for specific button, often a combination of two buttons) for a few seconds until the indicator light illuminates. This prevents accidental changes to settings during operation. Repeat the process to deactivate.
5.7 Ending a Cycle
Once the cycle is complete, the machine will signal, and the door will unlock. Remove your laundry promptly to prevent wrinkles and odors. Turn the program selector dial to the 'Off' position.
6. Programs and Features
Your Zanussi ZWF50820WW offers a variety of programs and features for different laundry needs:
- Cottons: For white and colored cotton items.
- Synthetics: For synthetic items like shirts, blouses, and mixed fiber garments.
- Delicates: For delicate items requiring gentle washing.
- Cottons Economy: An energy-efficient program for cottons.
- Mixed Fabrics: For a mixed load of cottons and synthetics.
- Wool/Handwash: For woolens and hand-washable items.
- Silk: Specifically designed for silk with a gentle wash and adapted spin cycle.
- Quick (20 minutes): A rapid wash for lightly soiled items.
- Blanket: For washing blankets and larger items.
- Sport Intensive: For sportswear.
- Dark Garments: Designed to protect dark colors.
- Baby Hygiene+: For baby clothes, providing thorough cleaning and rinsing.
- Intense (1 hour): For heavily soiled items requiring a more powerful wash.
- Spin/Drain: For draining water and spinning laundry without a wash cycle.
Additional Features:
- Automatic Sensor: Adapts water and energy consumption to the load size.
- Anti-Flood Protection: Integrated safety system to prevent water leaks.
7. Maintenance and Cleaning
Regular maintenance ensures optimal performance and longevity of your washing machine.
7.1 Cleaning the Detergent Dispenser
Periodically remove and clean the detergent dispenser drawer (Figure 3.3) under running water to remove any detergent residue or mold buildup. Use a brush if necessary.
7.2 Cleaning the Drain Pump Filter
The drain pump filter (Figure 3.6) should be cleaned regularly, especially if you notice drainage issues. To clean:
- Open the access panel at the bottom front of the machine.
- Place a shallow container beneath the filter to catch any residual water.
- Slowly unscrew the filter counter-clockwise until water starts to drain.
- Once all water has drained, fully remove the filter and clean it under running water.
- Remove any lint or foreign objects.
- Screw the filter back in clockwise until it is tight. Close the access panel.
7.3 Cleaning the Drum
Run a maintenance wash (e.g., a hot cotton cycle with no laundry and a descaling agent or washing machine cleaner) monthly to prevent odor and residue buildup in the drum.
7.4 Exterior Cleaning
Wipe the exterior surfaces of the machine with a soft, damp cloth. Do not use abrasive cleaners or solvents.
7.5 Door Seal Maintenance
After each wash, wipe the rubber door seal to remove any trapped lint or moisture, which can prevent mold growth and odors.
8. Troubleshooting
Before contacting service, check the following common issues:
| Problem | Possible Cause | Solution |
|---|---|---|
| Machine does not start | No power; door not closed; program not selected; Start button not pressed. | Check power supply; ensure door is latched; select program; press Start. |
| Water not draining | Drain hose kinked or blocked; drain pump filter blocked. | Check and clear drain hose; clean drain pump filter (Section 7.2). |
| Excessive vibration/noise | Machine not level; transport bolts not removed; uneven load. | Adjust feet to level machine; ensure transport bolts are removed; redistribute laundry. |
| Poor wash results | Incorrect detergent dosage; wrong program selected; overloaded machine. | Use correct detergent amount; select appropriate program; reduce load size. |
9. Specifications
| Feature | Detail |
|---|---|
| Brand | Zanussi |
| Model | ZWF50820WW |
| Capacity | 5 Kilograms |
| Max Spin Speed | 800 RPM |
| Installation Type | Freestanding |
| Access Location | Front Load |
| Control Console | Push Button / Rotary Dial |
| Color | White |
| Material Type | Metal |
| Item Weight | 21 Kilograms |
| Special Features | Child Lock, Automatic Sensor, Anti-Flood Protection, Delay Start (3-6-9 hours) |
| Quick-Wash Duration | 20 minutes |
10. Warranty and Support
Your Zanussi ZWF50820WW washing machine comes with a manufacturer's warranty. Please refer to the separate warranty card provided with your appliance for details on coverage and duration. For technical assistance, spare parts, or service requests, please contact Zanussi customer support in your region. Ensure you have your model number (ZWF50820WW) and serial number ready when contacting support.


