
1. Product Overview
This manual provides instructions for the installation, operation, and maintenance of your Whirlpool Direct Cool 305 IMPRO Plus PRM 3S single door refrigerator. Please read this manual thoroughly before using your appliance to ensure safe and efficient operation.
The Whirlpool 305 IMPRO Plus PRM 3S refrigerator features IntelliFrost Technology for intuitive cooling and intelligent defrosting, utilizing a temperature sensor for optimized performance. It offers 4 cooling modes to suit various needs.
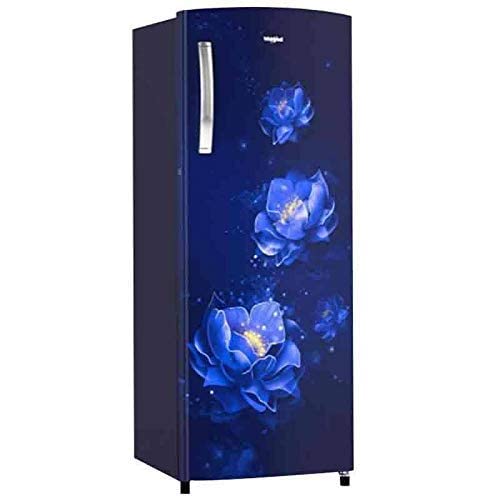
Figure 1: Exterior view of the Whirlpool 305 IMPRO Plus PRM 3S refrigerator, showcasing its floral design.
2. Safety Information
Always follow basic safety precautions when using this appliance to reduce the risk of fire, electric shock, or injury.
- Ensure the refrigerator is properly grounded.
- Do not use electrical appliances inside the food storage compartments unless they are of the type recommended by the manufacturer.
- Do not store explosive substances such as aerosol cans with a flammable propellant in this appliance.
- Keep ventilation openings, in the appliance enclosure or in the built-in structure, clear of obstruction.
- Do not damage the refrigerant circuit.
- This appliance is not intended for use by persons (including children) with reduced physical, sensory or mental capabilities, or lack of experience and knowledge, unless they have been given supervision or instruction concerning use of the appliance by a person responsible for their safety.
- Children should be supervised to ensure that they do not play with the appliance.
3. Setup Guide
3.1 Unpacking
Carefully remove all packaging materials, including tape and protective films. Inspect the refrigerator for any damage incurred during transit. Report any damage to your retailer immediately.
3.2 Placement
- Place the refrigerator on a firm, level surface.
- Allow adequate space around the refrigerator for proper ventilation (at least 10 cm at the back and sides).
- Avoid direct sunlight or heat sources.
- Ensure the ambient temperature is within the recommended operating range for refrigerators.
3.3 Handle Installation
The refrigerator comes with handles that need to be installed. Locate the handles and the screws provided in the packaging.
- Align the handle with the pre-drilled holes on the refrigerator door.
- Secure the handle firmly using the screws. Do not overtighten.
3.4 Power Connection
Before plugging in, ensure the voltage specified on the rating label matches your household power supply. Plug the refrigerator into an exclusive, grounded wall outlet. Do not use extension cords or adapter plugs.
Allow the refrigerator to stand for at least 2-4 hours before plugging it in to allow refrigerants to settle.
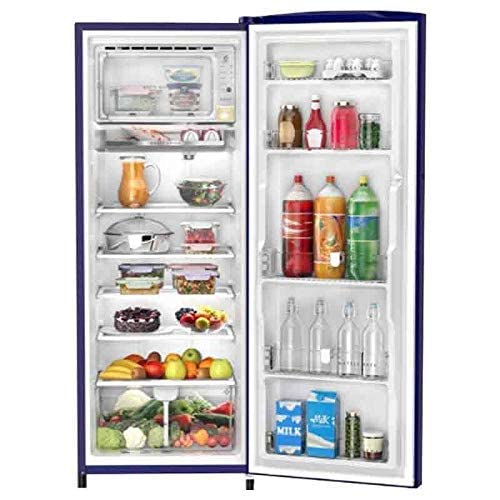
Figure 2: Interior view of the refrigerator, showing shelves, door bins, and the vegetable crisper.
4. Operating Instructions
4.1 Temperature Control
The refrigerator is equipped with a temperature control dial, typically located inside the fresh food compartment. Adjust the dial to set the desired cooling level. A higher number usually indicates colder temperatures.
- Initial Setup: For first-time use, set the temperature control to a medium setting and allow the refrigerator to run for several hours before storing food.
- Adjustment: Adjust the setting based on ambient temperature and the amount of food stored.
4.2 IntelliFrost Technology and Cooling Modes
Your Whirlpool refrigerator features IntelliFrost Technology, which intelligently senses temperature and defrosts as needed, optimizing cooling performance and energy efficiency. It offers 4 distinct cooling modes:
- Fast Ice Mode: Activates rapid cooling to produce ice in approximately 1 hour. Ideal for quick ice requirements.
- Quick Chill Mode: Provides accelerated cooling for beverages and other items, ensuring they reach desired temperatures faster. This also enables the fastest bottle cooling.
- Everyday Mode: Standard operating mode for daily use, balancing cooling efficiency and energy consumption.
- Power Saver Mode: Optimizes energy consumption for periods when less cooling is required or during off-peak hours.
Refer to the control panel or internal settings for selecting these modes.
4.3 Auto-Connect to Home Inverter
This refrigerator is designed to automatically connect to your home inverter during power outages, ensuring continuous cooling and food preservation. No manual intervention is typically required for this feature to function, provided your home inverter system is properly installed and connected.
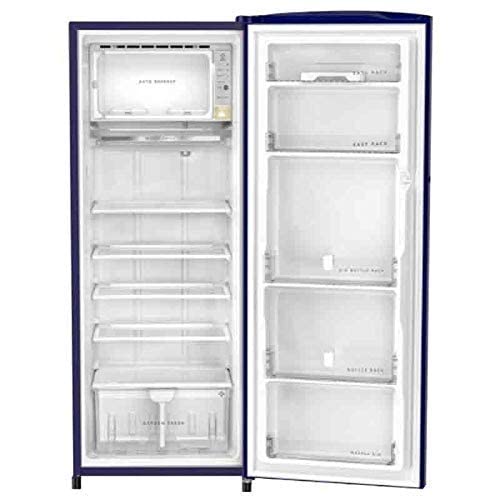
Figure 3: Empty interior of the refrigerator, highlighting the shelf configuration and storage compartments.
5. Maintenance
5.1 Cleaning
- Interior: Clean the interior regularly with a solution of mild soap and warm water. Rinse thoroughly and dry. Do not use abrasive cleaners or harsh chemicals.
- Exterior: Wipe the exterior surfaces with a soft cloth dampened with water and a mild detergent.
- Door Gaskets: Clean door gaskets regularly to ensure a proper seal.
- Condenser Coils: Periodically clean the condenser coils at the back or bottom of the refrigerator to maintain efficiency. Unplug the appliance before cleaning.
5.2 Automatic Defrost System
This refrigerator features an automatic defrost system (Direct Cool with IntelliFrost Technology), which minimizes the need for manual defrosting. The system intelligently defrosts the evaporator coil as required. If excessive frost builds up, ensure the door is sealing properly and that the temperature setting is not excessively low.
5.3 Power Outage
In case of a power outage, keep the refrigerator door closed to maintain the internal temperature for as long as possible. The auto-connect to home inverter feature will activate if an inverter is connected.
6. Troubleshooting
Before contacting customer service, review the following common issues and their solutions:
| Problem | Possible Cause | Solution |
|---|---|---|
| Refrigerator does not operate. | No power supply; power cord not plugged in; circuit breaker tripped. | Check power connection; reset circuit breaker. |
| Temperature is not cold enough. | Temperature control set too warm; door opened too frequently; large amount of warm food added; poor ventilation. | Adjust temperature setting; minimize door openings; allow hot food to cool before storing; ensure adequate clearance around the unit. |
| Unusual noises. | Refrigerator not level; items vibrating inside; compressor noise (normal). | Level the refrigerator; rearrange items; compressor noise is normal during operation. |
| Water on floor. | Drain tube blocked or dislodged. | Clear the drain tube; ensure it is correctly positioned. |
7. Specifications
| Brand | Whirlpool |
| Model Name | 305 IMPRO Plus PRM |
| Model Number | 305 IMPRO Plus PRM 3S |
| Capacity | 280 Liters |
| Configuration | Freezer-on-Top |
| Defrost System Type | Direct Cool (Automatic Defrost) |
| Number of Doors | 1 |
| Voltage | 230 Volts (AC) |
| Shelf Type | Plastic |
| BEE Star Rating | 3 Star |
| Refrigerant | R-410A |
| Included Components | Handles |
8. Warranty Information
Your Whirlpool Direct Cool 305 IMPRO Plus PRM 3S Refrigerator comes with a comprehensive warranty:
- Product Warranty: 1 Year Warranty on the entire product from Whirlpool.
- Compressor Warranty: 10 Years Warranty on the compressor from Whirlpool.
Please retain your purchase receipt for warranty claims. The warranty covers manufacturing defects under normal use. For detailed terms and conditions, refer to the warranty card provided with your appliance or contact Whirlpool customer service.
9. Customer Support
For any queries, service requests, or technical assistance regarding your Whirlpool refrigerator, please contact Whirlpool customer support.
Manufacturer Contact Information:
WHIRLPOOL HOUSE PLOT NO. 40, SECTOR 44, GURUGRAM – 122002, HARYANA, INDIA
Please visit the official Whirlpool website or refer to the contact details provided in your warranty documentation for the most current support information, including phone numbers and email addresses.


