
1. Introduction
This manual provides essential information for the safe and effective use of your MASKO 1800W Electric 2-in-1 Scarifier and Aerator. This tool is designed for maintaining lawns by removing moss, thatch, and weeds, and by aerating the soil to promote healthy grass growth. Please read these instructions carefully before assembly, operation, or maintenance to ensure proper function and user safety. Keep this manual for future reference.
2. Safety Instructions
Always observe basic safety precautions to reduce the risk of fire, electric shock, and personal injury. Failure to follow these instructions may result in serious injury or damage to the product.
- Read the entire manual: Understand all operating instructions and safety warnings before using the machine.
- Personal Protective Equipment (PPE): Always wear appropriate safety glasses, sturdy footwear, and long trousers. Gloves are recommended.
- Electrical Safety: Ensure the power supply matches the machine's specifications. Use only outdoor-rated extension cords in good condition. Do not operate in wet conditions or rain. Disconnect from power before cleaning, maintenance, or when not in use.
- Work Area: Keep the work area clear of debris, children, and pets. Operate only in daylight or good artificial light.
- Inspect Before Use: Check the machine for any damage, loose parts, or worn components before each use. Ensure rollers are securely fastened.
- Avoid Obstacles: Clear the lawn of stones, sticks, wires, and other objects that could be thrown by the blades or tines.
- Proper Handling: Do not force the machine. Operate at a steady pace. Be aware of the power cord's position to avoid cutting it.
- Maintenance: Perform maintenance as described in this manual. Use only original replacement parts.
3. Package Contents
Carefully unpack the box and ensure all items are present and undamaged. If any parts are missing or damaged, contact customer support.
- MASKO Electric Scarifier/Aerator Unit
- Scarifier Roller (with 20 steel blades)
- Aerator Roller (with 24 spring tines)
- 55-Liter Collection Bag
- Handle Assembly (upper and lower sections)
- Fastening Hardware (knobs, screws)
- User Manual

Figure 1: Main unit and included accessories.
4. Assembly & Setup
Follow these steps to assemble your scarifier/aerator. Ensure the machine is disconnected from the power supply during assembly.
4.1 Handle Assembly
- Attach the lower handle sections to the main unit using the provided screws and knobs. Ensure they are securely tightened.
- Connect the upper handle section to the lower sections. Align the holes and secure with the remaining screws and knobs.
- Ensure the cable is routed correctly and secured with any provided clips to prevent strain.
4.2 Roller Installation/Changing
The machine comes with two interchangeable rollers: a scarifier roller and an aerator roller. Choose the appropriate roller for your task.
- Ensure the machine is unplugged.
- Turn the machine on its side to access the roller compartment.
- Locate the roller locking mechanism (often a lever or screws). Release the mechanism to remove the currently installed roller.
- Insert the desired roller (scarifier or aerator) into the compartment, ensuring it aligns correctly with the drive shaft.
- Secure the roller by engaging the locking mechanism. Verify the roller is firmly in place and spins freely without excessive play.
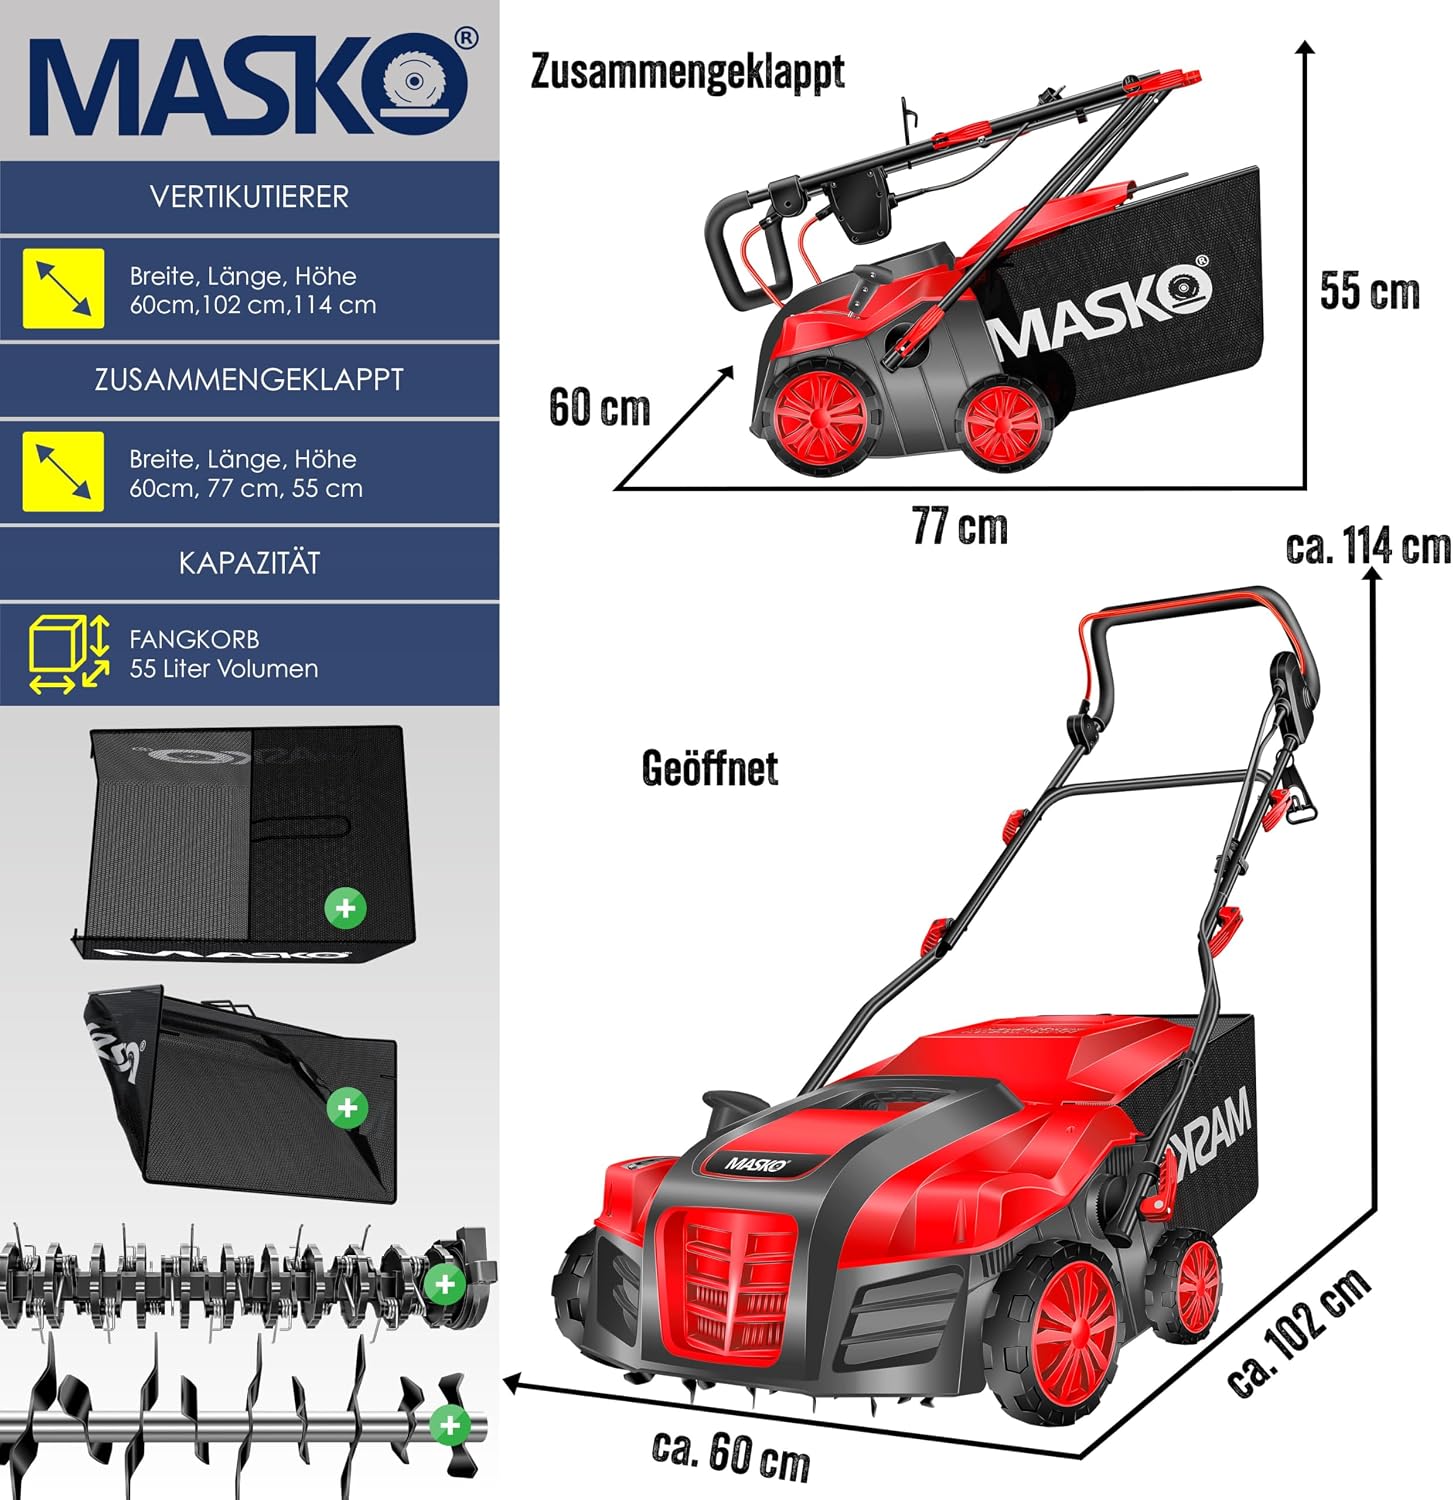
Figure 2: Scarifier roller (left) and Aerator roller (right).
4.3 Collection Bag Attachment
The 55-liter collection bag gathers debris during operation.
- Assemble the collection bag frame if necessary.
- Hook the collection bag onto the designated attachment points at the rear of the machine. Ensure it is securely fastened to prevent detachment during use.

Figure 3: Collection bag attached to the unit.
4.4 Working Depth Adjustment
The working depth can be adjusted to 5 different levels to suit your lawn's condition and the task (scarifying or aerating).
- Locate the central depth adjustment lever on the side of the machine.
- Move the lever to select the desired working depth. Refer to the markings on the machine for depth indications.
- For initial scarifying, start with a shallower depth and gradually increase if needed. For aeration, a moderate depth is usually sufficient.

Figure 4: Working depth adjustment lever.
5. Operation
Before starting, ensure all safety instructions have been read and understood.
5.1 Pre-Operation Checks
- Ensure the correct roller is installed for your task.
- Check that the collection bag is securely attached.
- Verify the power cord and extension cord are undamaged and properly connected.
- Clear the lawn of any foreign objects.
5.2 Starting and Stopping
- To start: Press and hold the safety button, then pull the operating lever towards the handle.
- To stop: Release the operating lever. The roller will stop rotating.
5.3 Scarifying and Aerating Techniques
Push the machine forward at a steady, even pace. Avoid sudden movements or tilting the machine. For optimal results, work in parallel lines, slightly overlapping each pass.
- Scarifying: Use the scarifier roller to remove dense layers of thatch and moss. Adjust the depth to penetrate the thatch layer without excessively digging into the soil.
- Aerating: Use the aerator roller to gently comb the lawn surface, removing light moss and improving air circulation to the grass roots. A shallower depth is typically used for aeration.

Figure 5: Scarifier/Aerator in operation.
Empty the collection bag regularly to maintain effective debris collection and prevent motor strain.
6. Maintenance
Regular maintenance ensures the longevity and performance of your machine. Always unplug the machine before performing any maintenance.
6.1 Cleaning
- After each use, clean the housing, rollers, and collection bag.
- Remove any grass, moss, or debris from the roller and its housing using a brush or a blunt scraper.
- Wipe the exterior surfaces with a damp cloth. Do not use harsh chemicals or abrasive cleaners.
- Ensure no water enters the motor housing.
6.2 Roller Inspection and Replacement
- Regularly inspect the blades of the scarifier roller and the tines of the aerator roller for wear or damage.
- Dull or damaged blades/tines can reduce performance and potentially damage your lawn. Replace rollers if significant wear or damage is observed.
- Refer to section 4.2 for instructions on changing rollers.
7. Storage
Proper storage helps protect your machine and extends its lifespan.
- Clean the machine thoroughly before storing.
- The handle features a foldable design for compact storage. Loosen the handle knobs and fold the handle down.
- Store the machine in a dry, well-ventilated area, away from direct sunlight and extreme temperatures.
- Keep out of reach of children.
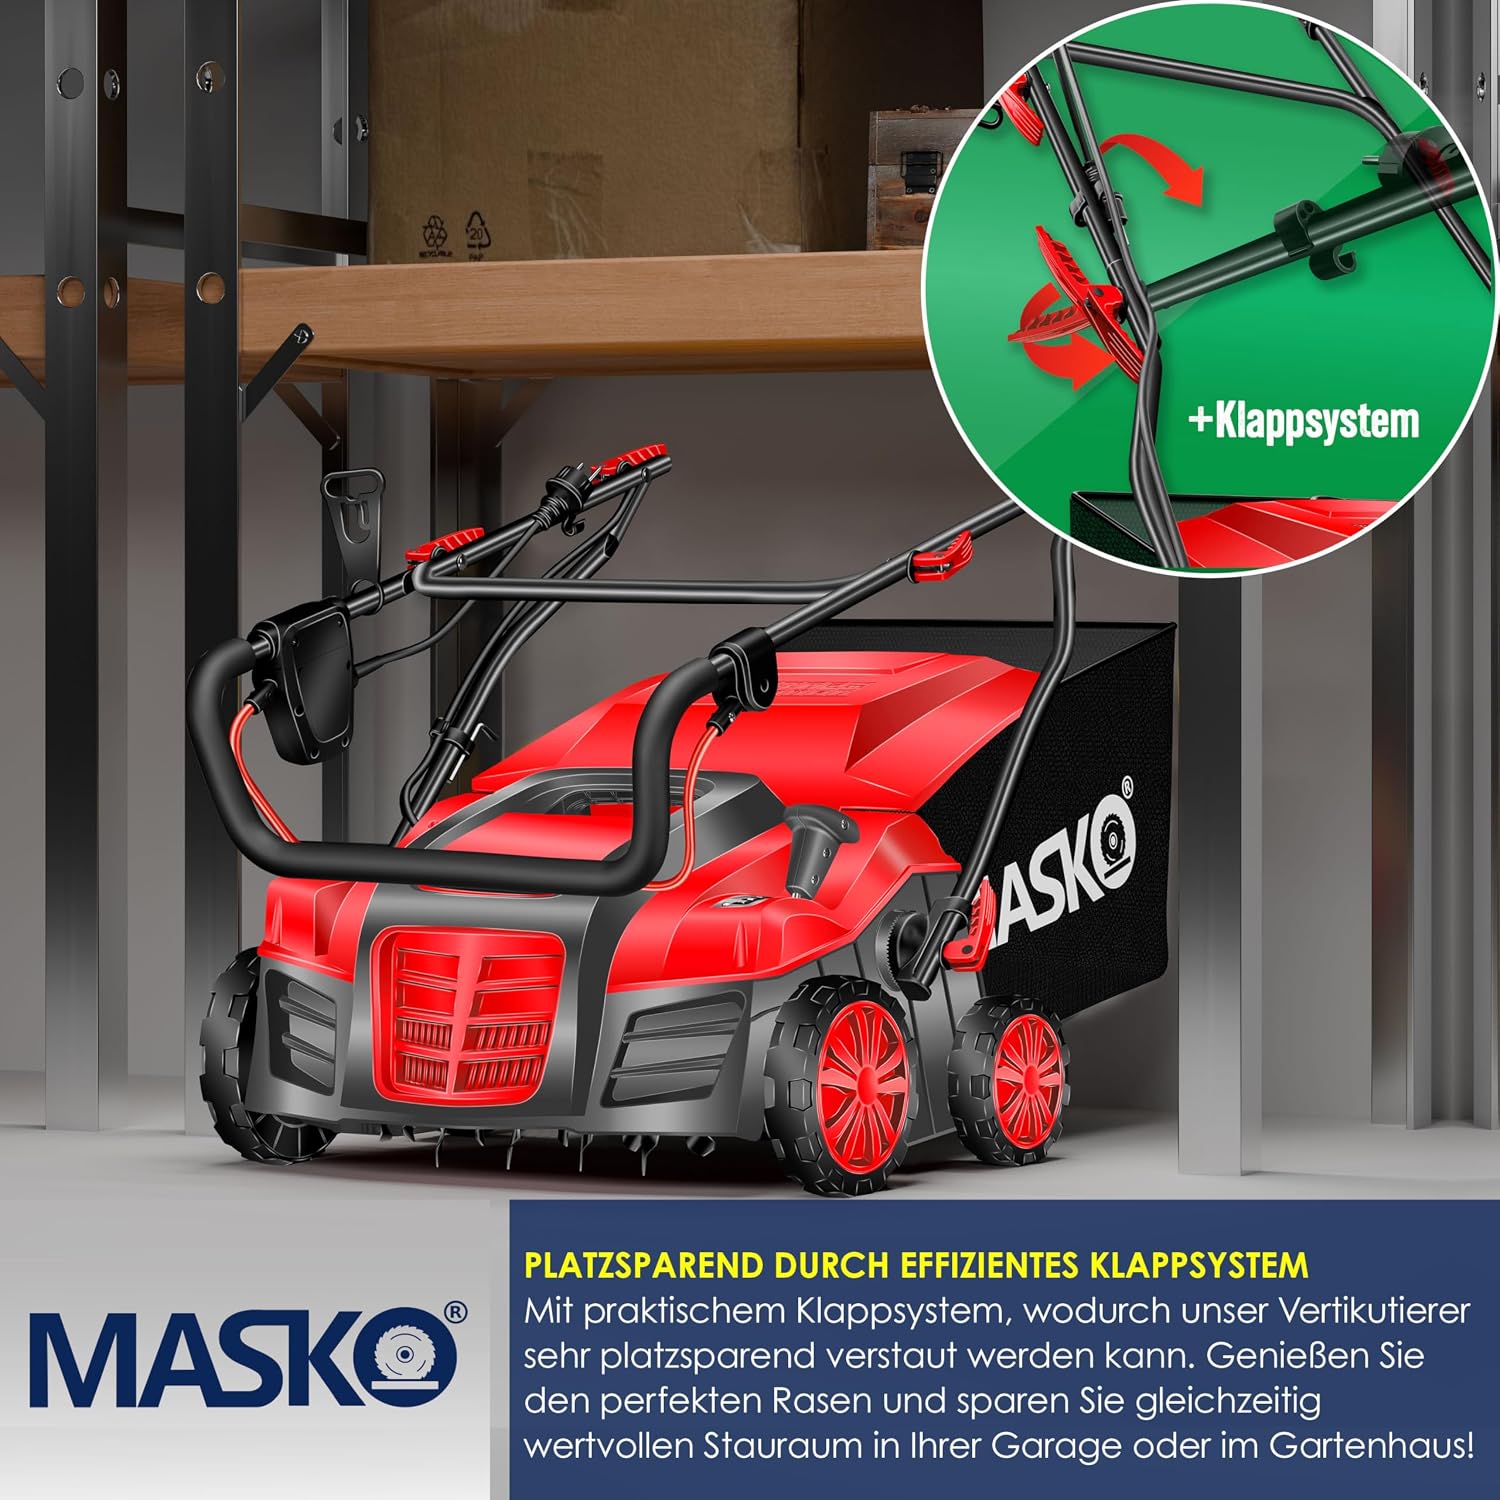
Figure 6: Machine with handle folded for storage.
8. Troubleshooting
This section addresses common issues you might encounter. If you experience a problem not listed here, or if the suggested solutions do not resolve the issue, contact customer support.
| Problem | Possible Cause | Solution |
|---|---|---|
| Machine does not start | No power supply Safety button/lever not engaged Damaged power cord | Check power connection and circuit breaker Ensure safety button is pressed before pulling lever Inspect cord for damage; replace if necessary |
| Poor scarifying/aerating performance | Incorrect working depth Worn or damaged roller blades/tines Collection bag full Excessive debris buildup | Adjust working depth (see section 4.4) Inspect and replace roller if needed (see section 6.2) Empty collection bag Clean roller and housing (see section 6.1) |
| Machine vibrates excessively | Unbalanced roller Loose components Damaged roller | Check roller for damage or debris buildup Tighten all screws and fasteners Replace roller if damaged |
| Motor overheats | Overload (too deep, too fast) Blocked ventilation slots | Reduce working depth or speed Clear ventilation slots Allow motor to cool down before resuming operation |
9. Technical Specifications
Key technical data for your MASKO Scarifier and Aerator.
| Feature | Specification |
|---|---|
| Model Number | 4260663286104 |
| Power | 1800 Watt |
| Working Width | 40 cm |
| Collection Bag Capacity | 55 Liters |
| Working Depth Adjustment | 5 levels |
| Scarifier Roller | 20 Steel Blades |
| Aerator Roller | 24 Spring Tines |
| Weight | 15 kg |
10. Warranty & Support
Your MASKO Electric 2-in-1 Scarifier and Aerator is covered by a manufacturer's warranty against defects in materials and workmanship. Please refer to the warranty card included with your purchase for specific terms and conditions, including the warranty period and coverage details.
For technical assistance, troubleshooting beyond this manual, or to inquire about replacement parts, please contact MASKO customer support. Contact information can typically be found on the product packaging, the official MASKO website, or your purchase receipt.
When contacting support, please have your product model number (4260663286104) and proof of purchase readily available.