
1. Introduction
This manual provides essential information for the safe and effective use of your Battery Tender 17 Watt Solar Panel 12V Battery Charger with Charge Controller. Please read these instructions thoroughly before installation and operation to ensure optimal performance and longevity of your product and connected batteries.

Image: The Battery Tender 17 Watt Solar Panel, a compact and efficient unit designed for battery charging and maintenance.
2. Product Features
- Mountable & Versatile: Designed for easy mounting to outdoor surfaces using four integrated mounting holes. Ideal for harnessing solar energy in locations without direct power access.
- Smart Charging: Features a built-in charge controller with a 3-step charging process to prevent overcharging and battery discharge. An LED indicator light displays the current charging status.
- Broad Compatibility: This compact solar panel is compatible with various 12V battery types, including lithium (LiFePO4), lead acid, flooded, and sealed maintenance-free AGM and gel cell batteries.
- Protected Design: IP67 rated for weather resistance, ensuring durability against outdoor elements. Includes spark-proof connections and reverse charging protection for enhanced safety.
- Low Maintenance: Engineered for minimal maintenance, offering a convenient solution for long-term battery care.
3. What's in the Box
- 1x Battery Tender 17 Watt Solar Panel
- 1x Solar Charge Controller (integrated)
- 1x Alligator Clips Quick Disconnect Cable
- 1x Ring Terminal Quick Disconnect Cable
- 1x 6-foot Quick Disconnection Extension Cable
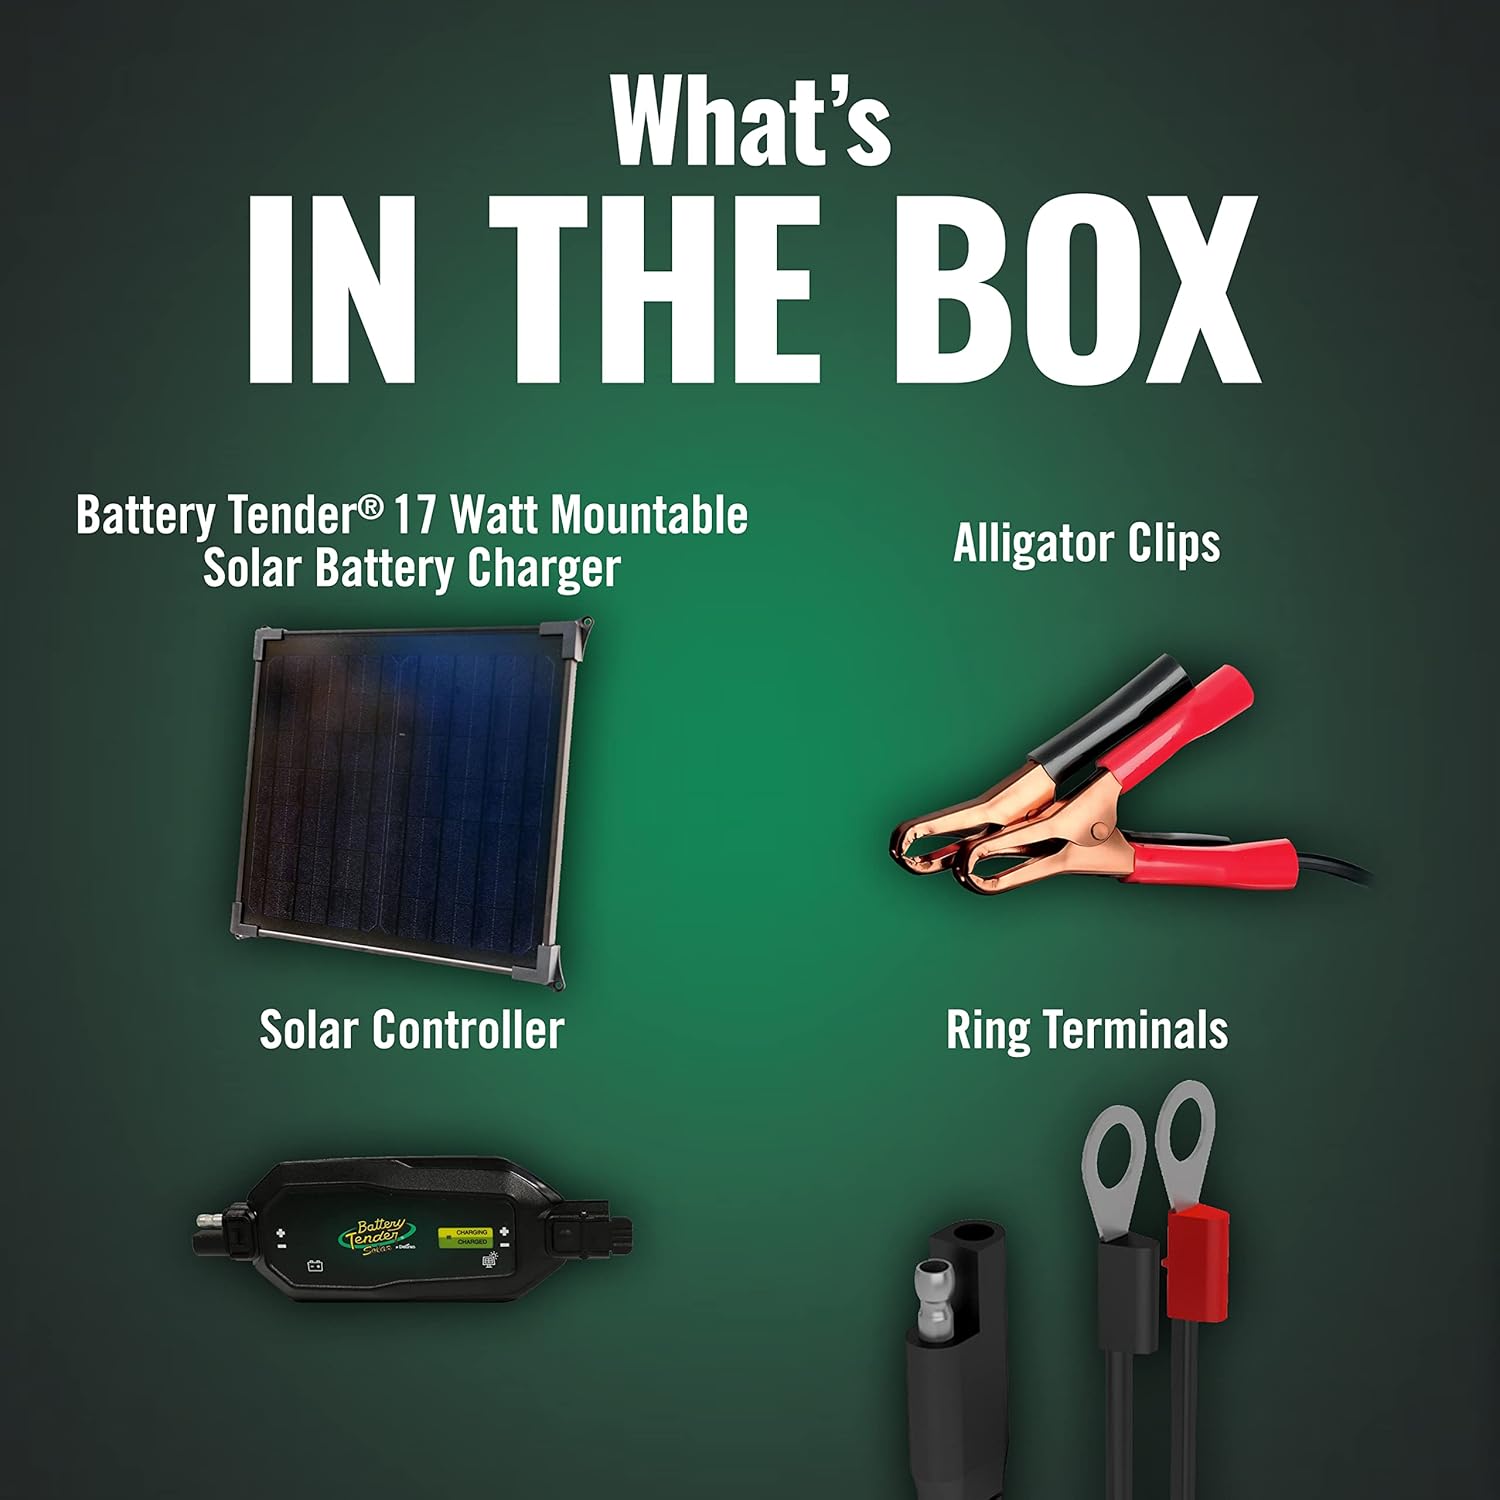
Image: The components included in the product package, showing the solar panel, charge controller, alligator clips, and ring terminals.
4. Setup
4.1. Mounting the Solar Panel
- Identify a location that receives maximum direct sunlight throughout the day.
- Use the four integrated mounting holes on the solar panel frame to securely attach it to a stable surface. Ensure the panel is angled towards the sun for optimal performance.
4.2. Connecting to the Battery
- Ensure the solar panel is not exposed to direct sunlight during initial connection to prevent accidental sparking.
- Select the appropriate quick disconnect cable: either the Alligator Clips for temporary connections or the Ring Terminals for permanent installation.
- Connect the red (+) connector of the quick disconnect cable to the positive terminal of your 12V battery.
- Connect the black (-) connector of the quick disconnect cable to the negative terminal of your 12V battery.
- Connect the quick disconnect end of the cable to the integrated solar charge controller on the solar panel. Use the 6-foot extension cable if additional length is required.
- Once connected, expose the solar panel to sunlight. The LED indicator on the charge controller will illuminate to show charging status.

Image: A Battery Tender solar panel positioned on a vehicle's dashboard, connected to the battery for charging.
5. Operating Instructions
The Battery Tender 17 Watt Solar Panel is designed for automatic operation. Once properly connected to a 12V battery and exposed to sufficient sunlight, the integrated charge controller will manage the charging process.
5.1. LED Indicator Status
The charge controller features an LED indicator to provide visual feedback on the charging status:
- No Light: Insufficient solar power or no connection.
- Flashing Amber: Not charging the battery.
- Solid Amber: Battery is currently charging.
- Flashing Green: Battery is more than 80% charged.
- Solid Green: Battery is fully charged and being monitored (float mode).

Image: The solar panel highlighting its safety features, including IP67 weather resistance, reversed hook-up protection, and spark-proof design.
6. Battery Compatibility
This solar panel is designed to charge and maintain 12V batteries of various types, including:
- Lithium (LiFePO4)
- Lead Acid
- Flooded
- Sealed Maintenance-Free AGM
- Gel Cell

Image: Visual representation of the solar panel's compatibility with different 12V battery types and applications, including RVs, cars, trucks, and boats.
7. 3-Step Charging Process
The integrated smart charge controller utilizes a 3-step charging process to optimize battery health and prevent overcharging:
- Bulk Charge: Delivers a constant current to bring the battery to approximately 80% of its capacity.
- Absorption Mode: Gradually reduces the charging current while maintaining a constant voltage to bring the battery to full charge.
- Float Mode: Once the battery is fully charged, the controller switches to a lower, constant voltage to maintain the battery's charge without overcharging or discharging, ensuring it's always ready for use.

Image: A visual breakdown of the automatic charging stages, including spark-proof connection, bulk charge, absorption mode, and float mode.
8. Safety Features
Your Battery Tender solar panel is equipped with several safety features to protect both the device and your battery:
- IP67 Weatherproof Rating: Provides complete protection against dust ingress and can withstand immersion in water up to 1 meter for 30 minutes, making it suitable for outdoor use in various weather conditions.
- Spark-Proof Design: Connections are designed to prevent sparks during hook-up, enhancing safety.
- Reverse Charging Protection: Prevents current from flowing back from the battery to the solar panel during periods of low light or darkness, safeguarding the battery from discharge.
- Reverse Polarity Protection: Ensures no charge is sent unless connections are attached correctly, preventing damage from incorrect wiring.
9. Maintenance
To ensure optimal performance and extend the lifespan of your solar panel and battery, follow these simple maintenance guidelines:
- Keep Clean: Regularly wipe the solar panel surface with a soft, damp cloth to remove dust, dirt, and debris that may obstruct sunlight and reduce efficiency.
- Check Connections: Periodically inspect all cable connections to ensure they are secure and free from corrosion.
- Optimal Positioning: Adjust the panel's angle seasonally to maximize exposure to direct sunlight.
- Avoid Obstructions: Ensure no objects (leaves, snow, etc.) are covering the solar panel, as this will reduce its charging capability.
10. Troubleshooting
If your solar panel is not performing as expected, consider the following:
- No LED Light: Check if the solar panel is receiving sufficient sunlight. Ensure all connections are secure and correctly polarized.
- Battery Not Charging (Flashing Amber): Verify that the battery terminals are clean and that the connections are firm. Ensure the solar panel is in direct sunlight and not obstructed.
- Slow Charging: Ensure the solar panel is positioned for maximum sun exposure. Clean the panel surface if it's dirty. Check the battery's overall health; older or damaged batteries may not hold a charge efficiently.
- Overheating: While the unit is designed to be robust, ensure adequate airflow around the charge controller and battery, especially in hot environments.
11. Specifications
| Attribute | Value |
|---|---|
| Brand | Battery Tender |
| Model Number | 021-1173 |
| Maximum Power | 17 Watts |
| Maximum Voltage | 12 Volts |
| Material | Aluminum, Monocrystalline Silicon, Tempered Glass |
| Product Dimensions | 16.25"L x 11.49"W x 1.18"H |
| Item Weight | 3.1 Pounds |
| Efficiency | High Efficiency |
| Special Feature | Built-in charge controller for smart charging |
| IP Rating | IP67 Weatherproof |
12. Warranty & Support
The Battery Tender 17 Watt Solar Panel comes with a 5-year manufacturer limited warranty. For any product-related inquiries, technical assistance, or warranty claims, please contact Battery Tender customer support. Lifetime customer support is provided to assist you with any questions or issues you may encounter.
For further assistance, please refer to the official Battery Tender website or contact their customer service directly.


