Introduction
This manual provides detailed instructions for the safe and effective setup, operation, maintenance, and storage of your Yaheetech 10x10 Commercial Instant Heavy Duty Canopy Tent. Designed for various outdoor events, this canopy features a robust frame and weather-resistant fabric to provide reliable shelter. Please read this manual thoroughly before assembly and retain it for future reference.
Package Contents
Verify that all components are present before beginning assembly:
- Canopy Frame (pre-assembled)
- 500D Polyester Canopy Fabric (with PU coating and UPF 50+ UV protective coating)
- Wheeled Carry Bag
- 4 Anchor Ropes
- 4 Metal Ground Anchors (Stakes)
- 4 Sandbags (for additional weighting)

Image: All components included with the Yaheetech canopy tent, including the frame, canopy top, wheeled carry bag, sandbags, and stakes.
Setup Instructions
Two people are recommended for efficient and safe assembly.
- Unpack the Frame: Remove the folded canopy frame from the wheeled carry bag. Place it in the desired setup location.
- Partially Expand the Frame: With a person on each side, gently pull the outer legs of the frame outwards until it is partially expanded. Do not fully extend the legs yet.
- Attach the Canopy Top: Drape the canopy fabric over the partially expanded frame. Secure the corners of the canopy to the frame's corner posts using the integrated hook-and-loop fasteners. Ensure the canopy is centered and evenly distributed.
- Fully Expand the Frame: Stand inside the canopy. Push up on the central locking mechanism until it clicks into place, fully extending the frame.
- Extend the Legs: Go to each leg and press the red release button. Extend the inner leg section downwards until it locks into your desired height setting. Repeat for all four legs.
- Secure the Canopy: Attach the anchor ropes to the designated loops on the canopy corners. Drive the metal ground anchors into the ground at an angle, away from the canopy legs, and tie the ropes securely to them. Fill the sandbags with sand or other heavy material and attach one to each leg for additional stability, especially in windy conditions.
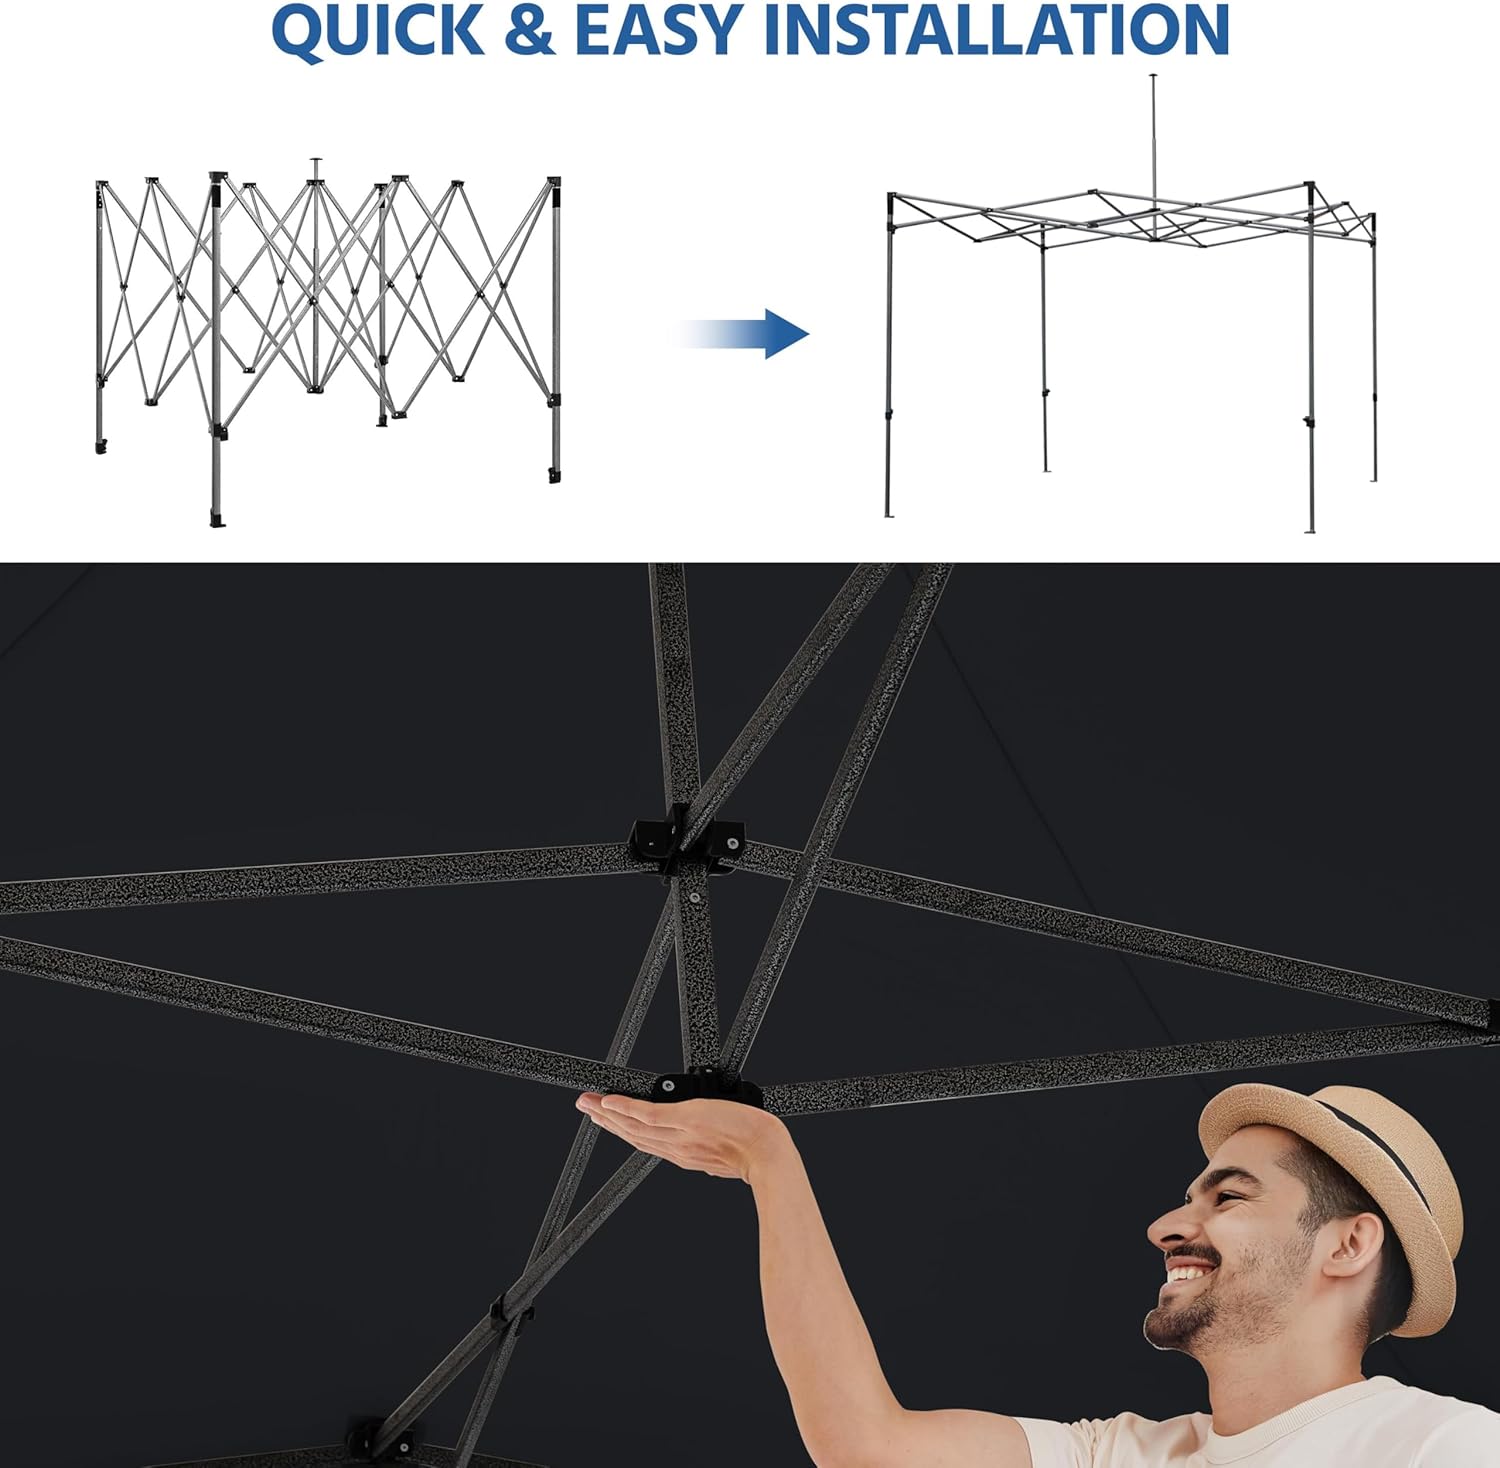
Image: The canopy frame in its partially expanded state, ready for the canopy top to be draped over it.

Image: A close-up view showing the hook-and-loop fasteners used to attach the canopy fabric to the frame's corner posts.

Image: Detail of the red release button on the canopy leg, used to adjust the height of the tent.

Image: The included sandbags, designed to be filled and attached to the canopy legs for increased stability.
Setup Video
Video: Official Yaheetech Canopy Tent Commercial Instant Canopy Installation Guide. This video demonstrates the step-by-step process of setting up the canopy tent, including frame expansion, canopy attachment, and leg extension.
Operating Instructions
Adjusting Height
The canopy offers three adjustable height settings: 10.6', 10.9', and 11.2'. To adjust the height, ensure the canopy is fully expanded but not yet secured with stakes or sandbags. Press the red release button on each leg and slide the inner leg section up or down to the desired position until it clicks into place. Ensure all four legs are set to the same height for stability.
Securing the Canopy
Always secure the canopy using the provided anchor ropes, metal ground anchors, and sandbags. In windy conditions, it is crucial to utilize all securing methods to prevent damage or injury. Lowering the canopy to its lowest height setting can also increase stability during strong winds.
Care and Maintenance
- Cleaning: Clean the canopy fabric with mild soap and water. Do not use harsh chemicals or abrasive cleaners, as this may damage the waterproof and UV protective coatings. Allow the fabric to air dry completely before storage.
- Frame Care: Inspect the steel frame regularly for any signs of rust, damage, or loose connections. Clean any dirt or debris from the frame.
- Fabric Inspection: Periodically check the canopy fabric for tears, punctures, or signs of wear. Small tears can often be repaired with a suitable fabric repair kit.
Storage
For long-term storage, ensure the canopy fabric is completely dry to prevent mold and mildew. Fold the canopy frame and fabric carefully according to the original packaging instructions. Store all components in the wheeled carry bag in a cool, dry place away from direct sunlight and extreme temperatures.
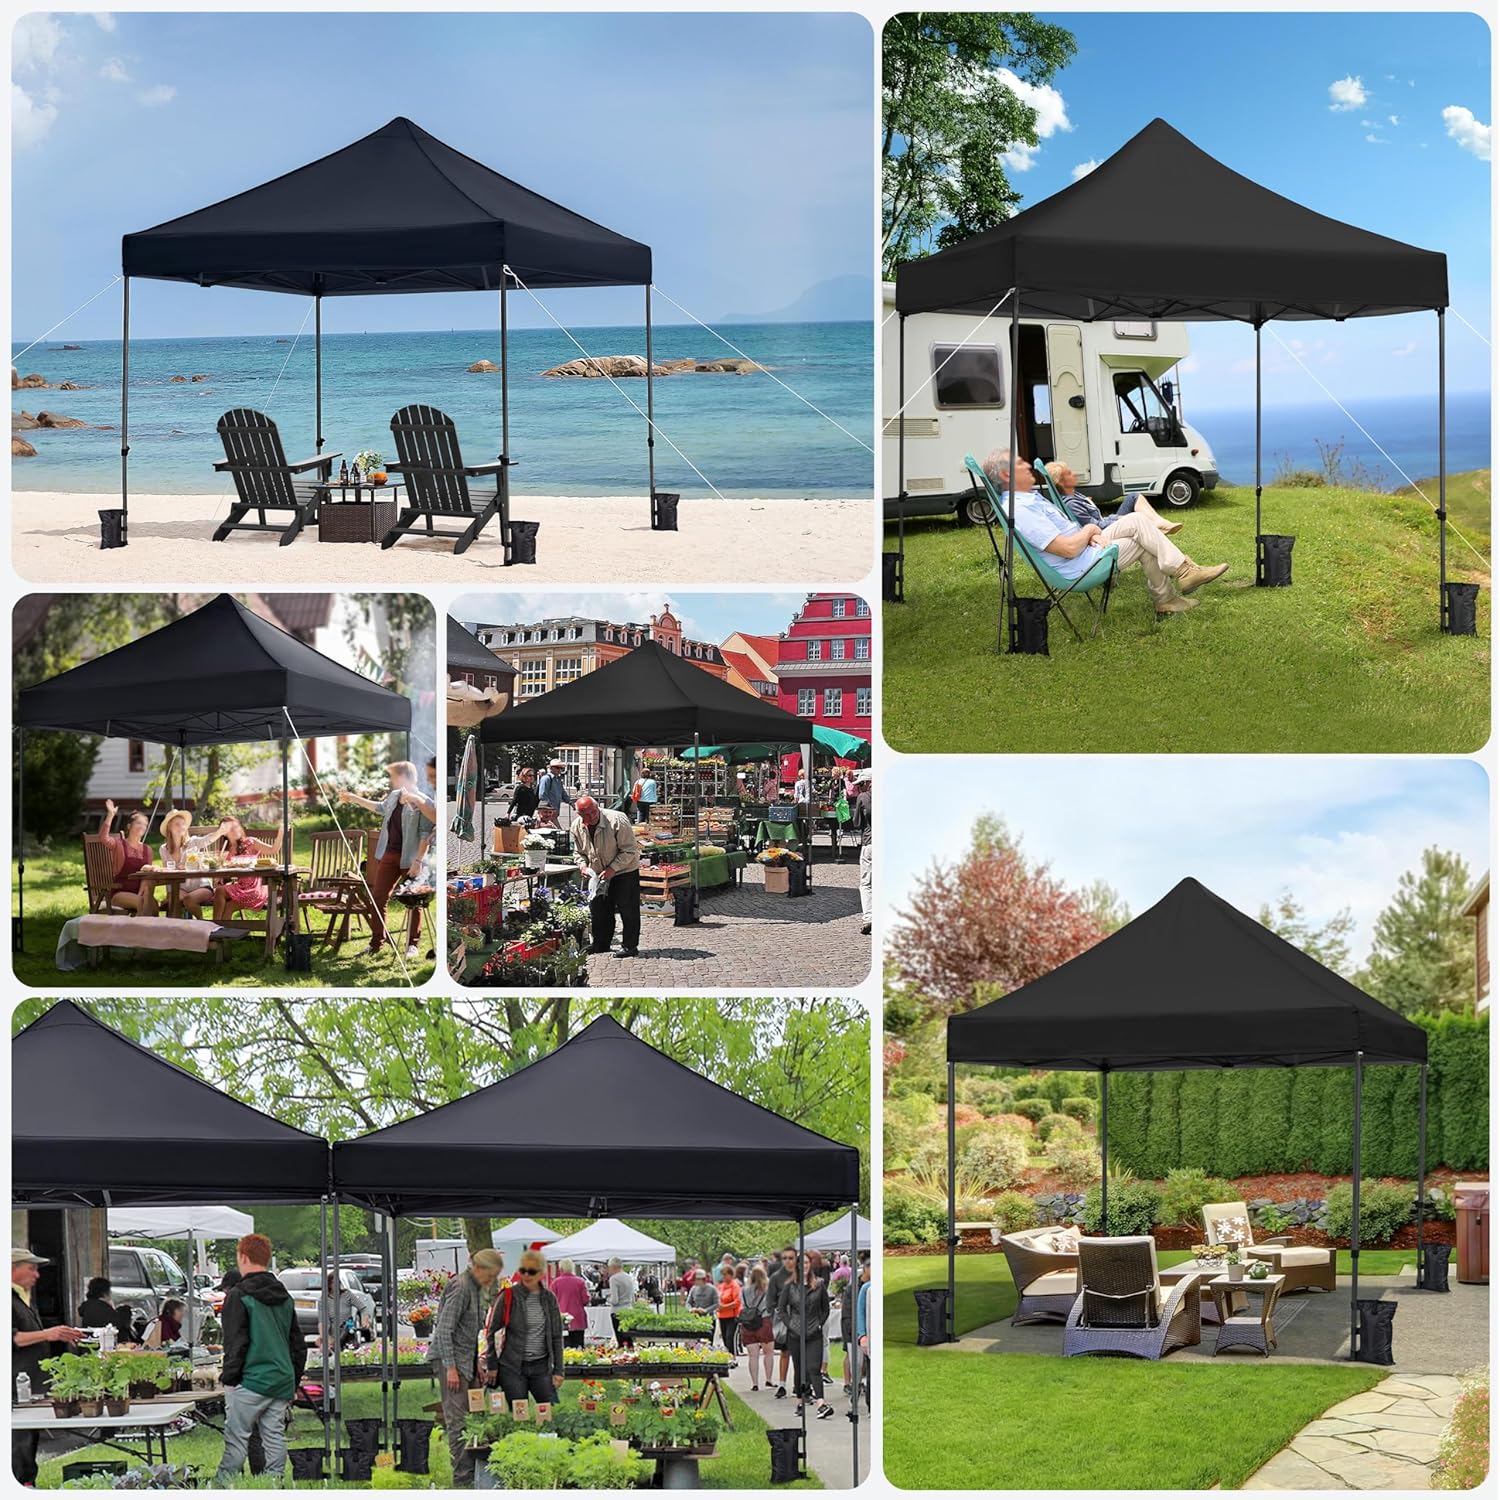
Image: The wheeled carry bag, designed for convenient storage and transport of the canopy tent and its accessories.
Safety Information
Securely anchor the shelter in windy conditions, avoid prolonged UV exposure, and ensure fire safety. Always follow included instructions and use provided accessories for safe setup and use.
Troubleshooting
- Water Pooling on Canopy: Ensure the canopy fabric is taut and properly secured to the frame. Adjust leg heights if necessary to create sufficient slope for water runoff. In heavy rain, consider lowering the canopy to its lowest setting to reduce stress on the frame.
- Canopy Instability in Wind: Always use all provided sandbags, anchor ropes, and metal ground anchors. For extreme wind, additional weights (not included) may be necessary. Disassemble the canopy in severe weather conditions.
- Difficulty Expanding/Collapsing Frame: Ensure all locking mechanisms are disengaged before attempting to collapse the frame. Lubricate moving parts with a silicone-based spray if resistance is encountered. Two people are recommended for these operations.
Specifications
| Brand | Yaheetech |
| Model Number | YTw2on0001001 |
| Material | 500D Oxford Cloth, PU Coating, Steel |
| Color | Black |
| Item Weight | 50 Pounds |
| Product Dimensions | 118.11"L x 118.11"W x 134.25"H |
| Ultraviolet Light Protection | UPF50+ |
| Water Resistance Level | Waterproof |
| Floor Area | 100 Square Feet |
| Max Ceiling Height | 11.2 Feet |
| Occupancy | 6-10 People |
| Assembly Required | Yes |
Warranty and Support
For warranty information or technical support, please refer to the contact details provided with your purchase or visit the official Yaheetech website. Keep your proof of purchase for any warranty claims.


