Introduction
This manual provides comprehensive instructions for the setup, programming, operation, and maintenance of your ASONPAO 375UT 380UT Universal Garage Door Opener Remote. Please read these instructions carefully before use to ensure proper functionality and safety.
The ASONPAO universal remote is designed for broad compatibility with various garage door openers, featuring Security+2.0 Rolling Code technology for enhanced security and a user-friendly design for convenient access.
What's in the Box
- Universal Garage Door Opener Remote
- 2 Lithium Metal batteries (CR2032)
- User Manual
- Visor Clip
Specifications
- Model: 375UT/375LM/380UT
- Working Range: 164 Feet
- Working Voltage: DC3V
- Frequency: Multi-frequency
- Channel: 2
- Battery Model: 3V CR2032
- Shell Material: ABS
- Product Size: 3.22 x 2 x 0.62 inches
- Product Weight: 0.088 LBS
- Code: Security 2.0 + rolling code
Compatibility
The ASONPAO 375UT 380UT remote is compatible with a wide range of garage door openers. It is compatible with LiftMaster, Chamberlain, and Sears Craftsman garage door openers that feature Yellow, Purple, Red/Orange, or Green Learn buttons. It also supports Linear, Genie, and Wayne Dalton garage door openers.
Important: Not Compatible with 811LMX, 812LMX, 813LMX models.
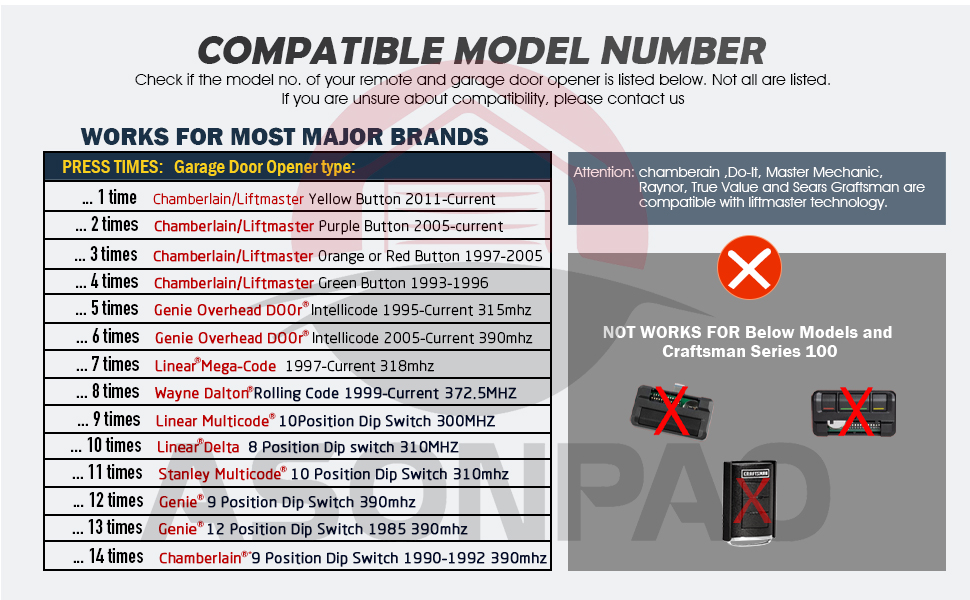
Image: Compatible Model Number Chart. This chart details the number of button presses required for programming based on the garage door opener's learn button color or DIP switch configuration.
Programming Instructions
Follow these steps to program your ASONPAO universal remote. Refer to the compatibility chart above to determine the correct number of button presses for your specific garage door opener type.
Step 1: Prepare the Remote for Programming
- Open the remote control by sliding the battery cover down.
- Press and hold the program button until the LED lights (approximately 2 seconds), then release it.
Step 2: Program the Remote to Your Garage Door Opener
Press and release the remote control button you wish to use, the number of times that corresponds with your garage door opener type (refer to the compatibility chart).
For example:
- If your garage door opener has a Yellow Learn Button (2011-Current Chamberlain/LiftMaster), press the remote button 1 time.
- If your garage door opener has a Purple Learn Button (2005-Current Chamberlain/LiftMaster), press the remote button 2 times.
- If your garage door opener has an Orange or Red Learn Button (1997-2005 Chamberlain/LiftMaster), press the remote button 3 times.
- If your garage door opener has a Green Learn Button (1993-1996 Chamberlain/LiftMaster), press the remote button 4 times.
Step 3: Sync with Garage Door Opener (Smart/Learn Button)
- Ensure your garage door opener is fully closed.
- Press and release the SMART/LEARN button on your garage door opener. The indicator light will glow steadily for 30 seconds.
- Get close to the garage door opener and press the programmed button of the remote to activate your opener. The garage door opener lights will flash or two clicks will be heard. If the opener does not activate, repeat the above programming steps.
Alternative: Sync with DIP Switches
If your existing receiver or remote control uses DIP switches, match the remote control's DIP switches to the existing receiver or remote control's settings.
Step 4: Exit Programming Mode
Press the program button again (LED goes OFF) to exit programming mode. Programming is now complete.

Image: Programming Instructions. This image provides a visual guide to the programming steps, including identifying the program button and DIP switches.
Programming Videos
Operation
Once programmed, the ASONPAO universal remote offers convenient operation of your garage door opener.
- Control Range: Enjoy a 164-foot control range for activating your garage door from a distance.
- Security: The remote utilizes Security+2.0 Rolling Code technology, which changes the code each time the button is pressed, providing enhanced anti-theft protection.
- Design: Its compact design allows for easy storage, such as on your car’s sun visor using the included clip, or in a pocket.

Image: Remote in use from a vehicle. Demonstrates the remote's range and convenience for opening a garage door.
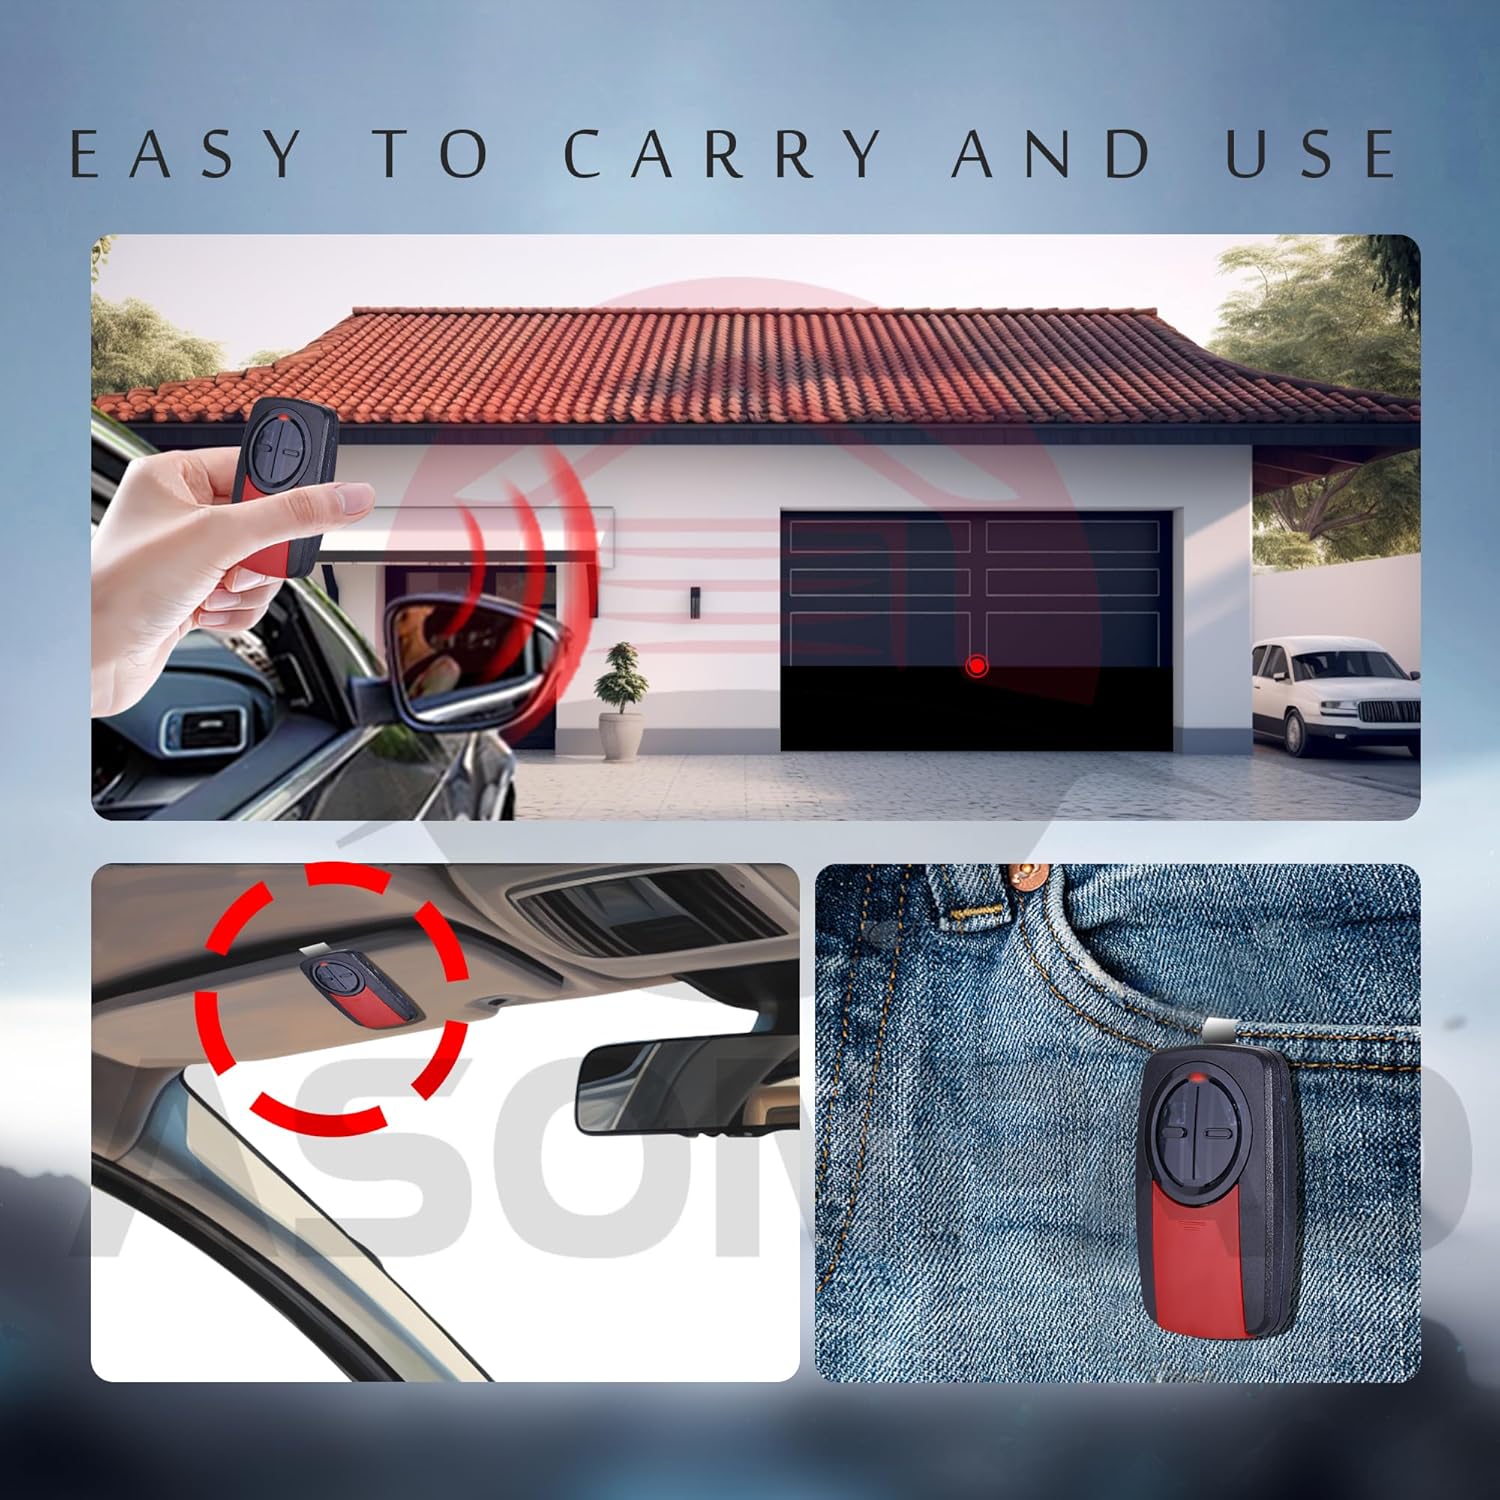
Image: Easy to Carry and Use. Shows the remote's compact size and how it can be clipped to a sun visor or carried in a pocket.
Maintenance
The remote is equipped with a 240mAh lithium battery and an intelligent low-power chip, ensuring extended usage. When the remote's LED indicator light becomes dim or fails to illuminate upon button press, it is time to replace the battery. The remote uses a 3V CR2032 battery.
Battery Replacement
- Slide the battery cover down to open the remote.
- Remove the old CR2032 battery.
- Insert a new 3V CR2032 battery with the positive (+) side facing up.
- Slide the battery cover back into place.
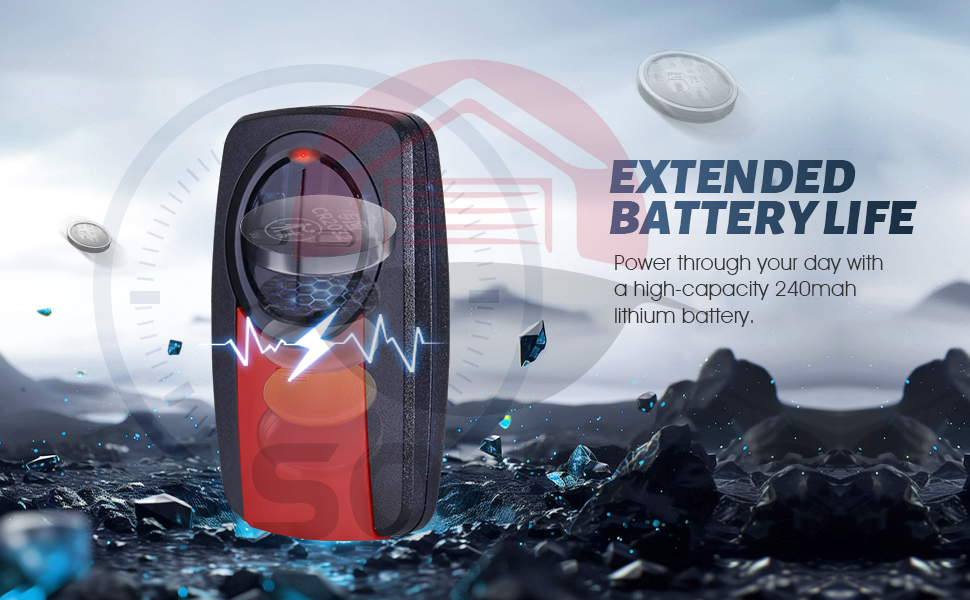
Image: Long-Lasting Battery. Illustrates the remote's internal battery and its capacity.
Troubleshooting
If your remote is not syncing or operating correctly, consider the following solutions:
- Solution 1: Double-check the color of the learn button on your garage door opener and ensure you are choosing the correct garage door opener type during programming.
- Solution 2: Make sure your garage door opener is fully closed before starting the programming process.
- Solution 3: Perform the programming steps quickly. If you wait too long (a few seconds) between steps, the process may time out and programming will fail.
- Solution 4: Watch the programming videos provided in this manual and follow the instructions carefully.
- Solution 5: The memory of your garage door opener might be full. Press and hold the learn button on your garage door opener for several seconds until the LED turns off. This clears all memory. Then, re-program the remote.
Warranty and Support
The ASONPAO 375UT 380UT Universal Garage Door Opener Remote comes with a 10-year warranty, ensuring product quality and customer satisfaction. For any technical assistance or inquiries, please utilize the 24/7 customer support available through Amazon.

Image: 24 Hours Amazon Online Tech Support. Highlights the availability of customer support and the product's warranty.


