
1. Product Overview
This manual provides instructions for the installation and maintenance of the HECASA Rear Wheel Arch Quarter Panel, Model MO-192. This product is designed as a replacement part for 2009-2014 Ford F-150 LD models that do not have molding holes.
Key Features:
- Compatibility: Specifically designed for 2009-2014 Ford F-150 LD models without molding holes.
- Construction: Manufactured from high-quality steel, ensuring durability and structural integrity.
- Finish: Features a black electrophoretic coating for enhanced corrosion resistance.
- Replacement Part: Designed to replace the upper rear wheel arch. Requires removal of the old panel.

Image 1.1: A pair of HECASA Rear Wheel Arch Quarter Panels.
2. Safety Information
Automotive body repair can be complex and requires specific tools and expertise. Please read and understand all safety warnings before proceeding with installation.
- Professional Installation Recommended: Due to the nature of this repair, professional installation by a qualified technician is highly recommended to ensure proper fitment and vehicle safety.
- Personal Protective Equipment (PPE): Always wear appropriate PPE, including safety glasses, gloves, and hearing protection, during any cutting, welding, or grinding operations.
- Vehicle Support: Ensure the vehicle is securely supported on jack stands or a lift before working underneath or removing any components. Never rely solely on a jack.
- Tool Safety: Use tools correctly and ensure they are in good working condition. Follow manufacturer guidelines for all power tools.
- Fire Hazards: Be aware of potential fire hazards when working with cutting tools, grinders, or welding equipment. Keep a fire extinguisher nearby.
- Ventilation: Ensure adequate ventilation when painting, welding, or using adhesives to avoid inhaling fumes.
3. Package Contents
Upon opening the package, verify that all components are present and undamaged. Contact your supplier immediately if any items are missing or damaged.
- 1x HECASA Rear Wheel Arch Quarter Panel (Driver Side)
- 1x HECASA Rear Wheel Arch Quarter Panel (Passenger Side)

Image 3.1: Front view of the HECASA Rear Wheel Arch Quarter Panels.
4. Installation Guide
This section outlines the general steps for installing the HECASA Rear Wheel Arch Quarter Panels. This is a complex repair that typically involves cutting, welding, and painting. If you are not experienced with such procedures, professional installation is strongly advised.
Required Tools and Materials (Not Included):
- Safety glasses, gloves, hearing protection
- Angle grinder or air saw for cutting
- Welding equipment (MIG welder recommended)
- Grinding discs and flap discs
- Body filler and sanding supplies
- Automotive primer and paint matching vehicle color
- Measuring tape, marking tools
- Vehicle lift or sturdy jack stands
Installation Steps:
- Prepare the Vehicle:
- Park the vehicle on a level surface and engage the parking brake.
- Safely lift the vehicle and support it with jack stands. Remove the rear wheels for better access.
- Clean the work area thoroughly to remove dirt, rust, and debris.
- Inspect and Mark:
- Carefully inspect the existing wheel arch for rust or damage.
- Position the new repair panel against the vehicle to determine the exact cut lines. Mark these lines clearly on the old panel.
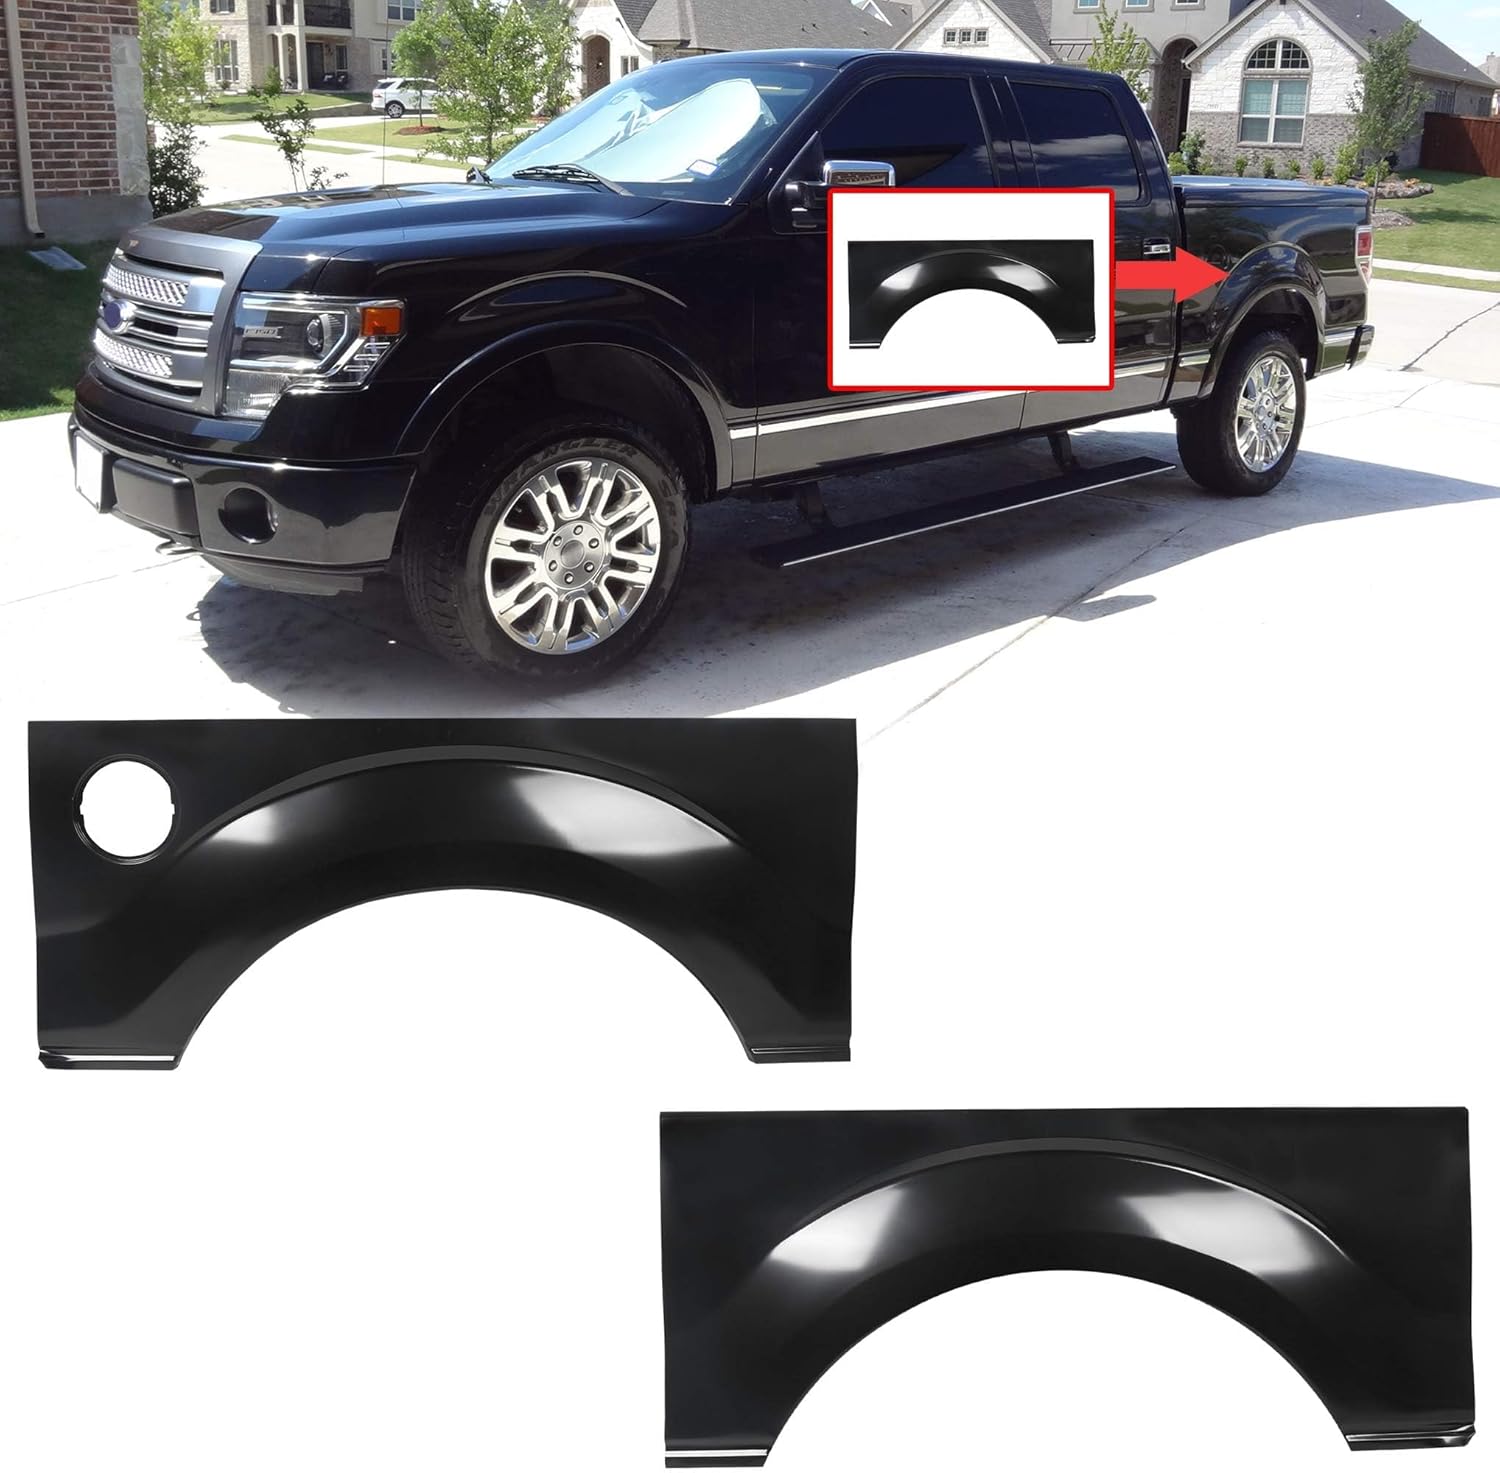
Image 4.1: Example of a wheel arch panel positioned on a truck for fitment assessment.
- Cut Out Old Panel:
- Using an angle grinder or air saw, carefully cut along the marked lines to remove the damaged section of the old wheel arch.
- Take precautions to avoid damaging surrounding vehicle components, wiring, or fuel lines.
- Prepare for Welding:
- Grind down any rough edges on the remaining vehicle body and the new panel to ensure a clean surface for welding.
- Test fit the new panel again to ensure a precise match. Trim as necessary.

Image 4.2: Detailed view of the driver side rear wheel arch panel.
- Weld New Panel:
- Secure the new panel in place using clamps or self-tapping screws.
- Begin welding the new panel to the vehicle body. Use a series of small spot welds to prevent warping, allowing the metal to cool between welds.
- Once fully welded, grind down the welds smooth.
- Bodywork and Finishing:
- Apply body filler over the welded seams and sand smooth to achieve a seamless finish.
- Clean the area thoroughly and apply automotive primer.
- Paint the repaired area to match the vehicle's existing color.
- Final Inspection:
- Reinstall the rear wheels and lower the vehicle.
- Perform a final inspection to ensure the panel is securely installed and the finish is satisfactory.
5. Maintenance
Proper maintenance will help extend the life and appearance of your new wheel arch quarter panels.
- Regular Cleaning: Wash the panels regularly with automotive soap and water to remove dirt, salt, and road grime.
- Waxing/Sealing: Apply a protective wax or sealant periodically to protect the paint finish and prevent corrosion.
- Inspect for Damage: Periodically inspect the panels for any signs of new damage, chips, or rust, especially after driving in harsh conditions. Address any issues promptly to prevent further deterioration.
6. Troubleshooting
This section addresses common issues that may arise with the wheel arch quarter panels.
| Issue | Possible Cause | Solution |
|---|---|---|
| Panel does not fit correctly. | Incorrect trimming of the old panel or new panel; vehicle frame damage; incorrect product for vehicle model. | Double-check compatibility. Re-measure and trim as needed. Consult a professional body shop to assess vehicle frame integrity. |
| Rust appears on the new panel. | Damage to the protective coating/paint; improper surface preparation before painting; exposure to harsh elements without protection. | Sand the rusted area, apply rust converter, prime, and repaint. Ensure proper paint adhesion and consider additional protective coatings. |
| Welds are visible or uneven. | Insufficient grinding; improper body filler application. | Re-grind welds to be flush with the panel surface. Reapply body filler and sand smooth. Ensure proper priming and painting techniques. |
7. Specifications
| Specification | Detail |
|---|---|
| Brand | HECASA |
| Model Number | MO-192 |
| Manufacturer Part Number | MO-192 |
| OEM Part Number | MJ1567952 |
| Material | High-quality Steel with Black Electrophoretic Coating |
| Position | Rear Wheel Arch Quarter Panel (Pair) |
| Compatibility | 2009-2014 Ford F-150 LD (without molding holes) |
| Item Weight | 8.4 kg (for the pair) |
| Parcel Dimensions | 130.5 x 56 x 6.8 cm |
8. Warranty Information
For specific warranty details regarding the HECASA Rear Wheel Arch Quarter Panels, please refer to the warranty documentation provided with your purchase or contact the manufacturer directly. Warranty terms typically cover manufacturing defects but may not cover damage due to improper installation, accidents, or normal wear and tear.
9. Support
If you have any questions about the HECASA Rear Wheel Arch Quarter Panels, require technical assistance, or need to report a missing/damaged part, please contact the seller or manufacturer through the platform where the purchase was made. Provide your order number and product model (MO-192) for faster service.
Manufacturer: Mod Vanten