
1. Important Safety Information
Read all instructions before using this appliance to reduce the risk of fire, electric shock, or injury. Keep this manual for future reference.
- Electrical Safety: Ensure the appliance is connected to a properly grounded 115 Volt, 60 Hz electrical outlet. Do not use extension cords.
- Water Connection: Installation by a licensed plumber is strongly recommended to ensure proper water supply and drainage connections.
- Drainage: This unit uses a gravity drain. If a floor drain is not available nearby, a condensate pump (not included) is required to pump water to an elevated drain.
- Appliance Function: This ice maker is designed to produce ice and store it temporarily. It is not a freezer and is not intended for long-term ice storage or food preservation.
- Ventilation: Maintain proper clearance around the unit as specified in the installation section to ensure adequate ventilation and prevent overheating.
- Proposition 65 Warning: This product may contain chemicals known to the State of California to cause cancer and birth defects or other reproductive harm.
2. Product Overview
The EdgeStar IB450BL is a 15-inch wide undercounter clear ice maker designed for both freestanding and built-in applications. It produces up to 50 pounds of clear, restaurant-quality ice per day and has a storage capacity of 25 pounds.
Key Features:
- Daily Ice Production: Up to 50 lbs
- Ice Storage Capacity: 25 lbs
- Ice Type: Clear, cubed (produced in sheets)
- Installation: Freestanding or Built-in
- Door: Commercial-grade black stainless steel, reversible
- Controls: Computerized
- Included: Removable ice bin, gravity drain line, ice scoop

Image: The EdgeStar IB450BL ice maker installed under a counter in a kitchen setting.
3. Setup and Installation
Proper installation is crucial for the performance and longevity of your ice maker. It is highly recommended that a licensed plumber performs the water and drain connections.
3.1 Unpacking
- Carefully remove all packaging materials.
- Inspect the unit for any shipping damage. Report any damage to the carrier immediately.
- Retain the packaging materials for future transport or service needs.
3.2 Location Requirements
Choose a location that is level, stable, and can support the weight of the unit (approximately 76.7 lbs empty, more when full of ice and water).
- Clearance: For built-in applications, allow 2 inches of clearance at the rear and 1/4 inch at the top and sides for proper ventilation.
- Temperature: Install in an area where the ambient temperature is between 50°F (10°C) and 90°F (32°C).
- Water Supply: A cold water supply line with a shut-off valve is required.
- Drainage: The unit requires a gravity drain. If a floor drain is not available, a condensate pump (sold separately) must be installed.

Image: The ice maker integrated into kitchen cabinetry, showcasing its built-in capability.
3.3 Electrical Connection
Ensure the electrical supply matches the requirements of the unit:
- Voltage: 115 Volts
- Frequency: 60 Hz
- Wattage: 552 watts
- A dedicated, grounded circuit is recommended.
3.4 Water and Drain Connections
Connect the water inlet line to a cold water supply. Connect the gravity drain line to a suitable drain. If using a condensate pump, follow its installation instructions.
3.5 Leveling the Unit
Use the adjustable leveling legs to ensure the unit is perfectly level. This is important for proper ice production and drainage.
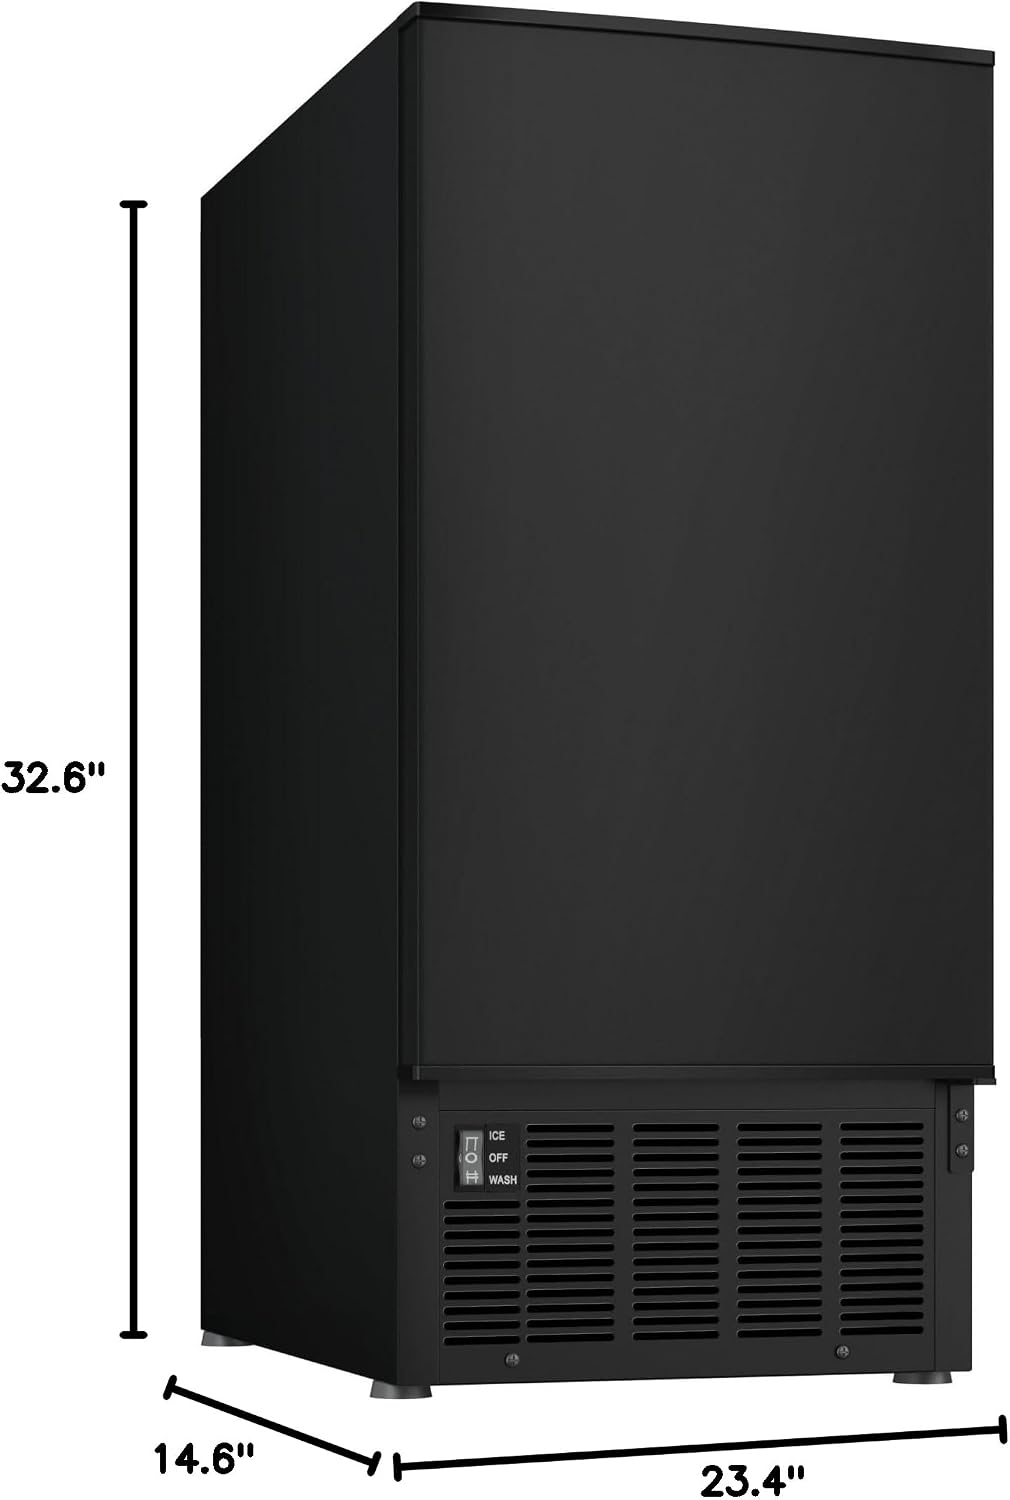
Image: Diagram showing the dimensions of the ice maker: 32.6 inches height, 14.6 inches width, 23.4 inches depth.
3.6 Reversible Door
The door hinge can be reversed to open from either the left or right side, depending on your installation needs. Refer to the detailed instructions in the full manual for this procedure.
4. Operating Instructions
Once installed and connected, your EdgeStar IB450BL ice maker is ready for operation.
4.1 Initial Startup
- Ensure the water supply is turned on.
- Plug the unit into the electrical outlet.
- Locate the control switch, typically at the bottom front of the unit.
- Set the switch to the "ICE" position to begin ice production.

Image: Close-up of the control switch with options for ICE, OFF, and WASH modes.
4.2 Ice Production
The unit will automatically begin the ice-making cycle. Ice is produced in sheets and will accumulate in the removable ice bin. The unit will pause production when the bin is full and resume when ice is removed.
Note on Ice Form: The ice is produced in sheets and may need to be broken apart with the included ice scoop before use. This is a normal characteristic of this ice maker.

Image: View of clear ice cubes collected in the ice storage bin.
4.3 Adjusting Ice Thickness
To adjust the thickness of the ice sheets, which affects how easily they break into cubes:
- Access the back panel of the machine.
- Locate the "Adjust" button.
- Press and hold the "Adjust" button until it begins blinking rapidly.
- Press the "Clean" button to cycle through the thickness settings. A thinner setting will result in ice sheets that break apart more easily.
- Release the button when the desired thickness is selected. You may need to repeat this process to find the optimal setting.
5. Maintenance
Regular maintenance ensures optimal performance and extends the life of your ice maker.
5.1 Cleaning Cycle (WASH)
The unit features a "WASH" cycle for internal cleaning:
- Empty the ice bin.
- Set the control switch to the "WASH" position.
- Follow the instructions in the full manual for adding a suitable ice maker cleaning solution (not included).
- Allow the cycle to complete, then rinse thoroughly.
5.2 Manual Defrost
This unit uses manual defrost. If ice buildup occurs, turn the unit off and allow the ice to melt naturally. Do not use sharp objects to remove ice.
5.3 Exterior and Interior Cleaning
- Clean the exterior with a soft cloth and mild detergent. Avoid abrasive cleaners.
- The removable ice bin can be washed with warm, soapy water. Rinse thoroughly before returning it to the unit.
- Periodically clean the condenser coils (located behind the front grille) with a vacuum cleaner brush attachment to ensure efficient operation.
6. Troubleshooting
Before contacting customer support, review the following common issues and solutions.
| Problem | Possible Cause | Solution |
|---|---|---|
| Unit does not turn on | No power, switch in OFF position | Check power cord, circuit breaker, and ensure switch is on "ICE". |
| No ice production | No water supply, clogged water filter, high ambient temperature, ice bin full sensor activated. | Check water connection, replace filter, ensure proper ventilation, empty ice bin. |
| Ice is too thin or thick | Ice thickness setting needs adjustment. | Adjust ice thickness using the "Adjust" and "Clean" buttons on the back panel (refer to section 4.3). |
| Unusual noise | Unit not level, loose components, normal operating sounds. | Ensure unit is level. Some operational noises are normal. If persistent or loud, contact support. |
| Rusting parts (reported by some users) | Potential material defect or water quality issue. | If you observe rust, especially on internal components, discontinue use and contact EdgeStar customer support immediately. |
For issues not listed here or if troubleshooting steps do not resolve the problem, please contact EdgeStar customer support.
7. Specifications
Detailed technical specifications for the EdgeStar IB450BL ice maker.
| Feature | Specification |
|---|---|
| Brand | EdgeStar |
| Model Name | IB450BL |
| Product Dimensions (D x W x H) | 23.4" x 14.56" x 32.6" |
| Capacity (Ice Storage) | 25 Pounds |
| Daily Ice Production | 50 Pounds |
| Wattage | 552 watts |
| Voltage | 115 Volts |
| Refrigerant | R134a |
| Material | Stainless Steel (door) |
| Item Weight | 90 pounds |
| Color | Black |
| Installation Method | Built-In, Freestanding, Undercounter |
| Included Components | Ice Scoop, Water Line, Removable Ice Bin |
| Defrost Type | Manual |
| Drain Required | Yes (Gravity Drain) |
| UPC | 846844013024 |
8. Warranty and Customer Support
For warranty information, please refer to the warranty card included with your product or visit the official EdgeStar website. Keep your proof of purchase for warranty claims.
If you require further assistance, have questions about installation, operation, or need to report a problem, please contact EdgeStar customer support. Contact details can typically be found on the manufacturer's website or in the product packaging.
Online Resources: For additional support and FAQs, visit the official EdgeStar website: www.edgestar.com


