
AEG ATB48E1AW
User Manual for AEG ATB48E1AW Table Freezer
Model: 922 717 086
1. Introduction
Thank you for choosing the AEG ATB48E1AW Table Freezer. This appliance is designed to provide efficient and reliable freezing for your food items. With its compact design and advanced features like LowFrost technology, it offers convenience and energy savings.
This manual provides important information regarding the installation, operation, maintenance, and troubleshooting of your new freezer. Please read it thoroughly before using the appliance and keep it for future reference.
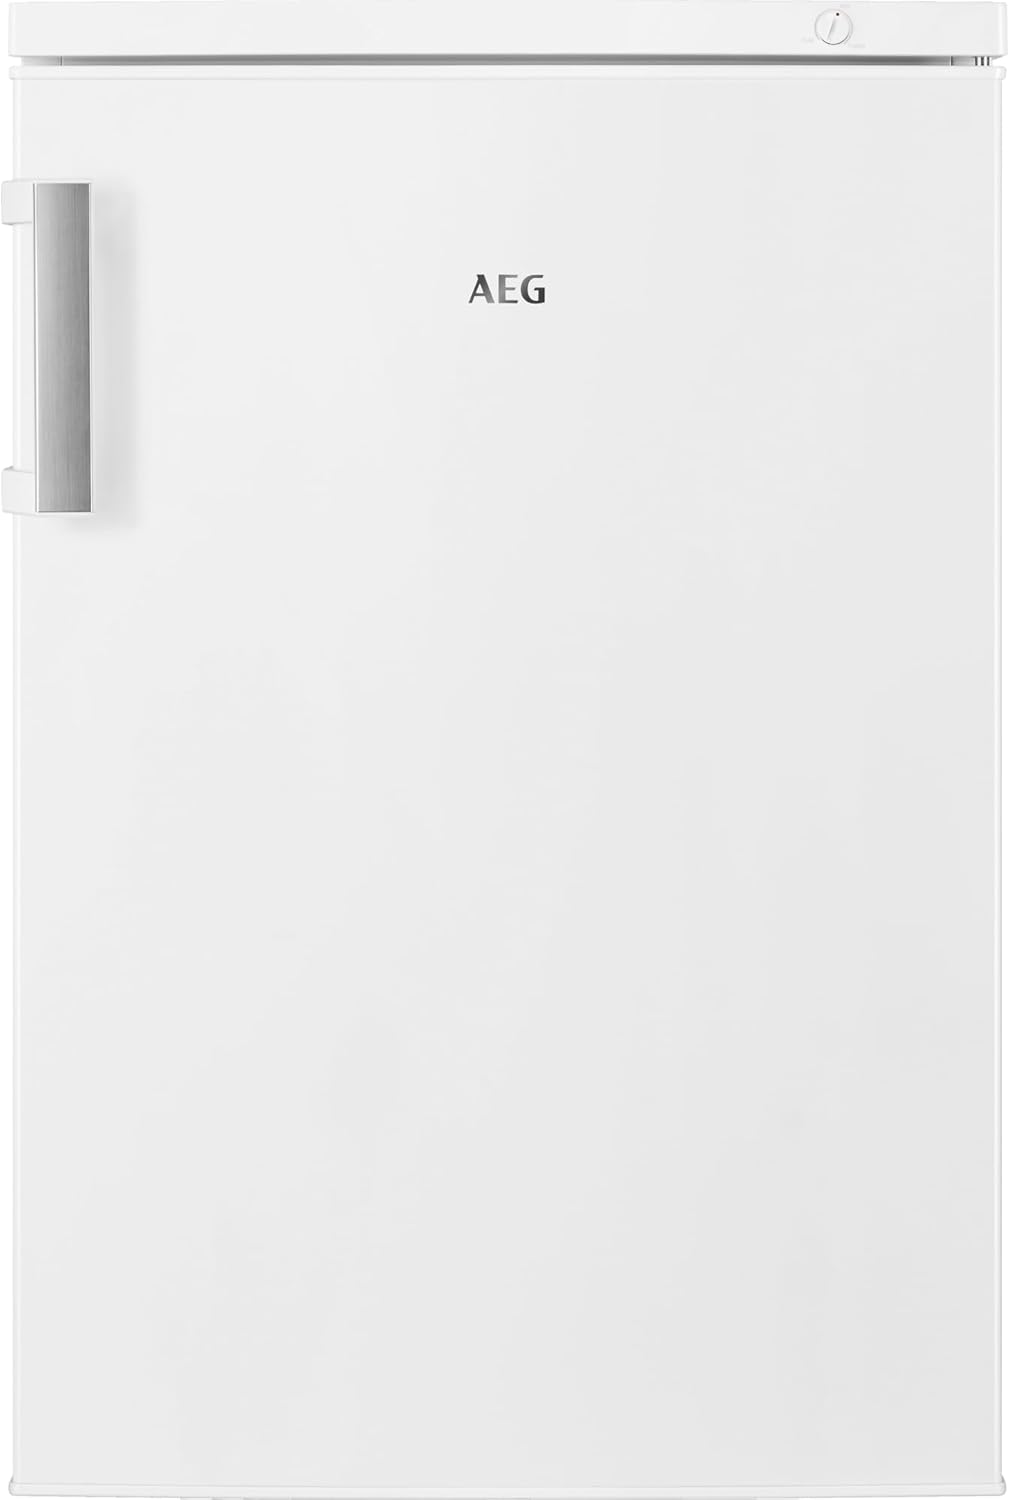
Figure 1.1: Front view of the AEG ATB48E1AW Table Freezer.
2. Safety Information
For your safety and to ensure correct operation, please read this manual carefully before installation and first use. Always keep these instructions with the appliance, even if it is moved or sold.
- Ensure the appliance is unplugged before cleaning or maintenance.
- Do not damage the refrigerant circuit.
- Do not use mechanical devices or other means to accelerate the defrosting process, other than those recommended by the manufacturer.
- Do not use electrical appliances inside the food storage compartments of the appliance, unless they are of the type recommended by the manufacturer.
- This appliance is intended for household use only.
- Keep ventilation openings, in the appliance enclosure or in the built-in structure, clear of obstruction.
- Do not store explosive substances such as aerosol cans with a flammable propellant in this appliance.
3. Setup and Installation
3.1 Unpacking
Carefully remove all packaging materials. Dispose of packaging responsibly, keeping plastic bags and other materials away from children.
3.2 Placement
Place the freezer on a firm, level surface. Ensure there is adequate ventilation around the appliance. Avoid placing it near heat sources (e.g., ovens, radiators) or in direct sunlight. Allow sufficient space for the door to open fully (180 degrees maximum).
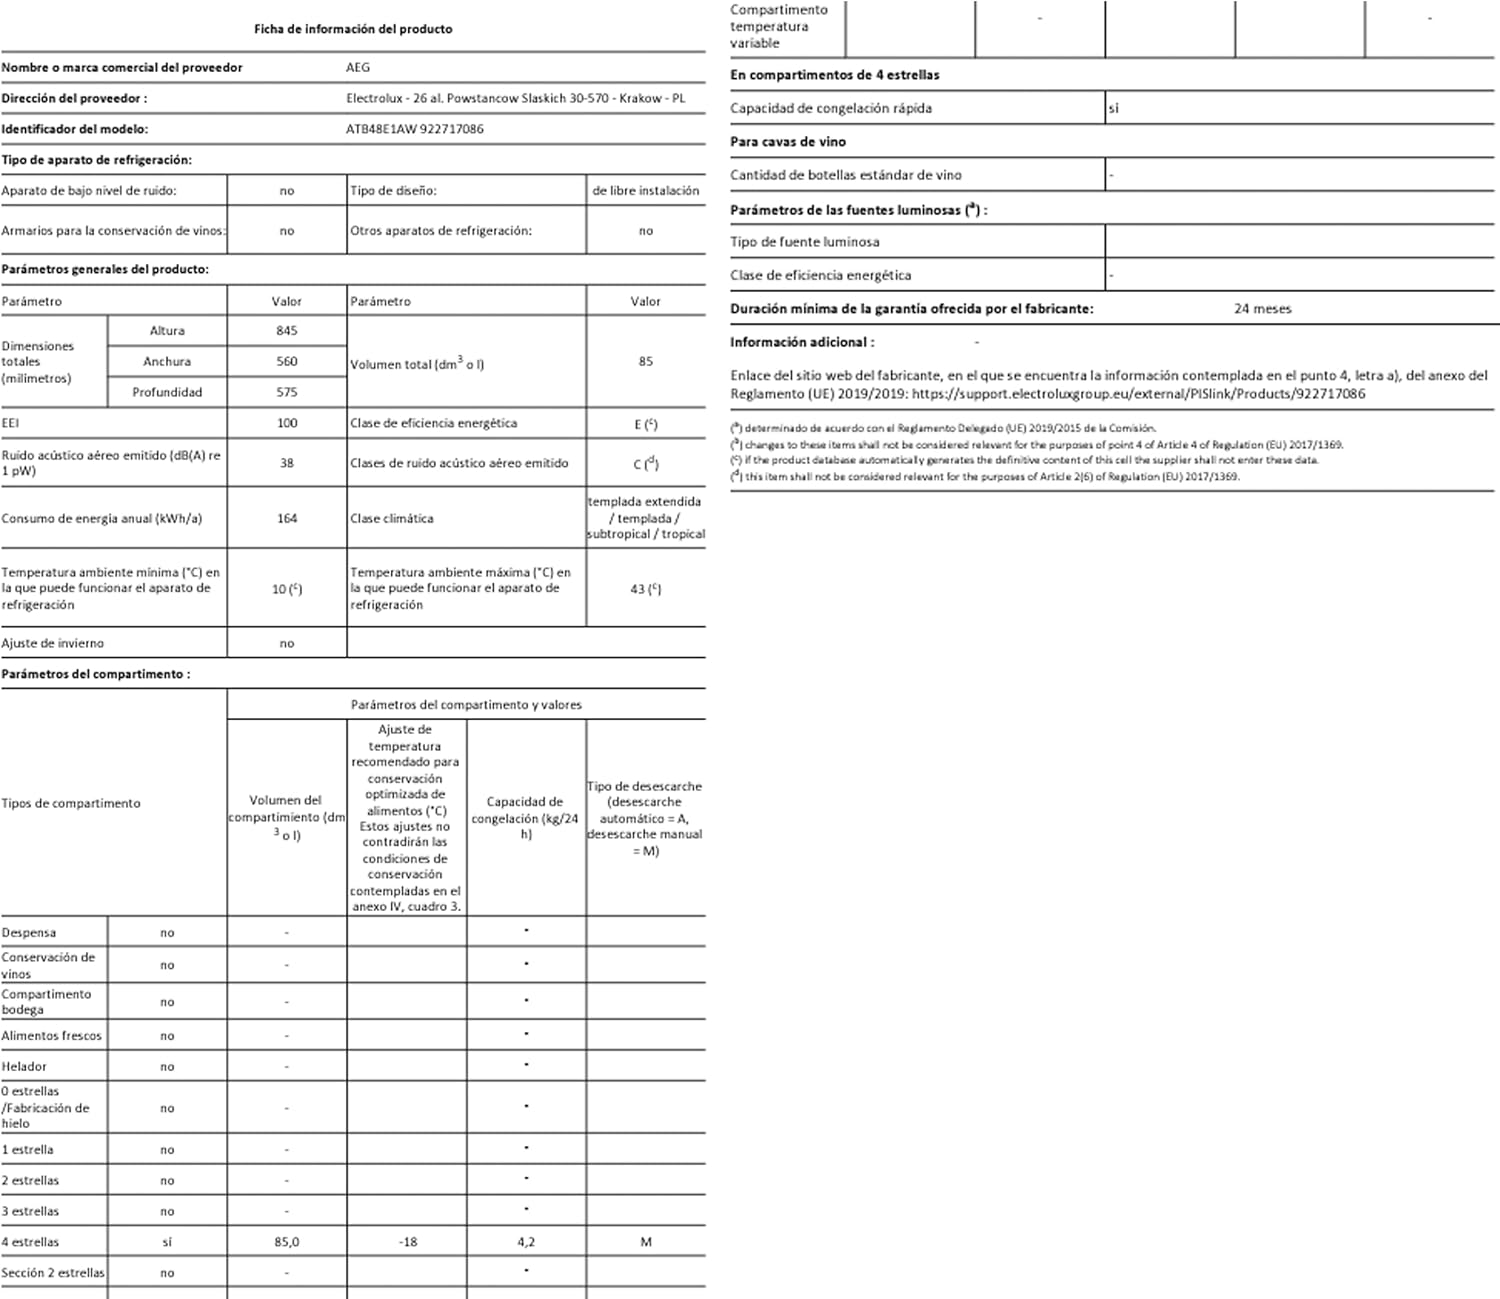
Figure 3.1: Dimensions and clearance requirements for installation. Note the maximum 180-degree door opening.
3.3 Electrical Connection
Before plugging in the appliance, ensure the voltage and frequency indicated on the rating plate match your household power supply. The appliance must be properly grounded.

Figure 3.2: Rear view of the freezer, illustrating the compressor and electrical components. Ensure proper ventilation around this area.
3.4 Initial Start-up
After installation, wait at least 4 hours before plugging in the appliance to allow the refrigerant fluids to settle. Once plugged in, set the temperature control to the desired setting and allow the freezer to cool for several hours before loading food.
4. Operating Instructions
4.1 Temperature Control
The temperature inside the freezer is controlled by a thermostat dial located inside the appliance. Turn the dial to adjust the temperature. Settings typically range from 'Cold' to 'Colder' or 'Mid'.

Figure 4.1: Temperature control dial with 'Cold', 'Mid', and 'Colder' settings.
4.2 Food Storage
The freezer is equipped with multiple compartments for organized storage of frozen foods. Utilize the drawers to separate different types of items and maintain optimal freezing conditions.
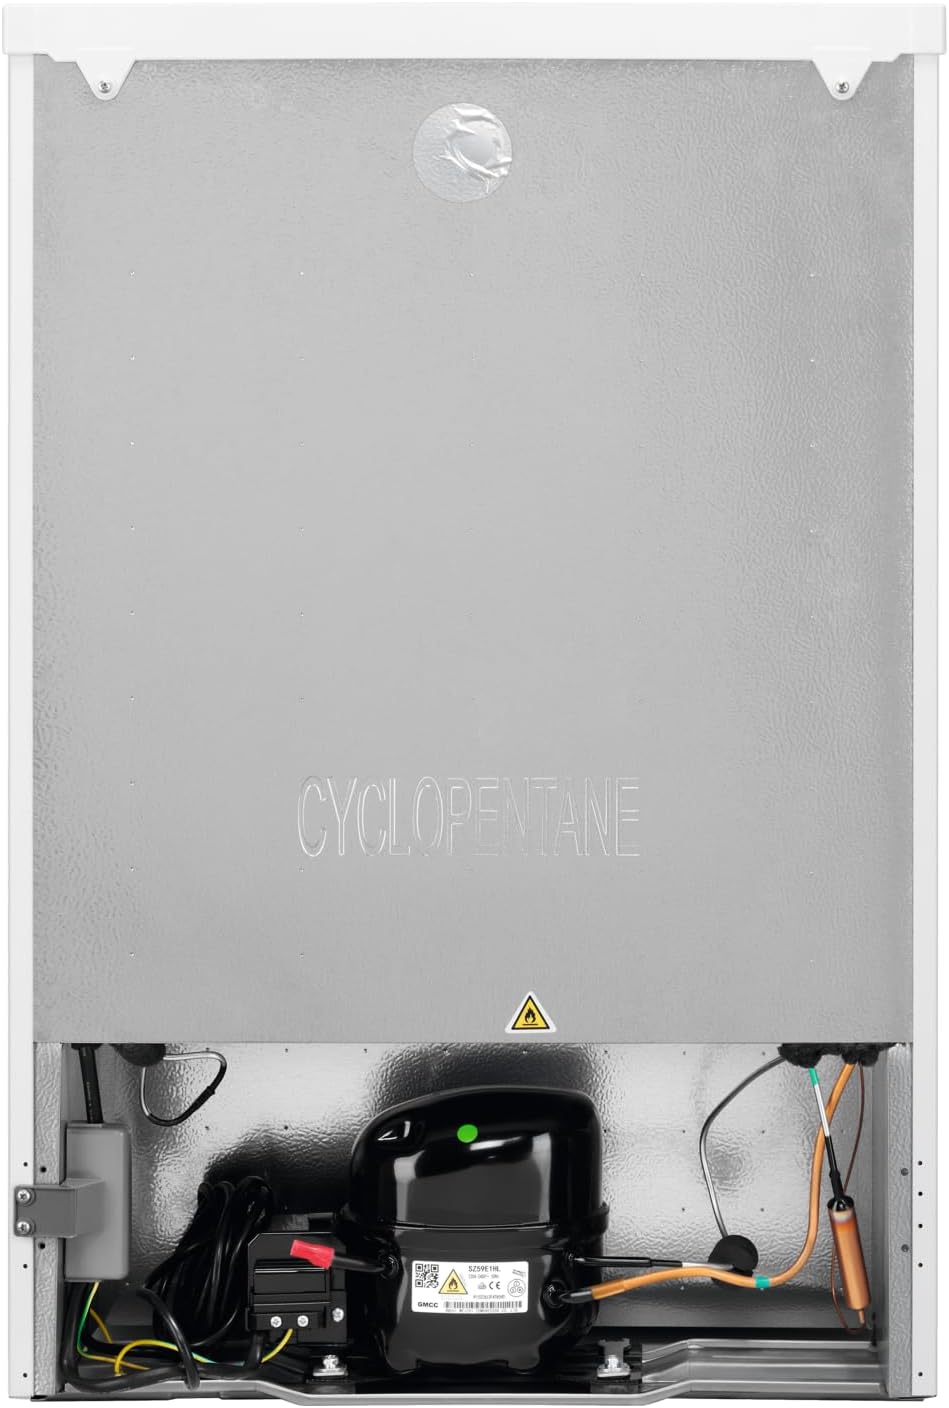
Figure 4.2: Interior of the freezer showing clear storage drawers for organized food placement.
4.3 Frostmatic Function
The Frostmatic function allows for rapid freezing of fresh food. Activate this function when adding a large quantity of unfrozen food to quickly bring it down to freezing temperature, preserving its quality. Refer to the full manual for specific instructions on activating and deactivating this feature.
5. Maintenance
5.1 Defrosting (LowFrost Technology)
This appliance features LowFrost technology, which significantly reduces ice formation, meaning defrosting works faster and has to be done less often. When a layer of frost approximately 3-5 mm thick has formed, the freezer should be defrosted.
- Unplug the appliance from the power supply.
- Remove all food items and store them in a cool place.
- Leave the freezer door open to allow the frost to melt naturally. Place towels or a shallow tray at the bottom to collect water.
- Once defrosted, clean and dry the interior thoroughly before plugging the appliance back in and returning food.
5.2 Cleaning
Regular cleaning of your freezer will help maintain its performance and hygiene.
- Clean the interior with a mild detergent and warm water. Avoid abrasive cleaners or solvents.
- Wipe down the exterior surfaces with a soft, damp cloth.
- Clean the door seals regularly to ensure a tight seal.
- Vacuum the condenser coils at the back of the appliance periodically to improve efficiency.
6. Troubleshooting
Before contacting service, please check the following common issues and their solutions:
| Problem | Possible Cause | Solution |
|---|---|---|
| Freezer does not operate. | No power supply. | Check if the plug is properly inserted and the fuse/circuit breaker is not tripped. |
| Temperature is not cold enough. | Door not closed properly; excessive door opening; large amount of warm food added; temperature setting too high. | Ensure door is sealed; reduce frequency of door opening; allow new food to cool before adding; adjust thermostat to a colder setting. |
| Excessive frost build-up. | Door not sealed properly; high humidity. | Check door seals for damage; ensure door is closed completely; defrost as per instructions. |
| Unusual noises. | Appliance not level; objects vibrating against the unit; normal operating sounds. | Level the appliance; ensure nothing is touching the back or sides; gurgling/hissing sounds are normal refrigerant flow. |
7. Specifications
| Specification | Value |
|---|---|
| Brand Name | AEG |
| Model Info | 922 717 086 |
| Item Weight | 79.2 pounds (36 Kilograms) |
| Product Dimensions (LxWxH) | 22.64 x 22.05 x 33.27 inches |
| Capacity | 81 Liters |
| Noise Level | 38 dB |
| Installation Type | Freestanding |
| Color | White |
| Voltage | 2.3E+2 Volts (AC) |
| Annual Energy Consumption (Wattage) | 164 kWh |
| Door Hinges | Left |
| Number of Shelves | 3 |
| Date First Available | October 7, 2024 |

Figure 7.1: Energy Label for the AEG ATB48E1AW, indicating its energy efficiency and key performance metrics.
For more detailed product information, refer to the EPREL database: https://eprel.ec.europa.eu/qr/271510
8. Warranty and Support
8.1 Product Warranty
This AEG appliance comes with a manufacturer's warranty. Please refer to the warranty card included with your purchase for specific terms and conditions, including the duration of coverage and what is covered. Typically, major appliances have a warranty period covering manufacturing defects.
Extended protection plans may also be available for purchase, offering additional coverage beyond the standard manufacturer's warranty. For example, 2-Year and 3-Year Protection Plans are often offered.
8.2 Returns Policy
This product typically includes a 30-day easy returns policy for refund or replacement, subject to the retailer's terms and conditions.
8.3 Customer Support
For technical assistance, spare parts, or service requests, please contact AEG customer support. Have your model number (ATB48E1AW) and serial number ready when contacting support. You can also refer to the official AEG website for support resources and contact details.
For purchases made through third-party sellers, please refer to their specific customer service policies. The current seller for this product is "Express Shipping ⭐⭐⭐⭐⭐".
Related documentsATB48E1AW


Ask a question about this manual
Ask about setup, troubleshooting, compatibility, parts, safety, or missing instructions. Manuals+ will review the question and use this page’s manual context to help answer it.