Introduction
This manual provides detailed instructions for the installation, configuration, and maintenance of your ASUS ROG Strix Z590-A Gaming WiFi Motherboard. Please read this manual thoroughly before proceeding with installation to ensure proper setup and optimal performance.
The ROG Strix Z590-A Gaming WiFi motherboard is designed to unleash the maximum performance of 11th Gen Intel Core processors, featuring robust power delivery, optimized thermal design, and high-performance networking capabilities.
Key Features
- Intel LGA 1200 socket: Designed to unleash the maximum performance of 11th Gen Intel Core processors.
- AI Motherboard: AI Overclocking, AI cooling, AI networking and AI noise cancelation.
- Robust Power Solution: 14+2 Dr. MOS power stages with ProCool II power connector, high-quality alloy chokes and durable capacitors to provide reliable power when pushing CPU performance to the limit.
- Optimized Thermal Design: VRM heatsink, PCH fanless heatsink, M.2 heatsink, hybrid fan headers and Fan Xpert 4 utility.
- High-performance Gaming Networking: Intel WiFi 6 AX201 (802.11 ax), Intel 2.5 Gb Ethernet with ASUS LANGuard.
Setup and Installation
1. Unboxing and Inspection
Carefully remove the motherboard from its packaging. Inspect for any visible damage. Ensure all accessories listed in the packing list are present.
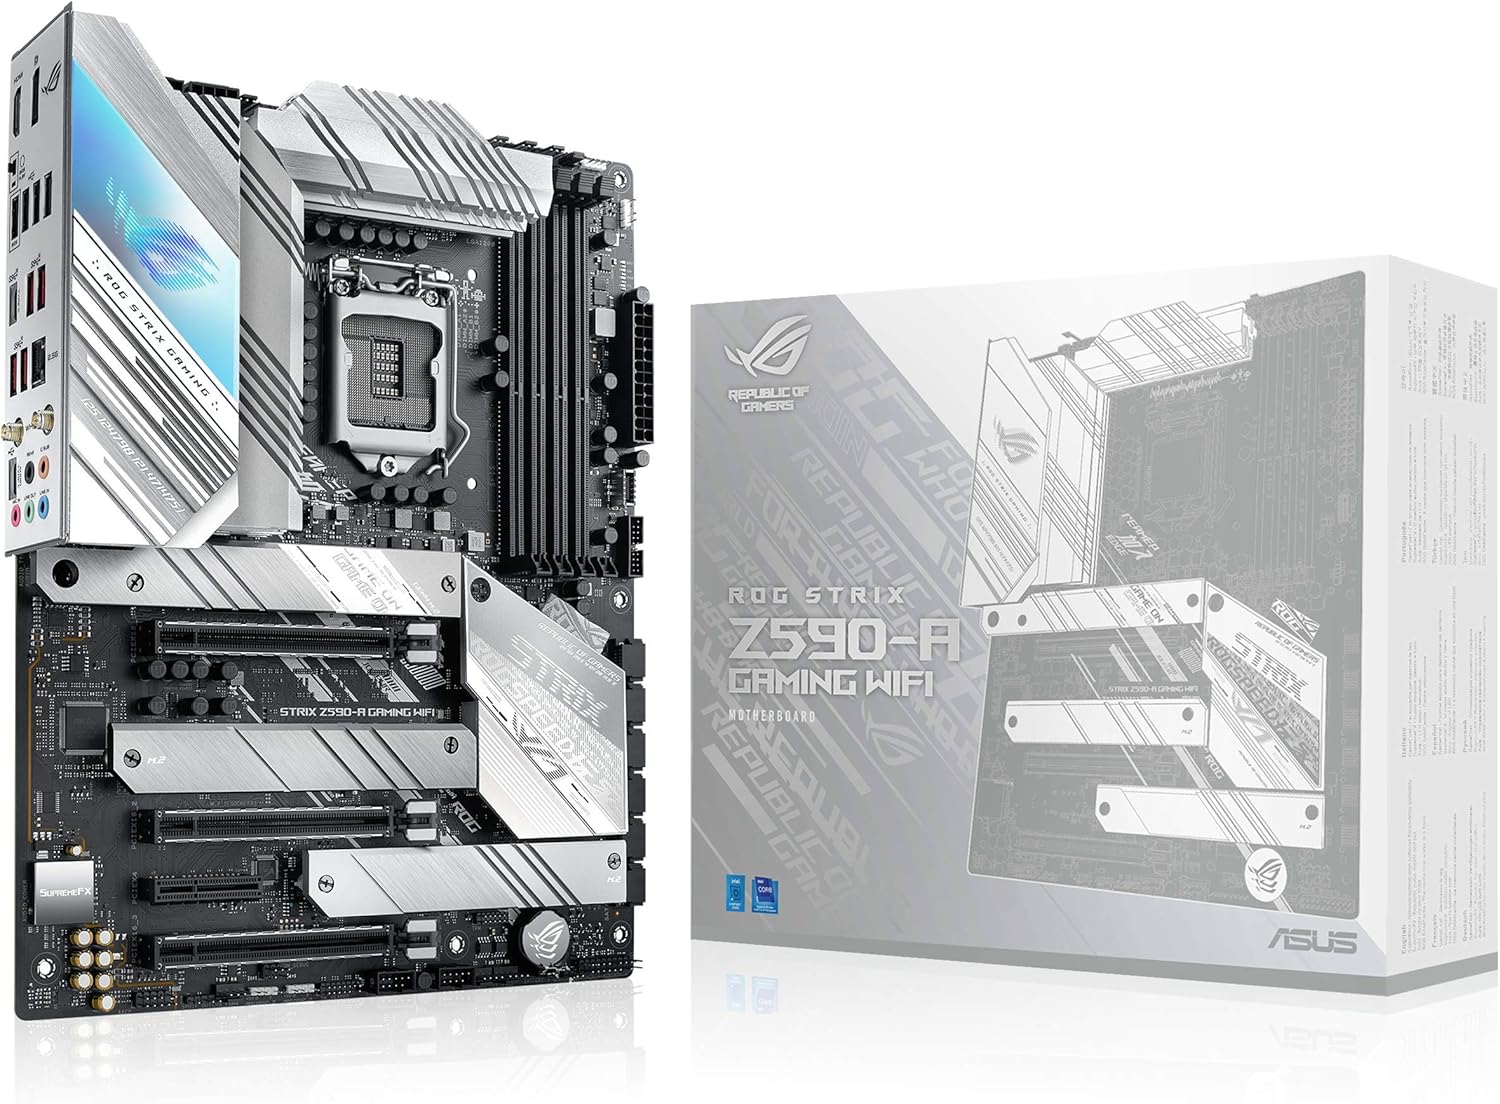
Image: The ROG Strix Z590-A Gaming WiFi Motherboard alongside its retail packaging. This image shows the overall aesthetic of the motherboard and its box, highlighting the white and silver design elements.
2. Component Overview
Familiarize yourself with the various components and headers on the motherboard before installation.

Image: A detailed view of the ROG Strix Z590-A Gaming WiFi Motherboard, highlighting key areas such as the I/O & Armor with AURA RGB LED, 4-PIN RGB Header, SupremeFX ALC4080 CODEC, and 3-PIN Addressable Gen 2 RGB Header. This image helps users identify various connectivity points and aesthetic features.

Image: An annotated diagram of the ROG Strix Z590-A Gaming WiFi Motherboard, illustrating its power and performance features. Labels include ProCool II Power Connectors, 14+2 70A Power Stage, 4X DIMM Slots supporting up to 128GB DDR4, 2X M.2 PCIe 4.0 slots, 1X M.2 PCIe 3.0 slot, and PCIe 3.0 X16 Safeslots. This visual aid assists in understanding the board's capabilities and component placement.
3. CPU Installation
- Open the CPU socket lever.
- Align the CPU with the socket, ensuring the golden triangle on the CPU matches the triangle on the socket.
- Gently place the CPU into the socket. Do not force it.
- Close the socket lever to secure the CPU.
4. Memory (RAM) Installation
- Open the clips on both ends of the DIMM slot.
- Align the notch on the DDR4 memory module with the key in the DIMM slot.
- Press down firmly on both ends of the memory module until the clips snap into place.
5. Storage Device Installation (M.2 SSDs)
The motherboard supports multiple M.2 SSDs. Note that the top M.2 slot requires an 11th Gen Intel CPU for functionality.
- Remove the M.2 heatsink and protective film.
- Insert the M.2 SSD into the slot at a 30-degree angle.
- Secure the M.2 SSD with the provided screw or Q-Latch mechanism.
- Reattach the M.2 heatsink.
6. Graphics Card (PCIe) Installation
- Open the retention clip on the PCIe x16 slot.
- Align your graphics card with the slot and press down firmly until it clicks into place.
- Secure the graphics card to your PC case with screws.
7. Power Connections
- Connect the 24-pin ATX power connector from your power supply to the motherboard.
- Connect the 8-pin and 4-pin (or 8-pin only, depending on CPU) CPU power connectors.
- Connect any necessary PCIe power cables to your graphics card.
8. Cooling System Integration
The motherboard features comprehensive cooling solutions, including multiple fan headers.

Image: A detailed diagram of the ROG Strix Z590-A Gaming WiFi Motherboard's cooling features. It highlights the Integrated I/O & MOS Heatsinks, L-Shape Heat-pipe Thermal Pad, 3X M.2 Heatsinks, PCH Passive Cooling, and the location of the 4-PIN Onboard PWM Fan Headers, indicating a total of 7 4-Pin PWM Fan Headers. This image provides a clear understanding of the thermal management components.
- Connect case fans to the available 4-pin PWM fan headers.
- Install your CPU cooler (air or liquid) according to its manufacturer's instructions, connecting its fan(s) and pump (if AIO) to the appropriate headers.
Operating Instructions
1. First Boot and BIOS Setup
Upon the first boot, the system may restart several times. This is normal. Press DEL or F2 during startup to enter the BIOS/UEFI setup.
- BIOS Update: It is recommended to update the BIOS to the latest version for optimal compatibility and performance. Use the ASUS EZ Flash 3 utility within the BIOS or the BIOS FlashBack™ feature.
- AI Overclocking: Utilize the AI Overclocking feature in the BIOS for automated performance tuning.
- Fan Xpert 4: Configure fan curves and monitor temperatures using the Fan Xpert 4 utility.
- Aura Sync: Manage RGB lighting effects through the Aura Sync software, compatible with Razer Chroma Studio.
2. Driver Installation
After installing your operating system, install the necessary drivers from the ASUS support website or the included driver DVD/USB drive. Key drivers include chipset, LAN, WiFi, audio, and graphics drivers.
3. Software Utilities
ASUS provides several utilities to enhance your experience:
- Armoury Crate: Centralized software for system monitoring, driver updates, and Aura Sync control.
- AI Suite 3: Comprehensive utility for system tuning, power saving, and fan control.
- Sonic Studio III / Sonic Radar III: Audio enhancement and gaming audio utilities.
Maintenance
- Dust Removal: Regularly clean dust from the motherboard and components using compressed air. Ensure the system is powered off and unplugged.
- BIOS Updates: Keep your BIOS updated to the latest version to ensure compatibility and stability.
- Driver Updates: Periodically check for updated drivers for your motherboard components (chipset, LAN, WiFi, audio) from the ASUS support website.
- Thermal Paste: If replacing the CPU cooler, ensure to clean off old thermal paste and apply new thermal paste for optimal heat transfer.
Troubleshooting
Common Issues and Solutions:
| Problem | Possible Cause | Solution |
|---|---|---|
| System does not power on. | Loose power cables, faulty PSU, incorrect front panel connections. | Check all power connections (24-pin, 8-pin CPU). Ensure front panel power switch is correctly connected. Test PSU. |
| No display output. | Graphics card not seated properly, monitor cable issue, faulty RAM. | Reseat graphics card and RAM. Check monitor cable and input. Test with one RAM stick. |
| System reboots unexpectedly. | Overheating, unstable overclock, faulty power supply. | Monitor temperatures. Reset BIOS to default settings. Test PSU. |
| WiFi/LAN connectivity issues. | Missing or outdated drivers, antenna not connected. | Install/update network drivers. Ensure WiFi antenna is securely connected. |
| M.2 SSD not detected. | Incorrect slot usage (10th Gen CPU in top M.2 slot), improper seating. | Ensure M.2 SSD is properly seated. If using 10th Gen CPU, use lower M.2 slots. Check BIOS settings. |
BIOS FlashBack™ Feature:
The ROG Strix Z590-A Gaming WiFi motherboard supports BIOS FlashBack™, allowing you to update the BIOS without a CPU or RAM installed. This is useful for troubleshooting or upgrading to support newer CPUs.
- Download the latest BIOS file from the ASUS support website.
- Rename the BIOS file to "Z590AG.CAP" (or as specified by ASUS for your model).
- Copy the renamed file to the root directory of a FAT32 formatted USB flash drive.
- Insert the USB drive into the dedicated BIOS FlashBack™ USB port on the rear I/O panel.
- Press and hold the BIOS FlashBack™ button for three seconds until the LED starts blinking.
- The LED will stop blinking when the update is complete.
Specifications
| Feature | Detail |
|---|---|
| Brand | ASUS |
| Model Name | ROG STRIX Z590-A GAMING WIFI |
| CPU Socket | LGA 1200 |
| Compatible Processors | 10th Generation Intel Core, 11th Generation Intel Core |
| Chipset Type | Intel Z590 |
| RAM Memory Technology | DDR4 |
| Memory Clock Speed | 5133 MHz |
| Memory Storage Capacity | 128 GB (Max) |
| Wireless Type | 802.11a/b/g/n/ac, 802.11ax (WiFi 6) |
| Ethernet | Intel 2.5 Gb Ethernet |
| Product Dimensions (LxWxH) | 13.3 x 10.74 x 2.7 inches |
| Item Weight | 1.32 pounds |
| PCIe Slots | 2x PCIe 4.0 x16, 1x PCIe 3.0 x16 |
| M.2 Slots | 3x M.2/NVMe SSD slots (PCIe 4.0 support with 11th Gen CPU) |
| Power Stages | 14+2 Dr. MOS |
Warranty Information
ASUS products come with a limited warranty. For detailed warranty terms and conditions, please refer to the warranty card included with your product or visit the official ASUS support website. Keep your proof of purchase for warranty claims.
You may also register your product with ASUS to facilitate warranty service.
Support and Resources
For further assistance, driver downloads, BIOS updates, and FAQs, please visit the official ASUS support website:
You can also refer to the official User Manual (PDF) for more in-depth information:
For Adobe Creative Cloud Subscription offer details (if applicable):


