
Introduction
This manual provides detailed instructions for the installation, operation, and maintenance of your Frienda Dual Laser Garage Parking Assistant. Please read this manual thoroughly before use to ensure proper function and safety.
Safety Information
- Ensure the device is securely mounted to prevent falling.
- Do not look directly into the laser beam. Lasers can cause eye damage.
- Keep the device away from water and moisture.
- Use only the specified power adapter or batteries.
- Keep out of reach of children.
- Do not attempt to disassemble or repair the device yourself. Contact customer support if needed.
Package Contents
Verify that all items are present in your package:
- 1 x Dual Laser Garage Parking Assistant Unit
- 1 x Power Supply (US regulation adapter)
- 3 x Screws
- 3 x Wall Anchors
- 1 x Bottom Plate for mounting

Product Features
- Dual Adjustable Lasers: Two laser lights provide precise parking guidance, accommodating two vehicles or offering flexible positioning for one.
- 360-Degree Rotation: Each laser module can be rotated 360 degrees for optimal beam placement.
- Motion Detection: Automatically detects vehicle movement up to 10 feet away, activating the lasers.
- Automatic Shut-off: Lasers turn off after 30 seconds of idle movement, conserving energy.
- Dual Power Options: Can be powered by the included AC adapter or 3x AAA batteries (not included).
- Durable Construction: Made from quality ABS material, resistant to deformation, rust, and erosion.

Setup and Installation
- Choose Mounting Location: Select an ideal spot on your garage ceiling where the laser beams can be clearly seen from your car's window or dashboard. Ensure it's centrally located for your parking needs.
- Mount the Bottom Plate:
Using the included screws and wall anchors, securely attach the bottom plate to the chosen ceiling location. Ensure it is firmly fixed to prevent movement.

Image: Step-by-step guide showing how to screw the bottom plate to the ceiling. - Attach the Main Unit:
Align the main laser unit with the mounted bottom plate and attach it securely. The unit should click or twist into place.
Image: Step-by-step guide showing how to attach the main unit to the mounted bottom plate. - Connect Power:
Connect the included power supply to the unit and plug it into a standard electrical outlet. Alternatively, insert 3x AAA batteries (not included) into the battery compartment. Ensure the power switch is in the OFF position before connecting power.
Image: Illustration of the dual power options, showing the battery compartment for 3x AAA batteries and the port for the AC adapter. Image: Step-by-step guide showing how to connect the power supply to the unit. - Turn On:
Flip the power switch to the ON position. The device is now ready for operation.
Image: Step-by-step guide showing the location of the power switch for control.
Operating Instructions
- Initial Laser Adjustment:
Drive your car into the garage to your desired parking position. Adjust the two laser modules by rotating them 360 degrees until the laser beams project onto a specific point on your car's dashboard or hood that you wish to use as your parking marker. Remember this spot.

Image: A car parked in a garage, with red laser beams from the ceiling-mounted device indicating the precise parking position on the vehicle's hood. - Automatic Activation:
When you drive your car into the garage, the built-in motion sensor will detect the vehicle's movement from up to 10 feet away and automatically activate the laser beams.
- Parking Guidance:
Continue driving until the laser beam(s) align with the predetermined spot on your car (dashboard, hood, etc.). This indicates you have reached your correct parking position.
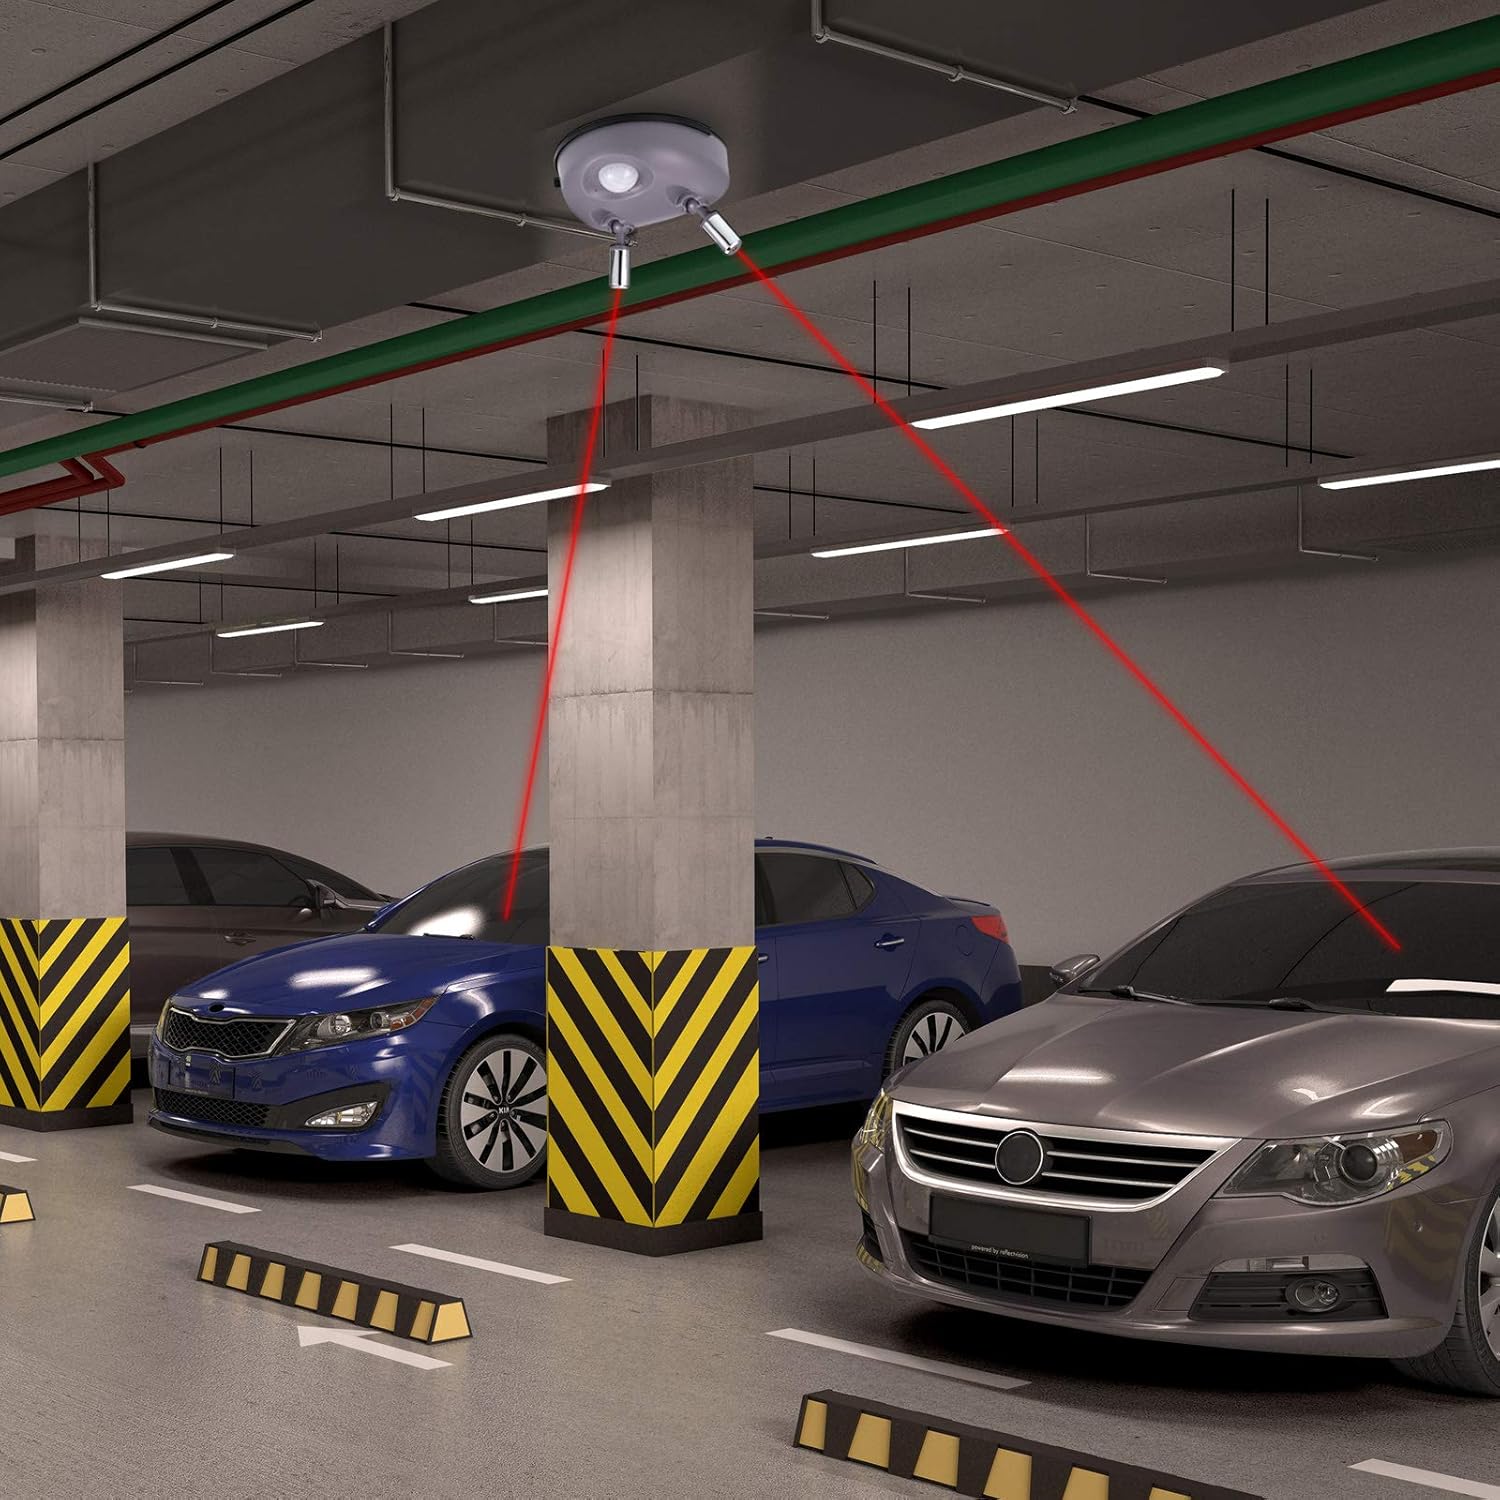
Image: An underground parking garage scene showing multiple cars, with a laser parking assistant mounted on the ceiling, guiding a car into its spot with red laser lines. - Automatic Deactivation:
After 30 seconds of no detected movement, the laser beams will automatically turn off to conserve power.
Maintenance
- Cleaning: Wipe the device with a soft, dry cloth. Do not use abrasive cleaners or solvents.
- Battery Replacement: If using batteries, replace them when the laser beams become dim or the device fails to activate. Ensure correct polarity when inserting new batteries.
- Mounting Check: Periodically check that the device and its mounting plate are securely fastened to the ceiling.
Troubleshooting
| Problem | Possible Cause | Solution |
|---|---|---|
| Lasers do not turn on. | No power; Power switch off; Batteries dead/incorrectly inserted; Motion sensor obstructed. | Check power adapter connection or replace batteries. Ensure power switch is ON. Clear any obstructions from the motion sensor. Ensure vehicle is within 10 feet of the sensor. |
| Lasers are dim. | Low battery power. | Replace batteries or use AC adapter. |
| Lasers turn off too quickly or stay on too long. | Motion sensor sensitivity issue; Continuous movement detected. | Ensure no continuous movement is occurring near the sensor after parking. The device is designed to turn off after 30 seconds of idle movement. |
| Device falls from ceiling. | Improper installation. | Re-install the bottom plate and main unit, ensuring all screws and anchors are securely fastened into a suitable surface. |
Specifications
| Model Number | Frienda-7982 |
| Brand | Frienda |
| Material | ABS |
| Product Weight | 231 g |
| Package Dimensions | 15.29 x 15.29 x 5.21 cm |
| Power Supply | AC Adapter (US regulation) or 3x AAA Batteries (not included) |
| Motion Detection Range | Up to 10 feet (approx. 3 meters) |
| Automatic Shut-off | 30 seconds of idle movement |

Warranty and Support
For warranty information or technical support, please refer to the seller's policy on the purchase platform or contact Frienda customer service directly. Keep your purchase receipt for warranty claims.
For returns, please refer to the 30-day free return policy mentioned at the time of purchase.