
Introduction
This manual provides detailed instructions for the safe and effective installation, operation, and maintenance of the Dayton Bearing/Shaft Assembly, Model B08SMR9BXX. This component is designed as a fan accessory shaft and is compatible with model 1YNW8A. Please read this manual thoroughly before installation and retain it for future reference.
Safety Information
Always observe the following safety precautions to prevent injury or damage to the product and associated equipment:
- Professional Installation: Installation should be performed by qualified personnel familiar with mechanical assemblies and fan systems.
- Power Disconnection: Ensure all power to the fan system is disconnected and locked out before beginning any installation or maintenance procedures.
- Personal Protective Equipment (PPE): Always wear appropriate PPE, including safety glasses, gloves, and sturdy footwear, during installation and maintenance.
- Secure Fastening: Ensure all fasteners are tightened to the manufacturer's specifications to prevent vibration and component failure.
- Inspect for Damage: Before installation, inspect the assembly for any signs of shipping damage. Do not install damaged components.
Package Contents
The package should contain the following item:
- 1x Dayton Bearing/Shaft Assembly (Model B08SMR9BXX)
Setup and Installation
This section outlines the general steps for installing the Bearing/Shaft Assembly. Specific procedures may vary depending on the fan system (e.g., model 1YNW8A) it is being integrated into. Refer to the fan system's specific service manual for detailed instructions.
- Preparation: Ensure the fan system is powered off and secured. Clear the work area and gather all necessary tools.
- Remove Old Component: Carefully remove the existing shaft and bearing assembly, noting the orientation and any shims or spacers.
- Inspect Mounting Surfaces: Clean and inspect all mounting surfaces for debris, corrosion, or damage. Ensure they are flat and free of imperfections.
- Install New Assembly: Position the Dayton Bearing/Shaft Assembly into its designated location. Ensure proper alignment with mating components.
- Secure Fasteners: Install and tighten all bolts, nuts, or set screws according to the fan system manufacturer's torque specifications. Ensure the shaft rotates freely without binding.
- Lubrication: If the bearings are not pre-lubricated or sealed, apply appropriate lubricant as specified by the fan system's maintenance guidelines.
- Reassembly: Reassemble any covers or guards removed during the installation process.
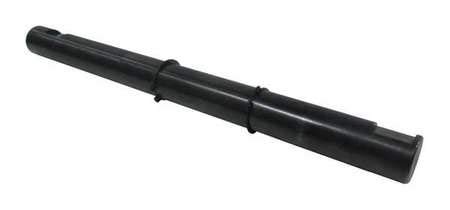
Figure 1: Dayton Bearing/Shaft Assembly (Model B08SMR9BXX). This image shows the main component, a metal shaft with an integrated bearing housing, ready for installation into a compatible fan system.
Operating Instructions
As a mechanical component, the Bearing/Shaft Assembly does not have direct operating controls. Its function is integral to the fan system it is installed within. After installation, ensure the following:
- Initial Power-Up: After installation and reassembly, carefully power on the fan system. Observe the shaft's rotation for smoothness and listen for any unusual noises or vibrations.
- Monitoring: During initial operation, monitor the bearing temperature and overall system performance to ensure proper function.
Maintenance
Regular maintenance is crucial for extending the lifespan and ensuring the reliable performance of the Bearing/Shaft Assembly.
- Periodic Inspection: Regularly inspect the shaft and bearing housing for signs of wear, corrosion, cracks, or looseness. Check for any lubricant leakage.
- Lubrication: If the bearings are designed for re-lubrication, follow the fan system manufacturer's schedule and specifications for lubricant type and quantity. Over-lubrication can be as detrimental as under-lubrication.
- Cleaning: Keep the area around the bearing assembly clean and free of dust, dirt, and debris, which can contaminate lubricants and accelerate wear.
- Alignment Check: Periodically verify the alignment of the shaft with connected components to prevent premature bearing failure.
Troubleshooting
This section provides general guidance for common issues. For specific diagnostics, consult a qualified technician or the fan system's service manual.
| Problem | Possible Cause | Solution |
|---|---|---|
| Excessive Noise/Vibration |
|
|
| Overheating Bearings |
|
|
| Shaft Seizing/Binding |
|
|
Specifications
- Product Type: Bearing/Shaft Assembly
- Accessory Type: Fan Shaft
- Brand: Dayton
- Model Number: B08SMR9BXX
- Compatibility: For Use With 1YNW8A (Fan Model)
- Manufacturer: Dayton
Warranty and Support
Specific warranty information for the Dayton Bearing/Shaft Assembly (Model B08SMR9BXX) is not provided within this document. For details regarding warranty coverage, terms, and conditions, please refer to the original product packaging or contact Dayton customer support directly. For technical assistance or replacement parts, please reach out to the manufacturer or your authorized distributor.