1. Introduction
The Hiseeu Solar Panel is designed to provide continuous power to compatible Hiseeu battery-powered security cameras, such as models C30, C80, WTD403, and WTD504, as well as other devices featuring a Type-C charging interface. This solar panel ensures your camera remains charged without the need for frequent manual battery replacements, offering a reliable and eco-friendly power solution.
Package Contents:
- 1 x Hiseeu Solar Panel
- 1 x 10 ft Type-C Charging Cable
- 1 x Adjustable Bracket Mount
- 1 x Screws Bag (for installation)
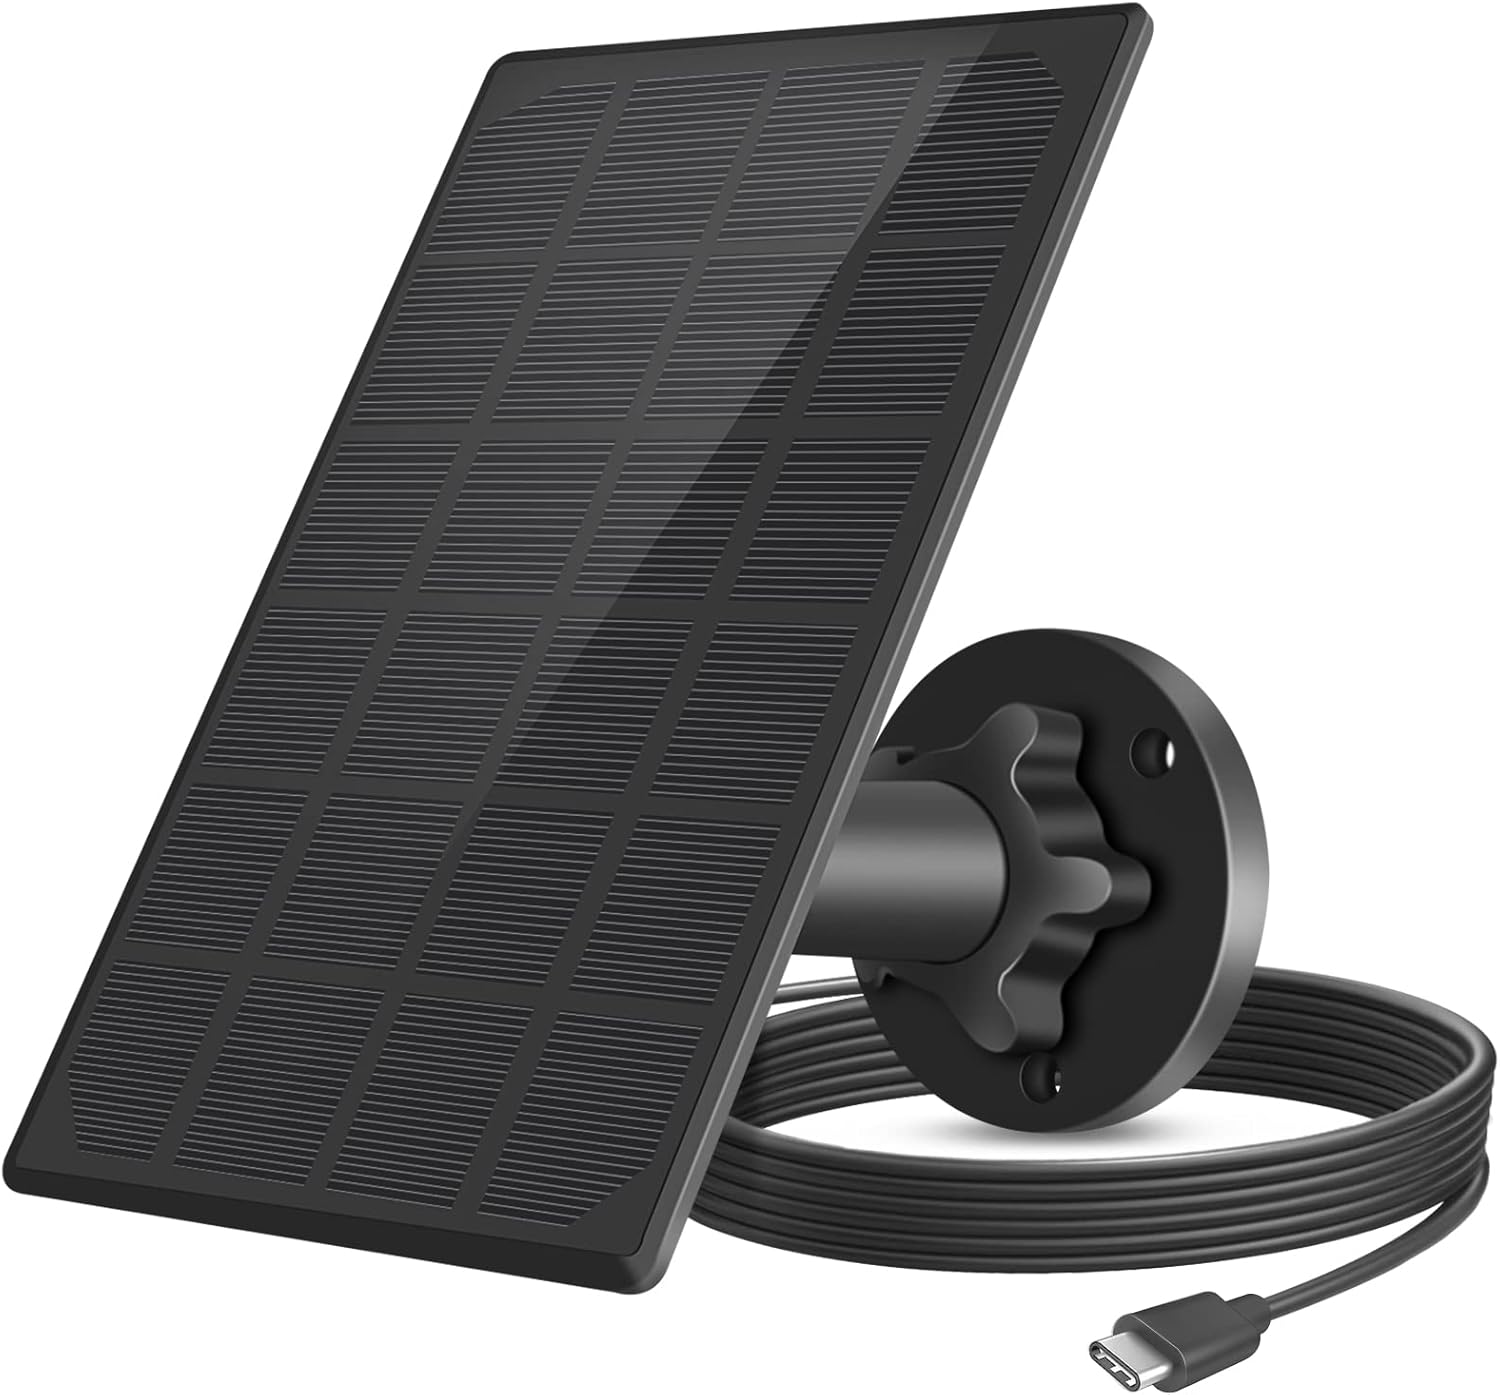
Figure 1: Hiseeu Solar Panel and included accessories.
2. Setup and Installation
Proper installation is crucial for maximizing the solar panel's charging efficiency. Follow these steps to set up your Hiseeu Solar Panel:
- Assemble the Mount: Attach the adjustable bracket mount to the back of the solar panel. Ensure it is securely fastened.
- Choose a Location: Select an outdoor location that receives direct sunlight for the majority of the day. Avoid areas with shade from trees, buildings, or other obstructions. The panel's 360-degree swivel and 90-degree tilt capabilities allow for optimal positioning.
- Mount the Bracket: Use the provided screws and wall anchors to securely attach the bracket mount to your chosen surface.
- Adjust the Panel: Position the solar panel to face the sun directly. Adjust the angle to maximize sunlight exposure throughout the day.
- Connect to Camera: Connect the 10-foot Type-C charging cable from the solar panel to the Type-C charging port on your compatible Hiseeu camera.
Important Note: When using the solar panel as the primary power source for your camera, it is recommended to remove the camera's internal batteries. This prevents potential conflicts or overcharging issues and ensures the solar panel directly powers the device.

Figure 2: Step-by-step installation process for the solar panel.

Figure 3: Dimensions of the solar panel and mounting components.

Figure 4: The solar panel is compatible with rechargeable battery cameras that have a Type-C charging port.
3. Operating Instructions
Once installed and connected, the Hiseeu Solar Panel will automatically begin charging your compatible camera when exposed to sufficient sunlight. The panel is designed for high efficiency energy conversion, providing a continuous power supply.
Weather Resistance:
The solar panel features an IP65 weatherproof design, making it suitable for outdoor use in various weather conditions. It is built to withstand temperatures ranging from -20°C to 60°C (-4°F to 140°F), ensuring reliable performance through thunderstorms, snow, and high heat.

Figure 5: The solar panel is designed for IP65 weather resistance across various conditions.

Figure 6: The solar panel provides continuous power to the camera.
4. Maintenance
To ensure optimal performance and longevity of your Hiseeu Solar Panel, periodic maintenance is recommended:
- Cleaning: Regularly clean the surface of the solar panel with a soft, damp cloth to remove dust, dirt, leaves, or other debris that may obstruct sunlight. Avoid abrasive cleaners or harsh chemicals.
- Cable Inspection: Periodically check the Type-C charging cable for any signs of wear, damage, or loose connections. Ensure the connection to the camera is secure.
- Mount Stability: Verify that the adjustable bracket mount remains securely fastened to its mounting surface and that the panel's angle is still optimized for sunlight exposure.
5. Troubleshooting
If your camera is not charging or experiencing power issues, consider the following troubleshooting steps:
- No Charging Indicator: If the camera's charging indicator light is not on, ensure the Type-C cable is firmly connected to both the solar panel and the camera.
- Insufficient Sunlight: Verify that the solar panel is receiving direct and unobstructed sunlight for several hours a day. Relocate or adjust the panel if necessary.
- Panel Cleanliness: Clean the solar panel surface to remove any accumulated dirt or debris that might be blocking sunlight.
- Cable Damage: Inspect the 10-foot Type-C cable for any visible damage. A damaged cable may prevent proper charging.
- Camera Battery Removal: Confirm that the internal batteries of the camera have been removed, as recommended, when using the solar panel as the primary power source.
6. Specifications
| Feature | Specification |
|---|---|
| Model Number | AMZ-TYNB-C30-5V |
| Maximum Output Power | 3.2 W |
| Standard Operating Voltage | 6 V |
| Standard Operating Current | 540 mA |
| Open Circuit Voltage | ≥7.2 V |
| Short Circuit Current | ≥560 mA |
| Cell Conversion Efficiency | ≥19.5% |
| Interface Type | Type-C |
| Cable Length | 10 ft (approximately 3 meters) |
| Waterproof Rating | IP65 |
| Working Temperature | -20°C to 60°C (-4°F to 140°F) |
| Item Weight | 9.6 ounces (0.27 kg) |
| Package Dimensions | 7.99 x 5.39 x 1.85 inches |

Figure 7: Overview of the Type-C port and key technical specifications.
7. Warranty and Support
Hiseeu products are designed for reliability and performance. For specific warranty details, please refer to the warranty card included with your purchase or visit the official Hiseeu website. If you encounter any issues or have questions regarding your Hiseeu Solar Panel, please contact Hiseeu customer support. Contact information, including email and phone, can typically be found in the user manual provided in the product packaging or on the official Hiseeu support page.


