Introduction
This manual provides detailed instructions for the proper installation, operation, and maintenance of your Kymate HM-36 8-pin microphone. Designed as a replacement for various ICOM transceiver radio models, this microphone offers clear audio communication and convenient control features. Please read this manual thoroughly to ensure optimal performance and longevity of your device.
Product Overview
The Kymate HM-36 is an 8-pin handheld microphone designed for compatibility with a wide range of ICOM transceiver radios. It features a robust construction and includes essential controls for efficient radio operation.
Key Features
- Up/down buttons located at the top for channel or frequency adjustment.
- High-quality speaker and microphone units for clear audio transmission and reception.
- Standard 8-pin plug for secure connection to compatible ICOM transceivers.
- Integrated Push-to-Talk (PTT) button for convenient communication.
- Durable metal clip for secure attachment.
Components
The Kymate HM-36 microphone consists of the main microphone unit with an integrated speaker, a coiled cable, an 8-pin connector, a Push-to-Talk (PTT) button, and up/down control buttons.

Figure 1: Overview of the Kymate HM-36 microphone, showing the handheld unit, coiled cable, and 8-pin connector.
Setup and Installation
Follow these steps to properly connect your Kymate HM-36 microphone to your ICOM transceiver radio.
- Power Off Radio: Ensure your ICOM transceiver radio is powered off before connecting or disconnecting any accessories.
- Locate Microphone Port: Identify the 8-pin microphone port on your ICOM transceiver. This port is typically located on the front panel of the radio.
- Connect Microphone: Align the 8-pin connector of the Kymate HM-36 microphone with the radio's microphone port. Gently push the connector in until it is fully seated and secure. Do not force the connection.
- Secure Connection: If your radio's port has a locking mechanism, ensure it is engaged to prevent accidental disconnection.
- Power On Radio: Once the microphone is securely connected, you may power on your ICOM transceiver radio.

Figure 2: Detail of the 8-pin connector, which plugs into the ICOM transceiver.
Operating Instructions
The Kymate HM-36 microphone provides intuitive controls for basic radio functions.
Push-to-Talk (PTT) Function
- To transmit, press and hold the PTT button located on the side of the microphone unit. Speak clearly into the microphone.
- Release the PTT button to stop transmitting and return to receive mode.
Up/Down Buttons
- The up and down buttons, located on the top front of the microphone, are typically used to change channels, frequencies, or menu settings on your connected ICOM transceiver.
- Refer to your specific ICOM radio's manual for detailed information on how these buttons interact with its functions.
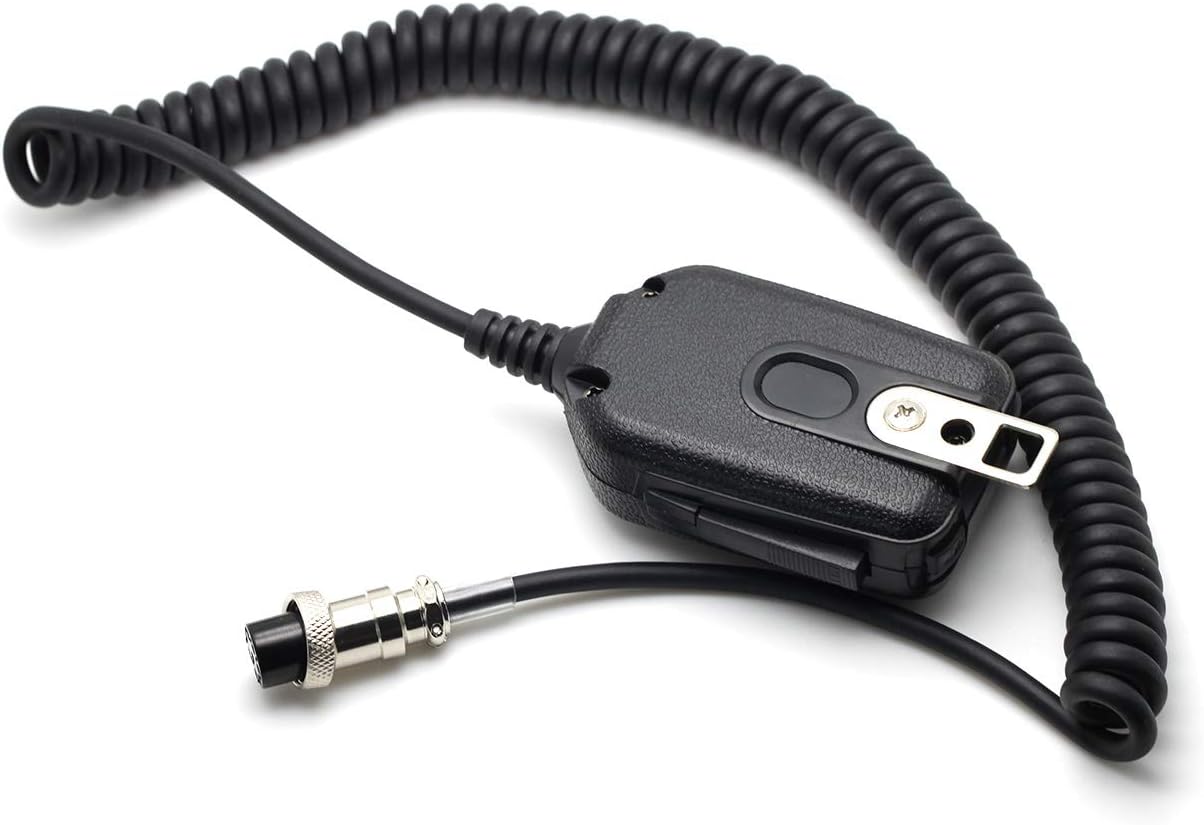
Figure 3: Rear view of the microphone, highlighting the Push-to-Talk (PTT) button and the durable metal clip.
Maintenance
Proper care and maintenance will extend the life of your Kymate HM-36 microphone.
- Cleaning: Use a soft, dry cloth to wipe the microphone's exterior. Avoid using harsh chemicals, solvents, or abrasive cleaners, as these can damage the finish or internal components.
- Storage: When not in use, store the microphone in a clean, dry environment away from direct sunlight and extreme temperatures. Avoid tightly coiling the cable to prevent damage.
- Connector Care: Keep the 8-pin connector clean and free of dust or debris. Inspect it periodically for any signs of damage.
Troubleshooting
If you encounter issues with your Kymate HM-36 microphone, refer to the following table for common problems and solutions.
| Problem | Possible Cause | Solution |
|---|---|---|
| No audio from microphone (no transmission) | Microphone not fully connected; Radio not in transmit mode; Faulty cable/connector. | Ensure 8-pin connector is securely seated. Press and hold PTT button firmly. Test with another microphone if available. |
| Distorted or low audio quality | Microphone too far/close; Radio audio settings; Environmental interference. | Speak at a consistent distance (approx. 5-10 cm) from the microphone. Check your radio's microphone gain settings. |
| Up/Down buttons not responding | Radio compatibility issue; Radio settings; Button malfunction. | Verify your radio model supports these functions with an external microphone. Check radio menu settings. |
| No audio from microphone speaker | Radio speaker output settings; Microphone speaker malfunction. | Ensure radio's audio output is directed to the external speaker/microphone. Check radio volume. |
Specifications
Detailed technical specifications for the Kymate HM-36 microphone.
| Feature | Detail |
|---|---|
| Item Model Number | HM36 HM-36 HAND MICROPHONE for ICOM |
| Brand | Kymate |
| Connector Type | 8 Pin XLR |
| Impedance | 600 Ohm |
| Microphone Form Factor | Handheld |
| Polar Pattern | Unidirectional |
| Power Source | Corded Electric (via radio) |
| Color | Black |
| Item Weight | 80 Grams (approx. 2.82 ounces) |
| Package Dimensions | 6.85 x 5 x 1.5 inches |
| UPC | 048518288688 |
Compatible ICOM Radios
The Kymate HM-36 microphone is compatible with a wide range of ICOM transceiver radio models, including but not limited to:
- IC-22U, IC-25A, IC-25H, IC-27A, IC-27H, IC-28A, IC-28H
- IC-37A, IC-38A, IC-45A, IC-47A, IC-48A, IC-77, IC-78
- IC-120, IC-120A, IC-228A, IC-228H, IC-229A, IC-229H
- IC-271, IC-275, IC-290A, IC-290H, IC-375, IC-451, IC-471
- IC-475, IC-490A, IC-505, IC-574, IC-575, IC-707, IC-718
- IC-725, IC-728, IC-729, IC-735, IC-736, IC-737, IC-738
- IC-745, IC-746, IC-746PRO, IC-751, IC-756, IC-756PROIII
- IC-761, IC-765, IC-775, IC-781, IC-820H, IC-821H
- IC-900A, IC-901A, IC-910, IC-910H, IC-970A, IC-970H
- IC-1200A, IC-1201A, IC-1275, IC-2400A, IC-2410A, IC-2410H
- IC-2500A, IC-3200A, IC-3210A, IC-3220A, IC-3220H
- IC-3230A, IC-3230H, IC-7200, IC-7400, IC-7410, IC-7600
- IC-7700, IC-7800, IC-9100
Warranty and Support
For warranty information and technical support, please refer to the documentation provided at the time of purchase or contact the seller directly. Keep your purchase receipt as proof of purchase for any warranty claims.


