1. Introduction
The XPG Vento Pro 120mm PWM Computer Case Fan is engineered for high performance and quiet operation, designed to optimize airflow and static pressure within your PC case. This fan incorporates advanced features such as dual bearings and Pulse Width Modulation (PWM) for precise speed control and extended lifespan. This manual provides essential information for installation, operation, maintenance, and troubleshooting to ensure optimal performance of your XPG Vento Pro fan.

Figure 1: XPG Vento Pro 120mm PWM Computer Case Fan
2. Key Features
- Collaboration with Nidec: Engineered in partnership with Nidec, referencing the Gentle Typhoon design, for improved airflow and reduced vibration noise.
- Pulse Width Modulation (PWM): Allows motherboards to dynamically and smoothly alter fan speed (RPM) for optimal cooling and noise control.
- Daisy Chain Capability: Flat cable design enables easy connection and simultaneous operation of multiple fans to manage temperatures efficiently.
- High Precision Dual Bearings: Equipped with Japanese quality dual bearings for heavy-duty loads, high thermal environments, greater efficiency, quiet spinning, and extended lifespan.
- High Static Pressure and Airflow: Capable of producing up to 3.15mm H₂O static pressure and 75 CFM airflow, ideal for water cooling radiators or restricted airflow environments.
- Vibration Reduction: Innovative fan motor design and support mechanism utilize a double-vibration reduction structure and spring instrument to dampen vibrations. Includes 4 anti-vibration rubber pads.
- Long Lifespan: Verified MTTF (mean time to failure) of 250,000 hours at 25°C, or 60,000 hours at 60°C ambient, suitable for demanding applications.

Figure 2: Illustration highlighting quieter operation and higher efficiency with dual bearings and PWM control.

Figure 3: Diagram showing the high endurance of the fan, with lifespans at different temperatures and the Japanese dual bearing system.

Figure 4: Comparison image emphasizing quietness and stability beyond the original design, featuring anti-vibration pads, tailored fan blade design, and improved motor support.
3. What's in the Box
Upon opening the package, please verify that all components are present:
- 1 x 120mm 4-pin PWM fan
- 1 x 450mm extension cable
- 4 x mounting screws

Figure 5: Visual representation of the package contents, including the fan, extension cable, and screws.
4. Setup and Installation
Follow these steps to properly install your XPG Vento Pro fan:
- Prepare Your System: Power off your computer and disconnect it from the power source. Open your PC case to access the fan mounting locations.
- Identify Mounting Location: Determine the desired location for the fan (e.g., front intake, rear exhaust, top exhaust, or radiator mounting). Ensure proper airflow direction for your system's cooling needs.
- Mount the Fan: Align the fan with the screw holes on your PC case or radiator. Use the four provided mounting screws to secure the fan firmly. Do not overtighten.
- Connect the Fan:
- Locate an available 4-pin PWM fan header on your motherboard.
- Connect the fan's 4-pin connector to the motherboard header. Ensure the connector is fully seated.
- If installing multiple XPG Vento Pro fans, utilize the daisy chain capability by connecting the fans in series using the provided extension cable or directly if the cable length allows. Connect the last fan in the chain to a single 4-pin PWM header on your motherboard.
- Cable Management: Route the fan cables neatly to avoid obstructing airflow or interfering with other components.
- Close Case and Power On: Close your PC case, reconnect the power, and power on your system.

Figure 6: Illustration demonstrating the 4-pin PWM connector and daisy chain capability for connecting multiple fans.
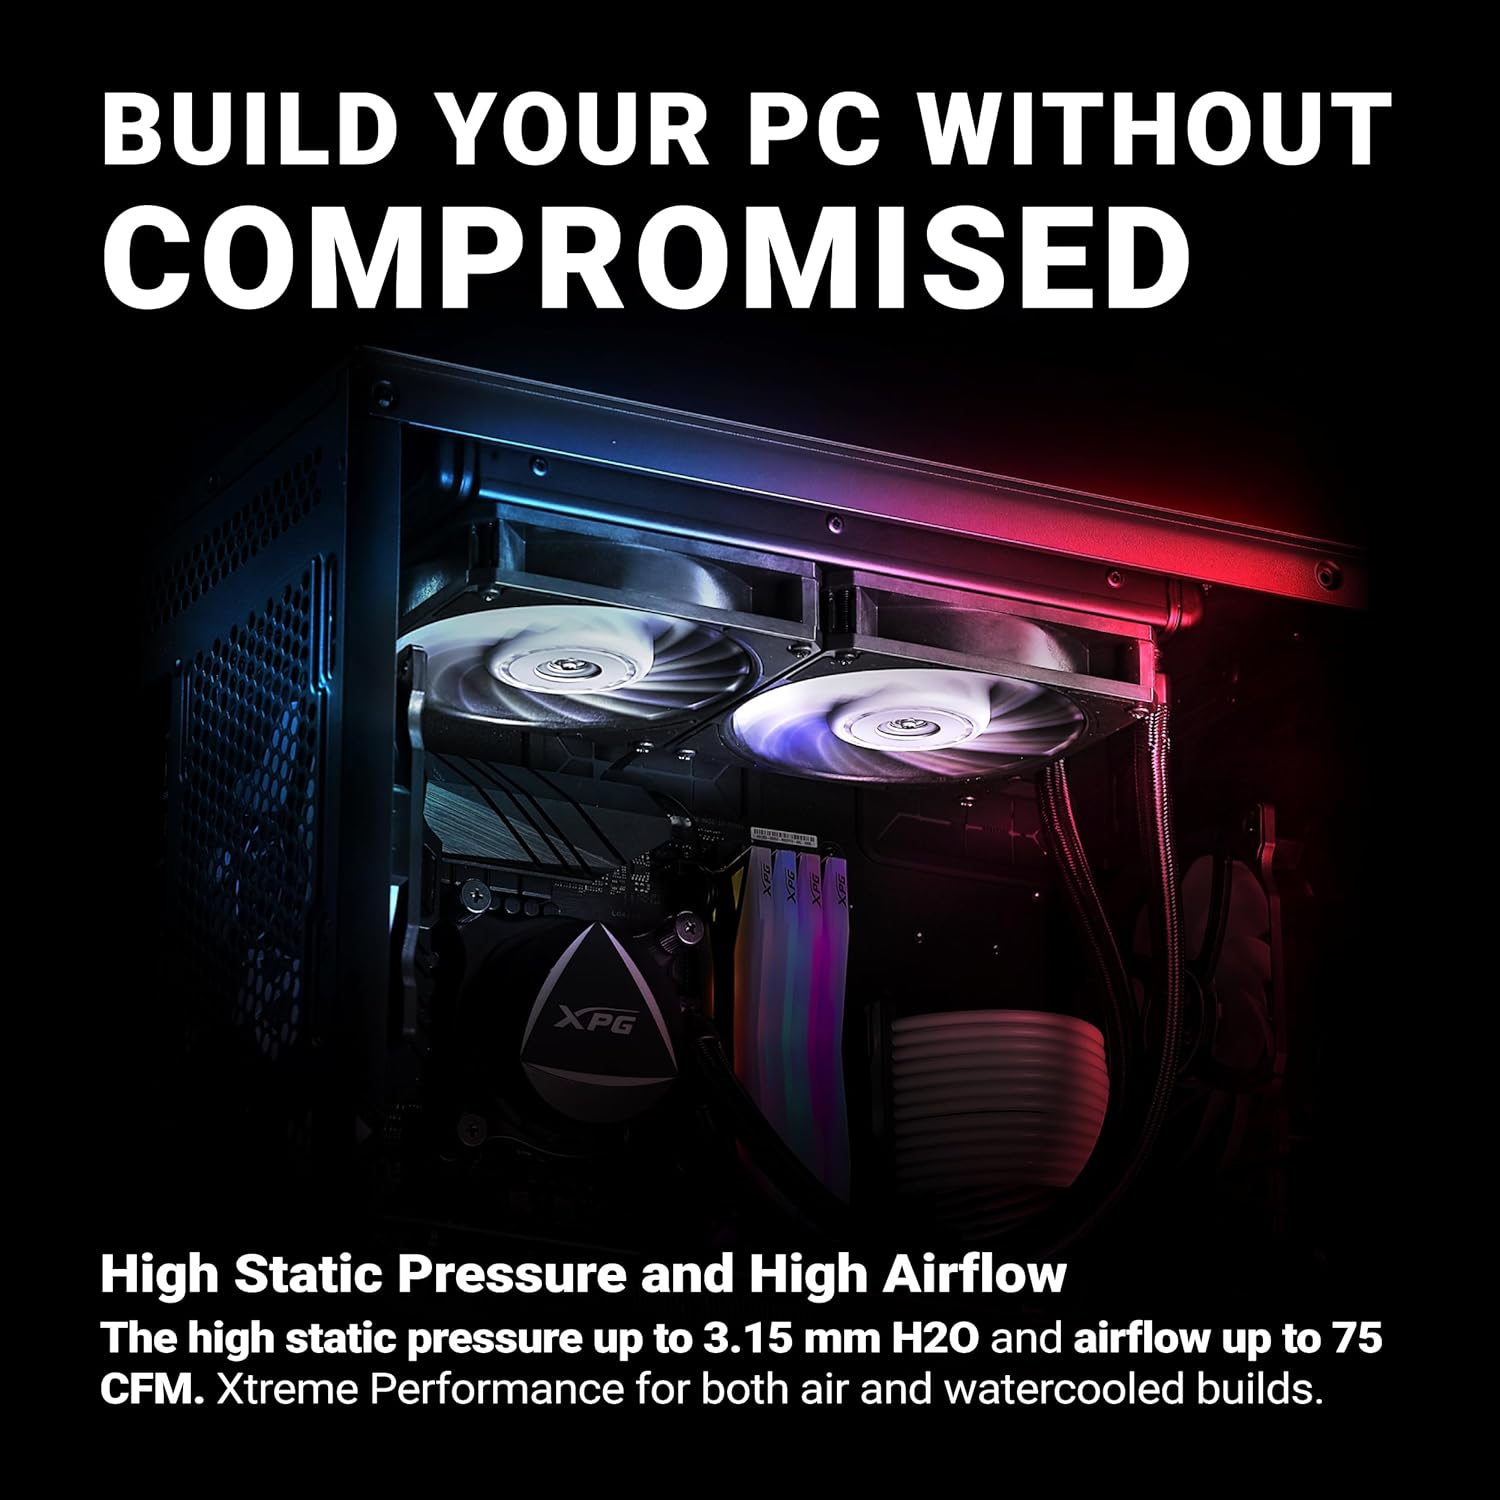
Figure 7: Example of XPG Vento Pro fans installed within a PC case, highlighting their contribution to system cooling.
5. Operating Instructions
The XPG Vento Pro fan utilizes Pulse Width Modulation (PWM) for intelligent speed control. Your motherboard's BIOS/UEFI settings or dedicated fan control software will manage the fan speed based on system temperatures.
- Automatic Control: By default, most motherboards will automatically adjust the fan speed based on CPU or system temperatures. This ensures efficient cooling while minimizing noise when the system is idle or under light load.
- Manual Control (Optional): For advanced users, fan curves can be customized within your motherboard's BIOS/UEFI or through software provided by your motherboard manufacturer. This allows you to set specific fan speeds at different temperature thresholds.
Note: Ensure your motherboard's fan headers are set to PWM mode for optimal control. Connecting to a 3-pin DC header may result in the fan running at full speed or not being controllable.
6. Maintenance
Regular maintenance helps ensure the longevity and optimal performance of your fan:
- Dust Removal: Periodically (e.g., every 3-6 months), power off your PC and use compressed air or a soft brush to gently remove dust accumulation from the fan blades and frame. Dust can impede airflow and increase noise.
- Inspection: Check for any loose cables or obstructions around the fan. Ensure the fan is securely mounted.
Do not attempt to lubricate the fan bearings yourself, as this can void the warranty and potentially damage the fan. The dual bearings are designed for long-term, maintenance-free operation.
7. Troubleshooting
If you encounter issues with your XPG Vento Pro fan, refer to the following common problems and solutions:
| Problem | Possible Cause | Solution |
|---|---|---|
| Fan is not spinning |
|
|
| Fan is spinning at full speed constantly |
|
|
| Excessive noise (grinding, rattling) |
|
|
| Fan wobbles |
|
|
8. Specifications
| Feature | Detail |
|---|---|
| Product Dimensions | 0.98"L x 4.72"W x 4.72"H (120 x 120 x 25mm) |
| Brand | XPG |
| Power Connector Type | 4-Pin PWM |
| Voltage | 13.2 Volts |
| Wattage | 1.56 watts |
| Cooling Method | Fan |
| Compatible Devices | Desktop |
| Noise Level | 10-28 dBA |
| Material | Copper (referring to motor windings, fan frame is plastic) |
| Maximum Rotational Speed | 2150 RPM (PWM Mode) / 2150 RPM (DC Mode) |
| Air Flow Capacity | 75 CFM (Cubic Feet Per Minute) |
| Static Pressure | Up to 3.15 mm H₂O |
| Bearing Type | Dual Ball Bearing |
| MTTF (Mean Time To Failure) | 250,000 hours at 25°C / 60,000 hours at 60°C |
| Item Model Number | VENTOPRO120PWM-BKCWW |
| UPC | 842243024098 |
9. Warranty and Support
The XPG Vento Pro 120mm PWM Computer Case Fan comes with a 5-year limited warranty from the date of purchase. This warranty covers defects in materials and workmanship under normal use.
For technical support, warranty claims, or further assistance, please visit the official XPG website or contact their customer service department. Keep your proof of purchase for warranty validation.
Please note that the warranty does not cover damage caused by improper installation, misuse, unauthorized modification, or natural disasters.
For more information, visit the XPG Official Website.


