
Introduction
Thank you for purchasing the visiPower Portable Smart Projector. This manual provides detailed instructions for the setup, operation, maintenance, and troubleshooting of your device. Please read this manual thoroughly before use to ensure proper functionality and to maximize your viewing experience.
Product Overview
Package Contents
Verify that all items are present in the package:
- Projector
- Remote control
- Bag
- Tripod
- HD-IN cable
- Power adapter
- User manual

The image above displays the complete list of items included with your visiPower Portable Smart Projector. Please ensure all components are present and undamaged upon unboxing.
Device Layout and Interfaces
Familiarize yourself with the projector's physical layout and available ports.

This diagram illustrates the various ports and controls on the projector, including the focus wheel, TF card slot, HDMI input, USB ports, power input, headphone jack, and the integrated touch panel.
Remote Control Functions
The included infrared remote control allows for convenient operation of the projector.

The remote features dedicated buttons for power, mute, navigation, home, return, mouse mode, and volume control. Ensure the remote is pointed towards the projector's infrared receiver for optimal response.
Setup
1. Powering On and Initial Charge
- Connect the power adapter to the DC-IN port on the projector and plug it into a power outlet.
- Press and hold the Power button on the projector or the ON/OFF button on the remote control to turn on the device.
- For first-time use or after extended storage, fully charge the built-in 4000 MA battery.
2. Placement and Focus Adjustment
- Place the projector on a stable, flat surface. The included tripod can be used for adjustable positioning.
- Position the projector between 1 to 5 meters from the projection surface to achieve a screen size of 30 to 120 inches.
- Rotate the focus wheel (refer to Figure 2) until the projected image appears clear and sharp.
3. Network Connection (Wi-Fi)
- Navigate to the "Settings" menu on the projector's interface.
- Select "Wi-Fi" and turn it on.
- Choose your desired 2.4G or 5G Wi-Fi network from the list.
- Enter the password if prompted and connect.
4. Connecting External Devices
- HDMI Input: Connect an HDMI cable from your source device (e.g., laptop, gaming console) to the HD-IN port on the projector.
- USB Devices: Insert USB flash drives or external hard drives into the USB HOST 1 or USB HOST 2 ports for media playback.
- TF Card: Insert a TF card into the designated slot for media playback (supports up to 32GB).
- Audio Output: Connect external speakers or headphones to the 3.5mm earphone jack.
Operating Instructions
1. Navigation and Control
- Touch Panel: Use the integrated touch area on the top of the projector for navigation and selection (refer to Figure 2). The touchscreen supports drag-and-click simplicity.
- Remote Control: Use the directional buttons and "OK" button on the remote for menu navigation. The "Mouse" button activates a virtual mouse pointer for easier interaction with Android applications.
- Keystone Correction: The projector features automatic vertical keystone correction (up to ±40 degrees). Manual adjustment may be available in settings if needed.
2. Input Source Selection
From the home screen or settings, select the desired input source:
- HDMI: For content from devices connected via HDMI cable.
- USB/TF Card: For local media files stored on USB drives or TF cards.
- Screen Mirroring: For wireless display from smartphones or tablets.
3. Wireless Screen Mirroring
The projector supports AirPlay, Miracast, EShare, and DLNA for wireless screen sharing.
- Ensure both the projector and your mobile device are connected to the same Wi-Fi network.
- Select the appropriate screen mirroring application or function on the projector (e.g., AirPlay, Miracast).
- On your mobile device, activate its screen mirroring feature (e.g., "Screen Mirroring" on Android, "AirPlay" on iOS) and select the projector from the list of available devices.
4. Media Playback
Access media files from connected USB drives or TF cards through the file manager or media player applications on the Android 6.0 operating system.
- Supported Video Formats: H.263, H.264, H.265, VC-1, RV, VP6/VP8, Sorenson Spark, MVC MPEG-1, MPEG-2, MPEG-4.
- Supported Audio Formats: MP3, WMA, MP2, OGG, AAC, M4A, MA4, FLAC, APE, 3GP, WAV.
- Supported Image Formats: JPG, PNG, BMP.
Maintenance
1. Lens Cleaning
- Gently wipe the projector lens with a soft, lint-free cloth specifically designed for optical surfaces.
- Do not use abrasive cleaners or harsh chemicals, as these can damage the lens coating.
- Avoid touching the lens directly with your fingers.
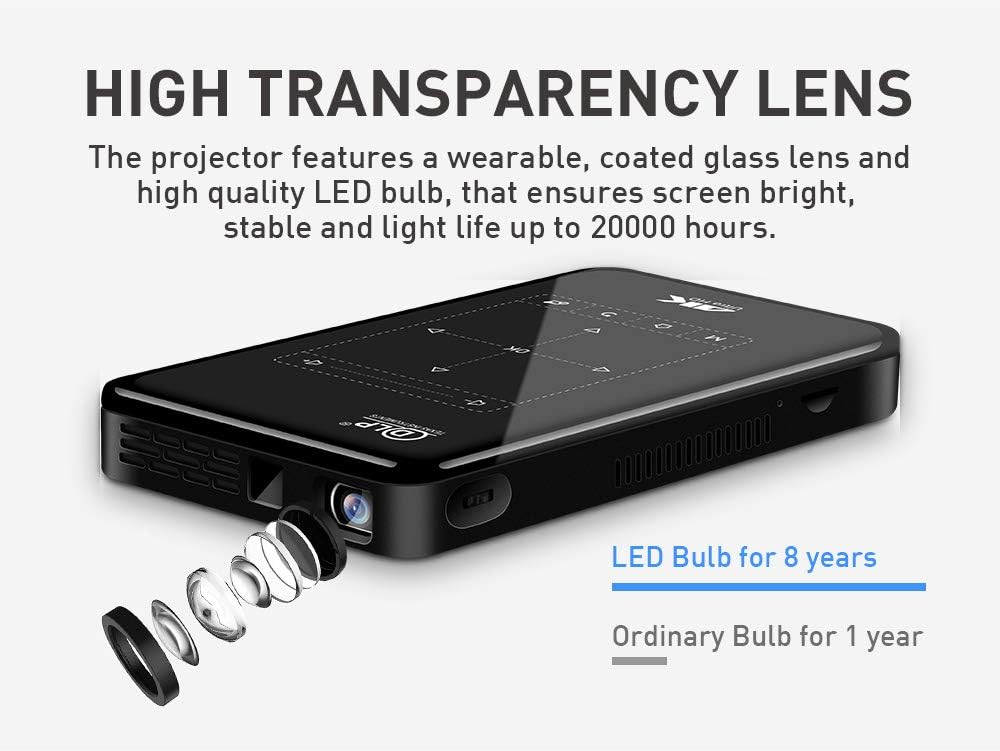
The projector features a durable LED light source designed for long life. Proper lens cleaning ensures optimal image clarity.
2. General Cleaning and Storage
- Wipe the exterior of the projector with a soft, dry cloth.
- Store the projector in a cool, dry place, away from direct sunlight and extreme temperatures.
- Use the provided bag for protection during transport or storage.
3. Battery Care
- To prolong battery life, avoid fully discharging the battery frequently.
- If storing for an extended period, charge the battery to approximately 50% and recharge every few months.
Troubleshooting
| Problem | Possible Cause | Solution |
|---|---|---|
| No power | Power adapter not connected; Battery depleted; Power button not pressed correctly. | Ensure power adapter is securely connected and plugged in. Charge the battery. Press and hold the power button for a few seconds. |
| No image | Incorrect input source selected; HDMI cable loose or faulty; Device not powered on. | Select the correct input source (e.g., HDMI). Check HDMI cable connection. Ensure the source device is powered on. |
| Image blurry | Focus not adjusted; Projector too close/far from screen. | Adjust the focus wheel. Reposition the projector within the recommended distance (1-5m). |
| No sound | Volume too low; Mute activated; External speakers not connected or faulty. | Increase volume. Deactivate mute. Check external speaker connection and functionality. |
| Wi-Fi connection issues | Incorrect password; Out of range; Router issues. | Verify Wi-Fi password. Move projector closer to the router. Restart your Wi-Fi router. |
Specifications
| Parameter | Detail |
|---|---|
| Product Type | Portable Smart Projector |
| Projection Technology | DLP (0.3DMD+RGBLED) |
| Light Luminance | 50 ANSI Lumens |
| Contrast Ratio | 2000:1 |
| Native Resolution | WVGA 854*480 |
| Maximum Supported Resolution | 1920 x 1080 (1080P) |
| Lamp Life | ≥20,000 Hours |
| Projection Ratio | 1.19:1 |
| Projection Area | 30-120 inches |
| Projection Distance | 1-5 meters (3.28 - 16.4 feet) |
| Keystone Correction | Automatic Vertical, ±40 degrees |
| CPU | Amlogic S905X Quad core ARM Cortex-A53 up to 1.5GHz |
| Buffer Memory | 1GB DDR3 |
| OS | Android 6.0 |
| Extended Storage | TF card (up to 32GB), Hard disk via USB |
| Connectivity | HDMI 1.4, USB HOST 2.0 (x2), Earphone (3.5mm), DC Input, Bluetooth 4.0, 2.4G/5G Wi-Fi |
| Power Input | 5V-3.0A DC |
| Whole Power Consumption | 6W |
| Built-in Battery | 3.7V 4000 MA |
| Dimensions | 146 x 78.5 x 18 mm |
Note: While the projector supports 1080P input, its native display resolution is WVGA 854x480.
Warranty and Support
For warranty information and technical support, please refer to the documentation provided at the time of purchase or contact the seller directly. Extended protection plans may be available for purchase separately.
For further assistance, you may visit the visiPower store on Amazon: visiPower Store