
Introduction
This manual provides essential information for the safe and efficient operation of your LVYUAN 3000W/6000W 12V to 220V Power Inverter. Please read these instructions carefully before installation and use. Keep this manual for future reference.
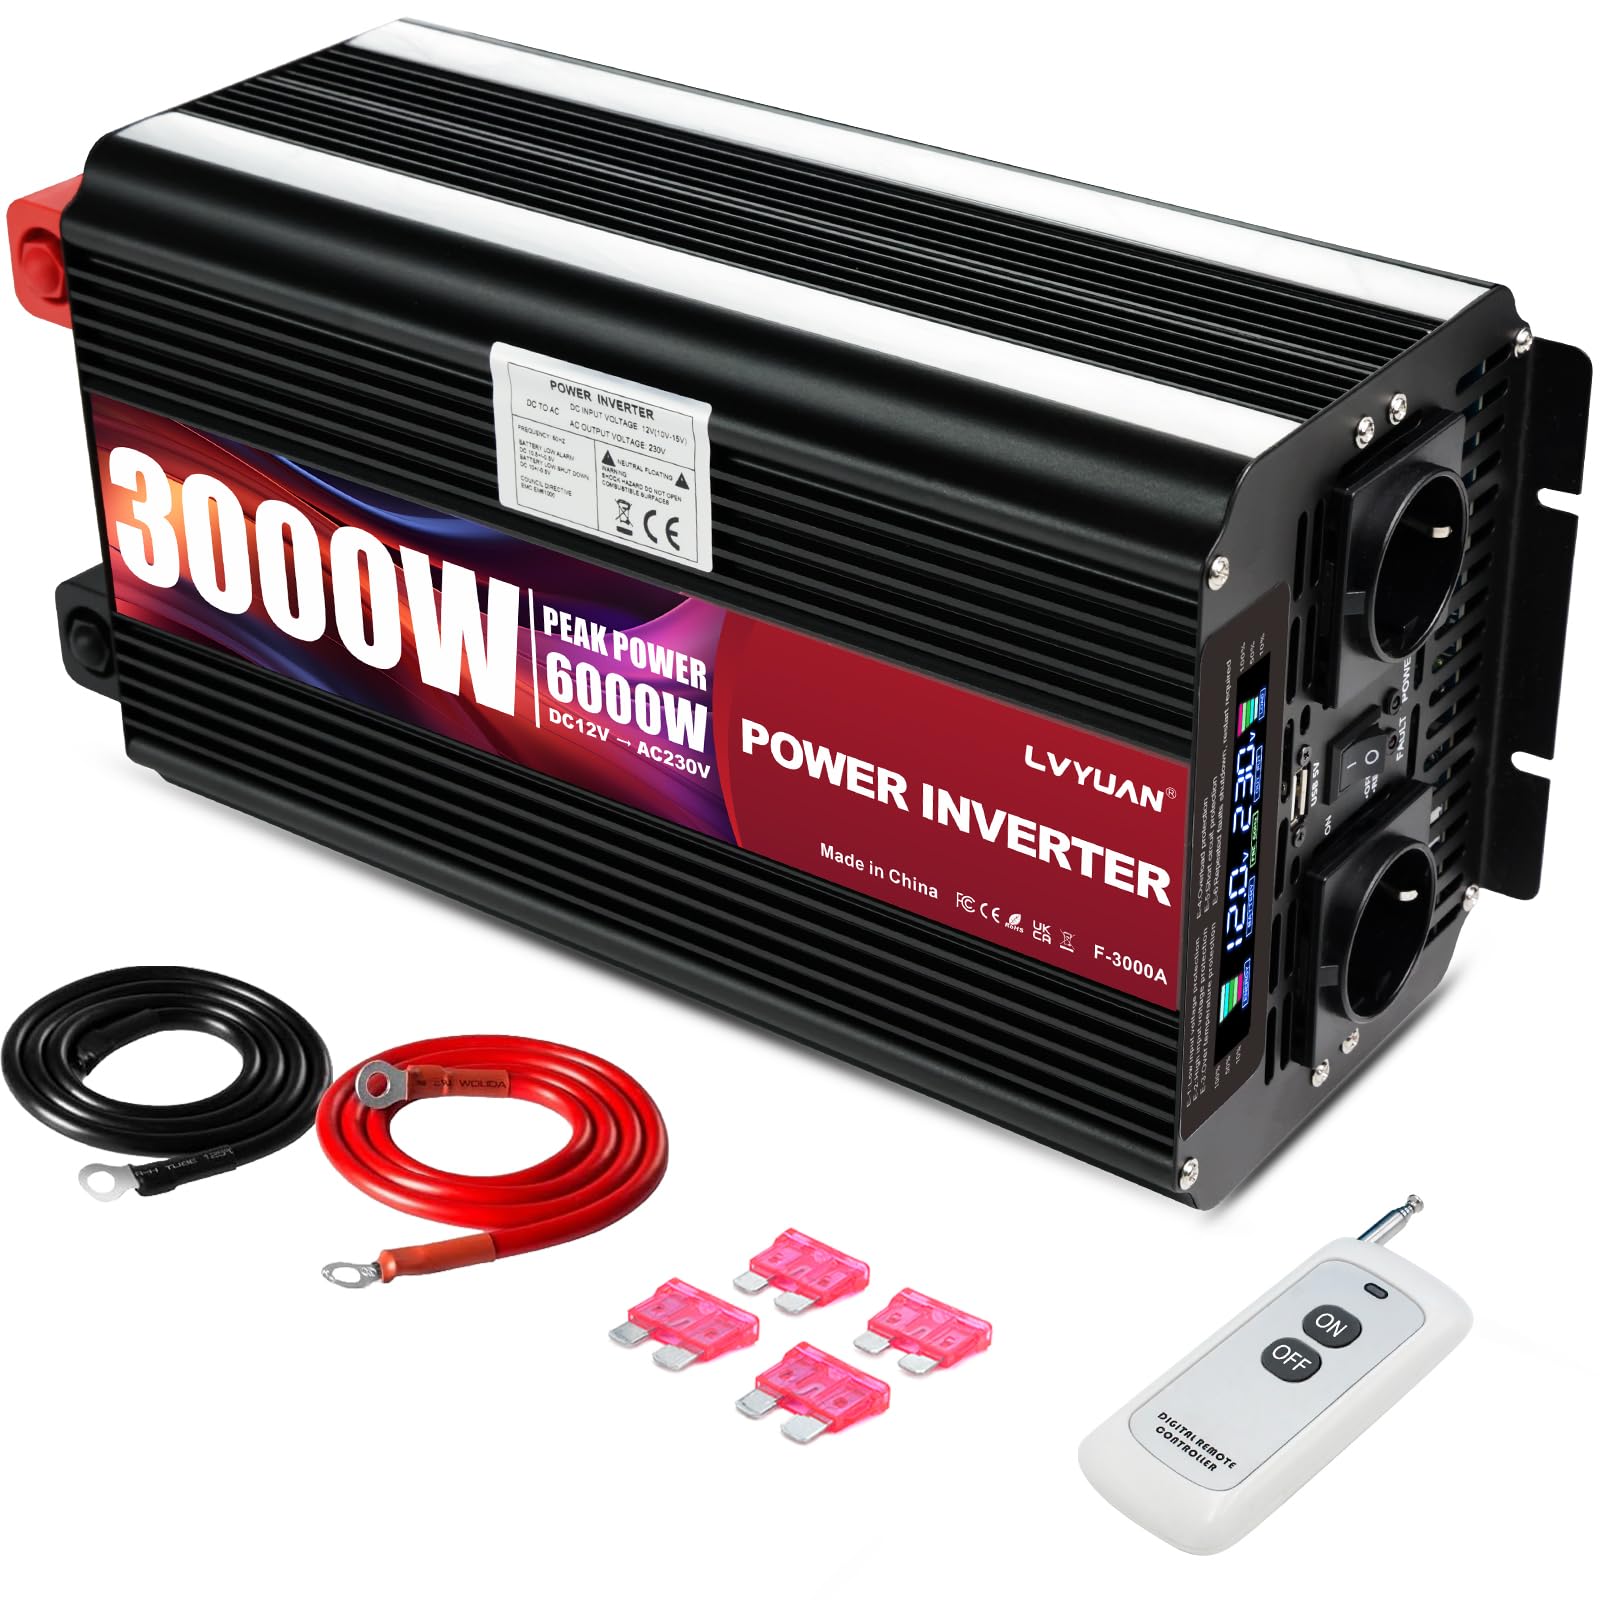
Image: LVYUAN 3000W/6000W Power Inverter. This image shows the main unit with its cooling fans, DC input terminals (red and black), and the front panel with AC outlets and USB port.
Important Safety Instructions
Failure to follow these safety instructions may result in electric shock, fire, or serious injury.
- Do not connect the inverter to AC mains power. This can cause severe damage to the inverter and connected devices.
- Ensure correct polarity when connecting to a battery. Reverse connection of positive (+) and negative (-) terminals is strictly prohibited and will damage the unit.
- Avoid overloading the inverter. Do not exceed the continuous output power of 3000W.
- Use only the provided standard battery cables. Using inadequate cables may prevent the inverter from delivering full power.
- The inverter is designed for DC 12V input (10V-15.5V). Do not use with other DC voltage sources.
- Ensure adequate ventilation around the inverter to prevent overheating. The aluminum casing helps dissipate heat, but proper airflow is crucial.
- Keep the inverter away from water, moisture, and flammable materials.
- Do not open the inverter casing. There are no user-serviceable parts inside.
- In case of accidental fuse blow, use only the provided spare fuses for replacement.
Package Contents
Verify that all items are present in the package:
- 1x LVYUAN Power Inverter (3000W/6000W)
- 2x Battery Connection Cables (50cm solid copper, 25mm²)
- 1x Wireless Remote Control (Note: 12V 23A battery not included)
- 1x User Manual
- Spare Fuses
Technical Specifications
| Feature | Specification |
|---|---|
| Model Number | BT-3000W12V-M-EU-DYK |
| Input Voltage | DC 12V (10V-15.5V) |
| Output Voltage | AC 220V ± 5% |
| Continuous Output Power | 3000W |
| Peak Output Power | 6000W |
| Output Frequency | 50 Hz |
| Conversion Efficiency | > 90% |
| AC Outlets | 2x EU Sockets (220V~240V) |
| USB Port | 1x 5V 2.4A |
| Operating Temperature | 0°C to 40°C |
| Dimensions (L x W x H) | 380 x 180 x 140 mm |
| Net Weight | 4.62 kg |
| Safety Standards | CE |
Setup and Installation
- Choose a suitable location: Place the inverter in a dry, well-ventilated area, away from direct sunlight, heat sources, and flammable materials. Ensure sufficient space for airflow around the unit.
- Prepare the battery: Ensure your DC 12V battery is fully charged and in good condition.
- Connect the battery cables:
- Connect the red battery cable to the positive (+) terminal of the inverter.
- Connect the other end of the red cable to the positive (+) terminal of your 12V battery.
- Connect the black battery cable to the negative (-) terminal of the inverter.
- Connect the other end of the black cable to the negative (-) terminal of your 12V battery.
Warning: Double-check all connections for correct polarity before proceeding. Incorrect polarity will damage the inverter.
- Secure connections: Ensure all cable connections are tight and secure to prevent loose contacts and potential hazards.
- Initial power-up: Once connected, switch the inverter's main power switch to the "ON" position. The LED display should illuminate, showing input and output voltage.
Operating Instructions
Using the Inverter
- Power On: Ensure the inverter is connected to a 12V DC battery. Turn the main power switch on the inverter to the "ON" position.
- Monitor LED Display: The integrated LED display will show the real-time input voltage (from the battery) and output voltage (AC 220V).
- Connect AC Devices: Plug your 220V~240V AC devices (e.g., laptops, hair dryers, sandwich makers, fans) into the two EU sockets on the inverter.
- Connect USB Devices: Plug your USB-powered devices (e.g., smartphones, tablets) into the 5V 2.4A USB port.
- Power Off: When finished, first disconnect all AC and USB devices. Then, switch the inverter's main power switch to the "OFF" position.
Using the Wireless Remote Control
The wireless remote control allows for convenient power management from a distance.
- Install Battery: Insert a 12V 23A battery (not included) into the wireless remote control.
- Enable Remote Control: Ensure the main power switch on the inverter is set to the "OFF" position. This enables the remote control functionality.
- Remote Operation: Use the A/B buttons on the remote control to turn the inverter ON or OFF.
- Note: If the main power switch on the inverter is in the "ON" position, the remote control will not function.
Overload Protection
The inverter features overload protection. If the connected load exceeds 3000W, the inverter may shut down automatically to prevent damage. Reduce the load and restart the inverter if this occurs.
Maintenance
- Cleaning: Periodically clean the exterior of the inverter with a soft, dry cloth. Do not use liquid cleaners or solvents.
- Ventilation: Ensure the cooling fans and ventilation openings are free from dust and debris. Blocked vents can lead to overheating.
- Cable Connections: Regularly check battery cable connections for tightness and corrosion. Clean any corrosion with a wire brush and baking soda solution.
- Fuse Replacement: If a fuse blows, replace it only with a fuse of the same type and rating as the original, using the provided spare fuses. Refer to the safety instructions for guidance.
- Storage: When not in use for extended periods, disconnect the inverter from the battery and store it in a cool, dry place.
Troubleshooting
| Problem | Possible Cause | Solution |
|---|---|---|
| Inverter does not turn on / No output voltage |
|
|
| Low output voltage (e.g., 195V instead of 220V) |
|
|
| Inverter shuts down automatically |
|
|
| Wireless remote control not working |
|
|
Warranty and Support
LVYUAN provides a warranty for this product, including free replacement under warranty. For any issues or support inquiries, please contact LVYUAN customer service. They offer 24-hour service.
Please refer to your purchase documentation for specific warranty terms and contact information.


