
GEOYEAO EVP 304
User Manual for GEOYEAO Portable Monitor
Model: EVP 304
Brand: GEOYEAO
Introduction
This manual provides comprehensive instructions for the setup, operation, maintenance, and troubleshooting of your GEOYEAO 15.6 Inch Portable Monitor. Please read this manual thoroughly before using the product to ensure proper functionality and to prevent damage.
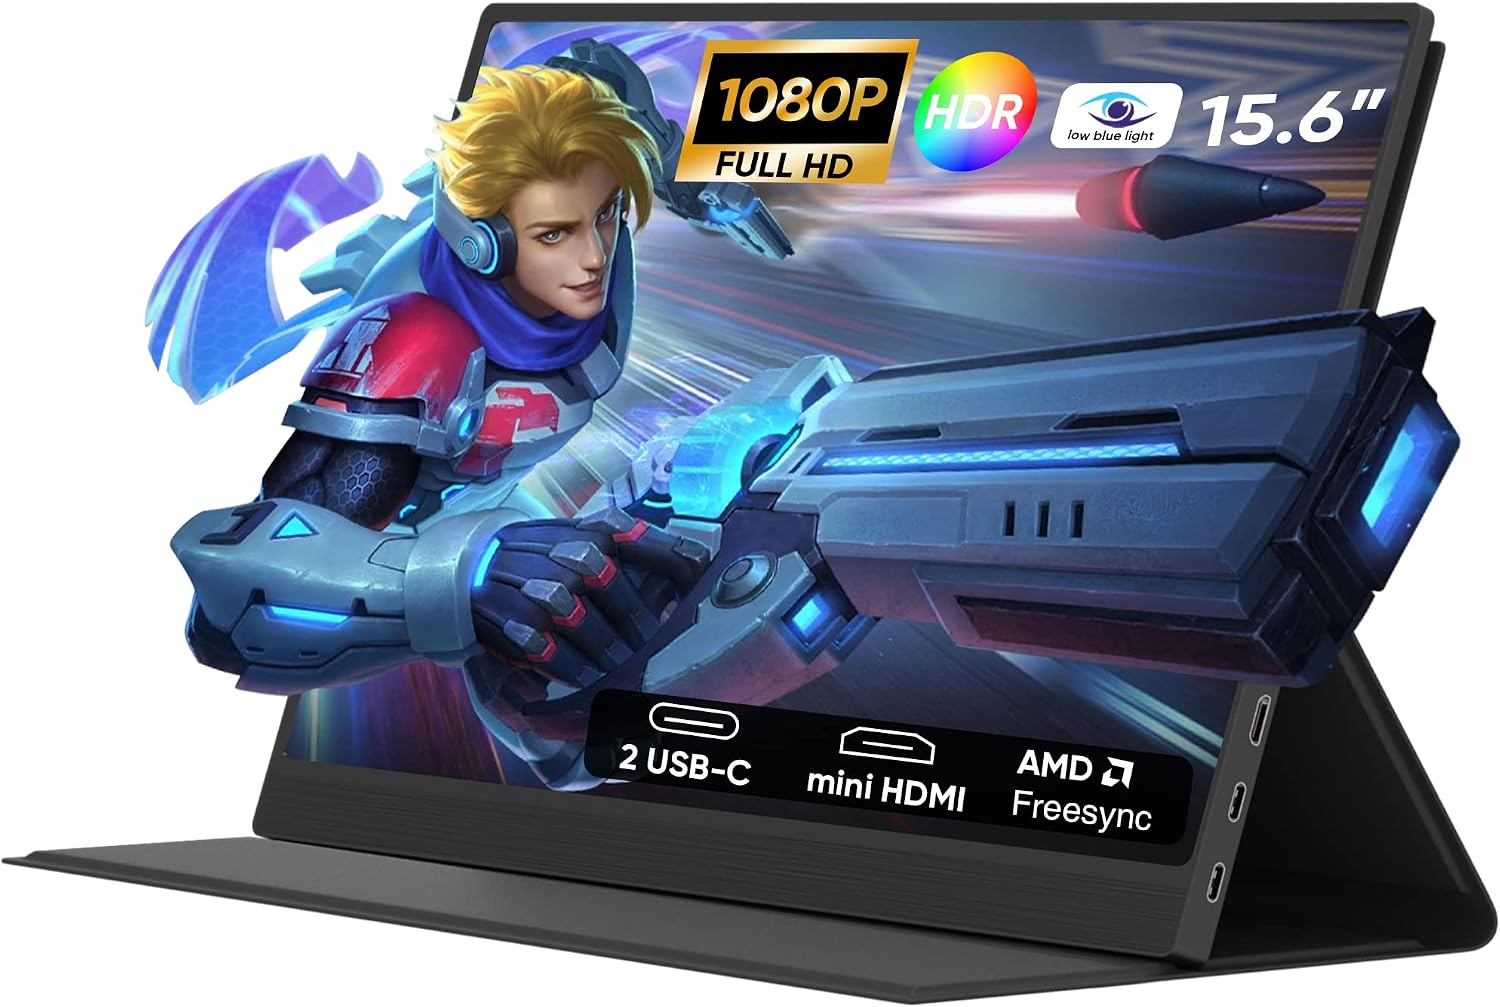
Image: The GEOYEAO 15.6 Inch Portable Monitor, showcasing its sleek design and vibrant display capabilities for gaming and multimedia.
Safety Information
To ensure safe operation and prolong the life of your monitor, please observe the following safety precautions:
- Do not expose the monitor to rain, moisture, or extreme temperatures.
- Avoid placing the monitor near heat sources or in direct sunlight.
- Use only the power adapter and cables provided or recommended by the manufacturer.
- Do not attempt to disassemble or repair the monitor yourself. Refer all servicing to qualified personnel.
- Keep the monitor away from strong magnetic fields.
- Clean the screen with a soft, lint-free cloth. Avoid using abrasive cleaners.
Package Contents
Please check the package contents to ensure all items are present:
- GEOYEAO 15.6 Inch Portable Monitor
- Adjustable Leather Protective Stand Case
- USB-C to USB-C Cable
- USB-A to USB-C Cable (for power)
- HDMI to Mini HDMI Cable
Product Overview
Familiarize yourself with the monitor's components and ports:

Image: Detailed view of the monitor's side panel, illustrating the location and function of each port and control button.
- 3.5mm Headphone Port: For connecting external audio devices.
- Menu Button: Accesses and navigates the On-Screen Display (OSD) menu.
- Power On/Off Button: Powers the monitor on or off. Also used for OSD navigation.
- Mini HDMI Port: For video and audio input from devices with HDMI output.
- Full Function Type-C Ports (x2): Supports power, video, and data transmission via a single cable.
Setup
Follow these steps to set up your portable monitor:
1. Using the Protective Stand Case
The included leather protective stand case can be folded to provide stable support for the monitor at various viewing angles. Simply adjust the case to your desired position.
2. Connecting to Devices
The monitor supports various connection methods. Ensure the monitor is powered before or during connection.
2.1. USB-C Connection (Full Function)
For devices with a full-function USB-C port (supporting DisplayPort Alternate Mode and power delivery), a single USB-C to USB-C cable is sufficient for both power and video/audio transmission.
- Connect one end of the USB-C to USB-C cable to one of the monitor's Full Function Type-C Ports.
- Connect the other end to the full-function USB-C port on your laptop, smartphone, or other compatible device.

Image: Monitor connected to a laptop, demonstrating dual-screen productivity via USB-C.

Image: Monitor connected to a smartphone, enabling a larger display for mobile content.
2.2. HDMI Connection (Requires External Power)
For devices with an HDMI output (e.g., PC, gaming consoles, older laptops), you will need to provide external power to the monitor.
- Connect one end of the HDMI to Mini HDMI cable to the monitor's Mini HDMI Port.
- Connect the other end to the HDMI port on your device.
- Connect the USB-A to USB-C cable to one of the monitor's Full Function Type-C Ports.
- Connect the USB-A end of the cable to a USB power adapter (not included) or a powered USB port on your device (e.g., laptop, PC) for power supply.

Image: Monitor connected to a desktop PC, extending the display for enhanced productivity.

Image: Monitor connected to a PlayStation 4, providing a portable gaming experience.
Operating Instructions
1. Power On/Off
Press the Power On/Off Button located on the side of the monitor to turn it on or off.
2. OSD (On-Screen Display) Menu Navigation
The OSD menu allows you to adjust various display settings.
- Press the Menu Button to open the OSD menu.
- Use the Power On/Off Button (often acts as an 'Up' or 'Select' button) and the Menu Button (often acts as a 'Down' or 'Back' button) to navigate through the menu options. Specific button functions may vary slightly; refer to the on-screen prompts.
- Press the Menu Button again to confirm a selection or exit a sub-menu.
3. Adjusting Display Settings
3.1. Brightness and Contrast
Navigate to the "Picture" or "Display" settings in the OSD menu to adjust brightness and contrast levels to your preference.
3.2. HDR (High Dynamic Range)
The monitor supports HDR for enhanced color and contrast. Enable HDR in the OSD menu if your connected device also supports HDR output.

Image: Visual demonstration of HDR capability, highlighting improved detail in both dark and bright areas compared to SDR.
3.3. AMD FreeSync™
For a smoother gaming experience, enable AMD FreeSync™ in the OSD menu. This technology synchronizes the monitor's refresh rate with your graphics card's frame rate to eliminate screen tearing and stuttering.

Image: Monitor displaying a high-speed racing game, illustrating the benefit of AMD FreeSync for fluid visuals.
3.4. Bluelight Eye Care Modes
The monitor features 4 modes of low blue light to reduce eye fatigue. Access these modes through the OSD menu to select the setting most comfortable for your eyes.

Image: Comparison demonstrating the visual difference with and without the low blue light feature, emphasizing eye comfort.
4. Audio Settings
The monitor has built-in speakers. You can adjust the volume or mute the audio through the OSD menu. Alternatively, connect external headphones or speakers to the 3.5mm headphone port.
Maintenance
Proper maintenance ensures the longevity and performance of your monitor.
- Cleaning: Gently wipe the screen with a soft, dry, lint-free cloth. For stubborn marks, lightly dampen the cloth with water or a screen-specific cleaning solution. Do not spray liquid directly onto the screen.
- Storage: When not in use, store the monitor in its protective stand case to prevent scratches and damage. Keep it in a cool, dry place away from direct sunlight.
- Portability: The monitor's slim and lightweight design makes it highly portable. Always use the protective case when transporting the monitor to safeguard it from impacts.

Image: The portable monitor being stored in a backpack, highlighting its compact and travel-friendly design.
Troubleshooting
If you encounter issues with your monitor, refer to the following table for common problems and solutions:
| Problem | Possible Cause / Solution |
|---|---|
| No Signal / Black Screen |
|
| Flickering Screen |
|
| No Audio |
|
| Buttons Not Responding |
|
Specifications
Key technical specifications for the GEOYEAO Portable Monitor:
| Feature | Detail |
|---|---|
| Model Number | EVP 304 |
| Screen Size | 15.6 Inches |
| Resolution | 1920 x 1080 Pixels (FHD 1080p) |
| Panel Type | IPS |
| Aspect Ratio | 16:9 |
| Screen Surface | Glossy |
| Connectivity | 2 x Full Function USB-C, 1 x Mini HDMI, 1 x 3.5mm Headphone Jack |
| Features | HDR, AMD FreeSync, Bluelight Eye Care (4 modes), Dual Built-in Speakers |
| Product Dimensions | 10.4 x 17.56 x 2 inches |
| Item Weight | 1.98 pounds |
Warranty and Support
For warranty information or technical support, please refer to the warranty card included with your product or contact GEOYEAO customer service directly. You may also visit the official GEOYEAO website for further assistance and updated support resources.
Note: This manual does not contain specific video embedding as no relevant video URLs with creator_type: "Seller" were provided in the input data.
Related documentsEVP 304

Ask a question about this manual
Ask about setup, troubleshooting, compatibility, parts, safety, or missing instructions. Manuals+ will review the question and use this page’s manual context to help answer it.