
iTOMA 525
iTOMA DAB/FM Radio Alarm Clock Model 525
Brand: iTOMA
Introduction
This manual provides comprehensive instructions for the iTOMA DAB/FM Radio Alarm Clock Model 525. It covers setup, operation, maintenance, and troubleshooting to ensure optimal use of your device. This alarm clock features dual alarms, DAB and FM radio with presets, Bluetooth 5.3 connectivity, and a dimmable LCD display.

This image displays the iTOMA DAB/FM Radio Alarm Clock Model 525 from the front, highlighting its digital display and icons representing key features such as volume, snooze, dual alarm, 40 presets, dimmer, and DAB/FM radio.
Setup
1. Package Contents
- 1 x iTOMA DAB/FM Radio Alarm Clock Model 525
- 1 x Power Adapter
- 1 x Quick Start Guide
2. Power Connection
- Connect the power adapter to the DC IN port on the back of the alarm clock.
- Plug the power adapter into a standard wall outlet.
- The display will light up, and the clock will automatically attempt to set the time via DAB signal.
3. Antenna Setup
For optimal DAB and FM radio reception, fully extend the wire antenna located at the back of the unit. Adjust its position for the best signal quality.
Operating Instructions
1. Setting the Time
- If the time is not set automatically, or if you wish to adjust it manually, refer to the Quick Start Guide for specific button presses.
- The device supports both 12-hour and 24-hour time display formats.
2. DAB and FM Radio
Enjoy a premium radio experience with both DAB and FM technologies. Upon first power-on, the device automatically tunes to all available radio stations.

The alarm clock is shown with 'DAB' and 'FM' radio signal icons, illustrating its capability to receive both digital and analog radio broadcasts. The display shows 'BBC RADIO'.
- Automatic Tuning: The radio will scan and store available stations automatically.
- Manual Tuning: Use the TUNE+/- buttons to manually search for stations.
- Presets: You can preset up to 40 favorite stations (20 DAB / 20 FM) for quick access.
- Sleep Timer: Set the radio to play for 5 to 120 minutes before automatically turning off.
3. Dual Alarms
The dual alarm function allows you to set two separate alarms for different times or days.

This image details the dual alarm functionality, showing two alarm icons (AL1 and AL2) with their respective set times (8:30 and 13:00) and options for wake-up modes (FM/DAB or Buzzer) and alarm schedules (All-7-Day, Weekday, Weekend).
- Setting Alarms: Alarms can be set for everyday, weekdays (Monday-Friday), or weekends (Saturday-Sunday).
- Alarm Sound: Choose to wake up to DAB radio, FM radio, or a buzzer sound.
- Alarm Volume: Adjust the alarm volume independently for each alarm.
- Alarm On/Off: Use the dedicated ON/OFF buttons to activate or deactivate each alarm.
4. Bluetooth Connectivity
Easily play music from your compatible mobile device using Bluetooth 5.3.

This image shows the iTOMA alarm clock from a top-down perspective, with a smartphone nearby playing music, indicating the device's Bluetooth connectivity for audio streaming.
- Press the MODE button to select Bluetooth mode.
- On your mobile device, enable Bluetooth and search for available devices.
- Select "iTOMA 525" (or similar) from the list to pair.
- Once paired, you can stream audio from your device to the alarm clock.
5. Dimmable LCD Display
The 4-level brightness control allows you to adjust the LCD screen's luminosity to your preference, ensuring clear time visibility while minimizing unnecessary light during sleep.
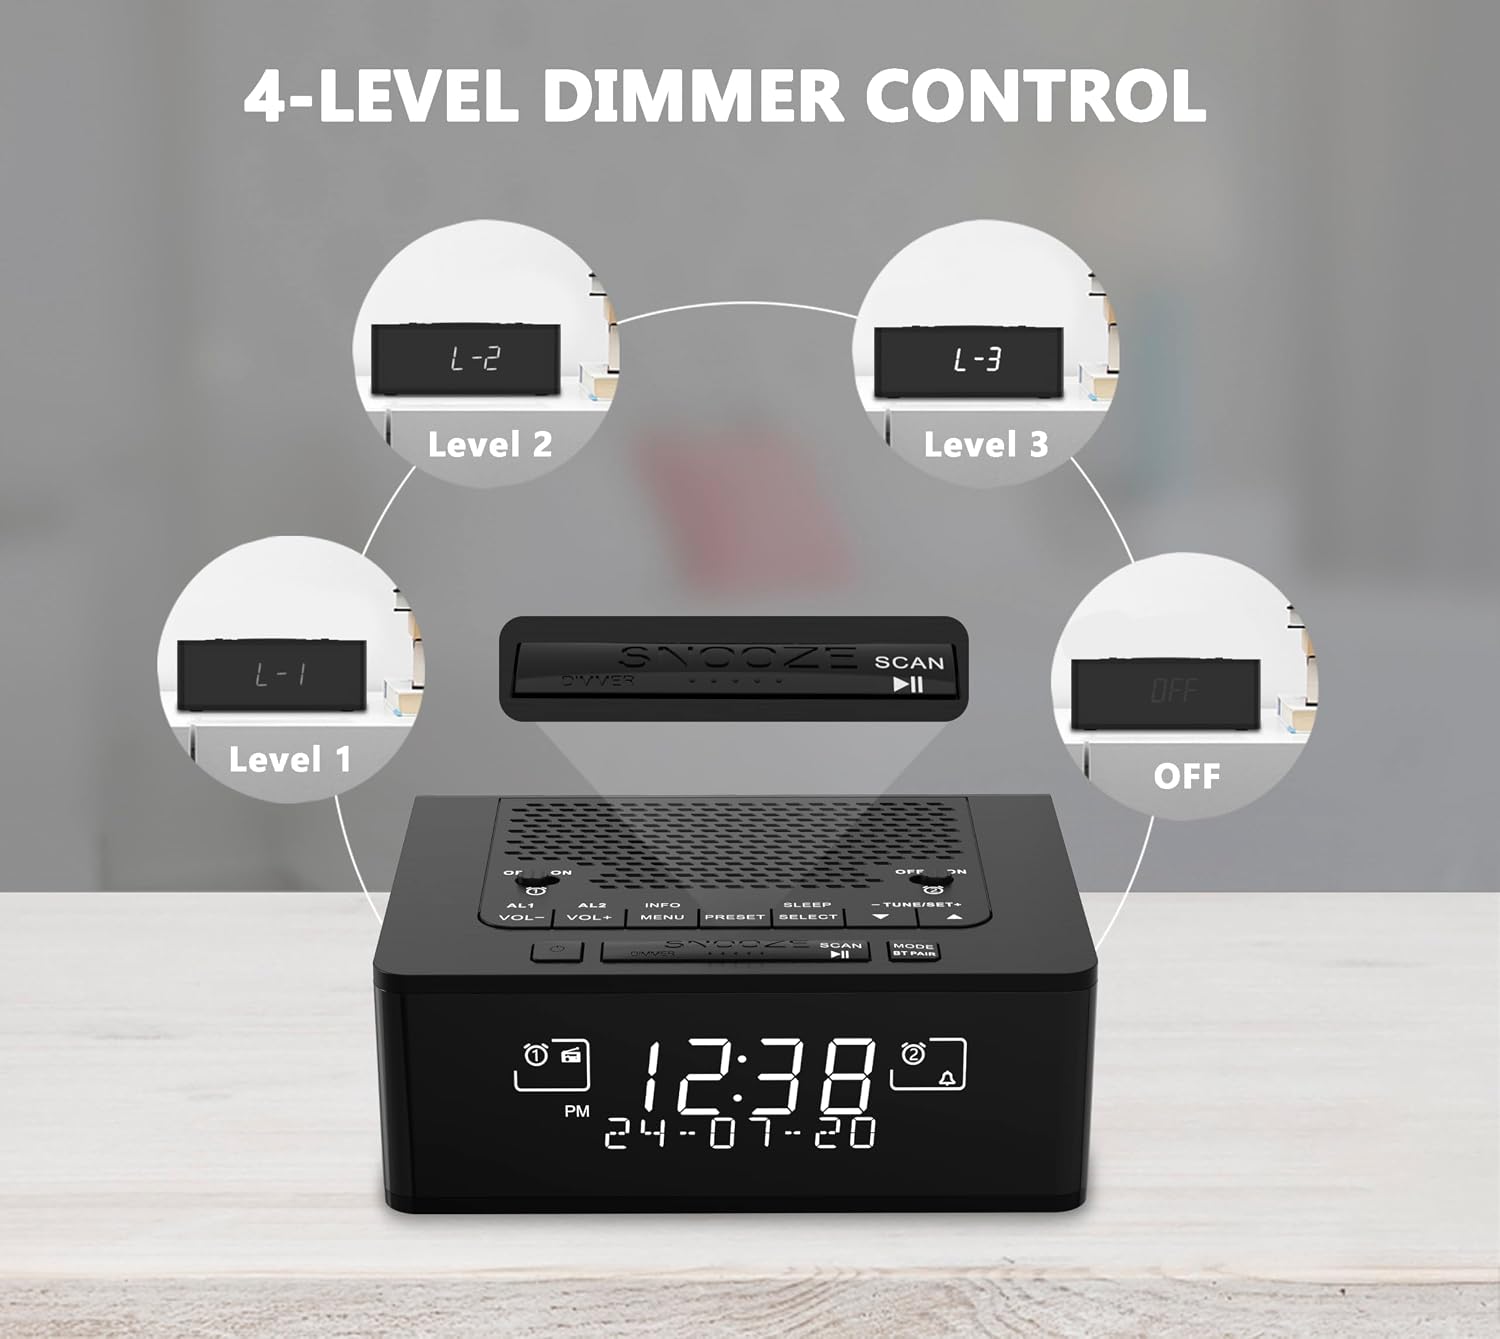
The image illustrates the four levels of display brightness (L-1, L-2, L-3, and OFF) available on the iTOMA alarm clock, allowing users to adjust the LCD screen's luminosity for comfort.
- Press the DIMMER button to cycle through the four brightness levels (L3, L2, L1, OFF).
- Select the level that best suits your environment.
6. Snooze Function
When an alarm sounds, press the large SNOOZE button to temporarily silence the alarm for a set period (e.g., 9 minutes). The alarm will sound again after the snooze period ends.
Maintenance
- Cleaning: Use a soft, dry cloth to clean the surface of the alarm clock. Do not use liquid cleaners or abrasive materials.
- Storage: If storing the device for an extended period, disconnect it from the power source and store it in a cool, dry place.
- Avoid Moisture: Keep the device away from water and high humidity.
Troubleshooting
| Problem | Possible Cause | Solution |
|---|---|---|
| No power/Display off | Power adapter not connected or faulty outlet. | Ensure the power adapter is securely connected and the outlet is functional. |
| Poor radio reception | Antenna not extended or poor signal area. | Fully extend the antenna and try repositioning the unit for better signal. |
| Alarm not sounding | Alarm not activated or volume too low. | Check if the alarm is enabled (AL1/AL2 ON) and ensure the alarm volume is set appropriately. |
| Bluetooth pairing failed | Device not in pairing mode or too far. | Ensure the alarm clock is in Bluetooth mode and your mobile device is within range. Restart both devices if necessary. |
Specifications
- Brand: iTOMA
- Model Number: 525-EU
- Display Type: Digital
- Special Features: Alarm, Radio (DAB/FM), Bluetooth 5.3, Dimmable LCD
- Product Dimensions: 11.5 cm (Length) x 5.8 cm (Height)
- Power Source: Electric Cable
- Material Type: Plastic
- GTIN: 711221617389
- UPC: 711221617389
Warranty Information
This product comes with a manufacturer's warranty. For detailed information regarding warranty coverage, terms, and conditions, please refer to the documentation included with your purchase or visit the official iTOMA website.
Support
If you encounter any issues not covered in this manual or require further assistance, please contact iTOMA customer support. Contact details can typically be found on the manufacturer's website or in the product packaging.
Related documents525


Ask a question about this manual
Ask about setup, troubleshooting, compatibility, parts, safety, or missing instructions. Manuals+ will review the question and use this page’s manual context to help answer it.