
JOYHO JH009001-300A
JOYHO 300A Continuous Duty 12V DC Solenoid Relay Instruction Manual
Model: JH009001-300A
Introduction
This manual provides detailed instructions for the installation, operation, and maintenance of your JOYHO 300A Continuous Duty 12V DC Solenoid Relay. Please read this manual thoroughly before installation and use to ensure proper function and safety.
The JOYHO 300A Solenoid Relay is designed for continuous duty applications in 12V DC systems, commonly used in golf carts, winches, and marine environments. It features nickel-plating for corrosion resistance and a robust design for reliable performance.
Safety Information
WARNING: Electrical components can cause serious injury or death if not handled properly. Always follow safety guidelines.
- Always disconnect the battery's negative terminal before working on any electrical system.
- Ensure all connections are secure and properly insulated to prevent short circuits.
- Wear appropriate personal protective equipment (PPE), such as safety glasses and gloves.
- Do not exceed the specified voltage (12V DC) or current ratings (300A transient, under 150A continuous).
- Consult a qualified technician if you are unsure about any installation steps.
Product Overview
The JOYHO 300A Solenoid Relay is a single-pole, single-throw (SPST) device designed to handle high current loads. Its nickel-plated exterior provides enhanced durability and resistance to environmental factors.
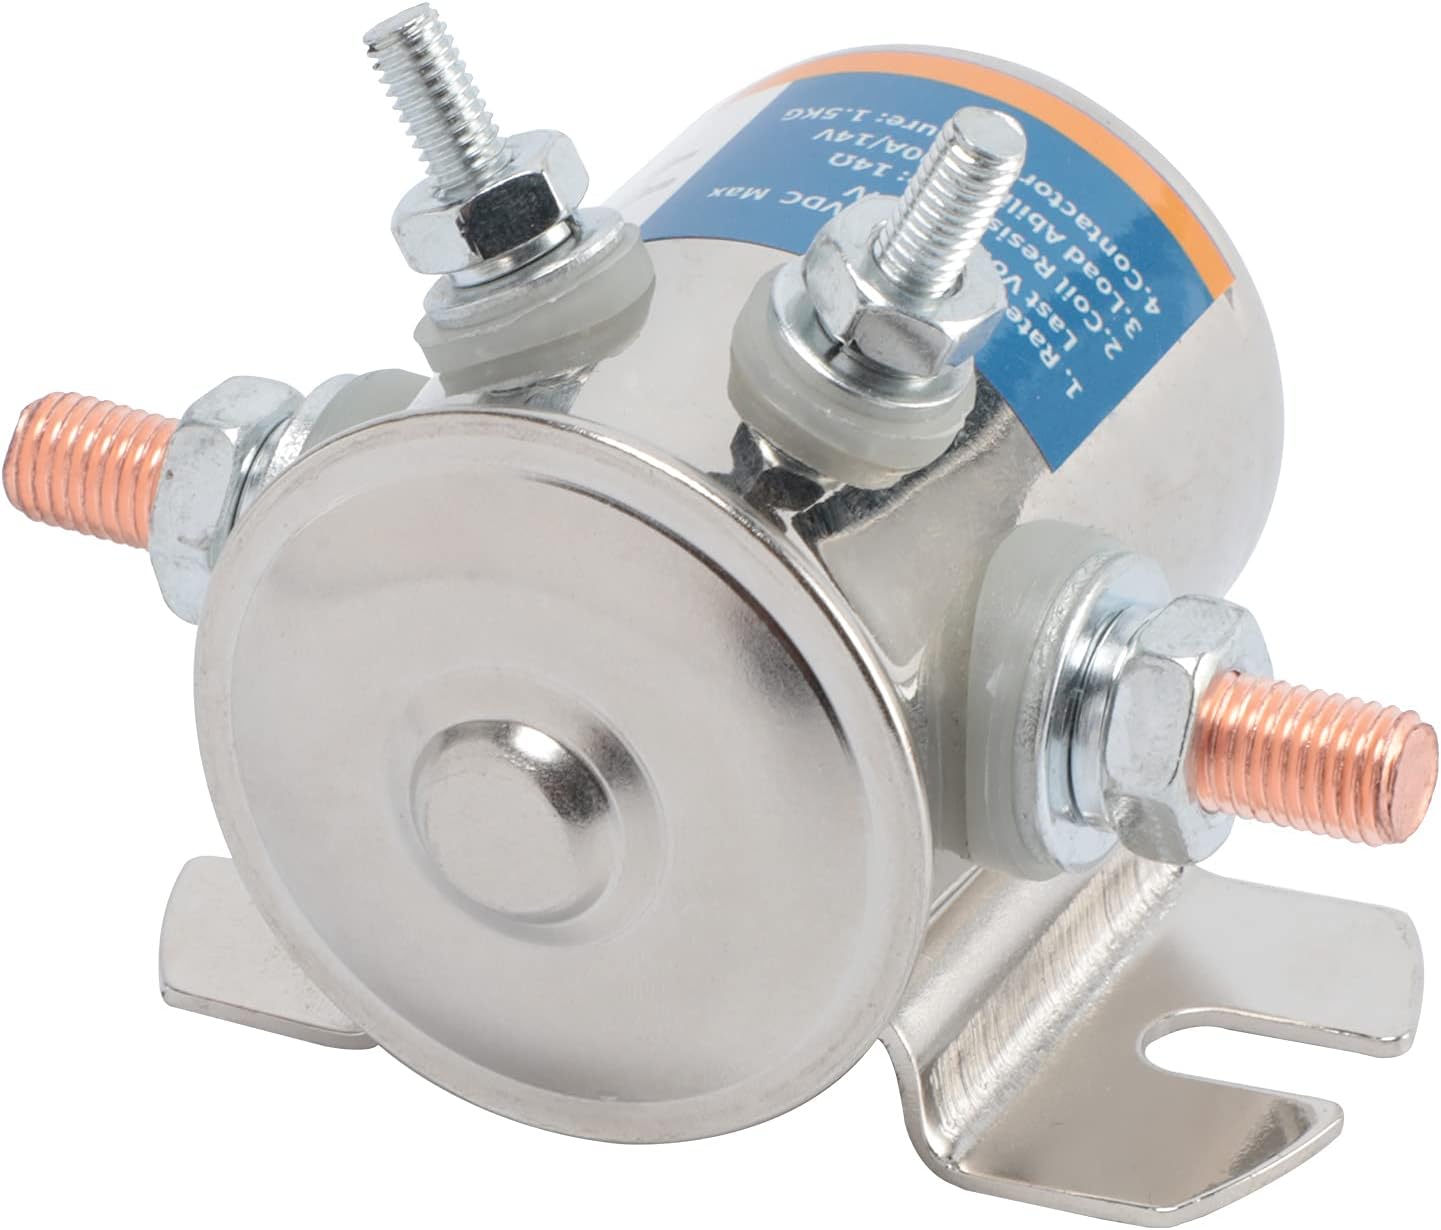
Image 1: Front view of the JOYHO 300A Continuous Duty Solenoid Relay, showing the main terminals and mounting bracket.
Key Features:
- Continuous Duty: Designed for applications requiring prolonged operation.
- High Current Capacity: Max transient current up to 300A, continuous working current under 150A.
- Nickel-Plating: Enhanced corrosion resistance and durability.
- 12V DC Operation: Compatible with standard 12-volt electrical systems.
- Wide Application: Suitable for golf carts, winches, marine, and other heavy-duty applications.

Image 2: The JOYHO 300A Solenoid Relay shown with included nuts and washers for installation.

Image 3: The JOYHO 300A Solenoid Relay depicted with a water splash effect, highlighting its water-resistant nickel-plating and potted coil interiors.
Specifications
| Feature | Detail |
|---|---|
| Model Number | JH009001-300A |
| Voltage | 12V DC |
| Coil Resistance | 14 Ohms |
| Wattage | 10.2 Watts |
| Max Transient Current | 300 Amps |
| Continuous Working Current | Under 150 Amps |
| Contact Type | Normally Open (SPST) |
| Contact Material | Nickel |
| Mounting Type | Pole Mount |
| Product Dimensions | 3.35 x 2.56 x 2.44 inches |
| Item Weight | 11.3 ounces |
| Replaces Part Numbers | 70-111224, 3635820, 1114208, 1114218, 1114223, 1114534, 1114547 |

Image 4: Detailed product dimensions of the JOYHO 300A Solenoid Relay, showing measurements in inches for various parts.
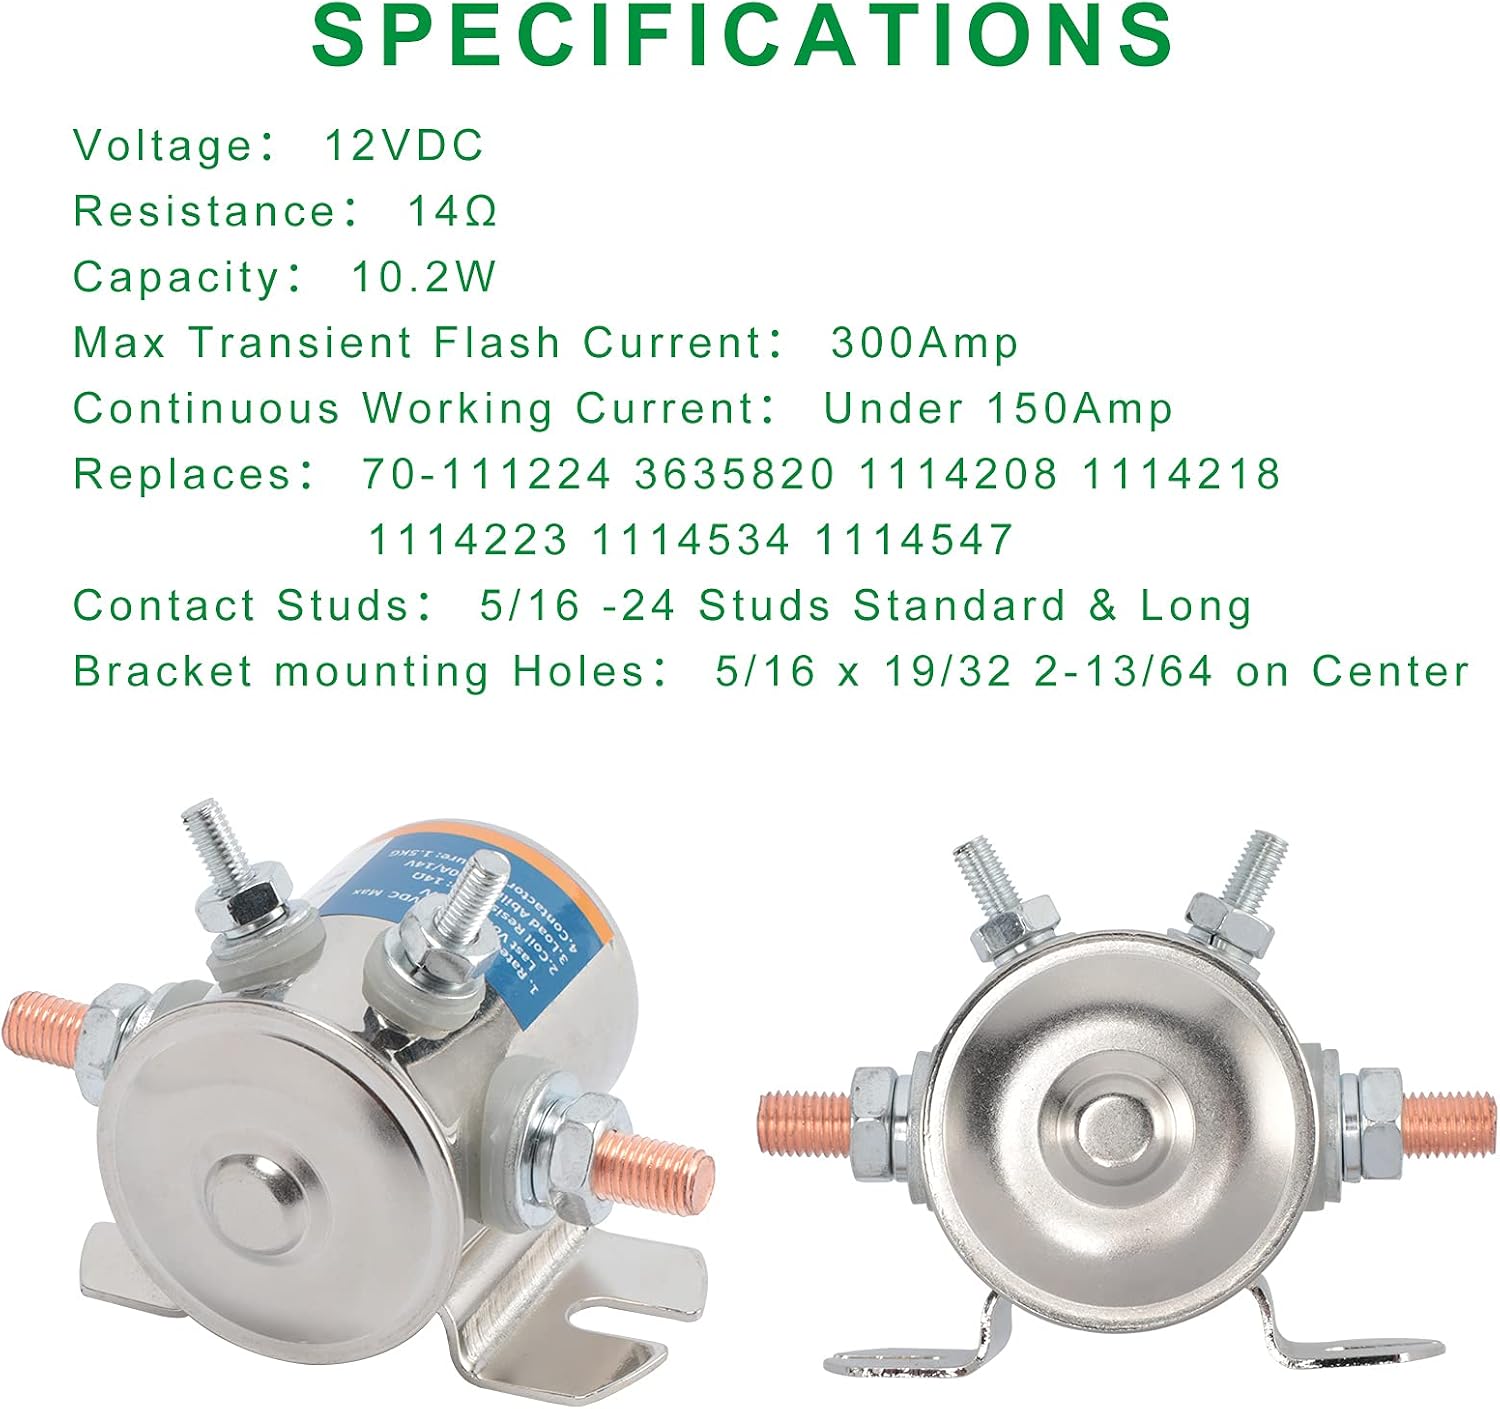
Image 5: A visual summary of key specifications and different views of the JOYHO 300A Solenoid Relay.
Setup and Installation
Proper installation is crucial for the safe and effective operation of the solenoid relay. Refer to your vehicle's or equipment's wiring diagram for specific connection points.
Tools and Materials Required:
- Wrenches or sockets for terminal nuts.
- Wire strippers and crimpers (if new wiring is needed).
- Appropriate gauge wiring for high current applications.
- Mounting hardware (screws/bolts) suitable for the mounting bracket.
- Multimeter for testing (optional, but recommended).
Installation Steps:
- Disconnect Power: Before starting, ensure the main power source (e.g., battery negative terminal) is disconnected to prevent electrical shock or short circuits.
- Choose Mounting Location: Select a dry, secure location for mounting the solenoid, away from excessive heat, moisture, and vibration. The solenoid features a pole mount bracket.
- Mount the Solenoid: Securely attach the solenoid to the chosen surface using appropriate mounting hardware through the bracket mounting holes (5/16 x 19/32 2-13/64 on center).
- Identify Terminals:
- Large Terminals (Copper Studs): These are the main power terminals for the high-current circuit. One connects to the power source (e.g., battery positive), and the other connects to the load (e.g., starter motor, winch motor).
- Small Terminals (Silver Studs): These are the coil activation terminals. One connects to a 12V DC switched power source (e.g., ignition switch, control button), and the other connects to ground.
- Wire Connections:
- Connect the main power cable from the battery positive to one large copper terminal.
- Connect the load cable (e.g., to the starter or winch) to the other large copper terminal.
- Connect the 12V DC activation wire from your control switch to one small silver terminal.
- Connect the other small silver terminal to a reliable ground point.
- Verify Wiring: Double-check all wiring connections against your system's diagram to ensure correct polarity and circuit integrity.
- Reconnect Power: Once all connections are secure and verified, reconnect the battery's negative terminal.
Operating Instructions
The JOYHO 300A Solenoid Relay operates as a remote switch for high-current circuits. When the coil is energized, it closes the internal contacts, allowing current to flow through the main power terminals.
- Activation: Apply 12V DC to the activation coil terminals (small silver studs). This is typically done via an ignition switch, push-button, or other control mechanism.
- Current Flow: Once the coil is energized, the solenoid's internal contacts will close, completing the high-current circuit between the two large copper terminals. Power will then flow to your connected load (e.g., starter motor, winch).
- Deactivation: Remove the 12V DC power from the activation coil terminals. The solenoid's internal contacts will open, interrupting the high-current circuit and stopping power to the load.
Ensure that the control switch used for activation is rated for 12V DC and can handle the coil's current draw (approximately 0.7A based on 12V / 14 Ohms).
Maintenance
The JOYHO 300A Solenoid Relay is designed for durability and requires minimal maintenance. Regular checks can help ensure long-term reliability.
- Inspect Connections: Periodically check all electrical connections for tightness and signs of corrosion. Loose or corroded connections can lead to overheating and poor performance.
- Clean Terminals: If corrosion is present, disconnect power and clean the terminals using a wire brush or fine-grit sandpaper. Apply dielectric grease to prevent future corrosion.
- Check Mounting: Ensure the solenoid remains securely mounted. Vibration can loosen mounting hardware over time.
- Environmental Protection: While nickel-plated and water-resistant, avoid prolonged exposure to extreme moisture or corrosive environments if possible.
Troubleshooting
If you experience issues with your JOYHO 300A Solenoid Relay, refer to the following troubleshooting guide:
| Problem | Possible Cause | Solution |
|---|---|---|
| Solenoid does not click or activate. | No power to activation coil; faulty control switch; poor ground connection for coil. |
|
| Solenoid clicks but load does not receive power. | Poor connection on large terminals; internal contact failure; load issue. |
|
| Solenoid remains engaged after deactivation. | Stuck contacts; faulty control switch; continuous power to coil. |
|
| Solenoid overheats. | Exceeding continuous current rating; poor connections; short circuit in load. |
|
Warranty and Support
JOYHO is committed to providing high-quality products and superior after-sales service. If you are not 100% satisfied with your purchase or encounter any issues, please contact JOYHO customer support for assistance, replacement, or refund.
For support, please refer to the contact information provided with your purchase or visit the official JOYHO store page on Amazon: JOYHO Store
Ask a question about this manual
Ask about setup, troubleshooting, compatibility, parts, safety, or missing instructions. Manuals+ will review the question and use this page’s manual context to help answer it.