
1. Introduction
The Waveshare Compute Module 4 IO Board is a companion board designed for the Raspberry Pi Compute Module 4 (CM4), which is sold separately. This board serves as both a development system for the CM4 and an embedded board for integration into final products. It facilitates rapid system creation using standard components like HATs and PCIe cards, supporting functionalities such as NVMe, SATA, networking, and USB. The design prioritizes ease of enclosure integration by positioning major user connectors along one side. This IO board is also an effective tool for prototyping systems that utilize the Compute Module 4.
2. Package Contents
Verify that all items listed below are included in your package:
- Waveshare Compute Module 4 IO Board
- RPi Zero V1.3 Camera Cable 15 CM

Image: The Waveshare Compute Module 4 IO Board and the included RPi Zero V1.3 Camera Cable.
3. Features
The Compute Module 4 IO Board offers a robust set of features for diverse applications:
- Designed as a companion board for Raspberry Pi Compute Module 4 (CM4).
- Functions as both a development system and an embedded board for end products.
- Enables quick system creation with off-the-shelf HATs and PCIe cards.
- Supports various peripherals including NVMe, SATA, networking, and USB.
- User connectors are strategically placed along one side for simplified enclosure design.
- Provides an excellent platform for prototyping CM4-based systems.

Image: An overview of the Waveshare Compute Module 4 IO Board, highlighting its compact design and various components.
4. Interfaces Introduction
The board is equipped with a variety of interfaces to connect different components and peripherals:
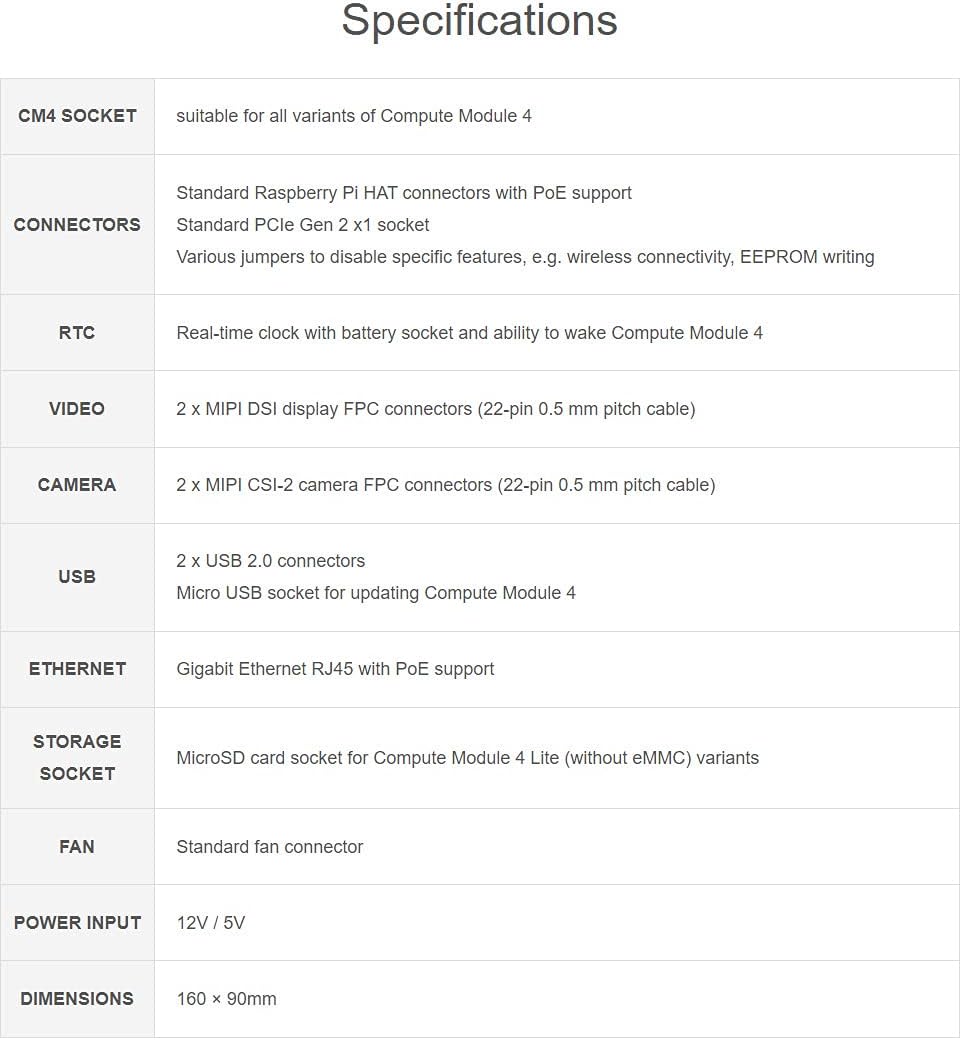
Image: A diagram illustrating the various interfaces on the Compute Module 4 IO Board, including HDMI, USB, Ethernet, DSI, CSI, and GPIO headers.
- CM4 Socket: For connecting the Raspberry Pi Compute Module 4.
- DSI (Display) Connector: For connecting a display.
- CSI (Camera) Connector: For connecting a camera module.
- PoE Header: Power over Ethernet support.
- GPIO Header: General Purpose Input/Output pins for custom projects.
- Real-time Clock (RTC): With battery socket for timekeeping.
- Fan Header: For connecting a cooling fan.
- PCIe Socket: For PCIe Gen 2 x1 expansion cards.
- DC Power Input: For external power supply.
- MicroSD Card Slot: For booting the operating system on CM4 Lite variants.
- USB 2.0 Ports: Multiple USB ports for peripherals.
- Gigabit Ethernet: RJ45 port for network connectivity.
- HDMI Ports: For video output.
5. Specifications
Detailed technical specifications of the Compute Module 4 IO Board:
| Feature | Description |
|---|---|
| CM4 Socket | Suitable for all variants of Compute Module 4 |
| Connectors | Standard Raspberry Pi HAT connectors with PoE support, Standard PCIe Gen 2 x1 socket, Various jumpers to disable specific features (e.g., wireless connectivity, EEPROM writing) |
| RTC | Real-time clock with battery socket and ability to wake Compute Module 4 |
| Video | 2 x MIPI DSI display FPC connectors (22-pin 0.5 mm pitch cable) |
| Camera | 2 x MIPI CSI-2 camera FPC connectors (22-pin 0.5 mm pitch cable) |
| USB | 2 x USB 2.0 connectors, Micro USB socket for updating Compute Module 4 |
| Ethernet | Gigabit Ethernet RJ45 with PoE support |
| Storage Socket | MicroSD card socket for Compute Module 4 Lite (without eMMC) variants |
| Fan | Standard fan connector |
| Power Input | 12V / 5V |
| Dimensions | 160 x 90mm |

Image: A detailed table outlining the technical specifications of the Compute Module 4 IO Board.
6. Setup Guide
Follow these steps to set up your Waveshare Compute Module 4 IO Board:
- Install the Compute Module 4: Carefully align your Raspberry Pi Compute Module 4 with the CM4 socket on the IO board. Gently press down until it is securely seated. Ensure correct orientation to prevent damage.

Image: Top-down view of the Compute Module 4 securely installed onto the IO Board.

Image: Angled view showing the Compute Module 4 connected to the IO Board, ready for peripheral connections.
- Connect Peripherals:
- Display: Connect your HDMI monitor(s) to the HDMI ports.
- USB Devices: Plug in your keyboard, mouse, or other USB peripherals into the USB 2.0 ports.
- Network: Connect an Ethernet cable to the Gigabit Ethernet port for wired network access.
- Camera/Display (Optional): If using, connect MIPI CSI-2 camera modules or MIPI DSI displays to their respective FPC connectors using the provided cables.
- MicroSD Card (for CM4 Lite): Insert a MicroSD card with a pre-installed operating system into the MicroSD card slot if you are using a CM4 Lite module (without eMMC).
- Power Connection: Connect a compatible 12V or 5V power supply to the DC power input jack. Ensure the power supply meets the board's requirements.

Image: The underside of the Waveshare Compute Module 4 IO Board, showing mounting points and additional circuitry.
7. Operating Instructions
Once the board is set up, you can begin operating your CM4 system:
- Power On: After connecting all necessary peripherals and the power supply, the system should power on automatically. Observe the status LEDs for activity.
- Operating System: If using a CM4 with eMMC, the OS is typically pre-installed. For CM4 Lite, ensure your MicroSD card contains a bootable Raspberry Pi OS image.
- Accessing the System: You can interact with your CM4 via a connected display, keyboard, and mouse, or remotely via SSH over the network.
- Software Development: Utilize the GPIO pins, CSI, DSI, and PCIe interfaces for custom hardware and software projects. Refer to Raspberry Pi documentation for specific programming and interface details.
8. Maintenance
To ensure the longevity and optimal performance of your Compute Module 4 IO Board:
- Keep the board in a clean, dry environment, away from dust and moisture.
- Avoid exposing the board to extreme temperatures or direct sunlight.
- Handle the board by its edges to prevent electrostatic discharge (ESD) damage.
- Regularly check for firmware updates for your Compute Module 4 and any connected peripherals.
- Ensure proper ventilation, especially if using high-load applications, by connecting a cooling fan to the dedicated header.
9. Troubleshooting
If you encounter issues, consider the following troubleshooting steps:
- No Power/Boot: Verify that the power supply is correctly connected and provides the correct voltage (12V or 5V). Check the CM4 module is seated correctly. For CM4 Lite, ensure the MicroSD card is properly inserted and contains a valid OS image.
- No Display Output: Confirm that HDMI cables are securely connected and the monitor is powered on and set to the correct input.
- USB Devices Not Working: Try different USB ports or devices. Ensure the CM4 is fully booted.
- Network Connectivity Issues: Check the Ethernet cable connection and your network configuration.
- Peripheral Detection: If a camera, display, or PCIe card is not detected, ensure it is correctly connected and any necessary software drivers or configurations are applied.
10. Related Videos
The following videos provide additional information and demonstrations related to Compute Module 4 carrier boards and accessories:
CM4 POE UPS Base by Waveshare
Video: This video from Waveshare demonstrates the CM4 PoE UPS Base, an expansion board designed for the Raspberry Pi Compute Module 4, highlighting its features and power management capabilities.
Rpi GPIO IO Breakout Board for Raspberry Pi 400 by whiteeeen
Video: A demonstration of a GPIO IO Breakout Board, showcasing its use with Raspberry Pi models, including the Raspberry Pi 400, for accessing GPIO pins.
CmRat Carrier Board by NG1 Consultants
Video: This video introduces the CmRat Carrier Board, an open-source hardware solution designed to support various Compute Modules, including the Raspberry Pi CM4, for building custom cloud servers and other applications.
Orange Pi CM4 Base Board 4 by Orange Pi
Video: An official video from Orange Pi showcasing their CM4 Base Board, detailing its features and compatibility with the Orange Pi Compute Module 4, including various ports and expansion options.
11. Warranty and Support
For warranty information, technical support, or further assistance, please refer to the official Waveshare website or contact their customer service. Keep your purchase receipt for warranty claims.
