
Introduction
This manual provides essential instructions for the safe and efficient operation, installation, and maintenance of your Cecotec GrandHeat 2050 Built-In Microwave. Please read this manual thoroughly before using the appliance and retain it for future reference.
Safety Instructions
Always follow basic safety precautions when using electrical appliances to reduce the risk of fire, electric shock, or injury. Keep children away from the appliance. Do not attempt to repair or modify the appliance yourself. Ensure proper ventilation. Do not operate the microwave if the door is damaged or if the seals are compromised. Use only microwave-safe cookware.
This appliance is equipped with a child safety lock for secure use.
Product Overview
The Cecotec GrandHeat 2050 is a 20-liter built-in digital microwave with 700W microwave power and a 900W grill function. It features a ceramic interior coating for easy cleaning and a user-friendly control panel.
Components:
- Microwave Unit
- Turntable (24.5 cm diameter)
- Grill Rack
- Control Panel (buttons and rotary wheel)
- Door with push-button opening

Figure 1: Front view of the Cecotec GrandHeat 2050 Built-In Microwave in white, displaying the digital clock and control panel on the right side.

Figure 2: A user interacting with the control panel of the microwave, which is seamlessly integrated into kitchen cabinetry.

Figure 3: Detailed view of the microwave's control panel, featuring a digital display, function buttons, and a central rotary dial for setting time and power.
Setup and Installation
This microwave is designed for built-in installation. Ensure the installation area meets the required dimensions for proper fit and ventilation.
Installation Steps:
- Unpack the microwave and all accessories.
- Verify that the appliance is not damaged.
- Place the turntable and turntable support inside the microwave cavity.
- Ensure the cabinet opening dimensions are appropriate for the microwave. Refer to the dimensions diagrams below.
- Slide the microwave into the prepared cabinet opening.
- Secure the microwave using the provided screws, if applicable, to prevent movement.
- Plug the microwave into a grounded electrical outlet.

Figure 4: Front installation dimensions of the microwave, indicating a width of 59.5 cm and a height of 34.2 cm for the outer frame.
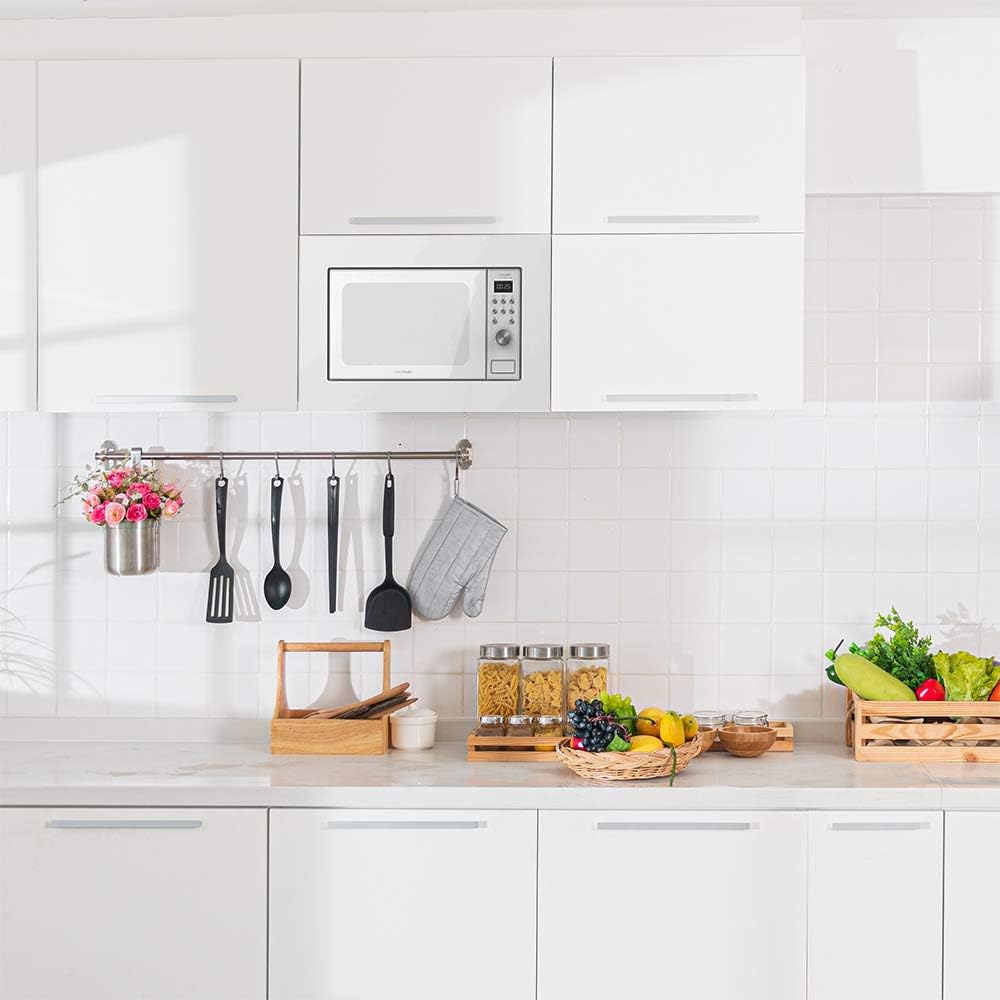
Figure 5: The microwave unit shown installed within a kitchen cabinet, demonstrating its built-in aesthetic.

Figure 6: Side and top view installation dimensions, showing the unit's depth of 39.1 cm and required cabinet cavity measurements.
Operating Instructions
Basic Operation:
- Setting Time: Use the rotary wheel on the control panel to set the desired cooking time.
- Power Levels: The microwave offers 6 power levels. Select the desired power level using the dedicated buttons on the control panel.
- Start/Pause: Press the start button to begin cooking. Press again to pause the operation.
- Stop/Cancel: Press the stop button to cancel an operation or clear current settings.
Special Functions:
- Grill Function: Combine microwave and 900W grill functions for browning and crisping food.
- Pre-configured Functions: Utilize 9 pre-set functions for common foods such as milk, coffee, rice, pasta, meat, potatoes, fish, chicken, skewers, and automatic heating. Select the desired function from the control panel.
- Defrost Mode: Defrost food by weight. Select the defrost function and input the weight of the food for optimal results.
- Quick Start: Initiates cooking at maximum power for a pre-set duration with a single button press.
- Automatic Start: Schedule a program to begin at a specific time.
- Timer: Set a timer for up to 95 minutes for various kitchen tasks.
- Child Safety Lock: Activate the child lock to prevent unintended operation, especially by children. Refer to the control panel instructions for activation and deactivation procedures.
Maintenance and Cleaning
Regular cleaning ensures optimal performance and extends the lifespan of your microwave.
Cleaning Steps:
- Unplug the microwave from the power outlet before cleaning.
- Clean the interior with a damp cloth and mild detergent. The ceramic coating facilitates easy cleaning of spills and food residue.
- Remove and wash the turntable and turntable support in warm, soapy water. Rinse thoroughly and dry before placing back.
- Wipe the exterior surfaces with a soft, damp cloth. Avoid excessive moisture.
- Clean the door seals and surrounding areas to ensure proper closure and hygiene.
- Do not use abrasive cleaners, steel wool, or harsh chemicals, as these can damage the surfaces.
Troubleshooting
If you encounter issues with your microwave, refer to the following common problems and solutions:
| Problem | Possible Cause | Solution |
|---|---|---|
| Microwave does not start | Not plugged in; Door not closed properly; Child lock activated; Household fuse blown. | Check power connection; Close door firmly until it latches; Deactivate child lock; Check household fuse/circuit breaker. |
| Food not heating evenly | Improper cookware; Food quantity too large; Turntable not rotating. | Use microwave-safe dishes; Reduce food quantity or stir during cooking; Ensure turntable is correctly placed and rotates freely. |
| Unusual noise during operation | Turntable obstruction; Loose components. | Check for obstructions under the turntable or on the roller ring; Contact customer support if noise persists. |
| Display not working | Power interruption; Appliance malfunction. | Unplug and re-plug the appliance after a few minutes; If issue persists, contact customer support. |
Specifications
- Brand: Cecotec
- Model: GrandHeat 2050
- Type: Built-In Digital Microwave with Grill
- Capacity: 20 Liters
- Microwave Power: 700 Watts (6 power levels)
- Grill Power: 900 Watts
- Interior Coating: Ceramic
- Turntable Diameter: 24.5 cm
- Unit Dimensions (W x H x D): Approximately 59.5 cm x 34.2 cm x 39.1 cm (excluding frame depth)
- Color: White
- Special Features: Defrost mode, Quick Start, Automatic Start, 9 Pre-configured functions, Child Safety Lock.
Warranty and Support
For warranty information, technical support, or service inquiries, please refer to the warranty card included with your product or visit the official Cecotec website. Keep your proof of purchase for warranty claims.
Official Cecotec Website: www.cecotec.com


