
OLIGHT RN 400 & RN 1500
OLIGHT RN 400 & RN 1500 Bike Light User Manual
Models: RN 400, RN 1500
1. Introduction
Welcome to the user manual for your OLIGHT RN 400 and RN 1500 Bike Lights. These high-performance bicycle lights are designed to provide superior illumination and safety for your cycling adventures. The RN 400 offers a compact design with efficient lighting, while the RN 1500 provides a higher output for more demanding conditions. Please read this manual thoroughly before use to ensure proper operation, maintenance, and to maximize the lifespan of your lights.
2. Safety Information
Always prioritize safety when using your bike lights. Adhere to the following guidelines:
- Do Not Stare Directly into Light: The powerful beam can cause temporary vision impairment.
- Secure Mounting: Ensure the light is securely mounted to your bicycle handlebar to prevent it from falling during rides.
- Water Resistance: Both lights are IPX7 waterproof, meaning they can withstand immersion up to 1 meter for 30 minutes. However, avoid prolonged submersion.
- Temperature: Do not operate the lights in extremely high temperatures.
- Children: Keep out of reach of children.
- Battery Care: Use only the specified charging methods. Do not disassemble the battery or expose it to fire.
3. Package Contents
Upon opening your OLIGHT RN 400 & RN 1500 Bike Light package, please verify that all the following items are included:
- OLIGHT RN 400 Bike Light
- OLIGHT RN 1500 Bike Light
- Handlebar Mount (for each light)
- USB-C Charging Cable
- User Manual
4. Product Overview
The OLIGHT RN 400 and RN 1500 are advanced bike lights designed for various cycling needs. Both models feature robust construction and user-friendly interfaces.

Image: OLIGHT RN 400 and RN 1500 bike lights side-by-side, showcasing their compact and sleek designs.
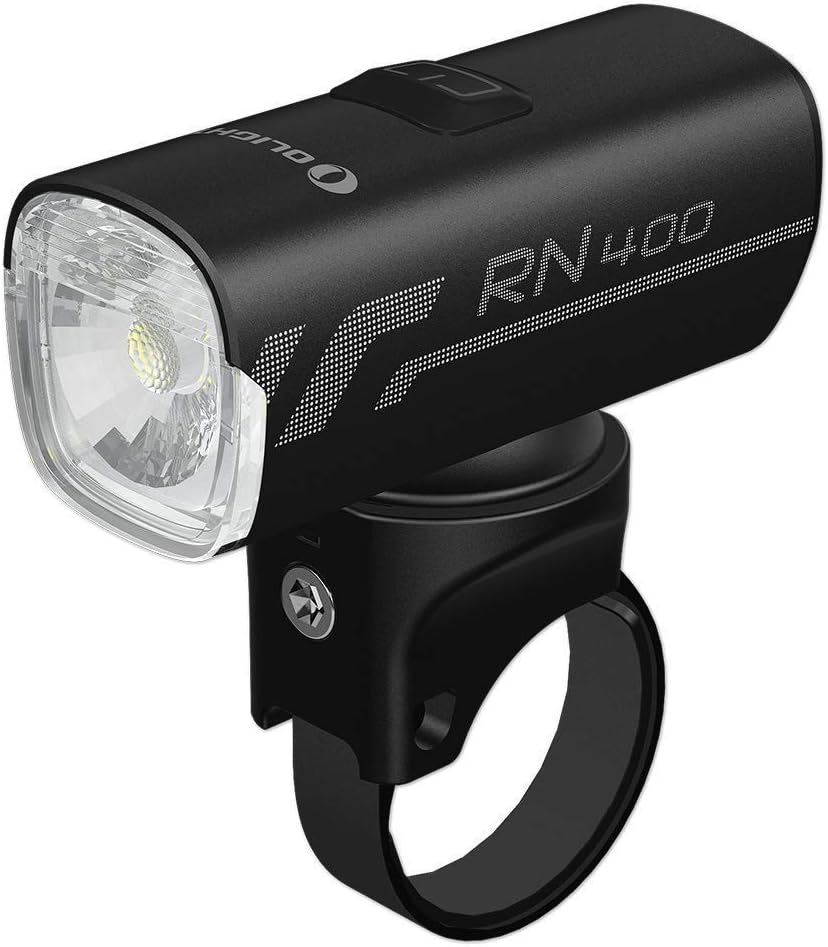
Image: Close-up view of the OLIGHT RN 400 bike light, highlighting its single button interface and lens.

Image: The OLIGHT RN 400 bike light mounted on bicycle handlebars, demonstrating its position and beam angle.

Image: Diagram illustrating the high-efficiency optical lens of the RN 400, designed for optimal light distribution.

Image: Comparison diagram showing the anti-glare beam pattern of the RN 400 versus a common bicycle light, emphasizing reduced glare for oncoming traffic.

Image: Close-up view of the OLIGHT RN 1500 bike light, showcasing its larger size and power indicator.

Image: Diagram illustrating the five lighting modes of the RN 1500, including Low, Mid, High, Flash 1, and Flash 2, with their respective lumen outputs and runtimes.

Image: Demonstration of the RN 1500's USB-C charging and discharging capabilities, showing it connected to a smartphone for power bank functionality.

Image: Comparison diagram showing the anti-glare beam pattern of the RN 1500 versus a common bicycle light, highlighting improved safety for other road users.
5. Installation and Mounting
Follow these steps to securely mount your OLIGHT RN 400 or RN 1500 bike light to your handlebars:
- Attach the Handlebar Mount: Place the rubber strap of the mount around your bicycle handlebar. Ensure the mount is positioned centrally and securely.
- Tighten the Strap: Pull the strap through the buckle and tighten it until the mount is firm and does not rotate easily.
- Slide in the Light: Align the light with the mounting slot on the handlebar mount. Slide the light forward until it clicks securely into place.
- Adjust Angle: Once mounted, adjust the angle of the light to ensure optimal illumination of the path ahead without blinding oncoming traffic.
- Verify Security: Before riding, gently tug on the light to confirm it is firmly attached and will not dislodge during your ride.
6. Operation
Power On/Off
- To Turn On: Press and hold the power button for approximately 1 second.
- To Turn Off: Press and hold the power button for approximately 1 second while the light is on.
Mode Switching
- Brightness Adjustment: With the light on, single-click the power button to cycle through brightness levels (e.g., Low > Mid > High).
- Mode Change: Double-click the power button to switch between constant lighting modes and flash modes.
Charging
Both the RN 400 and RN 1500 feature a USB-C fast charging port.
- Connect: Plug the provided USB-C cable into the light's charging port and connect the other end to a USB power source (e.g., wall adapter, computer, power bank).
- Charging Indicator: The power button will typically illuminate red while charging and turn green when fully charged.
- Discharging (RN 1500 only): The RN 1500 can also act as a power bank to charge other devices via its USB-C port. Connect your device to the light using a compatible USB-C cable.
Battery Indicator
The power button on both lights serves as a battery level indicator:
- Green: Battery level is sufficient.
- Red: Battery level is low, requiring a charge.
- Flashing Red: Battery is critically low.
7. Maintenance
Proper maintenance will ensure the longevity and optimal performance of your OLIGHT bike lights.
- Cleaning: Wipe the light body with a soft, damp cloth. Do not use abrasive cleaners or solvents. Keep the lens clean for maximum light output.
- Storage: Store the lights in a cool, dry place when not in use. Avoid extreme temperatures.
- Battery Care: For long-term storage, charge the battery to approximately 50-70% every 3-6 months to prevent deep discharge and extend battery life.
- Charging Port: Keep the USB-C port clean and free of debris. Ensure the rubber cover is properly sealed when not charging to maintain water resistance.
8. Troubleshooting
If you encounter issues with your OLIGHT bike lights, refer to the following table for common problems and solutions:
| Problem | Possible Cause | Solution |
|---|---|---|
| Light does not turn on. | Battery is depleted. | Charge the light using the USB-C cable. |
| Light turns off unexpectedly. | Low battery. | Recharge the light. |
| Light output is dim. | Low battery or dirty lens. | Charge the light. Clean the lens with a soft cloth. |
| Light is not securely mounted. | Mounting strap is loose. | Re-tighten the mounting strap on the handlebar. Ensure the light is clicked into place. |
| Charging not working. | Faulty cable or power source. | Try a different USB-C cable or power adapter. Ensure the charging port is clean. |
9. Technical Specifications
Detailed specifications for the OLIGHT RN 400 and RN 1500 bike lights:
| Feature | RN 400 | RN 1500 |
|---|---|---|
| Max Brightness | 400 lumens | 1500 lumens |
| Power Source | Battery Powered | Battery Powered |
| Water Resistance Level | IPX7 (Waterproof) | IPX7 (Waterproof) |
| Mounting Type | Handlebar Mount | Handlebar Mount |
| Charging Port | USB-C | USB-C (Fast Charging & Discharging) |
| Color | Black | Black |
| Modes | Multiple (Constant & Flash) | 5 Lighting Modes (Low, Mid, High, Flash 1, Flash 2) |
10. Warranty and Customer Support
OLIGHT is committed to providing high-quality products. Your OLIGHT RN 400 and RN 1500 Bike Lights come with a Lifetime Warranty, reflecting our confidence in the product's durability and performance. This warranty covers defects in materials and workmanship under normal use.
For warranty claims, technical assistance, or any other inquiries, please visit the official OLIGHT website or contact their customer support directly. Ensure you have your product model and purchase information ready when seeking support.
For more information, please visit: www.olightstore.com
Related documentsRN 400 & RN 1500


Ask a question about this manual
Ask about setup, troubleshooting, compatibility, parts, safety, or missing instructions. Manuals+ will review the question and use this page’s manual context to help answer it.