
1. Introduction
Thank you for choosing the JOYUSING 14MP HD Document Scanner. This manual provides detailed instructions for setting up, operating, and maintaining your scanner. Please read this manual thoroughly before use to ensure optimal performance and longevity of your device.
The JOYUSING L140 is a versatile document scanner designed for high-definition capture of documents and books up to A3 size. It features advanced OCR capabilities, multi-language support, and compatibility with both Windows and macOS systems, making it ideal for various business and educational applications.
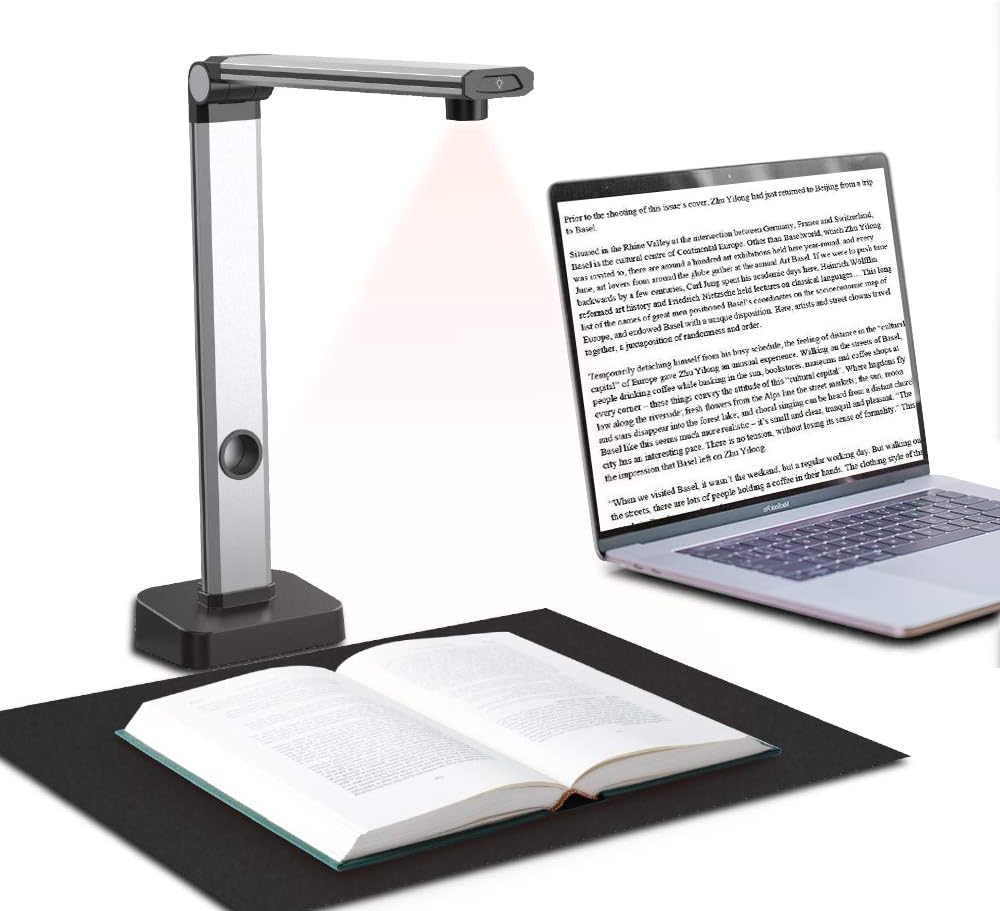
Figure 1.1: JOYUSING 14MP HD Document Scanner in operation, scanning an open book onto a laptop screen.
2. Product Overview
2.1 Key Features
- 14MP HD Camera: Captures high-resolution images for clear and detailed scans.
- A3 Capture Size: Capable of scanning documents and books up to A3 dimensions.
- Ultra-Fast Scanning: Scans documents in less than 3 seconds per page.
- Smart Multi-Language OCR: Converts scanned images into editable text formats (PDF, Word, Txt, Excel).
- Integrated LED Lighting: Features 3-level LED lights for optimal scanning in various lighting conditions.
- Portable Design: Compact and easy to transport for on-the-go scanning needs.
- Advanced Image Processing: Includes features like Smart Paging, Auto Flattening, Background Purifying, Professional Trimming, and Fingerprint Removal.

Figure 2.1: The portable design of the JOYUSING L140 scanner, illustrating how it folds for easy transport.

Figure 2.2: Detail of the 14MP camera and the 3-level LED lighting system, ensuring clear scans even in dim environments.

Figure 2.3: Illustration of the scanner's A3 capture size capability, showing the dimensions of the scanning area.
3. Setup Guide
3.1 Unpacking and Assembly
- Carefully remove all components from the packaging.
- Place the scanner base on a stable, flat surface.
- Unfold the scanner arm to its upright position.
- Connect the USB cable from the scanner to your computer.
- Place the black positioning pad directly under the scanner camera, ensuring it is flat and centered. This pad is crucial for accurate scanning, especially for books.
3.2 Software Installation
To utilize the full functionality of your JOYUSING scanner, software installation is required. The scanner is compatible with Windows XP/7/8/10/11 and macOS 10/11/12/13/14.
- Visit the official JOYUSING website by searching "Joyusing" on Google.
- Navigate to the "SUPPORT" section and click on "Download Center".
- Select your device model (L140).
- Choose the correct software version for your computer's operating system (Windows or Mac) and download it.
- Follow the on-screen instructions to complete the software installation.

Figure 3.1: Screenshot illustrating the software download process from the JOYUSING website.
Video 3.1: Official "L140 Book Scanner Software Operation Guide" from JOYUSING, demonstrating the software installation and basic operation steps.
4. Scanning Operations
The JOYUSING scanner offers various scanning modes to suit different needs. Ensure the black positioning pad is in place before scanning books.
4.1 Manual Scan
For precise control over each scan, use the manual scan mode.
- Open the JOYUSING Scanner software.
- Select "Book Scanner" mode.
- Choose your desired color mode (Color, B&W, Gray).
- Place the document or book page on the black pad under the camera.
- Click the "Scan" button in the software interface or use the external hand button/foot pedal to capture the image.
4.2 Auto Scan
The auto scan mode automatically detects when a page is turned and initiates a scan, ideal for large volumes of documents.
- In the software, select "Auto Scan" from the scan options.
- Adjust the sensitivity setting if needed.
- Place your document or book on the pad and turn pages. The scanner will automatically capture images.
4.3 Timing Scan
Set a specific time interval between scans for consistent capture without manual intervention.
- Select "Timing Scan" from the scan options.
- Set the desired time gap between scans.
- The scanner will capture images at the set intervals.
4.4 Book Scan with Finger Cots
For scanning thick books, use the provided finger cots to hold down pages without interfering with the scan. The software's intelligent technology will remove your fingers from the final image.
- Wear the yellow-striped finger cots on your thumbs. Ensure the black stripes are facing upwards.
- Place the open book on the black pad, aligning the spine with the reference line in the software preview.
- Gently press down the pages with your cots to flatten them.
- Initiate the scan using the hand button or foot pedal. The software will automatically remove your fingers.
Video 4.1: A detailed guide on "how to use the software of the book scanner," including various scanning modes and features.
Video 4.2: Short overview of the "14MP HD Book & Document Scanner" highlighting its key features and scanning capabilities.
5. File Processing and Output
After scanning, you can process and export your images using the software's "File Processing" tab.
5.1 Image Adjustment
- Cropping: Adjust the borders of your scanned images to remove unwanted areas.
- Rotation: Rotate images 90, 180, or 270 degrees, or flip them horizontally/vertically.
- Color Balance: Fine-tune exposure, hue, saturation, contrast, and sharpness for optimal image quality.

Figure 5.1: Overview of the intelligent technology features available in the software, including auto-flattening and fingerprint removal.
5.2 OCR Functionality
The Optical Character Recognition (OCR) feature allows you to convert scanned images into editable text documents.
- Select the images you wish to convert.
- Choose the desired output format: Word (DOCX), Excel (XLSX), PDF (OCR), or TXT (OCR).
- Select the language of the text in your document for accurate OCR conversion.
- Click "Start" to begin the conversion process and save the output file to your desired location.

Figure 5.2: Illustration of how scanned documents are converted into various editable formats, such as Word, Excel, and searchable PDF.
6. Maintenance
To ensure the longevity and optimal performance of your JOYUSING scanner, regular maintenance is recommended:
- Keep the scanner and black pad clean from dust and debris using a soft, dry cloth.
- Avoid using abrasive cleaners or solvents on any part of the scanner.
- Store the scanner in a cool, dry place when not in use.
7. Troubleshooting
Common Issues and Solutions:
| Issue | Possible Cause | Solution |
|---|---|---|
| Scanner not recognized by computer. | USB connection issue, driver not installed. | Ensure USB cable is securely connected. Reinstall scanner drivers from the JOYUSING website. |
| Scanned images are blurry or unclear. | Insufficient lighting, dirty camera lens, incorrect focus. | Adjust LED lights. Clean camera lens. Ensure document is flat on the pad. |
| OCR conversion errors. | Incorrect language selected, poor image quality. | Verify selected OCR language matches document. Improve scan quality (lighting, focus). |
| Software crashes or freezes. | Outdated software, system incompatibility. | Update software to the latest version. Ensure your OS meets system requirements. |
If you encounter issues not listed here or require further assistance, please contact JOYUSING customer support via Amazon Message.
8. Specifications
- Model: L140
- Camera Resolution: 14MP (4320*3240)
- Max Scan Size: A3
- Scanning Speed: Less than 3 seconds per page
- Connectivity: USB
- Operating System Compatibility: Windows XP/7/8/10/11, macOS 10/11/12/13/14
- Product Dimensions: 2.38"D x 11.69"W x 12.17"H
- Item Weight: 0.97 Kilograms (2.13 pounds)
- Manufacturer: Joyusing Tech
9. Warranty and Support
For warranty information and technical support, please refer to the documentation included with your product or contact JOYUSING directly through their official website or Amazon messaging service. JOYUSING is committed to providing assistance for any product-related inquiries.

