1. Introduction
Thank you for choosing the Rebel RB-0005 Weather Station. This device provides accurate indoor and outdoor temperature readings, indoor humidity, and features a clock, calendar, and alarm function. This manual will guide you through the setup, operation, and maintenance of your new weather station to ensure optimal performance.
2. Safety Information
- Do not expose the device to extreme temperatures, direct sunlight, or high humidity.
- Avoid dropping or subjecting the device to strong impacts.
- Keep the device away from water and other liquids.
- Dispose of used batteries responsibly according to local regulations.
- Do not attempt to disassemble or repair the device yourself. Contact qualified personnel for service.
- The outdoor sensor cable should be handled with care to prevent damage.
3. Package Contents
Please check the package contents upon unpacking:
- 1x Rebel RB-0005 Weather Station Main Unit
- 1x Wired Outdoor Temperature Sensor
- 1x User Manual (this document)
Note: 1x AAA battery is required for operation and is not included in the package.
4. Product Features
- Indoor and Outdoor Temperature Measurement
- Indoor Humidity Measurement
- Calendar Function
- Alarm Function
- 12/24 Hour Clock Display
- Memory Function for Highest and Lowest Temperature Readings
- Clear and Easy-to-Read LCD Display
- Battery Operated for Portability
5. Product Overview
Familiarize yourself with the main components of your Rebel RB-0005 Weather Station.
5.1 Front Display
The large LCD screen displays various information simultaneously:
- IN Temperature: Current indoor temperature.
- OUT Temperature: Current outdoor temperature from the wired sensor.
- Time: Current time in 12-hour (AM/PM) or 24-hour format.
- RH%: Current indoor relative humidity.
- Calendar: Date display (day, month).
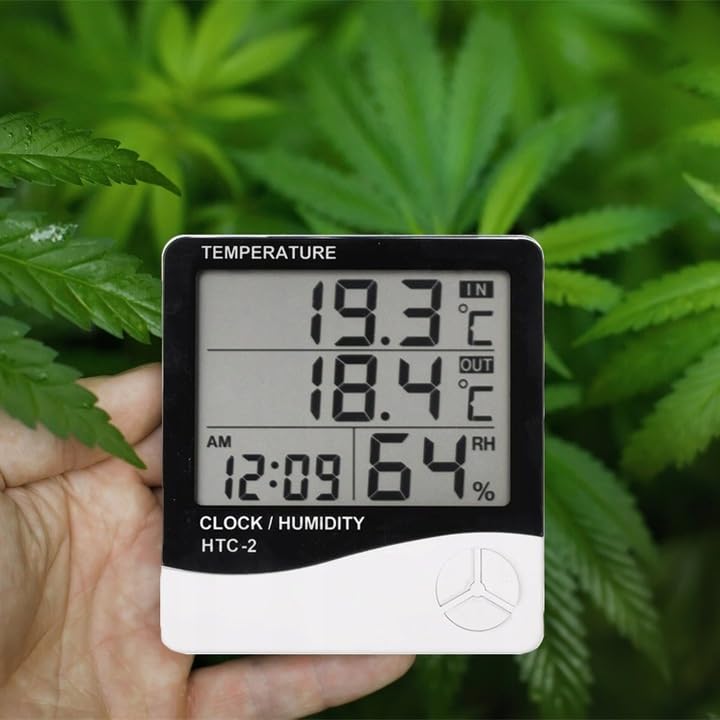
Figure 1: Front display of the weather station showing temperature, time, and humidity readings.

Figure 2: Detailed view of the display and control buttons.
5.2 Control Buttons
The device features three control buttons located on the front, below the display:
- MODE: Used to switch between display modes (e.g., time, alarm, calendar) and to enter/exit setting modes.
- ADJ (Adjust): Used to adjust values (e.g., hours, minutes, date) when in setting mode.
- MEMORY: Used to view the highest and lowest recorded temperature and humidity values.
5.3 Rear View and Sensor
The back of the unit houses the battery compartment, a foldable stand, and the input for the wired outdoor temperature sensor.

Figure 3: Rear view of the weather station with battery compartment and wired sensor.
6. Setup
6.1 Battery Installation
- Open the battery compartment cover on the back of the main unit.
- Insert one (1) AAA battery, ensuring the correct polarity (+/-).
- Close the battery compartment cover securely. The device should power on automatically.
6.2 Outdoor Sensor Placement
- Connect the wired outdoor temperature sensor to the designated port on the back of the main unit.
- Carefully route the sensor cable to the desired outdoor location. Ensure the cable is not pinched or damaged.
- Place the sensor in a shaded area, protected from direct sunlight and precipitation, to ensure accurate readings. Avoid placing it near heat sources or vents.

Figure 4: Example placement of the weather station for indoor temperature monitoring.
7. Operating Instructions
7.1 Setting Time and Date
- Press and hold the MODE button for approximately 3 seconds until the time display starts flashing.
- Use the ADJ button to adjust the flashing value (e.g., hours, minutes).
- Press the MODE button again to confirm the setting and move to the next value (e.g., minutes, 12/24 hour format, year, month, day).
- Repeat step 2 and 3 until all time and date settings are configured.
- Press MODE one last time to exit the setting mode.
7.2 Setting the Alarm
- From the normal time display, press the MODE button once to enter alarm display mode (usually indicated by an alarm icon).
- Press and hold the MODE button for approximately 3 seconds until the alarm time starts flashing.
- Use the ADJ button to set the desired alarm hour.
- Press the MODE button to confirm the hour and move to set the minutes.
- Use the ADJ button to set the desired alarm minute.
- Press the MODE button to confirm and exit alarm setting mode.
- To activate/deactivate the alarm, press the ADJ button once while in alarm display mode. An alarm icon will appear/disappear on the display.
7.3 Viewing Min/Max Temperature and Humidity
- From the normal display, press the MEMORY button once to show the maximum recorded indoor/outdoor temperature and indoor humidity.
- Press the MEMORY button again to show the minimum recorded indoor/outdoor temperature and indoor humidity.
- Press the MEMORY button a third time to return to the current readings.
- To clear the min/max memory, press and hold the MEMORY button for approximately 3 seconds while viewing the min/max values.
7.4 Switching Temperature Units (°C/°F)
While in normal display mode, press the ADJ button once to toggle between Celsius (°C) and Fahrenheit (°F) temperature units.
8. Maintenance
- Cleaning: Wipe the device with a soft, dry cloth. Do not use abrasive cleaners or solvents.
- Battery Replacement: Replace the AAA battery when the display becomes dim or the device stops functioning. Follow the battery installation steps in Section 6.1.
- Sensor Care: Ensure the outdoor sensor cable is not damaged. Periodically check the sensor's placement to ensure it remains protected from elements for accurate readings.
9. Troubleshooting
| Problem | Possible Cause | Solution |
|---|---|---|
| No display or dim display. | Low or depleted battery. Incorrect battery polarity. | Replace the AAA battery with a new one, ensuring correct polarity. |
| Outdoor temperature reading is incorrect or "---". | Outdoor sensor cable is disconnected or damaged. Sensor is exposed to direct sunlight or heat source. | Check if the sensor cable is securely connected. Ensure the sensor is placed in a shaded, protected area. Inspect the cable for damage. |
| Time/Date is incorrect. | Time/Date not set correctly after battery installation. | Refer to Section 7.1 "Setting Time and Date" to adjust. |
| Alarm does not sound. | Alarm is not activated. Alarm volume is too low (if adjustable, though this model likely isn't). | Ensure the alarm icon is displayed, indicating it is active (refer to Section 7.2). |
10. Specifications
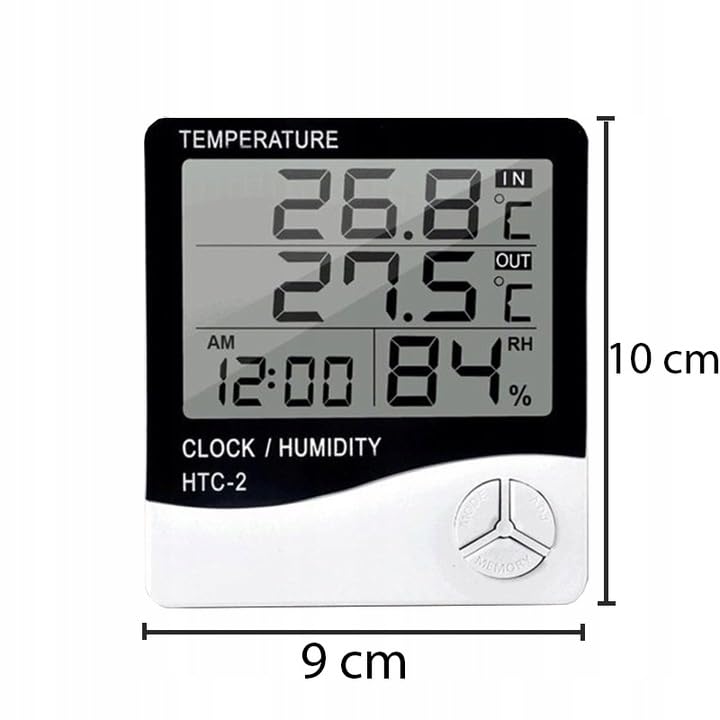
Figure 5: Approximate dimensions of the weather station.
- Model: RB-0005
- Brand: Rebel
- Power Source: 1x AAA Battery (not included)
- Material: Plastic
- Special Features: Alarm, Calendar, Min/Max Memory
- Package Dimensions: 18 x 12 x 10 cm
- Product Dimensions (approx.): 9 cm (Width) x 10 cm (Height)
- First Available Date: November 23, 2020
11. Warranty and Support
This product is covered by a standard manufacturer's warranty. For specific warranty terms and conditions, please refer to the documentation provided at the time of purchase or contact your retailer.
For technical support or inquiries, please contact the Rebel customer service department through their official website or the contact information provided by your retailer.


