
1. Introduction
This manual provides detailed instructions for the assembly, operation, and maintenance of the TAMIYA JR Hi-Mount Tube Stabilizer Black, Model 15528. This product is designed to enhance the stability of your Mini 4WD vehicle, particularly during high-speed cornering and track transitions.
Please read these instructions carefully before beginning assembly to ensure correct installation and optimal performance.
2. Setup and Assembly
2.1. Components Included
Before starting, ensure all components are present:
- Stabilizer Tubes (Black)
- Brass Bushings
- Mounting Screws
- Washers
- Aluminum Spacers
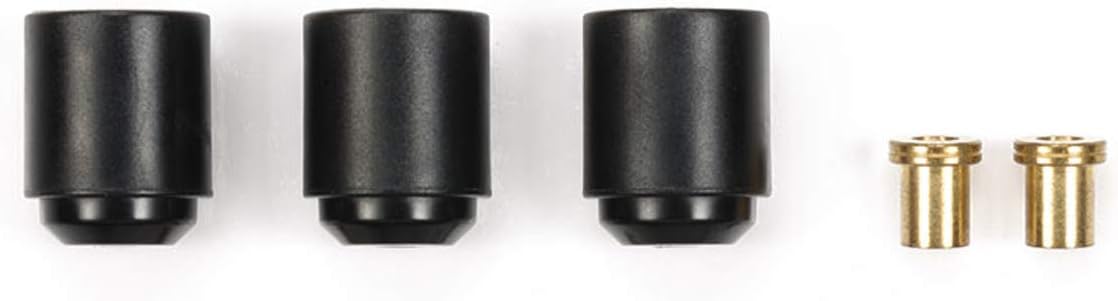
Image: Stabilizer tubes and brass bushings.

Image: Mounting screws, washers, and aluminum spacers.
2.2. Assembly Steps
- Identify the mounting points on your Mini 4WD chassis. The Hi-Mount Tube Stabilizer is typically installed on the front or rear bumper unit.
- Insert the brass bushings into the stabilizer tubes.
- Place a washer onto a mounting screw, then slide an aluminum spacer onto the screw.
- Pass the screw assembly through the designated hole on your chassis.
- Attach the stabilizer tube (with bushing) to the screw, ensuring it is positioned correctly.
- Secure the assembly with another washer and a nut (if provided with your chassis, not included with this stabilizer kit). Tighten gently to allow the stabilizer tube to rotate freely but without excessive play.
- Repeat for all stabilizer tubes. Ensure all parts are securely fastened but do not overtighten, which could damage the plastic chassis or restrict stabilizer movement.

Image: Front view of the stabilizer installed on a Mini 4WD chassis.
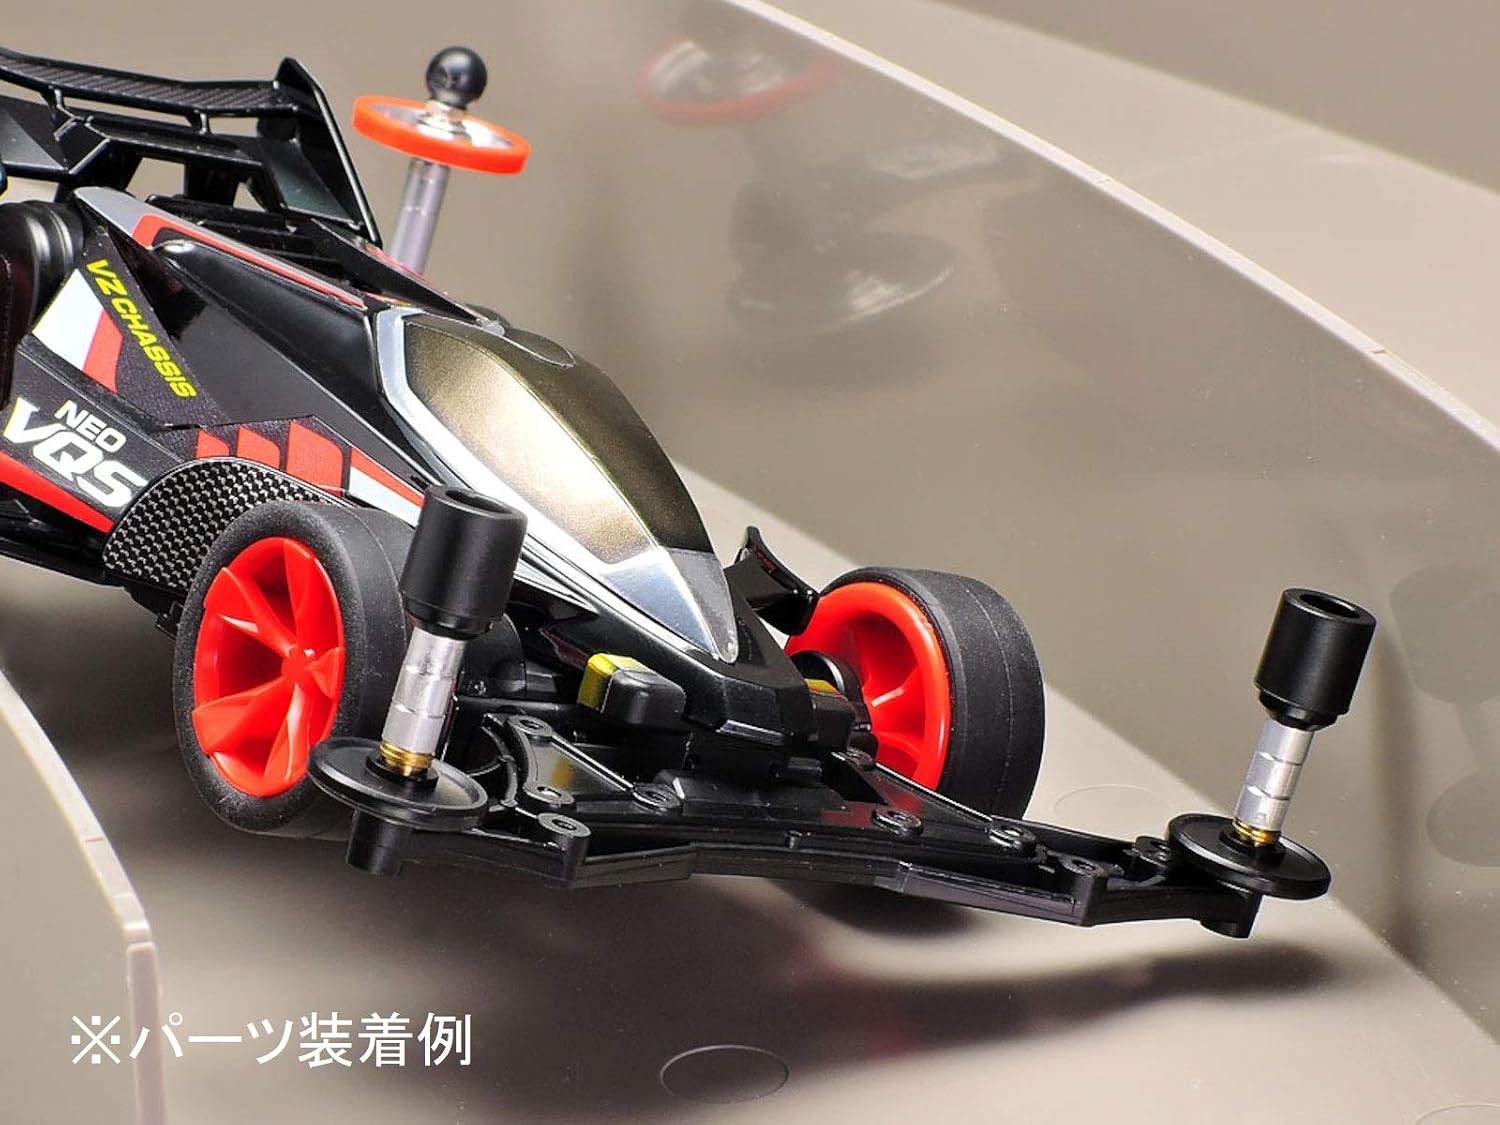
Image: Side view of the stabilizer installed on a Mini 4WD chassis, demonstrating its function on a track.
3. Operation and Function
The JR Hi-Mount Tube Stabilizer is designed to prevent your Mini 4WD vehicle from climbing track walls or becoming unstable during high-speed maneuvers. When the vehicle leans or shifts sideways, the stabilizer tubes make contact with the track's side walls, guiding the car and maintaining its trajectory.
Proper installation ensures that the stabilizer tubes are positioned to effectively contact the track walls without hindering the vehicle's forward motion or cornering ability. The free rotation of the tubes minimizes friction, allowing for smooth contact and reduced speed loss.
4. Maintenance
Regular maintenance ensures the longevity and optimal performance of your stabilizer.
- Cleaning: After use, wipe the stabilizer tubes and other components with a soft, dry cloth to remove dust and debris. For stubborn dirt, a slightly damp cloth can be used, followed by thorough drying.
- Inspection: Periodically check all screws and connections to ensure they are secure. Verify that the stabilizer tubes rotate freely on their axles.
- Wear and Tear: Inspect the stabilizer tubes for signs of excessive wear or damage from repeated contact with track walls. Replace any worn or damaged parts to maintain performance.
- Storage: Store the stabilizer and your Mini 4WD vehicle in a clean, dry environment away from direct sunlight and extreme temperatures.
5. Troubleshooting
| Problem | Possible Cause | Solution |
|---|---|---|
| Stabilizer tubes do not rotate freely. | Overtightened screws, debris in bushings, bent axle. | Loosen screws slightly. Clean bushings. Inspect and replace bent parts. |
| Vehicle still climbs track walls. | Stabilizers not positioned correctly, insufficient height, or track conditions. | Adjust stabilizer height and position. Ensure they make proper contact with track walls. Consider additional stabilization if needed. |
| Stabilizer tubes fall off during use. | Loose screws, missing washers/nuts. | Tighten all fasteners. Ensure all components are present and correctly assembled. |
6. Specifications
| Feature | Detail |
|---|---|
| Brand | TAMIYA |
| Model Number | 15528 |
| Color | Black |
| Item Dimensions (L x W x H) | 0.31 x 0.31 x 0.39 inches (approximate, for individual tube) |
| Item Weight | 9.07 g (total package weight) |
| Manufacturer | Tamiya |
7. Warranty and Support
Specific warranty information for the TAMIYA JR Hi-Mount Tube Stabilizer Black (Model 15528) is not provided in this manual. For details regarding warranty coverage, please refer to the official Tamiya website or contact your authorized Tamiya retailer.
For technical support or inquiries, please contact Tamiya customer service directly through their official channels.