1. Introduction
Thank you for choosing the REDPINGUO Digital Indoor Thermometer Hygrometer. This device is designed to provide accurate and real-time measurements of indoor temperature and humidity, helping you maintain a comfortable and healthy living environment. Please read this manual carefully before use to ensure proper operation and longevity of your device.
2. Product Overview
The REDPINGUO Digital Indoor Thermometer Hygrometer features a large LCD display for easy readability, showing time, temperature, and humidity. It is designed for various indoor applications, from bedrooms to greenhouses.

Figure 2.1: Two REDPINGUO Digital Thermometer Hygrometers (Black and White models).

Figure 2.2: Device displaying temperature and humidity, highlighting its role in monitoring environmental conditions for health.
Key Features:
- Large, clear LCD display (8.1 x 7.1 cm) for easy reading.
- Displays temperature in Celsius only.
- High accuracy: 2-5% RH and 1°C.
- Fast refresh rate: Data updates every 20 seconds.
- Integrated clock with AM/PM indicator.
- Versatile placement options: tabletop stand or wall-mount with double-sided stickers.
- Powered by 1 CR2032 battery (included).
3. Setup
3.1 Battery Installation
- Locate the battery compartment on the back of the device.
- Open the compartment cover.
- Insert one CR2032 battery, ensuring the correct polarity (+/-). The positive (+) side should face upwards.
- Close the battery compartment cover securely.
3.2 Placement Options
The device offers two convenient placement methods:
- Tabletop Stand: Utilize the integrated stand on the back of the device to place it on any flat surface, such as a desk, shelf, or countertop.
- Wall Mounting: Use the provided double-sided adhesive stickers to attach the device to a wall or other vertical surface, such as a refrigerator. Ensure the surface is clean and dry before applying the stickers.

Figure 3.1: Available mounting options for the device.
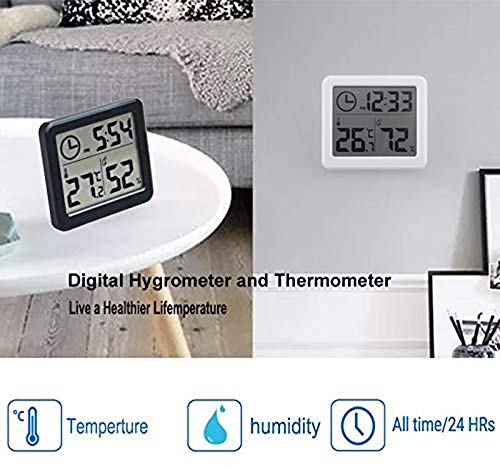
Figure 3.2: Examples of device placement on a table and mounted on a wall.
4. Operating Instructions
4.1 Display Overview
The large LCD screen displays the following information:
- Time: Shown in 12-hour format with AM/PM indicator.
- Temperature: Displayed in Celsius (°C) only.
- Humidity: Displayed as a percentage (%).

Figure 4.1: Detailed view of the LCD display and comfort level indicators.
4.2 Setting the Time
To adjust the time:
- Locate the 'Adjust time' button, typically on the side or back of the device (refer to Figure 4.1).
- Press and hold the 'Adjust time' button until the hour digits start flashing.
- Press the 'Adjust time' button repeatedly to cycle through the hours.
- Once the correct hour is set, wait a few seconds, and the minute digits will start flashing.
- Press the 'Adjust time' button repeatedly to cycle through the minutes.
- After setting the minutes, wait a few seconds for the setting to be saved, and the display will return to normal operation.
4.3 Reading Temperature and Humidity
The device automatically measures and displays the current indoor temperature and humidity. Readings are updated approximately every 20 seconds to provide current environmental data.
Note: Temperature is displayed exclusively in Celsius (°C). The device does not support Fahrenheit (°F) display.
4.4 Comfort Level Indicators
The device may provide visual indicators for humidity comfort levels:
- DRY: Humidity below 30%
- COMFORT: Humidity between 30% and 60%
- WET: Humidity above 60%
5. Maintenance
5.1 Battery Replacement
When the display becomes dim or stops functioning, it is time to replace the CR2032 battery. Follow the battery installation steps in Section 3.1.
5.2 Cleaning
To clean the device, gently wipe the display and casing with a soft, dry cloth. Do not use abrasive cleaners, solvents, or immerse the device in water, as this can damage the electronic components.
6. Troubleshooting
- No display or dim display:
Check if the battery is installed correctly with the correct polarity. Replace the CR2032 battery if it is depleted. - Inaccurate readings:
Ensure the device is placed in a stable environment, away from direct sunlight, heat sources, or strong drafts, which can affect readings. Allow the device a few minutes to stabilize after placement or battery change. - Time not setting:
Ensure you are pressing and holding the 'Adjust time' button long enough to enter setting mode. Follow the steps in Section 4.2 carefully. - Device not responding:
Remove the battery, wait for 30 seconds, and then reinsert it to perform a soft reset.
7. Specifications
| Feature | Specification |
|---|---|
| Model Number | Temp-BW |
| Display Type | LCD |
| Display Size | Approximately 8.1 x 7.1 cm (3.2 x 2.8 inches) |
| Temperature Unit | Celsius (°C) only |
| Temperature Accuracy | ±1°C |
| Humidity Accuracy | ±2-5% RH |
| Data Refresh Rate | Every 20 seconds |
| Power Source | 1 x CR2032 battery (included) |
| Product Dimensions | 18.1 x 9 x 2.2 cm (Package dimensions) |
| Weight | 140 grams (Package weight) |
| Manufacturer | YOUDUO |

Figure 7.1: LCD Display Dimensions.
8. Warranty and Support
For warranty information and customer support, please refer to the documentation provided with your purchase or visit the official REDPINGUO website. Keep your purchase receipt as proof of purchase for any warranty claims.


