1. Introduction
This manual provides detailed instructions for the QZT Mini WiFi Camera (Model Fr-V001). This portable surveillance camera offers HD 1080P video recording, motion detection, and Wi-Fi connectivity for remote monitoring. It is designed for various security applications in homes and offices.
Please read this manual thoroughly before operating the device to ensure proper usage and to maximize its features.

Image 1.1: Overview of the QZT Mini WiFi Camera system, showing the main control unit, the flexible camera module, and a smartphone displaying the live video feed. This illustrates the compact design and remote viewing capability.
2. Package Contents
Verify that all items listed below are included in your package. If any items are missing or damaged, please contact customer support.
- QZT Mini WiFi Camera Main Unit
- Camera Module with Flexible Ribbon Cable
- Rechargeable Lithium-ion Battery (3000 mAh)
- USB Charging Cable
- User Manual
- Various Button Lens Covers (for discreet placement)
- Antenna (for enhanced Wi-Fi signal)
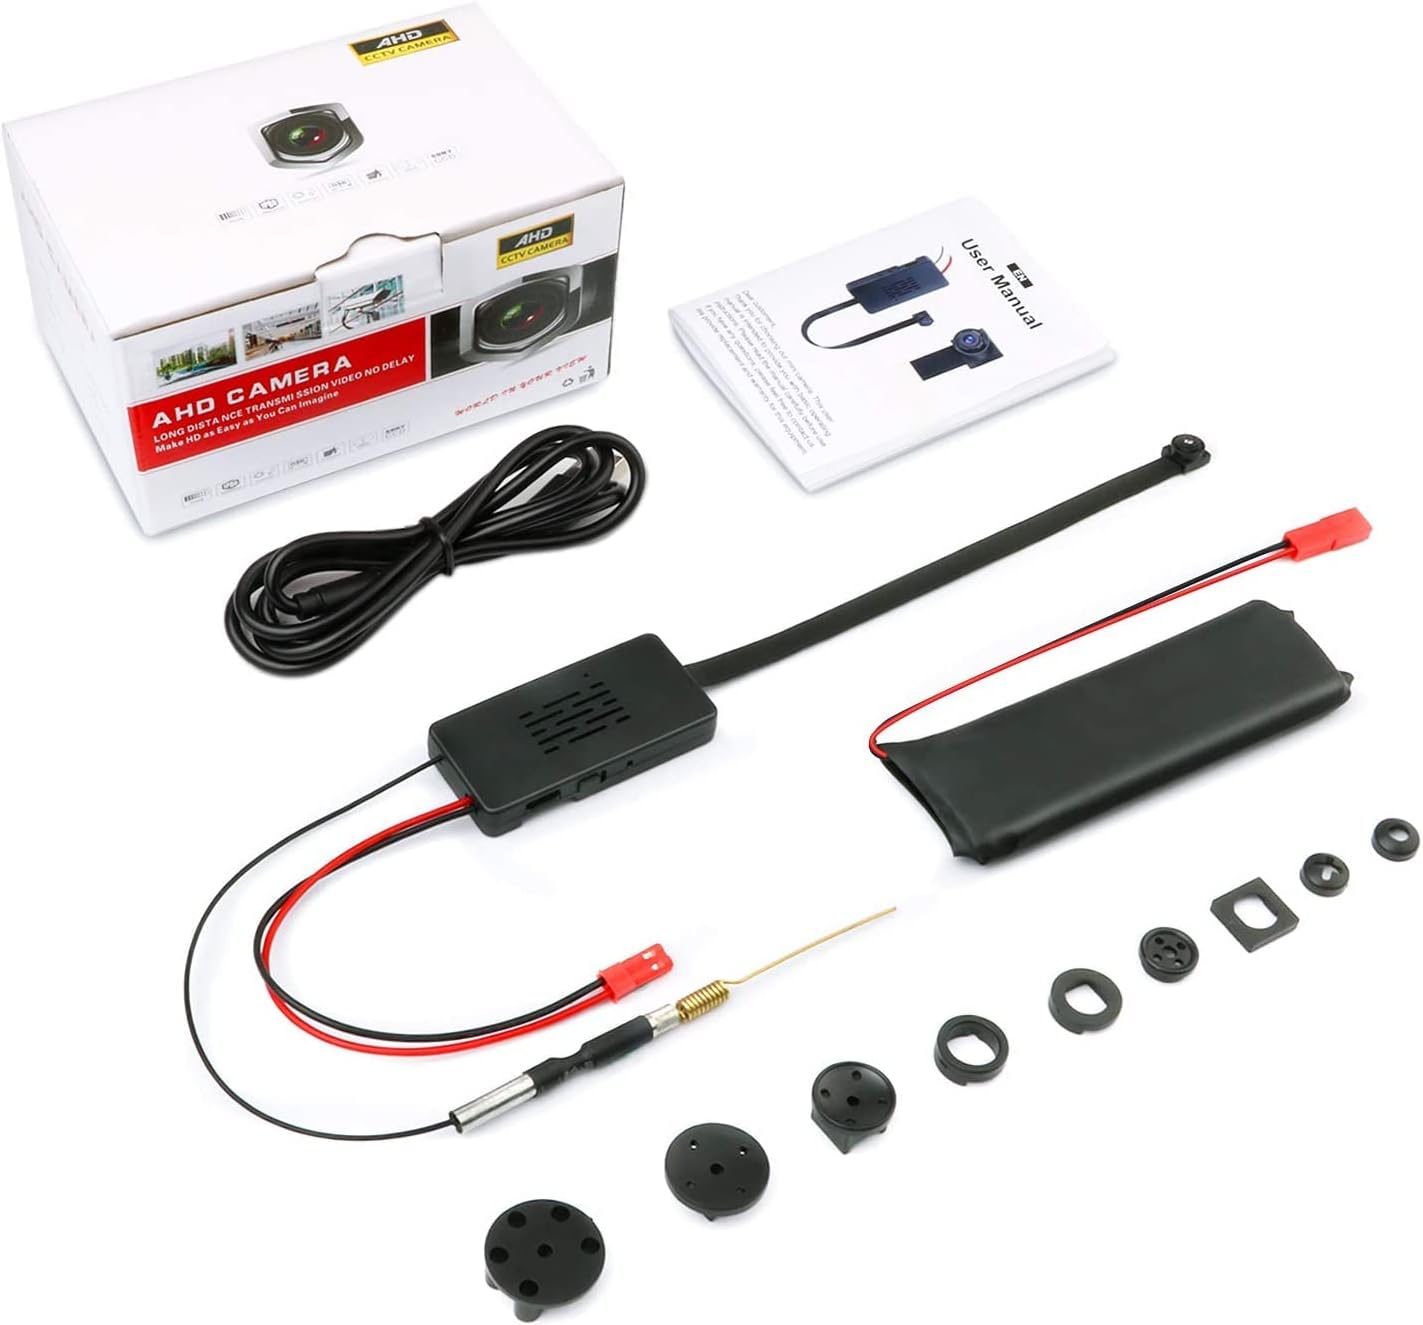
Image 2.1: The complete package contents of the QZT Mini WiFi Camera. This includes the main camera unit, the separate camera lens with its ribbon cable, a rechargeable battery, a USB cable for charging, a user manual, and various button-shaped lens covers for concealment, along with a small antenna.
3. Product Overview
Familiarize yourself with the components and ports of your QZT Mini WiFi Camera.
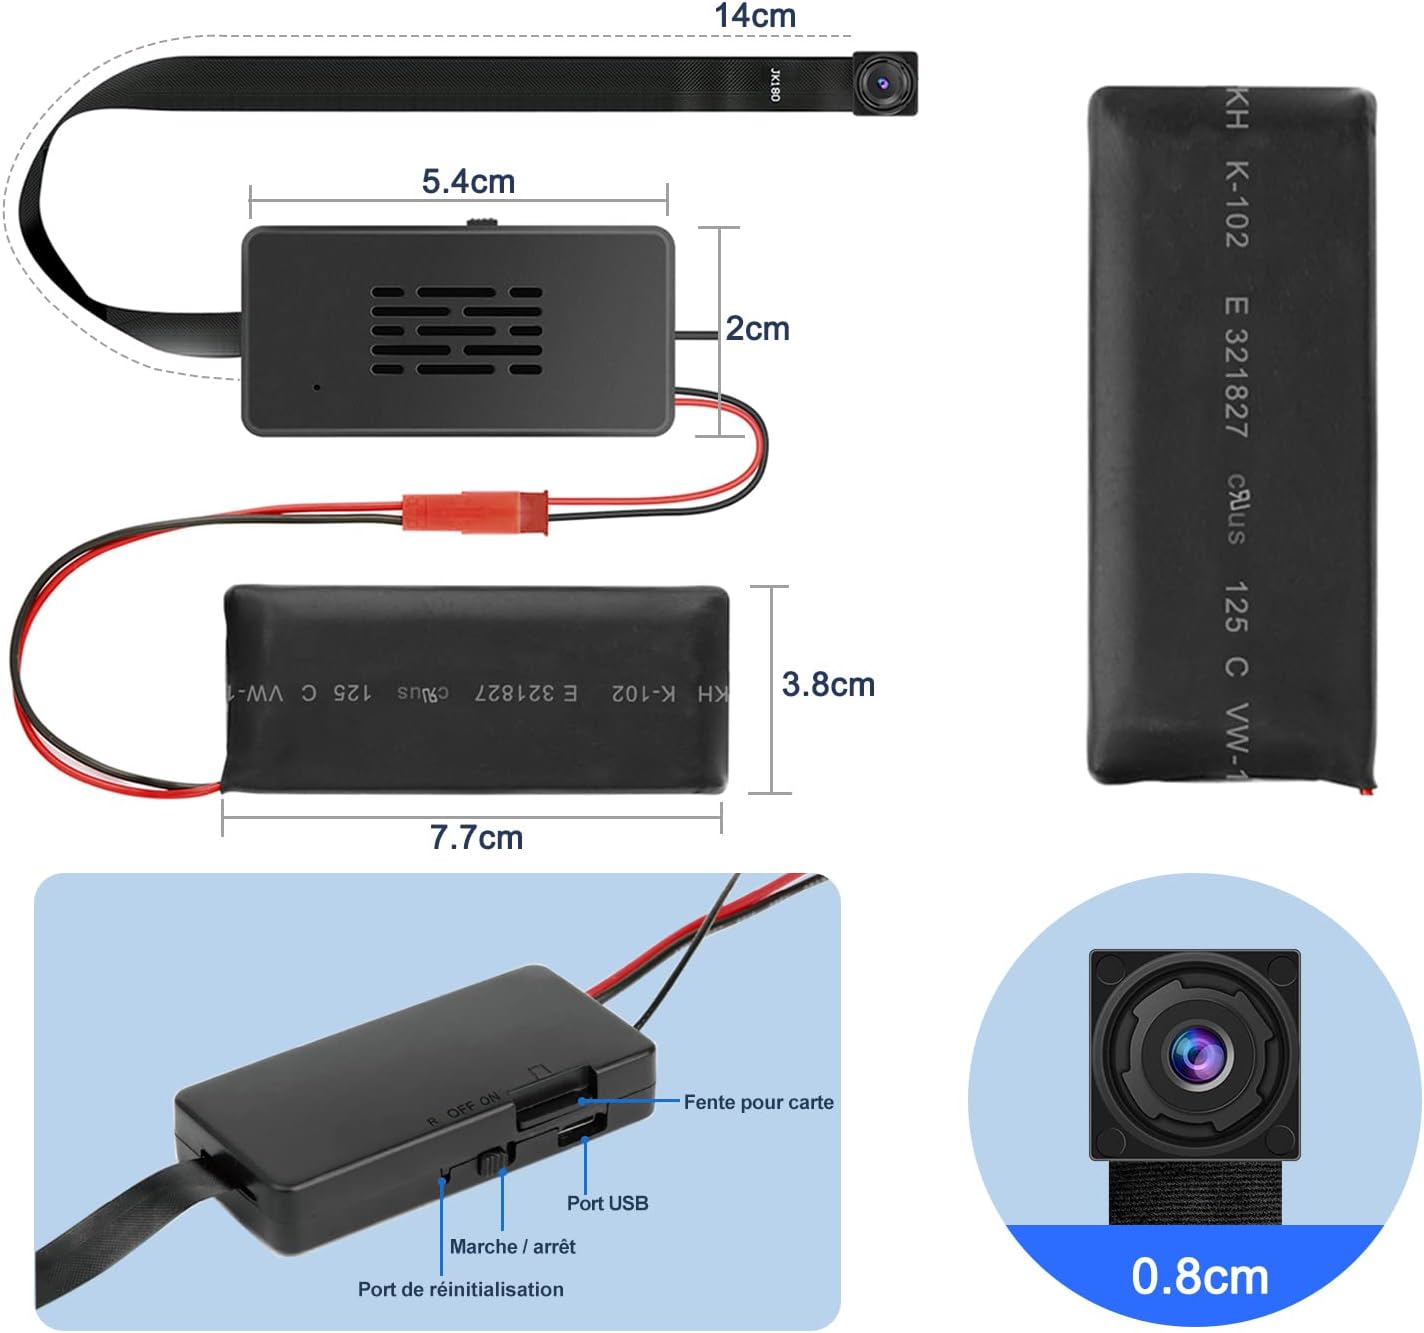
Image 3.1: A detailed diagram showing the main unit of the QZT Mini WiFi Camera. Key features labeled include the card slot for Micro SD, the On/Off switch, the USB port for charging and data transfer, and the reset port. Dimensions of the main unit, battery, and camera ribbon cable are also provided.
Key Components:
- Main Unit: Houses the electronics, battery connection, Micro SD card slot, and control buttons.
- Camera Module: The lens and sensor connected via a flexible ribbon cable.
- Micro SD Card Slot: For local storage of video recordings. Supports loop recording.
- USB Port: For charging the battery and connecting to a computer for data transfer.
- On/Off Switch: To power the device on or off.
- Reset Port: Used to reset the camera to factory settings if needed.
4. Setup Guide
4.1 Charging the Battery
- Connect the provided USB cable to the camera's USB port and the other end to a 5V/1A USB power adapter (not included) or a computer USB port.
- The indicator light will show charging status. A full charge typically takes 3-4 hours.
- The camera can record for approximately 5 to 7 hours on a full charge. It can also operate while charging.
4.2 Inserting a Micro SD Card
- Ensure the camera is powered off.
- Gently insert a Micro SD card (Class 10 or higher, up to 128GB recommended) into the card slot until it clicks into place.
- To remove, push the card in again until it springs out.
4.3 App Installation and Wi-Fi Connection
The camera uses a dedicated mobile application for remote viewing and control. The application name is typically HDLIVECAM (refer to your product packaging or manual for the exact app name and QR code).
- Download the App: Search for "HDLIVECAM" in your smartphone's app store (Google Play Store for Android, Apple App Store for iOS) and install it.
- Power On Camera: Slide the On/Off switch to the 'On' position. The camera will emit a Wi-Fi hotspot.
- Enable Phone GPS: Before use, ensure your phone's GPS is turned on as required by the application for initial setup.
- Connect to Camera's Wi-Fi Hotspot (P2P Mode):
- Go to your phone's Wi-Fi settings.
- Find and connect to the camera's Wi-Fi hotspot (e.g., "IPC-XXXXXX"). There is no password for this direct connection.
- Open the HDLIVECAM app. The camera should automatically appear in the device list. You can now view the live feed directly.
- Connect to Home/Office Wi-Fi (Router Mode):
- In the app, go to the camera settings (usually a gear icon).
- Select "Wi-Fi Settings" or "Network Settings".
- Choose your home/office 2.4GHz Wi-Fi network from the list and enter its password.
- Confirm the settings. The camera will restart and connect to your router. Once connected, the camera's hotspot will be disabled for security.
- You can now access the camera remotely from anywhere with an internet connection via the app.
5. Operating Instructions
5.1 Live Viewing
Once connected to Wi-Fi (either P2P or router mode), open the HDLIVECAM app and select your camera from the device list to view the live video feed.
5.2 Video Recording
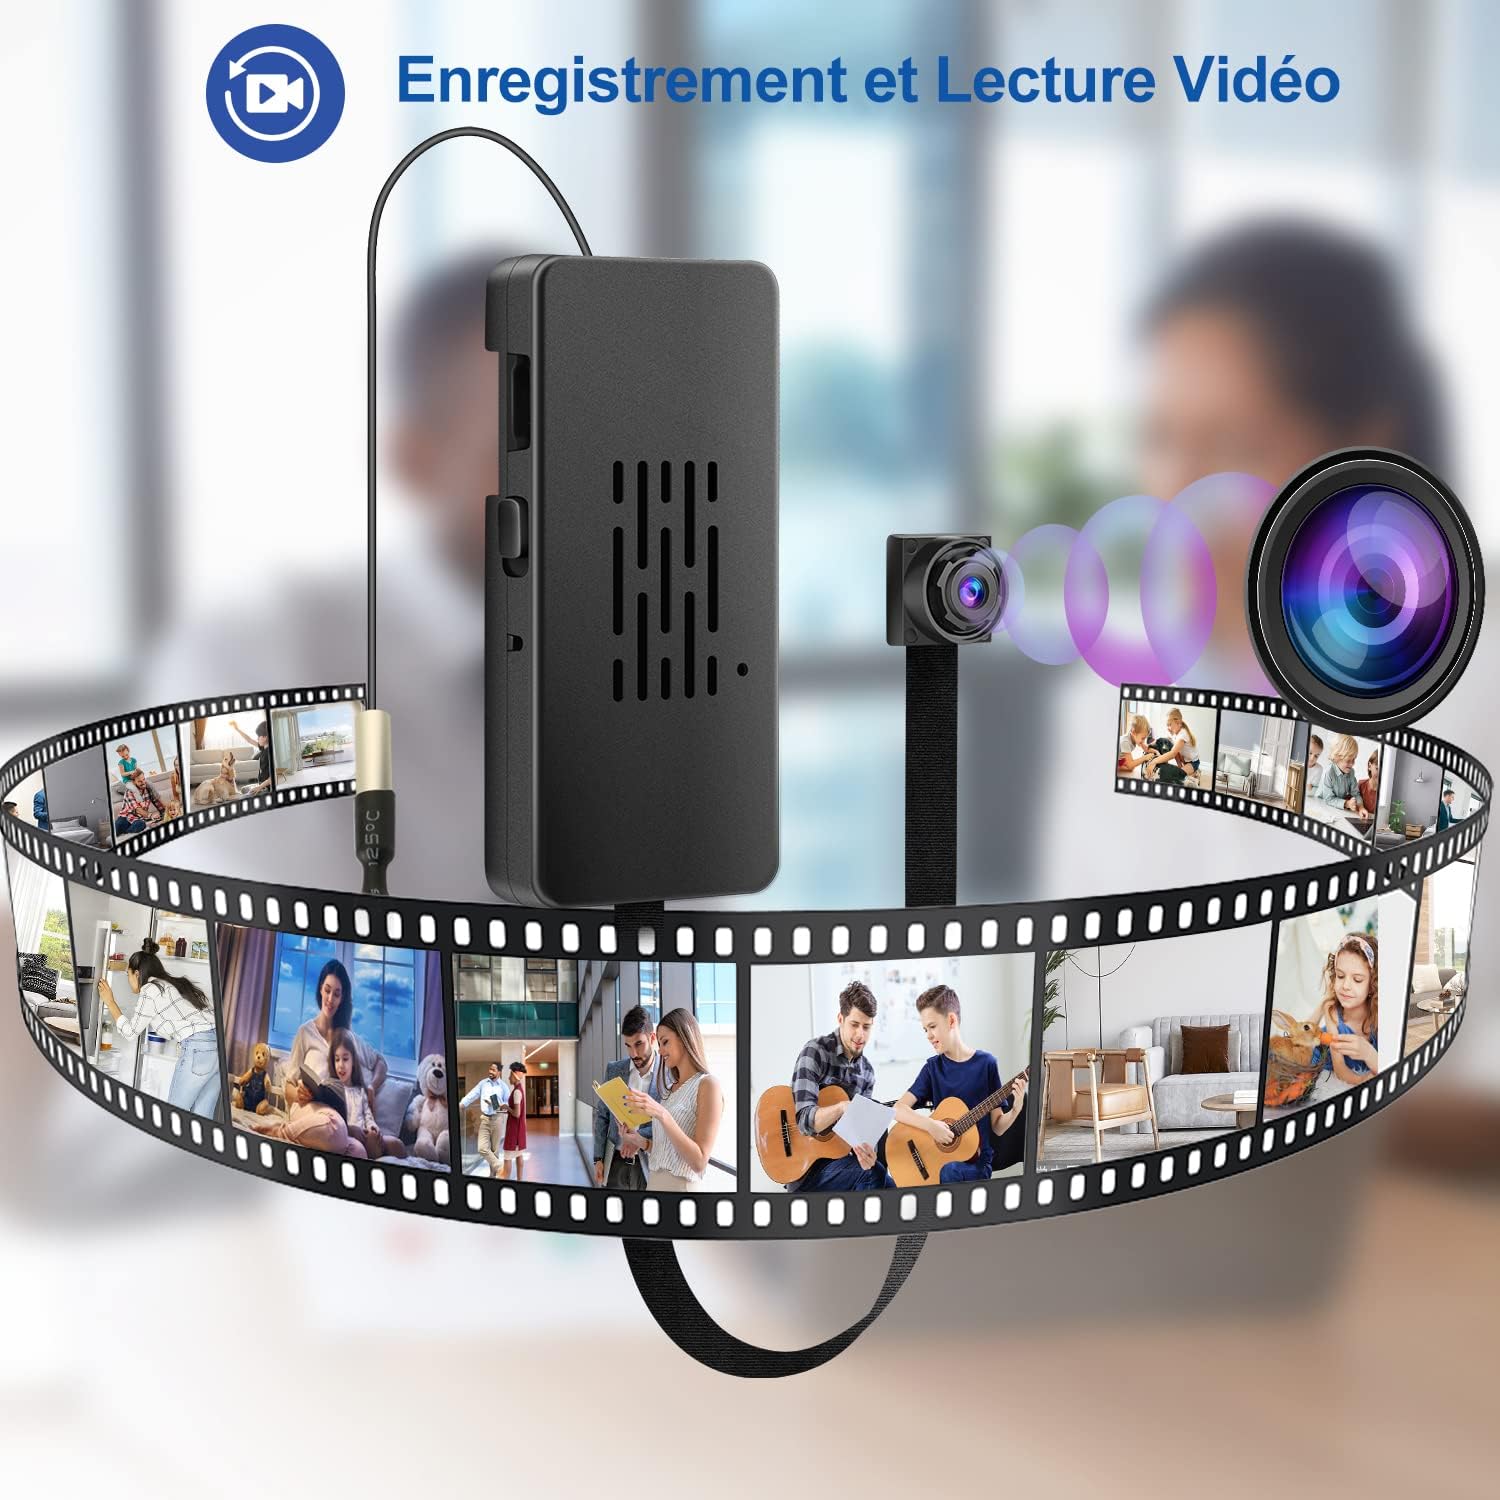
Image 5.1: This image illustrates the QZT Mini WiFi Camera's capability for both video recording and playback. The main unit and camera module are shown, with a filmstrip graphic representing recorded video segments, emphasizing continuous capture and review.
- Manual Recording: Within the app's live view interface, you can manually start and stop video recording. These recordings are saved to the inserted Micro SD card.
- Loop Recording: The camera supports loop recording. When the Micro SD card is full, the oldest video files will be automatically overwritten by new recordings. This feature ensures continuous recording without manual intervention.
5.3 Motion Detection
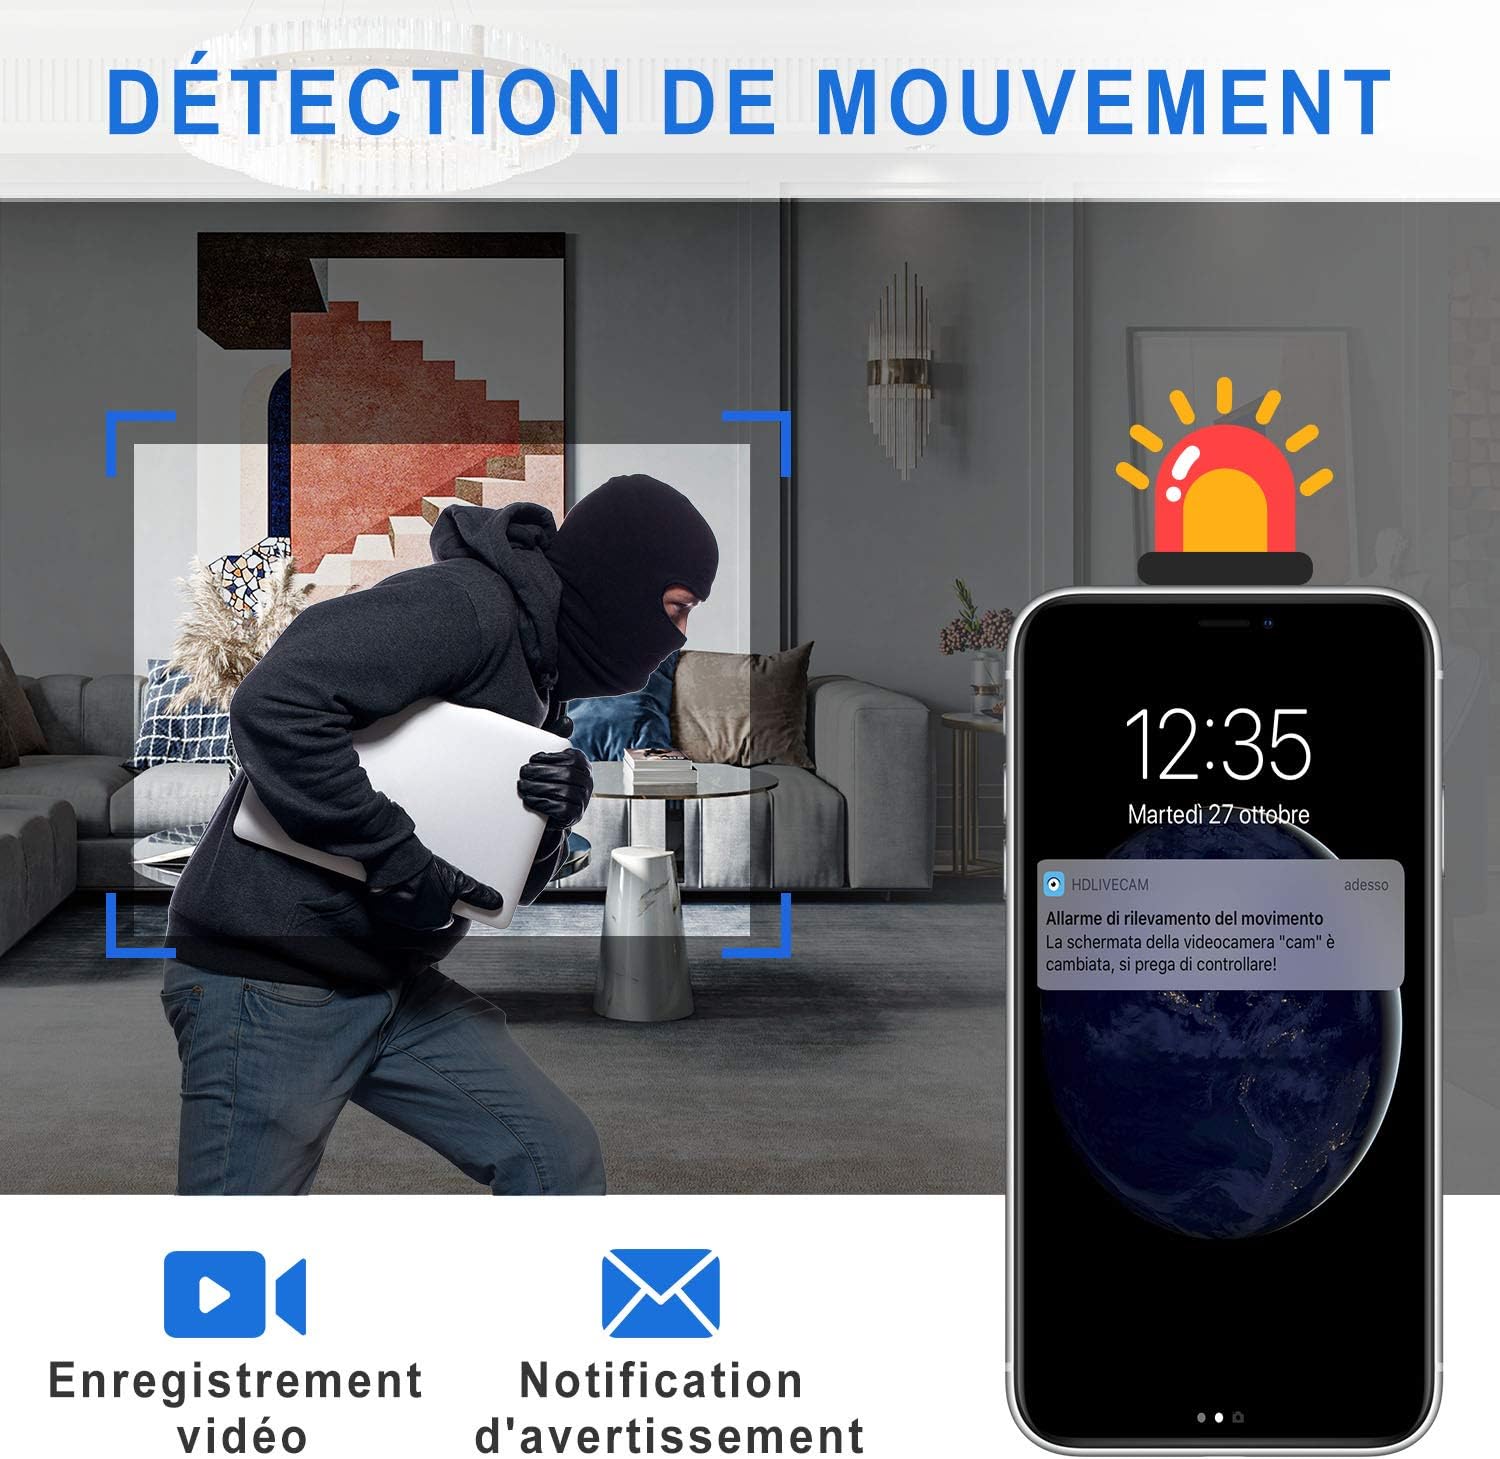
Image 5.2: A smartphone screen displaying a notification for motion detection from the camera, with an image of a person in a room, highlighted by red detection zones. This demonstrates the camera's ability to alert users to activity.
The motion detection feature allows the camera to automatically start recording when movement is detected in its field of view.
- Enable/Disable: You can enable or disable motion detection within the app's settings.
- Sensitivity: Adjust the motion detection sensitivity to minimize false alarms.
- Notifications: When motion is detected, the app can send push notifications to your smartphone, alerting you to activity.
- Automatic Recording: The camera can be configured to record short video clips (e.g., 30 seconds) automatically upon motion detection, saving them to the Micro SD card.
5.4 Video Playback
- Via App: Access recorded videos directly through the HDLIVECAM app. Navigate to the playback section to view footage stored on the Micro SD card.
- Via Computer: Remove the Micro SD card from the camera and insert it into a card reader connected to a computer. You can then access and play the video files using standard media players.
5.5 Security Features
Once the camera is successfully configured with your home/office Wi-Fi network, its direct Wi-Fi hotspot will be deactivated. This prevents unauthorized access to the camera's direct connection, enhancing security.
6. Maintenance
6.1 Battery Care
- Avoid fully discharging the battery frequently to prolong its lifespan.
- If storing the camera for an extended period, charge the battery to about 50% and store it in a cool, dry place.
6.2 Cleaning
- Use a soft, dry cloth to clean the camera lens and main unit.
- Avoid using liquid cleaners or abrasive materials.
6.3 Micro SD Card Management
- Regularly back up important recordings from the Micro SD card to another storage device.
- Format the Micro SD card periodically (e.g., once a month) through the app settings to maintain optimal performance and prevent data corruption.
7. Troubleshooting
If you encounter issues with your QZT Mini WiFi Camera, refer to the following common problems and solutions:
| Problem | Possible Cause / Solution |
|---|---|
| Camera not connecting to Wi-Fi. |
|
| App cannot find the camera. |
|
| Short battery life. |
|
| No video recording or playback issues. |
|
| Poor video quality. |
|
| Fragile ribbon cable. |
|
Resetting the Camera
If the camera is unresponsive or experiencing persistent issues, you can perform a factory reset. Locate the reset port (refer to Image 3.1) and use a thin object (like a paperclip) to press and hold the reset button for approximately 5-10 seconds until the indicator lights change or the camera restarts. This will restore the camera to its default settings.
8. Specifications
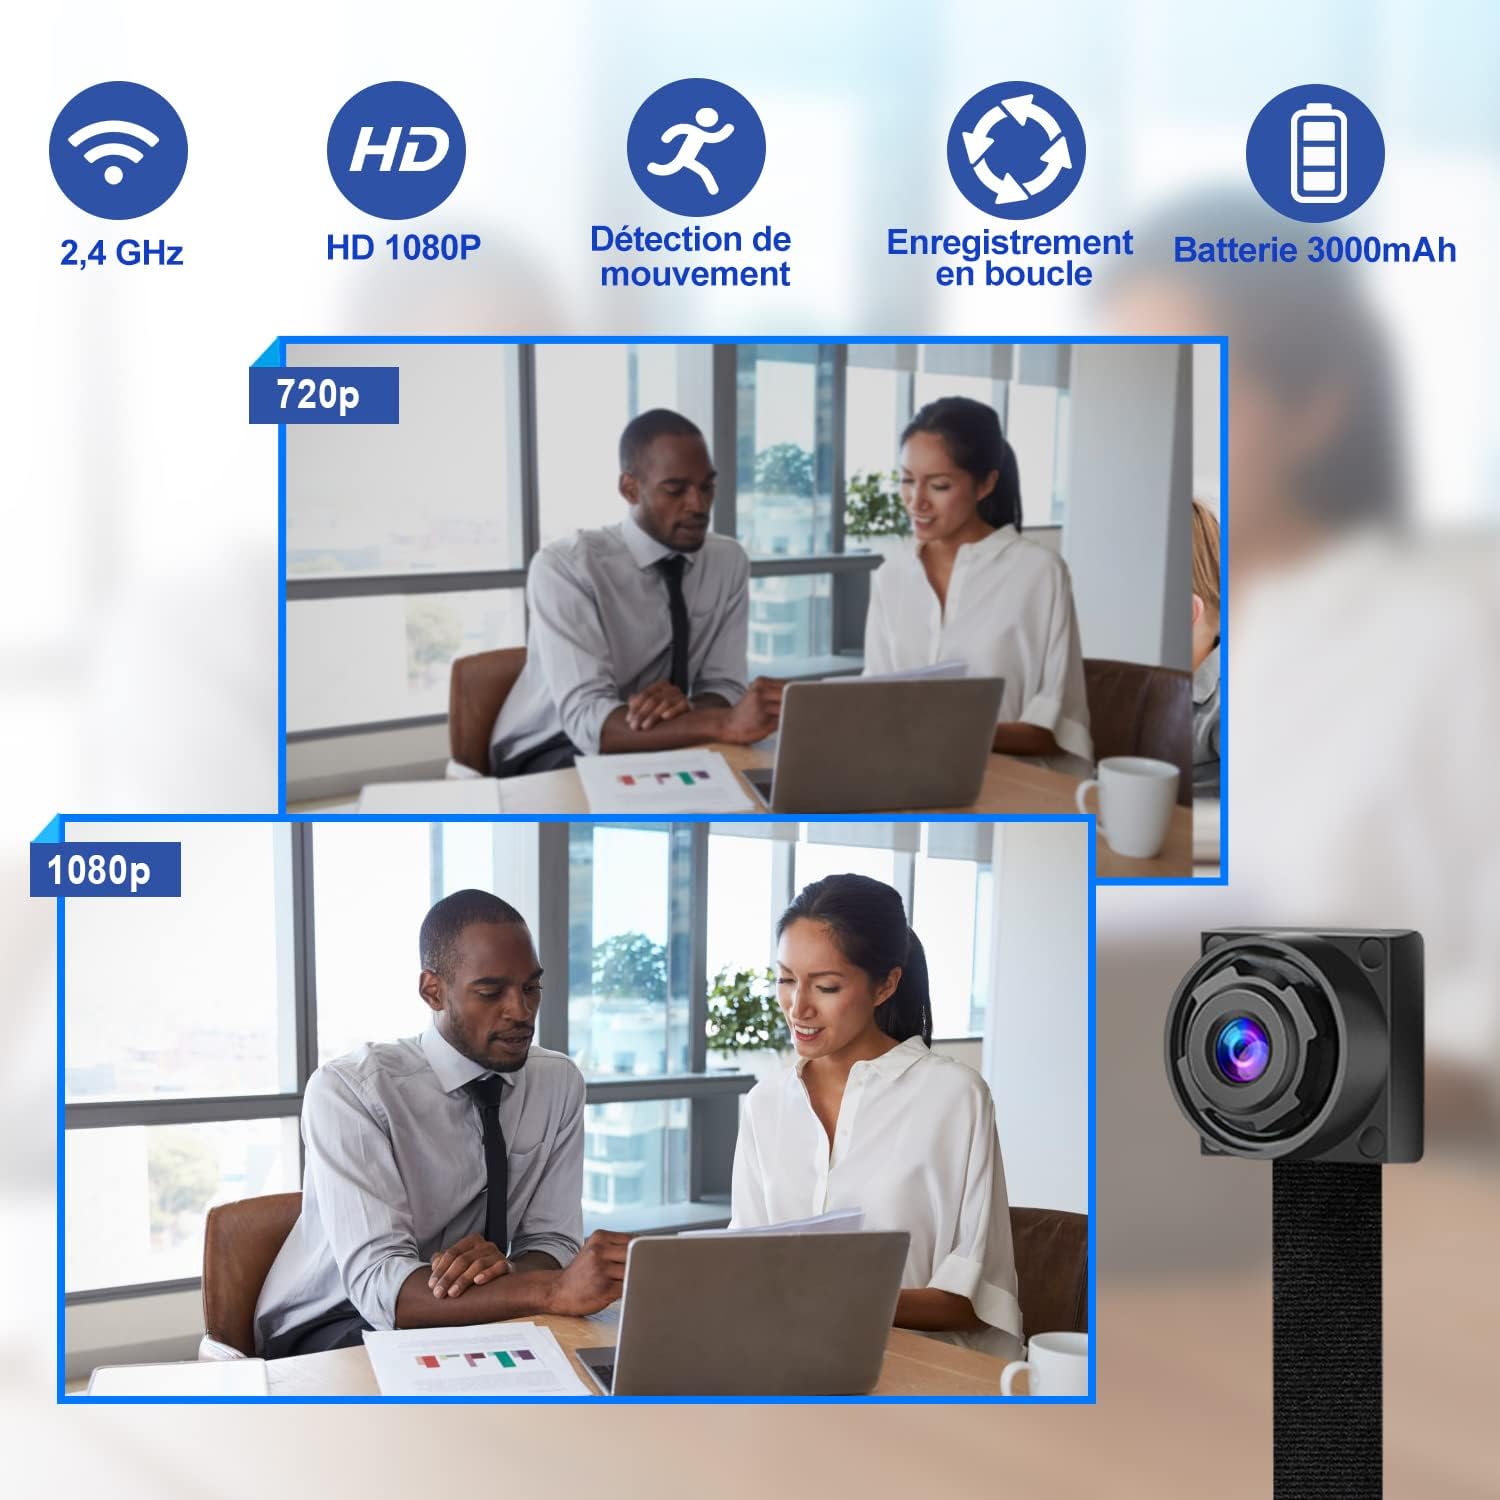
Image 8.1: Visual representation of key features: 2.4 GHz Wi-Fi connectivity, HD 1080P video resolution, motion detection capability, loop recording function, and a 3000mAh battery capacity. Also shows a comparison between 720p and 1080p video quality.
| Feature | Detail |
|---|---|
| Model Number | Fr-V001 |
| Brand | QZT |
| Video Resolution | 1080p HD |
| Wireless Communication Technology | Wi-Fi (2.4GHz only) |
| Special Features | Motion Detector, Portable |
| Power Source | Battery Powered (Lithium-ion) |
| Battery Capacity | 3000 mAh |
| Recording Time | Approx. 5-7 hours (on full charge) |
| Storage | Micro SD Card (up to 128GB, not included) |
| Material | Plastic |
| Recommended Uses | Surveillance (Indoor; Amateur) |
| Dimensions (Main Unit) | Approx. 5.4 cm x 2 cm (refer to Image 3.1 for full dimensions) |
9. Warranty & Support
QZT provides a warranty and replacement service for its products. If you have any questions, concerns, or require assistance with your QZT Mini WiFi Camera, please do not hesitate to contact QZT customer support. Refer to your purchase documentation or the QZT official website for contact information.
Please retain your proof of purchase for warranty claims.


