
ATNSINC 19061
User Manual: TP4056 Micro USB Lithium Battery Charging Module
Model: 19061 | Brand: ATNSINC
Introduction
This manual provides essential information for the safe and effective use of the ATNSINC TP4056 Micro USB Lithium Battery Charging Module. This compact module is designed for charging single-cell lithium batteries or multiple parallel-connected lithium batteries, offering reliable charging with integrated protection features.
Please read this manual thoroughly before operation to ensure proper setup and to maximize the lifespan of your module and batteries.
Product Overview

Figure 1: A set of 15 ATNSINC TP4056 Micro USB Lithium Battery Charging Modules.
The TP4056 module is a complete constant-current/constant-voltage linear charger for single-cell lithium-ion batteries. Its compact size and Micro USB input make it ideal for various DIY projects and portable applications.
Key Features:
- Input Voltage: 5V via Micro USB or solder pads.
- Maximum Output Current: 1A.
- Charging Cut-off Voltage: 4.2V ± 1%.
- Integrated Battery Over-discharge Protection Voltage: 2.5V.
- Integrated Battery Overcurrent Protection Current: 3A.
- Dual LED Indicators: Red for charging, Green for fully charged.
- Can charge single-cell lithium batteries or multi-section parallel-connected lithium batteries.
- Retains voltage input wiring pads for flexible integration.
Setup and Connections
Before connecting the module, ensure all components are correctly identified and polarity is observed. Incorrect connections can damage the module or battery.

Figure 2: Detailed view of the TP4056 module with connection labels.
- Input Power Connection:
- Connect a 5V power source to the Micro USB port.
- Alternatively, solder a 5V input to the designated "In the input +" and "In the input -" pads. Ensure correct polarity.
- Battery Connection:
- Connect the positive terminal of your 18650 lithium battery (or parallel battery pack) to the "B+" pad on the module.
- Connect the negative terminal of your battery to the "B-" pad on the module.
- Important: Always ensure correct battery polarity. Reversing polarity will damage the module.
- Load Output Connection (Optional):
- If you intend to power a load directly from the module while charging, connect your load to the "OUT+" and "OUT-" pads.
- Caution: Do not connect the load OUT terminal with wrong polarity, as this will damage the module.

Figure 3: Example setup demonstrating the module connected to a battery and a small load.
Operating Instructions
Once the module is correctly wired, charging will begin automatically when a 5V power source is connected.
Charging Process:
- Connect the 5V power supply to the Micro USB port or input pads.
- The Red LED (LED1) will illuminate, indicating that the battery is currently charging.
- When the battery reaches its full charge (4.2V), the Green LED (LED2) will illuminate, and the Red LED will turn off. This indicates that charging is complete.
- The module automatically stops charging when the battery is full, preventing overcharge.
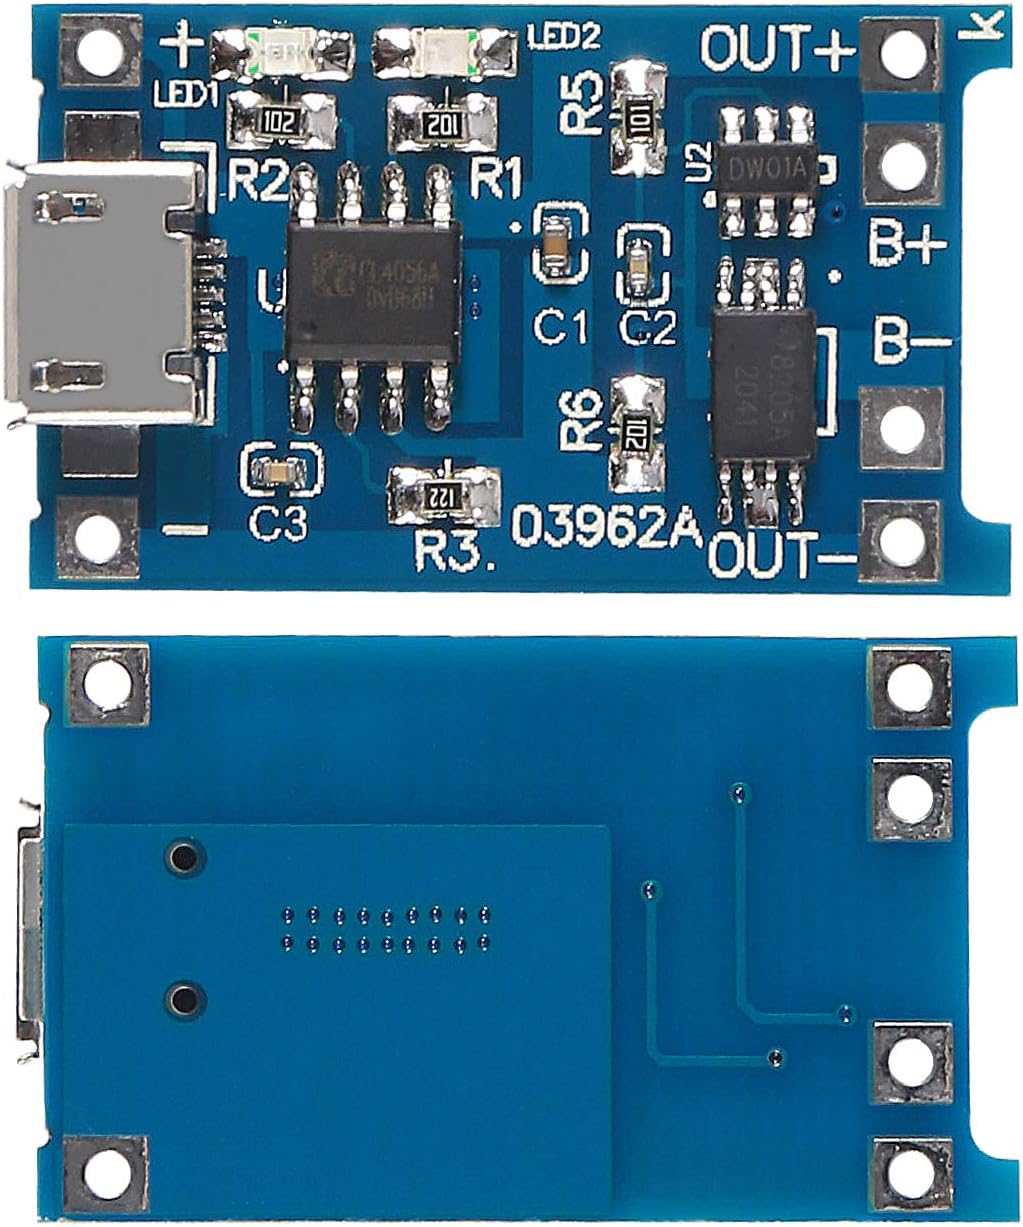
Figure 4: Front and back view of the TP4056 module, showing component layout.
Maintenance
The TP4056 module requires minimal maintenance. Follow these guidelines to ensure longevity:
- Keep the module clean and free from dust and debris.
- Avoid exposing the module to moisture or extreme temperatures.
- Do not apply excessive force to the Micro USB port or solder pads.
- Regularly inspect connections for any signs of wear or corrosion.
Troubleshooting
| Problem | Possible Cause | Solution |
|---|---|---|
| Module not charging (no LEDs or only green LED) |
|
|
| Red and Green LEDs blink alternately |
|
|
| Module gets excessively hot |
|
|
| Battery not reaching 4.2V |
|
|
Specifications

Figure 5: Module with its technical specifications table.
| Specification | Value |
|---|---|
| Input Voltage | 5V |
| Maximum Output Current | 1A (1000mA) |
| Charging Cut-off Voltage | 4.2V ± 1% |
| Battery Over-discharge Protection Voltage | 2.5V |
| Battery Overcurrent Protection Current | 3A |
| Input Interface | Micro USB |
| Dimensions (approx.) | 28mm x 17mm (1.1 x 0.67 inches) |
| Item Weight | 0.704 ounces (0.02 Kilograms) |

Figure 6: Dimensions of the TP4056 Micro USB Charging Module.
Warranty and Support
For any questions, technical support, or warranty inquiries regarding your ATNSINC TP4056 Micro USB Lithium Battery Charging Module, please contact ATNSINC customer service through the retailer's platform where the product was purchased.
Please retain your proof of purchase for warranty claims.
Ask a question about this manual
Ask about setup, troubleshooting, compatibility, parts, safety, or missing instructions. Manuals+ will review the question and use this page’s manual context to help answer it.