
1. Introduction
This manual provides detailed instructions for the safe and effective use of your BEETRO Electric Spray Gun, model BE0094. Please read all instructions carefully before operating the device and retain this manual for future reference.
2. Safety Instructions
Always observe basic safety precautions to reduce the risk of fire, electric shock, and personal injury when using this electric spray gun.
- Work Area Safety: Keep the work area clean and well-lit. Do not operate power tools in explosive atmospheres, such as in the presence of flammable liquids, gases, or dust.
- Electrical Safety: Avoid body contact with earthed or grounded surfaces. Do not expose power tools to rain or wet conditions. Never abuse the cord; keep it away from heat, oil, sharp edges, or moving parts.
- Personal Safety: Always wear eye protection, such as safety glasses with side shields. Use respiratory protection (mask) when spraying paint or other materials. Wear appropriate clothing and gloves. Stay alert and use common sense when operating the spray gun.
- Chemical Safety: Always refer to the material manufacturer's safety data sheet (SDS) for the material being sprayed. Ensure adequate ventilation. Do not spray highly flammable materials near open flames or ignition sources.
- Tool Use and Care: Do not force the power tool. Use the correct power tool for your application. Disconnect the plug from the power source before making any adjustments, changing accessories, or storing power tools.
3. Product Components
Familiarize yourself with the parts of your BEETRO Electric Spray Gun:
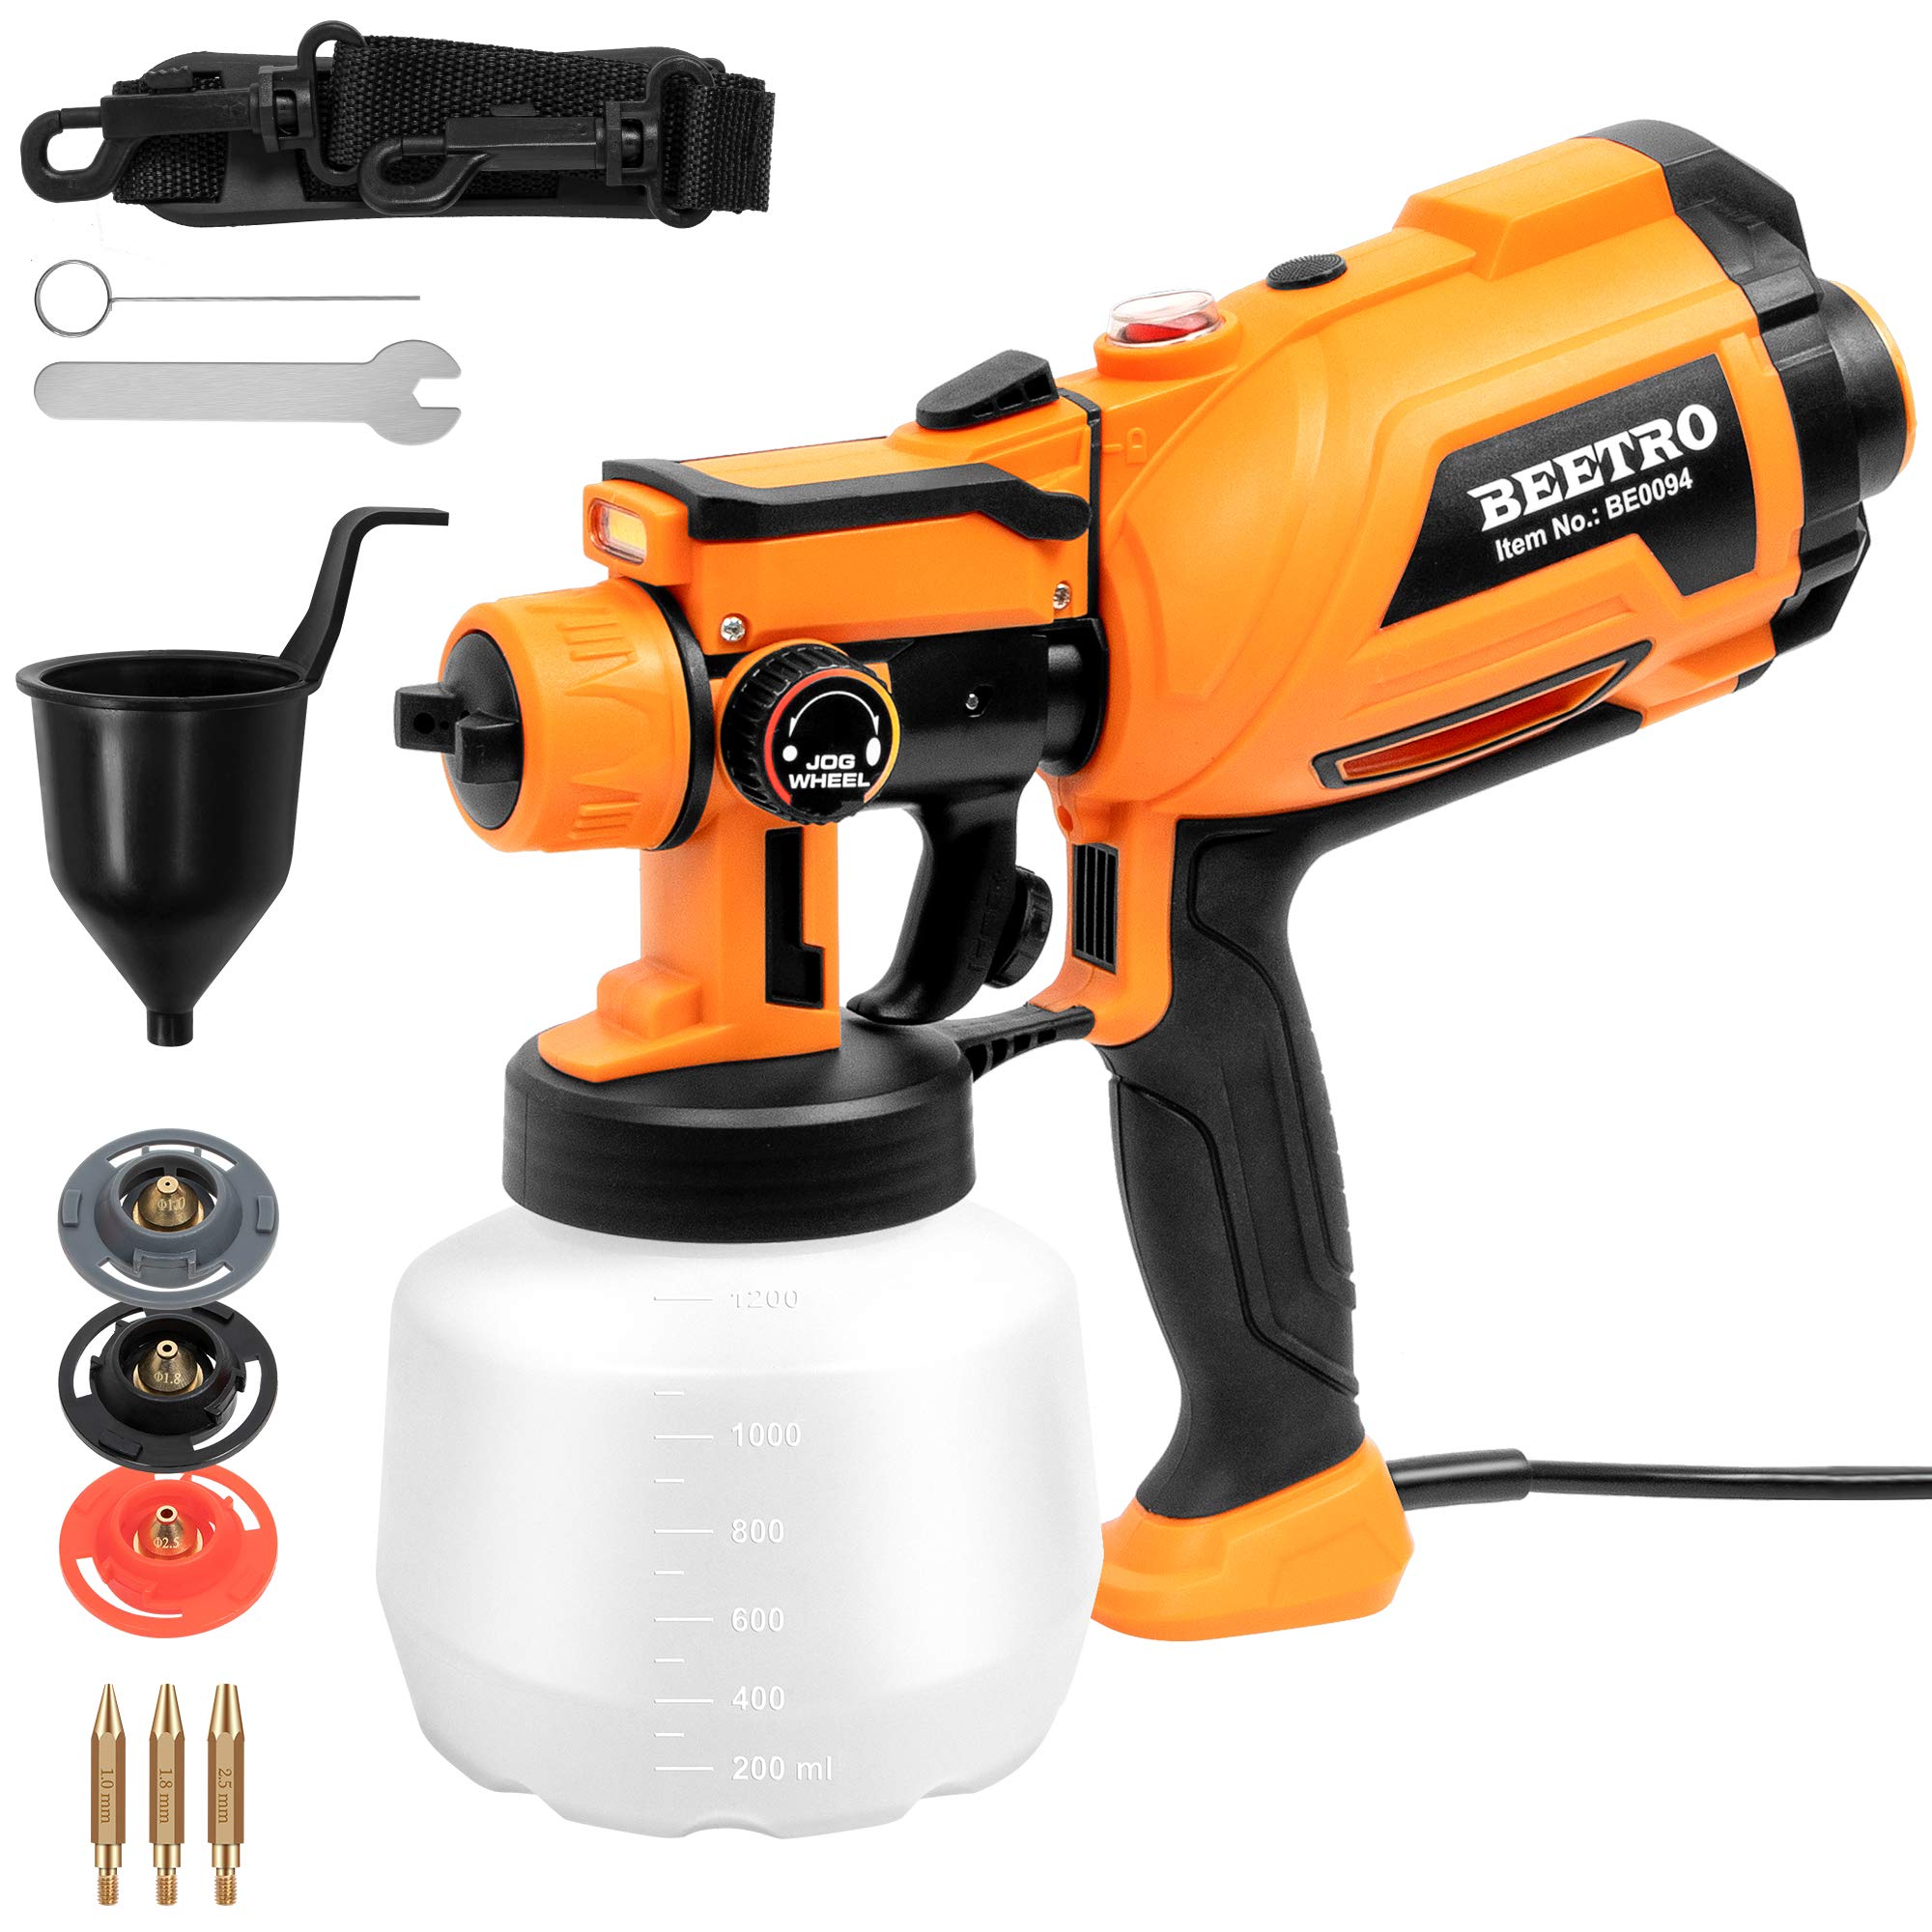
Figure 1: Main Components of the BEETRO Electric Spray Gun
This image displays the primary components of the spray gun, including the main body, container, and various control elements. Key parts are numbered for easy identification.
- Union Nut
- Spray Ball
- Spray Nozzle (Ø1.0/1.8/2.5mm)
- LED Light
- Hook
- Length Control Knob
- Flow Adjusting Knob
- Container
- Release Button
- Accessories

Figure 2: Detailed View of Controls and Nozzle Area
This image provides a closer look at the release button, dust-proof cover, switches, nozzles, and wrench, highlighting areas for adjustment and maintenance.
- Release Button
- Dust-proof Cover
- Switch
- LED Switch
- Nozzles
- Wrench
4. Setup
4.1 Material Preparation
Before filling the container, ensure your material (paint, stain, varnish, etc.) is properly prepared.
- Stir and Filter: Always stir and filter the material thoroughly to remove any lumps or foreign particles that could clog the nozzle.
- Viscosity Check: Use a viscosity cup (not included, but commonly used for this purpose) to check the material's viscosity. The recommended viscosity for different nozzles is provided below.
4.2 Nozzle Selection
Select the appropriate nozzle size based on the material you are spraying and the project requirements. Refer to the table below for recommendations:

Figure 3: Nozzle Recommendations and Applications
This table guides the user in selecting the correct nozzle size (1.0mm, 1.8mm, 2.5mm) based on the material type, recommended viscosity (Din-s), and specific project applications.
| Nozzle | Recommended Material | Recommended Viscosity | Project |
|---|---|---|---|
| 1.0 mm | Sealants, stains, enamel, and varnish | 30 Din-s | Chair, table, bicycle, shutter, cabinets, wooden artwork, model DIY |
| 1.8 mm | Polyurethane, chalk type paint | 40 Din-s | Railings, heating pipes, window frames, boats, garage doors, metal garden fences |
| 2.5 mm | Low viscosity primer and wall paint | 45 Din-s | Internal wall, wooden garden fences, wooden pile, corridor |
4.3 Assembly
Assemble the spray gun by securely attaching the selected nozzle and the material container. Ensure all connections are tight to prevent leaks.
5. Operating Instructions
5.1 Powering On/Off
Connect the spray gun to a suitable power outlet. Press the main switch to turn the unit on or off. The LED light (4) indicates power status.
5.2 Adjusting Flow Rate
Use the Flow Adjusting Knob (7) to control the amount of material sprayed. Turn clockwise to increase flow and counter-clockwise to decrease flow. Always test the flow on a scrap piece of material before applying to your project.
5.3 Adjusting Spray Pattern
The spray gun offers three different spray patterns: Circular, Horizontal, and Vertical. Adjust the nozzle cap to achieve the desired pattern.

Figure 4: Spray Pattern Adjustments
This image illustrates the three available spray patterns: Circular 45°, Horizontal 90°, and Vertical 180°, demonstrating how to adjust the nozzle for each.
- Circular 45°: For small areas or detailed work.
- Horizontal 90°: For spraying vertical surfaces.
- Vertical 180°: For spraying horizontal surfaces.
5.4 Spraying Technique
Maintain a consistent distance from the surface and move the spray gun at an even speed for uniform coverage. Overlap each pass slightly to avoid streaks.

Figure 5: Spraying a Fence
An example of the BEETRO spray gun being used to apply material to a vertical surface like a fence, demonstrating proper technique.

Figure 6: Spraying a Table
An example of the BEETRO spray gun being used to apply material to a horizontal surface like a table, illustrating controlled application.
6. Maintenance and Cleaning
Proper cleaning after each use is crucial for maintaining the performance and longevity of your spray gun.
- Immediate Cleaning: Clean the spray gun immediately and thoroughly after each use. Do not allow material to dry inside the gun.
- Disassembly: Disassemble the container, nozzle, and suction tube.
- Cleaning Components: Wash all components that came into contact with the material using an appropriate cleaning solution (e.g., water for water-based paints, solvent for oil-based paints).
- Nozzle Cleaning: Use the provided wrench (6) to carefully remove and clean the nozzle. Ensure all material residue is removed from the nozzle and spray ball (2).
- Reassembly: Reassemble all parts once they are clean and dry.
7. Troubleshooting
Refer to the table below for common issues, their causes, and solutions:

Figure 7: Troubleshooting Guide
This table outlines common operational problems, their potential causes, and recommended solutions to help resolve issues quickly.
| Problem | Cause | Solution |
|---|---|---|
| A. Little or no material flow | 1. Nozzle clogged | 1. Clean |
| 2. Suction tube clogged | 2. Clean | |
| 3. Material volume setting turned too far to the right | 3. Turn to the left | |
| 4. Suction tube loose | 4. Insert | |
| 5. Material is too thick | 5. Check viscosity | |
| 6. Inconsistent paint | 6. Strain paint | |
| 7. Container is loose | 7. Tighten the container | |
| B. Material leaking | 1. Nozzle loose | 1. Tighten |
| 2. Nozzle worn | 2. Replace | |
| 3. Nozzle seal worn | 3. Replace | |
| 4. Material build-up on spray pattern dial and nozzle | 4. Clean | |
| C. Atomization is too coarse | 1. Viscosity of material too high | 1. Thin |
| 2. Material volume too large | 2. Turn to the right | |
| 3. Nozzle clogged | 3. Clean | |
| 4. Too little pressure build-up in container | 4. Tighten container | |
| D. Spray jet pulsates | 1. Material in container running out | 1. Refill |
| 2. Material is too thick | 2. Check viscosity | |
| E. Pattern runs or sags | 1. Applying too much material | 1. Adjust material flow or increase movement of spray gun |
| F. Too much over-spray | 1. Gun too far from spray object | 1. Reduce distance |
| 2. Too much material applied | 2. Turn material volume setting to right | |
| G. Pattern is very light and splotchy | 1. Moving the spray gun too fast | 1. Adjust material flow or decrease movement of spray gun |
| H. Large cloud of paint | 1. Gun too close to surface | 1. Move gun away from surface and reduce paint flow |
8. Specifications
| Brand | BEETRO |
| Model Number | BE0094 |
| Manufacturer Part Number | BE0094 |
| Power Source | Corded Electric |
| Manufacturer | Beetro Co., Ltd |
| ASIN | B08ML8KLF4 |
| UPC / GTIN | 603813099768 |
9. Warranty and Support
For warranty information, technical support, or service inquiries, please contact the manufacturer, Beetro Co., Ltd, or your product retailer. Keep your purchase receipt as proof of purchase.