
Introduction
This manual provides instructions for the assembly, operation, and maintenance of your tectake Wall Greenhouse. Designed to be placed against a wall, this greenhouse offers an optimal environment for cultivating plants, protecting them from adverse weather conditions such as cold, rain, and frost. It features a robust anodized aluminum frame, heat-insulating polycarbonate panels, a sliding door, and a roof window for ventilation. A stable foundation is included to secure the greenhouse to the ground.

Image: Overview of the tectake Wall Greenhouse, highlighting key features such as UV protection, anodized frame, heat-insulating panels, optimal ventilation, and generous space.
Safety Instructions
- Always follow the assembly instructions carefully.
- Exercise caution when handling components with sharp edges during assembly. Protective gloves are recommended.
- Use appropriate protective gear when moving heavy parts.
- Protect your eyes and skin from UV radiation when inside or near the greenhouse, especially during prolonged exposure.
- Ensure the greenhouse is securely anchored to the ground using the provided foundation to prevent wind damage.
Package Contents
Before beginning assembly, verify that all parts are present and undamaged. The package includes:
- 1 tectake Wall Greenhouse
- 1 Foundation kit
- Assembly instructions (separate document)
Setup and Assembly
The tectake Wall Greenhouse is designed for straightforward assembly. It is recommended to have at least two people for assembly. Ensure you have adequate space and the necessary tools (e.g., screwdriver, wrench) before starting.
- Site Selection: Choose a flat, stable surface against a suitable wall (house wall, garden wall, shed) that receives adequate sunlight.
- Foundation Assembly: Assemble the galvanized steel foundation according to the separate assembly instructions. This foundation provides stability and helps prevent heat loss from the ground. Secure the foundation firmly to the ground using the included ground anchors.
- Frame Assembly: Construct the anodized aluminum frame. The robust design ensures durability and resistance to corrosion. Pay attention to the correct orientation of all frame components.
- Panel Installation: Carefully insert the 4mm UV-resistant polycarbonate (PC) hollow-chamber panels into the frame. These panels are heat-insulating and protect plants from cold, rain, and frost.
- Door and Window Installation: Install the sliding door (60 x 156 cm) and the roof window. Ensure the sliding door operates smoothly and the roof window can be opened and closed for ventilation.
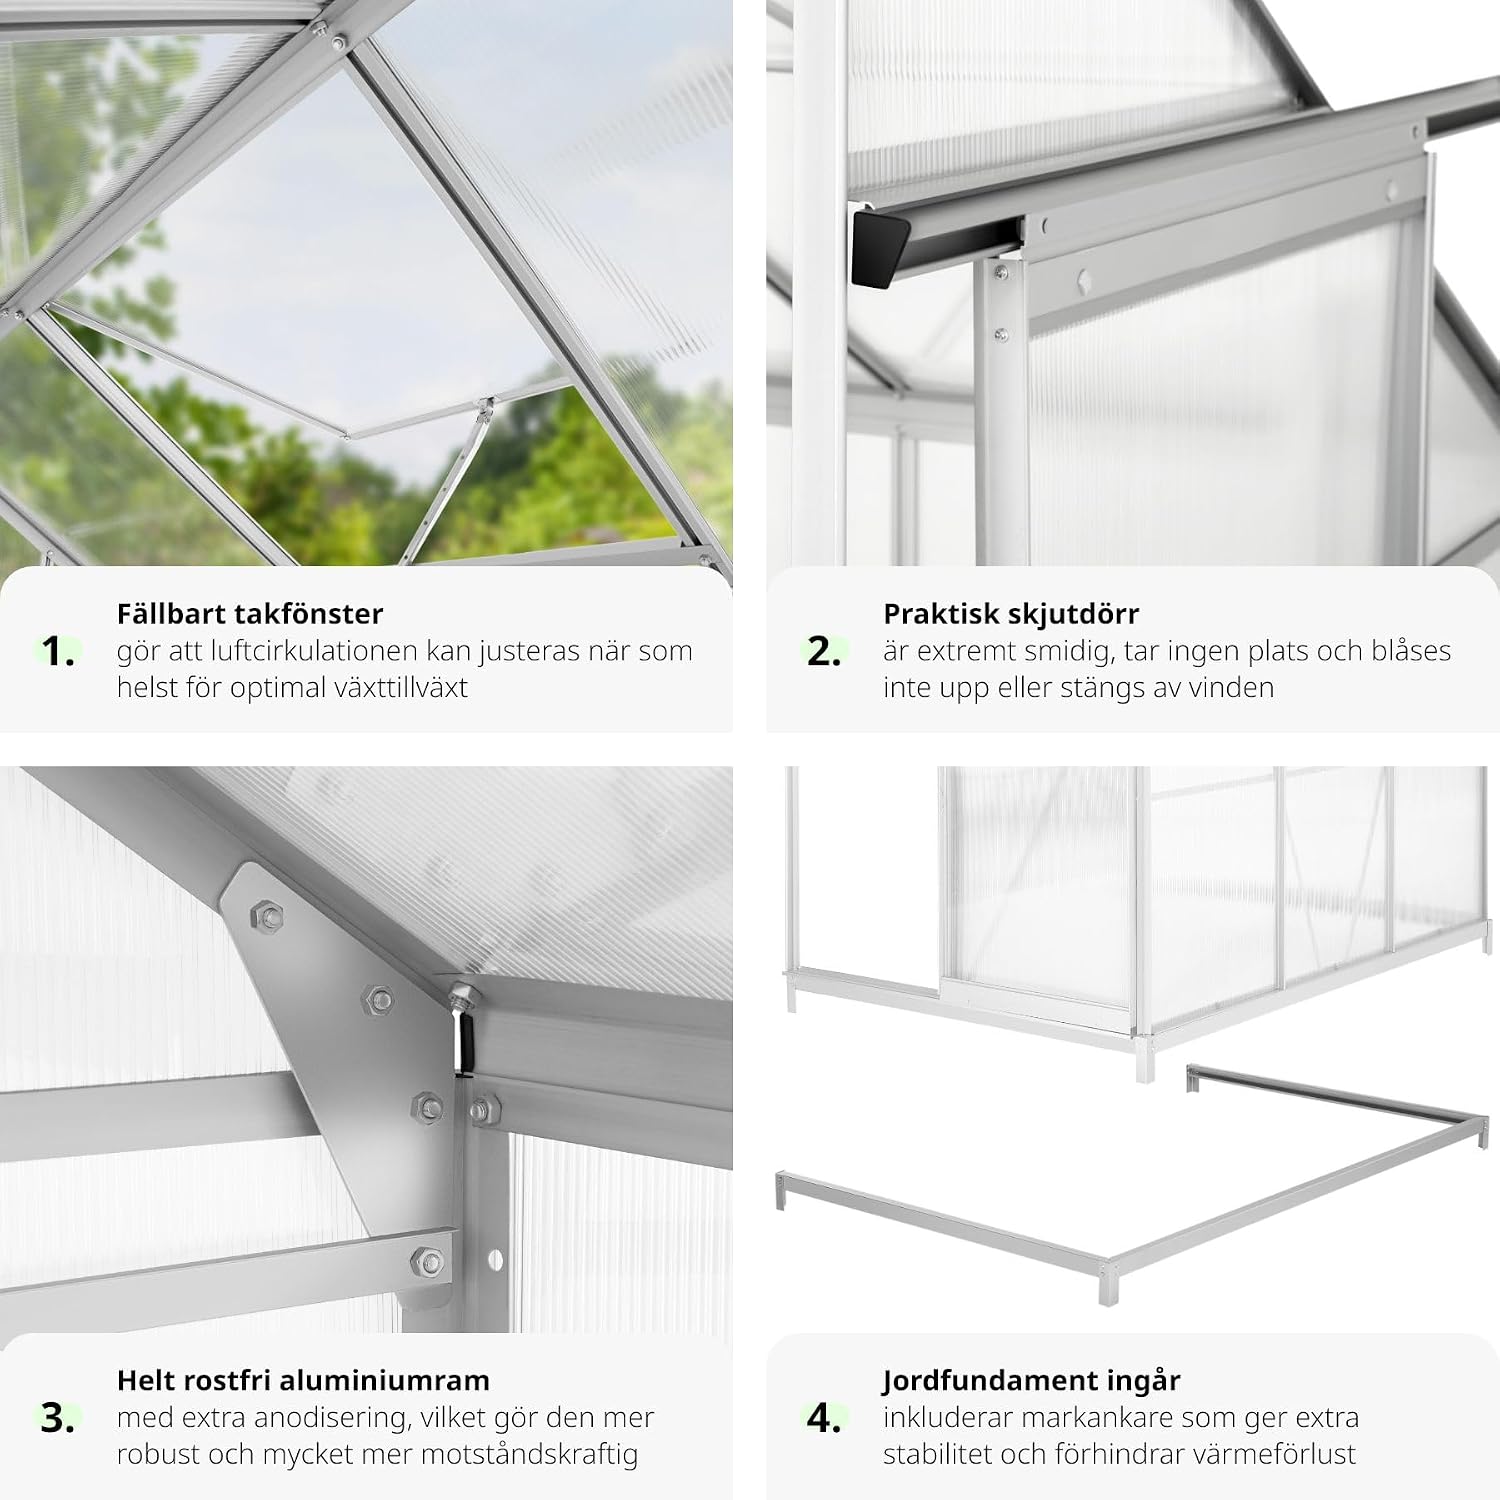
Image: Close-up views illustrating the foldable roof window for air circulation, the practical sliding door, the rust-free aluminum frame, and the included ground foundation for stability.
Operating Instructions
- Ventilation: Utilize the roof window to regulate the internal temperature and humidity. Open the window during warm periods to allow for air circulation and prevent overheating. Close it during colder weather or at night to retain heat.
- Access: The smooth-gliding sliding door provides convenient access to your plants. Ensure the door is fully closed when not in use to maintain the internal climate and protect plants from external elements.
- Plant Placement: Arrange your plants to optimize light exposure and air circulation. Consider the height and growth habits of different plants when positioning them within the greenhouse.
- Watering: Monitor soil moisture regularly. The enclosed environment of a greenhouse can reduce water evaporation, so adjust your watering schedule accordingly.
Maintenance
- Cleaning: Regularly clean the polycarbonate panels with mild soap and water to ensure maximum light transmission. Avoid abrasive cleaners or tools that could scratch the panels.
- Frame Inspection: Periodically check the aluminum frame for any signs of damage or loose connections. Tighten any bolts or screws as needed to maintain structural integrity.
- Door and Window Mechanism: Keep the sliding door tracks and roof window hinges clean and free of debris to ensure smooth operation. Lubricate if necessary.
- Foundation Check: Inspect the foundation and ground anchors periodically, especially after strong winds, to ensure the greenhouse remains securely fixed.
Troubleshooting
- Poor Ventilation: If the greenhouse becomes too hot or humid, ensure the roof window is open. Check for any obstructions preventing proper airflow.
- Sticking Sliding Door: Clean the door tracks thoroughly to remove any dirt or debris. Apply a silicone-based lubricant if the door still does not slide smoothly.
- Water Leaks: Inspect the panel seals and frame connections for any gaps. Apply silicone sealant if necessary to prevent water ingress.
- Greenhouse Instability: Ensure the foundation is correctly assembled and securely anchored to the ground. Check that all frame bolts are tightened.
Specifications
| Feature | Specification |
|---|---|
| Overall Dimensions (L x W x H) | 192 x 128 x 202 cm (approx. 2.02L x 1.28W x 2.02H meters) |
| Eaves Height | 126 cm |
| Foundation Dimensions (L x W x H) | 190 x 127 x 12 cm |
| Floor Area | Approx. 2.39 m² |
| Room Volume | Approx. 4.09 m³ |
| Sliding Door Opening (W x H) | 60 x 156 cm |
| Panel Thickness | 4 mm (Polycarbonate hollow-chamber panels) |
| Weight | Approx. 21.9 kg |
| Frame Material | Anodized Aluminum |
| Cover Material | Polycarbonate (PC) |
| Foundation Material | Galvanized Steel |
| Number of Doors | 1 (Sliding door) |
| Number of Vents | 1 (Roof window) |
| Color | Transparent |
| Model Number | 402469-SE |
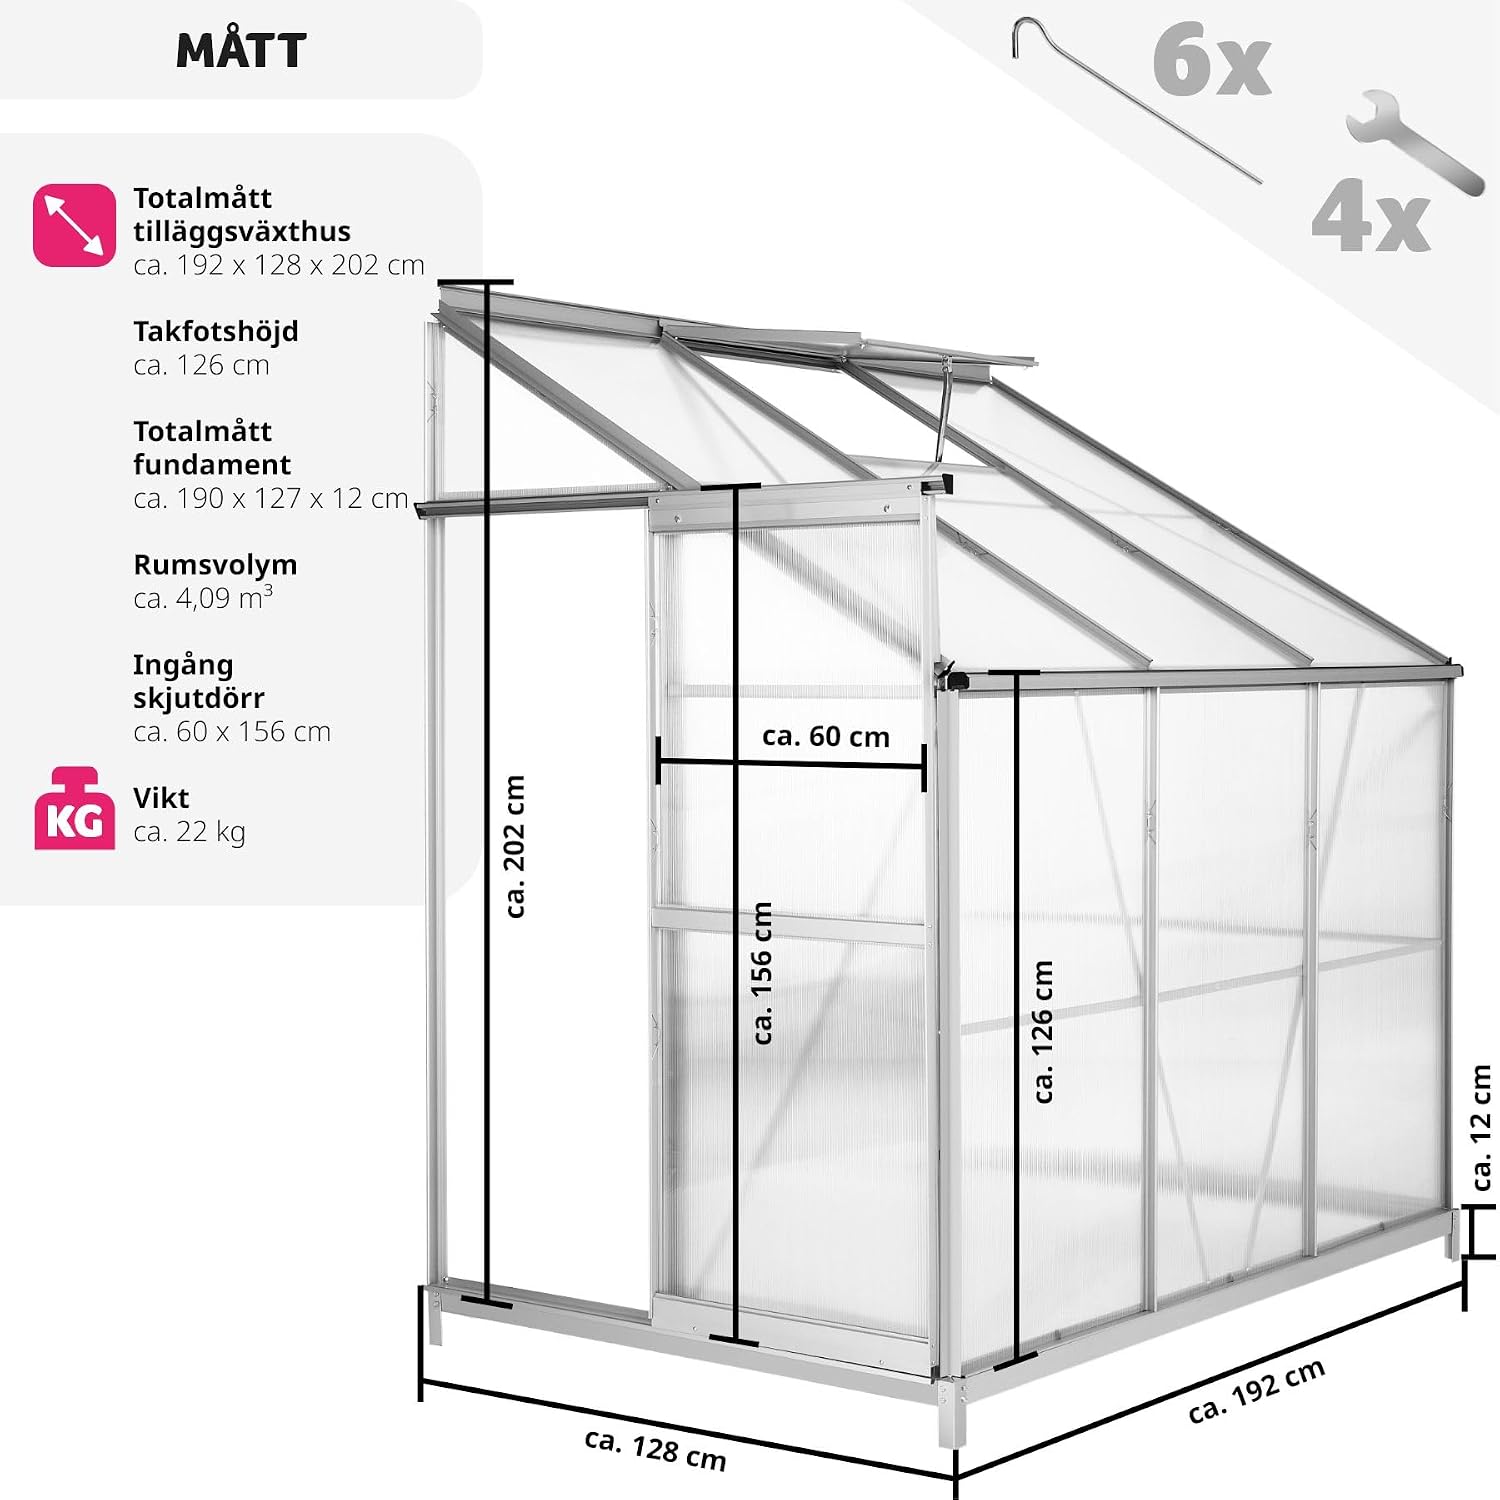
Image: Detailed dimension diagram of the tectake Wall Greenhouse, including overall length, width, height, eaves height, sliding door dimensions, and foundation dimensions.
Warranty and Support
For warranty information, technical support, or to order replacement parts, please refer to the contact information provided with your purchase or visit the official tectake website. Keep your proof of purchase for warranty claims.