
1. Product Overview
The Dixon HS152 Worm Gear Clamp is designed for securing hoses to fittings, ensuring a tight and leak-free connection. This clamp features a 9/16" band and is suitable for hoses with an outer diameter ranging from 7-8/64" to 10". It meets SAEJ1508 standards, which supersedes Mil Spec WW-C-440B, indicating its adherence to specific quality and performance criteria.
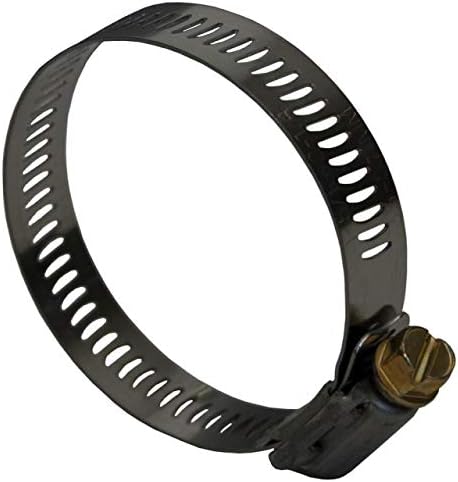
Image 1.1: A single Dixon HS152 Worm Gear Clamp. This image displays the stainless steel band with perforations and the brass-colored hex head screw mechanism used for tightening the clamp around a hose.
2. Specifications
| Feature | Detail |
|---|---|
| Model Number | HS152 |
| Band Width | 9/16" |
| Hose Outer Diameter (OD) Range | 7-8/64" to 10" |
| Construction | Four-piece |
| Screw Design | 5/16" slotted hex head |
| Band and Housing Material | SAE 201/301 Series Stainless Steel |
| Screw Material | SAE 1018 case-hardened, hex-free Chrome Zinc-Plated Steel |
| Compliance | Meets SAEJ1508 (supersedes Mil Spec WW-C-440B) |
| UPC | 089109911707 |
3. Safety Information
Always observe the following safety guidelines when handling and installing worm gear clamps:
- Ensure the clamp size is appropriate for the hose and fitting outer diameter to achieve a secure seal without over-tightening.
- Do not over-tighten the clamp, as this can damage the hose, fitting, or the clamp itself, leading to potential leaks or failure.
- Verify material compatibility between the clamp, hose, and the fluid being conveyed to prevent corrosion or degradation.
- Inspect clamps regularly for signs of wear, corrosion, or damage, especially in critical applications.
- Wear appropriate personal protective equipment (PPE) such as gloves and eye protection during installation and maintenance.
4. Setup and Installation
Follow these steps for proper installation of the Dixon HS152 Worm Gear Clamp:
- Prepare the Hose and Fitting: Ensure both the hose and the fitting are clean and free from debris. The hose end should be cut squarely.
- Position the Clamp: Loosen the clamp screw sufficiently to allow the clamp band to open. Slide the clamp over the end of the hose before attaching the hose to the fitting.
- Attach Hose to Fitting: Push the hose firmly onto the fitting, ensuring it is fully seated and covers the barb or sealing surface.
- Position the Clamp on the Connection: Slide the clamp into position over the hose and fitting connection. The clamp band should be centered over the sealing area of the hose and fitting.
- Tighten the Clamp: Using a 5/16" slotted screwdriver or a hex driver, gradually tighten the screw on the clamp. Tighten until the hose is securely gripped by the fitting and the clamp feels snug. Avoid excessive force.
- Inspect for Security: After tightening, visually inspect the connection to ensure the hose is firmly attached and the clamp is properly seated.
5. Operating Instructions
Once properly installed, the Dixon HS152 Worm Gear Clamp functions by maintaining a constant radial force around the hose, compressing it onto the fitting. This creates a secure, leak-resistant seal. The clamp is designed for static applications where the hose connection needs to be reliably maintained under specified pressure and temperature conditions. No further operational steps are required after correct installation.
6. Maintenance
Regular maintenance helps ensure the longevity and effectiveness of your worm gear clamps:
- Periodic Inspection: Regularly check all installed clamps for signs of corrosion, cracks, deformation, or loosening. The frequency of inspection should be determined by the operating environment and application criticality.
- Cleaning: If operating in dirty or corrosive environments, periodically clean the clamps to remove accumulated debris or corrosive agents. Use a mild cleaner and rinse thoroughly.
- Re-tightening: Over time, hoses can compress or settle. Periodically check the tightness of the clamp screw and re-tighten if necessary, ensuring not to over-tighten.
- Replacement: Replace any clamp that shows signs of significant wear, damage, or corrosion. Do not attempt to repair damaged clamps.
- Storage: Store unused clamps in a dry, clean environment to prevent premature corrosion.
7. Troubleshooting
Common issues and their potential solutions:
| Problem | Possible Cause | Solution |
|---|---|---|
| Leakage at connection |
|
|
| Clamp slips or rotates |
|
|
| Clamp screw stripped or broken |
|
|
8. Warranty Information
Dixon products are manufactured to high standards. For specific warranty details regarding the HS152 Worm Gear Clamp, please refer to the official Dixon Valve & Coupling Company warranty policy available on their official website or contact their customer service directly. Keep your purchase receipt as proof of purchase.
9. Customer Support
For technical assistance, product inquiries, or to report issues, please contact Dixon Valve & Coupling Company customer support through their official channels. Visit the Dixon Valve website for contact information and additional resources.
