
Introduction
This manual provides detailed instructions for the setup, operation, and maintenance of your RCA RCWS30A Weather Station. Please read this manual thoroughly before using the device to ensure proper function and to maximize its lifespan. The RCA RCWS30A Weather Station offers a full-color display for time, date, day, weather forecast, indoor and outdoor temperature, and indoor humidity.
Safety Information
- Do not expose the main unit to extreme temperatures, direct sunlight, or moisture.
- Ensure the outdoor sensor is placed in a location protected from direct rain and sunlight for accurate readings.
- Use only the specified battery types (AAA) for both the main unit and the sensor.
- Keep the device away from strong magnetic fields or electronic interference sources.
- Do not attempt to disassemble or repair the unit yourself. Contact qualified service personnel.
Package Contents
Verify that all items are present in the package:
- Main Weather Station Unit
- RF Sensor
- USB Power Cable (Power adapter sold separately)
Product Overview
The RCA RCWS30A Weather Station consists of a main display unit and a wireless outdoor RF sensor. The main unit displays various environmental data and time information, while the RF sensor transmits outdoor temperature and humidity data wirelessly.
Main Unit Display and Controls

Image: The main display unit of the RCA RCWS30A Weather Station, highlighting key display areas such as Time, Date, Forecast, Indoor Temperature, and Outdoor Temperature. This full-color display provides a clear overview of current conditions.
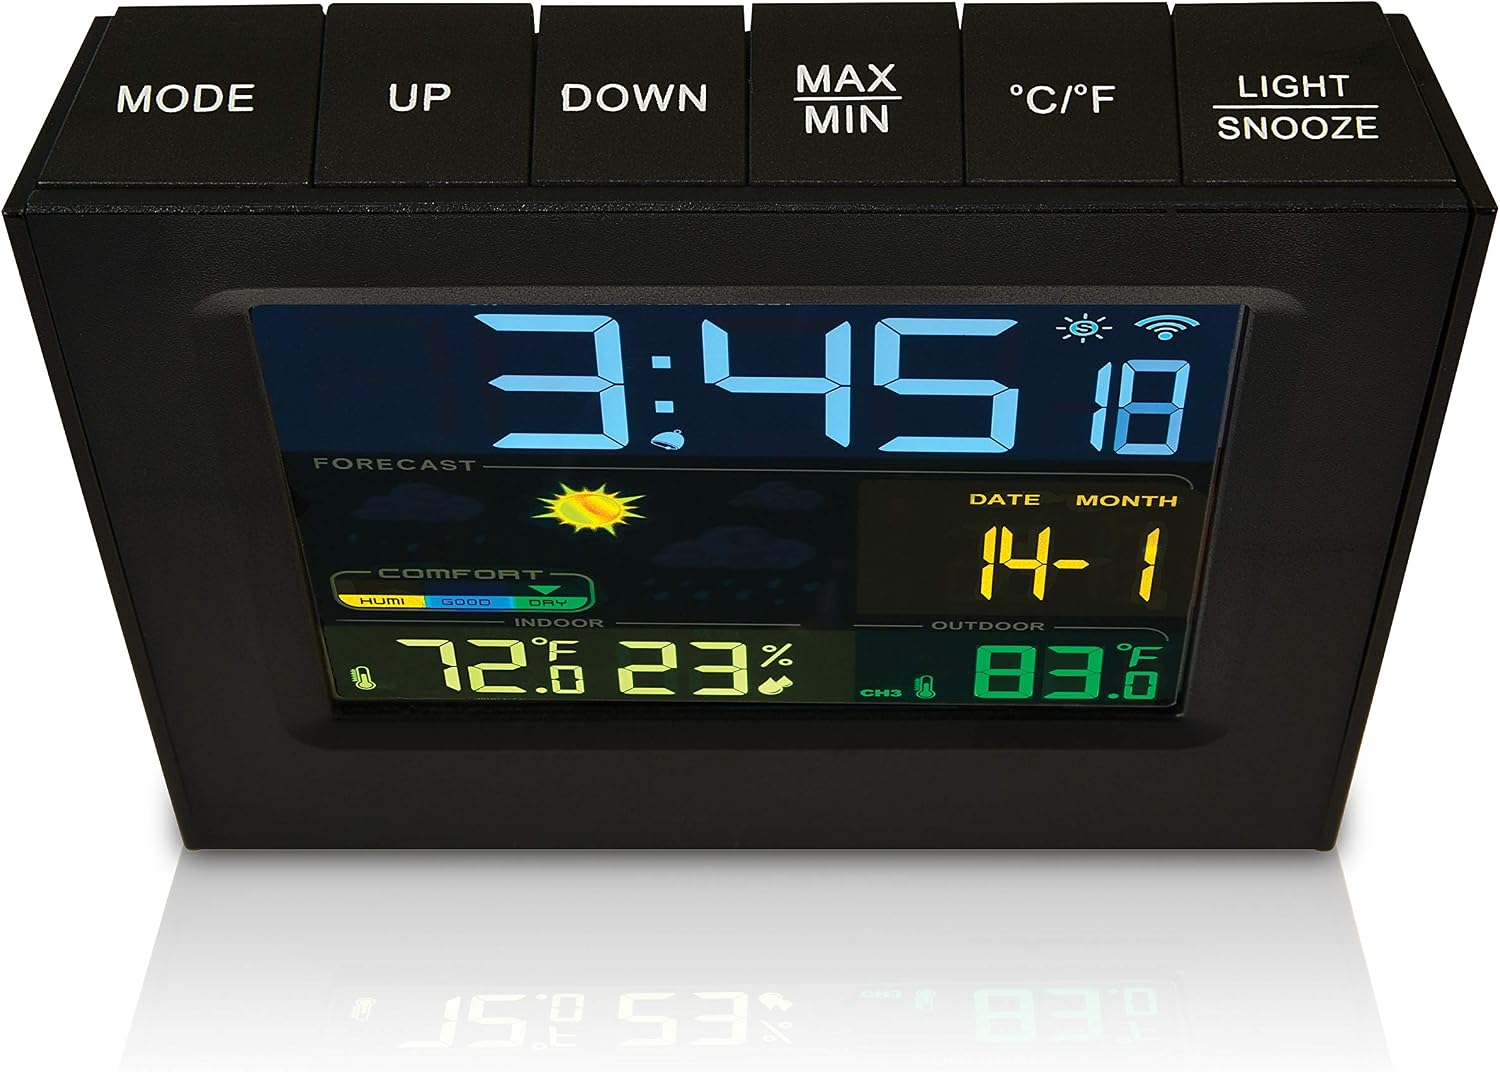
Image: An angled view of the RCA RCWS30A Weather Station's main unit, showing the top control buttons (MODE, UP, DOWN, MAX/MIN, °C/°F, LIGHT/SNOOZE) and the vibrant display from a different perspective.

Image: The rear view of the RCA RCWS30A Weather Station main unit, showing the battery compartment cover and product information label. This area is where AAA batteries are inserted for backup power.
RF Sensor

Image: The compact wireless RF sensor for the RCA RCWS30A Weather Station. This sensor is designed to be placed outdoors to measure external temperature and humidity.
Setup
1. Powering the Main Unit
- USB Power: Connect the included USB power cable to the main unit and to a USB power adapter (sold separately). This is the primary power source for continuous display.
- Battery Backup: For backup power, open the battery compartment on the back of the main unit and insert 3 x AAA batteries (sold separately), observing polarity. Batteries alone will not keep the display continuously lit.
2. Powering the RF Sensor
- Open the battery compartment on the RF sensor.
- Insert 2 x AAA batteries (sold separately), observing polarity.
- Close the battery compartment securely.
3. Pairing the Sensor
Once both units are powered, the main unit will automatically attempt to connect with the RF sensor. This may take a few minutes. Ensure both units are within range of each other during the initial pairing process. If pairing fails, try repositioning the sensor or restarting both units.
4. Placement
- Main Unit: Place the main unit indoors on a flat surface, away from direct sunlight and heat sources, for optimal indoor temperature and humidity readings.
- RF Sensor: Mount the RF sensor outdoors in a shaded, dry location, protected from direct rain and snow. A north-facing wall or under an eave is often ideal. Ensure it is within the wireless range of the main unit.

Image: The wireless RF sensor mounted on the exterior of a house, demonstrating a typical installation location. The image shows wireless signals emanating from the sensor, indicating its communication with the main unit.

Image: The RCA RCWS30A Weather Station main unit displayed on a wooden surface in a modern kitchen setting, illustrating its aesthetic integration into a home environment.
Operating Instructions
Display Overview
The full-color display shows the following information:
- Time and Date: Current time, day, and date.
- Weather Forecast: Graphical representation of upcoming weather conditions (sunny, cloudy, rainy, etc.) based on ambient temperature and humidity changes.
- Indoor Temperature & Humidity: Current temperature and humidity levels detected by the main unit.
- Outdoor Temperature: Current temperature transmitted by the RF sensor.
- Comfort Level Indicator: Displays comfort levels (HUMI, GOOD, DRY) based on indoor humidity.
Setting Time and Date
- Press the MODE button to enter time setting mode.
- Use the UP and DOWN buttons to adjust the values (e.g., hour, minute, year, month, day).
- Press MODE again to confirm each setting and move to the next.
Temperature Unit Selection (°C/°F)
Press the °C/°F button on the top of the main unit to switch between Celsius and Fahrenheit display for temperature readings.
Alarm and Snooze Function
- To set the alarm, press the MODE button repeatedly until the alarm time is displayed.
- Use UP and DOWN to adjust the alarm hour and minute.
- Press MODE to activate or deactivate the alarm.
- When the alarm sounds, press the LIGHT/SNOOZE button to activate the snooze function, which will temporarily silence the alarm.
MAX/MIN Temperature and Humidity Records
Press the MAX/MIN button to view the maximum and minimum recorded indoor and outdoor temperatures and humidity levels. Press again to cycle through MAX, MIN, and current readings. The records are reset daily or can be manually cleared.
Weather Forecast Interpretation
The weather forecast icons are based on changes in atmospheric pressure and humidity detected by the main unit. These are predictions and may not always perfectly match official weather reports. The icons typically represent:
- Sunny
- Partly Cloudy
- Cloudy
- Rainy
Maintenance
- Cleaning: Wipe the main unit and sensor with a soft, dry cloth. Do not use abrasive cleaners or solvents.
- Battery Replacement: Replace batteries in both the main unit (for backup) and the RF sensor when the low battery indicator appears on the display. Ensure correct polarity.
- Sensor Placement: Periodically check the outdoor sensor's placement to ensure it remains protected from direct weather elements and is securely mounted.
Troubleshooting
| Problem | Possible Cause / Solution |
|---|---|
| No display on main unit | Ensure USB power cable is connected and power adapter is working. Check AAA backup batteries for correct insertion and charge. |
| Outdoor temperature not displayed or incorrect | Check RF sensor batteries. Ensure sensor is within range of the main unit. Try re-pairing by removing and reinserting batteries in both units. Avoid obstacles between sensor and main unit. |
| Inaccurate temperature/humidity readings | Ensure main unit and sensor are not exposed to direct sunlight, heat sources, or excessive moisture. Allow time for readings to stabilize after initial setup or battery change. |
| Weather forecast seems inaccurate | The forecast is based on local atmospheric pressure changes. It is a prediction and may not always align with regional forecasts. Ensure the unit has been operating for at least 24 hours for initial calibration. |
Specifications
- Brand: RCA
- Model: RCWS30A
- Power Source (Main Unit): USB (cable included, adapter sold separately) or 3 x AAA batteries (sold separately)
- Power Source (RF Sensor): 2 x AAA batteries (sold separately)
- Display Type: LCD, Full-color
- Connectivity Technology: Wireless (RF Sensor) / USB (Main Unit)
- Temperature Accuracy: ±1 °C
- Product Dimensions: 2.28 x 4.56 x 4.64 inches (Main Unit)
- Item Weight: 10.8 ounces
- Material: Plastic
- Special Features: Alarm, Clock, Weather Forecast, MAX/MIN Records
Warranty and Support
This RCA product is covered by a limited warranty. For specific warranty terms and conditions, please refer to the documentation included with your purchase or visit the official RCA website. For technical support or customer service inquiries, please contact RCA customer support through their official channels.


