
1. Introduction
This manual provides detailed instructions for the proper setup, operation, and maintenance of your Andonstar AD208 Coin Microscope. Designed for precision viewing, this digital microscope is suitable for various applications including coin inspection, PCB repair, soldering, jewelry examination, and general scientific observation. Please read this manual thoroughly before using the device to ensure optimal performance and longevity.
2. Product Overview
The Andonstar AD208 features an 8.5-inch LCD screen, an adjustable metal stand, and integrated lighting for clear observation of magnified objects. Key components are described below and illustrated in the accompanying images.

Figure 2.1: The Andonstar AD208 Coin Microscope, showcasing its 8.5-inch LCD screen and adjustable stand with integrated lighting, observing a circuit board.
2.1 Key Components
- 8.5-inch LCD Screen: Provides a large, clear display for viewing magnified images.
- Adjustable Metal Stand: Offers stability and allows for precise height and angle adjustments of the microscope head.
- Focus Controller: A rotating knob used to achieve a sharp image.
- Built-in LED Lights: Eight integrated LEDs provide primary illumination.
- Adjustable Fill LED Lights: Two flexible, external LED lights on the stand for additional, directional illumination.
- Micro-SD Card Slot: For storing captured photos and recorded videos.
- Control Buttons: Located below the screen for power, menu, mode, and capture functions.

Figure 2.2: Detailed view of the microscope's components, including the two metal fixed clips on the base, the 180-degree adjustable stand, the two metal fill LED lights with 360-degree rotation, and the metal optical bracket for holding the microscope lens.
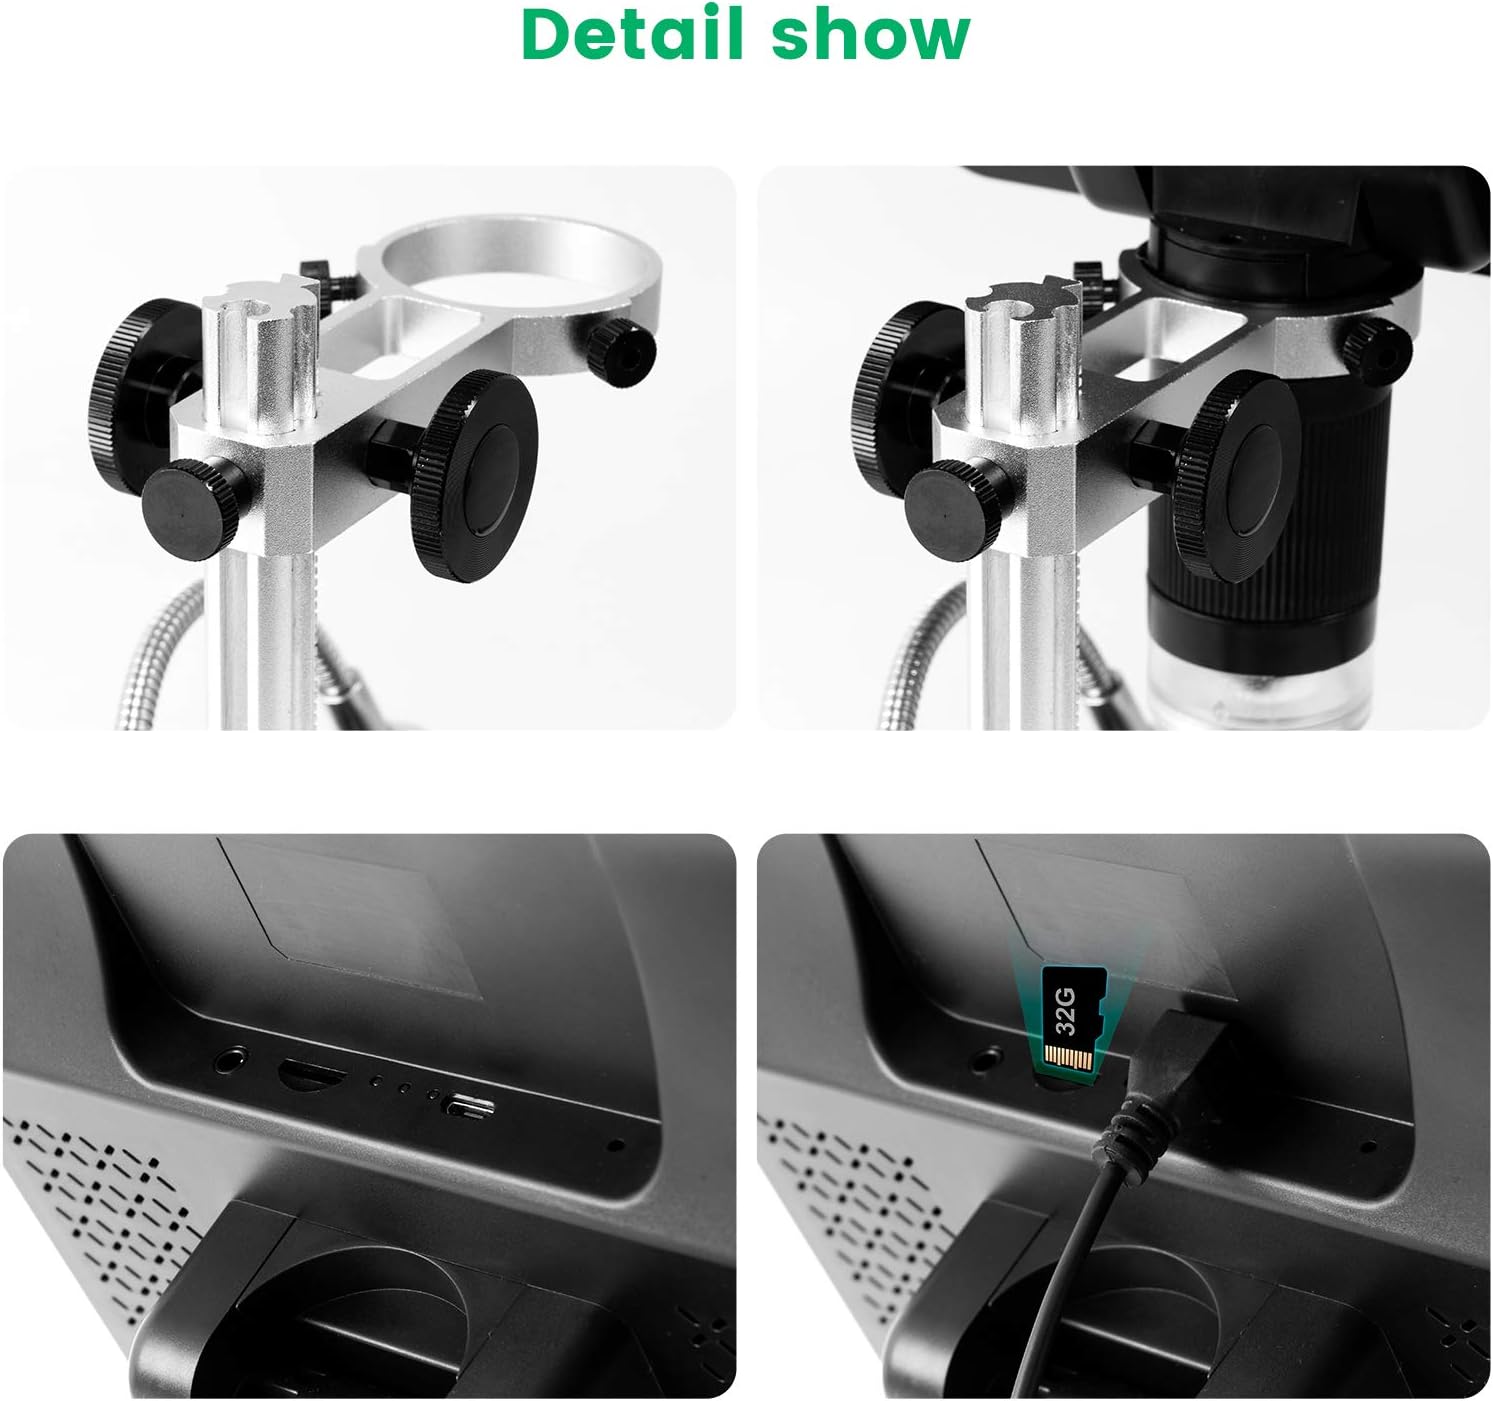
Figure 2.3: Close-up images showing the metal optical bracket for secure lens positioning and the micro-SD card slot for data storage.
3. Setup Instructions
Follow these steps to assemble and prepare your microscope for first use.
3.1 Assembly
- Carefully unpack all components from the packaging.
- Attach the microscope unit (with the LCD screen) to the adjustable metal stand. Ensure it is securely fastened.
- Position the two flexible fill LED lights on the stand as desired.
- Connect the power adapter to the microscope and plug it into a power outlet.
3.2 Micro-SD Card Installation
- Locate the micro-SD card slot on the side of the microscope unit.
- Insert a compatible micro-SD card (not included) into the slot until it clicks into place. Ensure the card is inserted in the correct orientation.
- The device supports photo and video recording only when a micro-SD card is installed.
4. Operating Instructions
This section details how to operate your Andonstar AD208 microscope.
4.1 Power On/Off
- To power on the microscope, press and hold the power button located below the screen.
- To power off, press and hold the power button again until the screen turns off.
4.2 Focusing and Magnification
Achieving a clear image involves adjusting both the distance to the object and the focus controller.
- Place the object you wish to observe on the base plate.
- Adjust the height of the microscope head using the knob on the bracket. The lower the height, the greater the magnification (up to 260X).
- Rotate the focus controller (the ring around the lens) until the image on the screen becomes clear and sharp.

Figure 4.1: Rotate the focus controller to obtain a clear image of the object under observation.
4.3 Adjusting Illumination
The microscope is equipped with multiple light sources to ensure optimal viewing conditions.
- The 8 built-in LEDs provide general illumination.
- The two adjustable/flexible fill LEDs on the stand can be positioned to eliminate shadows or highlight specific areas. Adjust their brightness as needed.
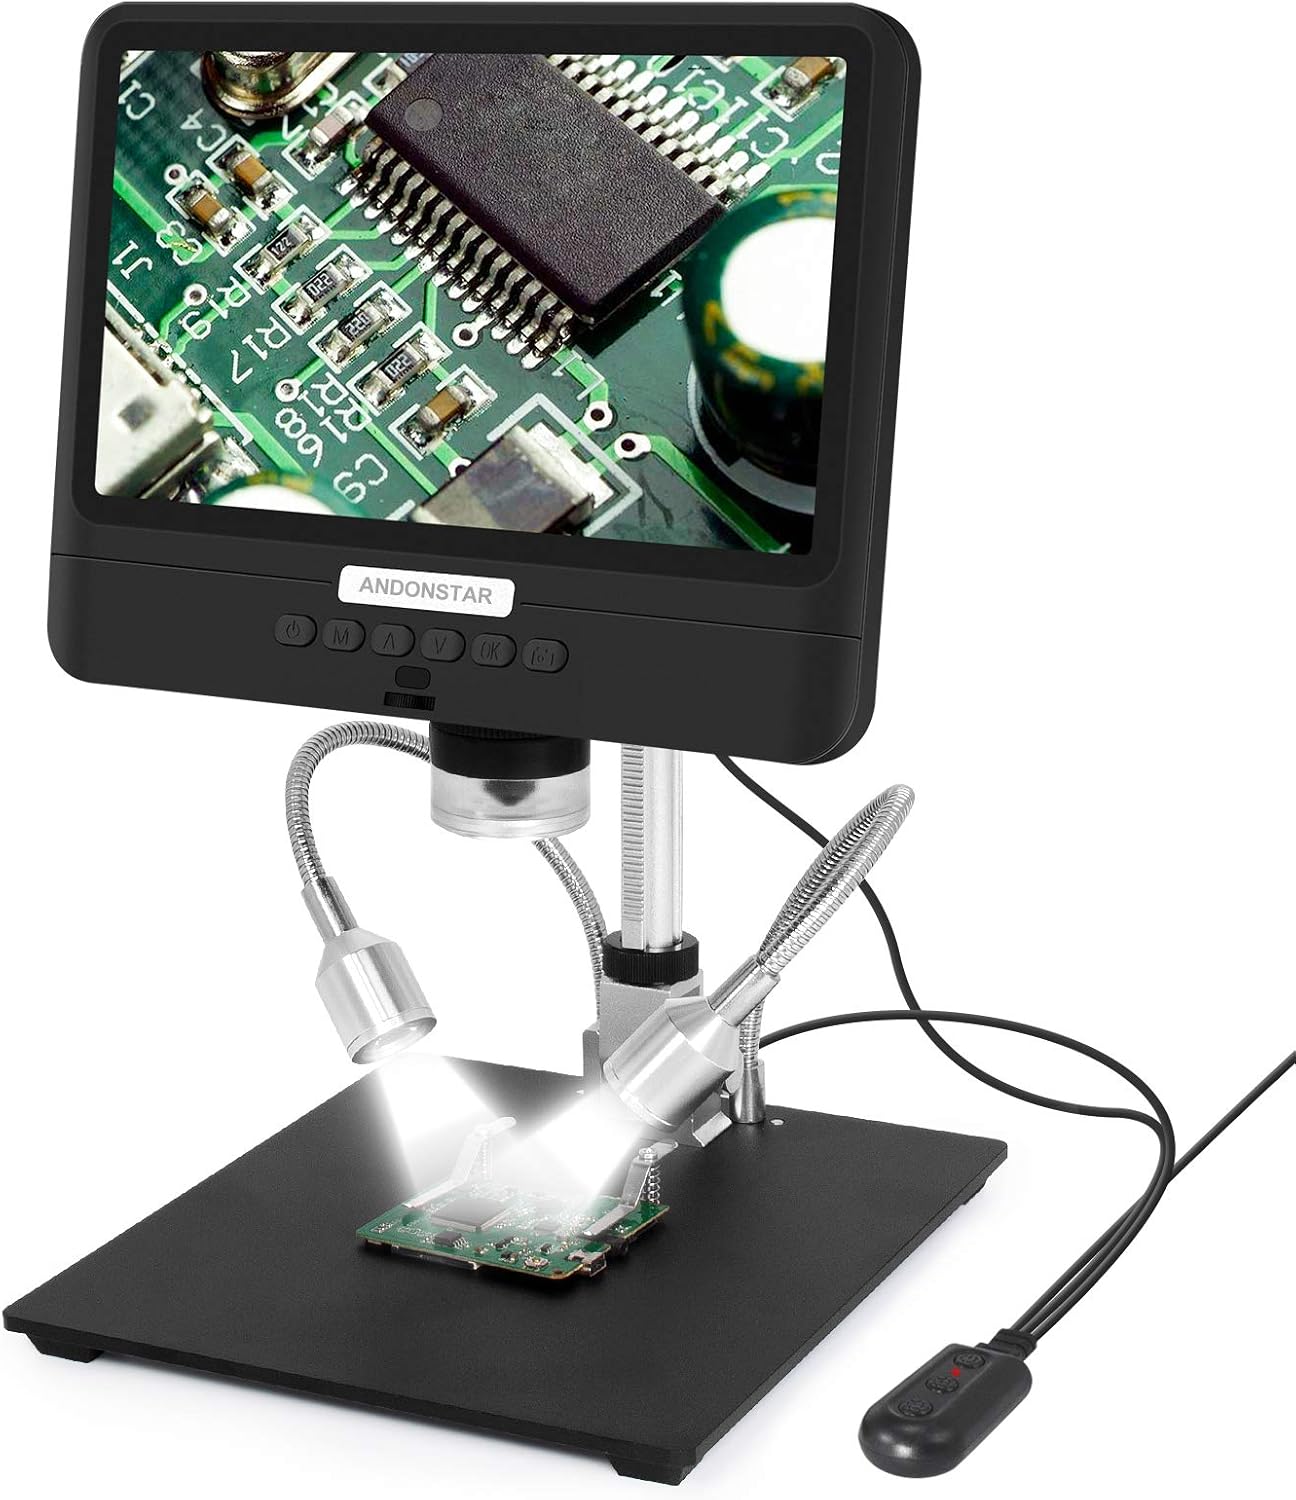
Figure 4.2: The two flexible LED lights provide additional illumination, useful for reducing shadows and enhancing detail.
4.4 Capturing Images and Recording Videos
With a micro-SD card inserted, you can capture high-resolution images and videos.
- Press the "OK" button to take a still photo.
- Press the "M" button to switch to video recording mode, then press "OK" to start/stop recording.
- It is possible to capture still photos while a video is being recorded.
4.5 Screen Adjustment
The 8.5-inch LCD screen can be adjusted for optimal viewing angles.
- The screen can be tilted up to 270 degrees, allowing for more convenient observation from various positions.

Figure 4.3: The microscope screen can be tilted up to 270 degrees for comfortable viewing.
5. Maintenance
Proper maintenance ensures the longevity and performance of your microscope.
- Cleaning the Lens and Screen: Use a soft, lint-free cloth specifically designed for optical surfaces. Do not use abrasive cleaners or solvents.
- General Cleaning: Wipe the body of the microscope and stand with a dry or slightly damp cloth.
- Storage: Store the microscope in a clean, dry environment away from direct sunlight and extreme temperatures.
- Battery Care: The device includes a Lithium Metal battery. For optimal battery life, avoid fully discharging the battery frequently and store the device with a partial charge if not used for extended periods.
6. Troubleshooting
Refer to this section for solutions to common issues.
| Problem | Possible Cause | Solution |
|---|---|---|
| Image is blurry or out of focus. | Incorrect focus adjustment; incorrect distance to object; insufficient lighting. | Adjust the focus controller. Adjust the height of the microscope head. Ensure adequate lighting from both built-in and fill LEDs. |
| Cannot capture photos or record videos. | No micro-SD card inserted; micro-SD card is full or corrupted; incorrect mode selected. | Insert a compatible micro-SD card. Check the card's storage capacity and format if necessary. Ensure the device is in photo or video mode. |
| No power. | Power adapter not connected; power outlet issue; battery discharged. | Ensure the power adapter is securely connected and plugged into a working outlet. Charge the internal battery. |
| Screen is too dark or too bright. | LED brightness settings are incorrect. | Adjust the brightness of the built-in and fill LED lights. |
7. Specifications
Key technical specifications for the Andonstar AD208 Coin Microscope.
- Model: AD208
- Screen Size: 8.5 inches LCD
- Magnification: Up to 260X
- Image Sensor: Native 2MP CMOS HD sensor
- Storage: Micro-SD card slot (card not included)
- Illumination: 8 built-in LEDs + 2 adjustable fill LEDs
- Power Source: 5 Volts (Lithium Metal battery included)
- Product Dimensions: 6 x 5.4 x 5.55 inches (L x W x H)
- Item Weight: 3.08 pounds (1.4 Kilograms)
- Material: Metal, Plastic
- Manufacturer: ShenZhen Andonstar Technology Co., Ltd
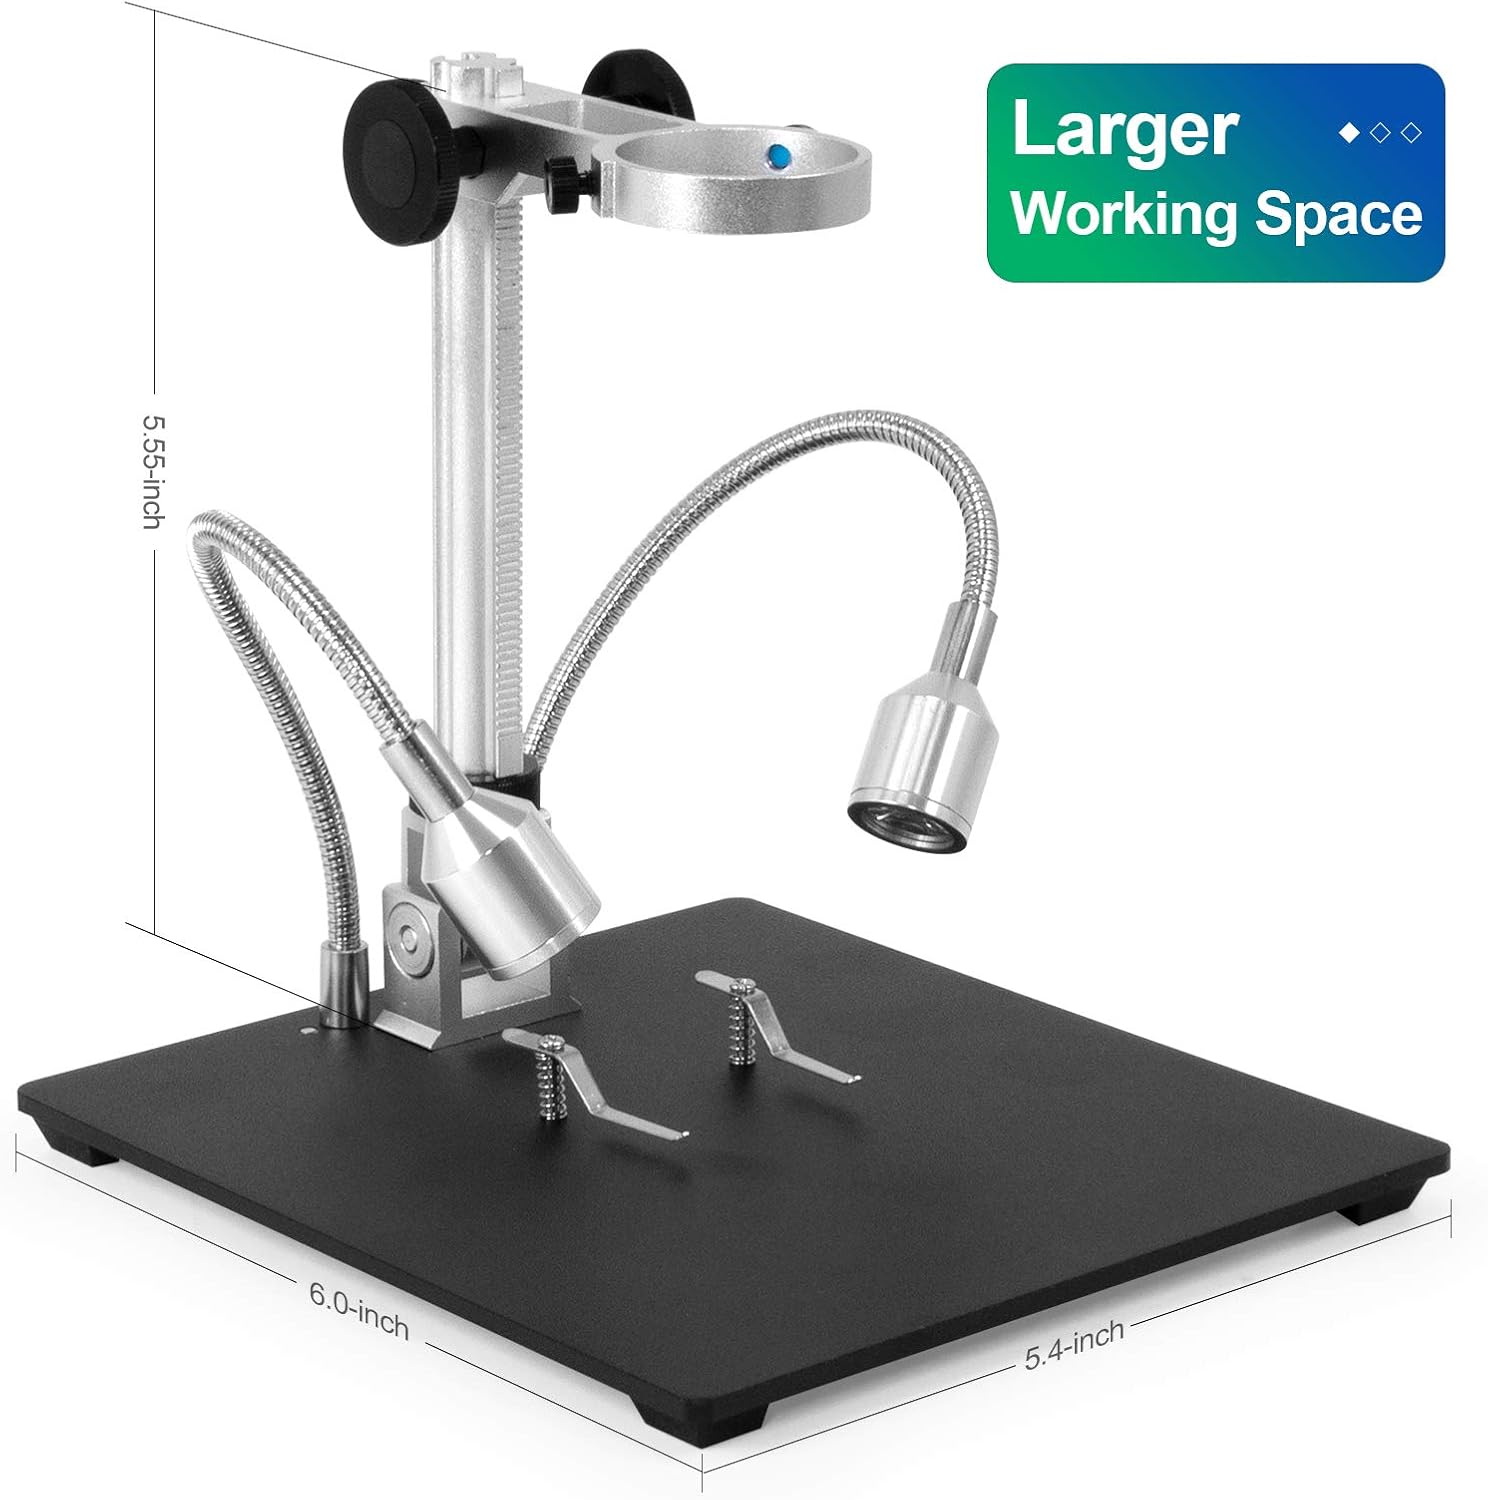
Figure 7.1: Dimensions of the microscope, illustrating the 6.0-inch base length, 5.4-inch base width, and 5.55-inch height, providing a larger working space.

Figure 7.2: Visual comparison highlighting the larger 8.5-inch LCD screen of the Andonstar AD208 model.
8. Warranty and Support
For warranty information and technical support, please refer to the manufacturer's official documentation or contact Andonstar customer service.
- Manufacturer: ShenZhen Andonstar Technology Co., Ltd
- Return Policy: Please refer to your retailer's return policy for details (e.g., 30-day return policy on Amazon).
- For further assistance, visit the Andonstar Store on Amazon.


