
Introduction
Thank you for choosing the Corby Drones CX013 Zoom Advance Smart Drone. This manual provides essential information for the safe operation, maintenance, and troubleshooting of your drone. Please read this manual thoroughly before operating the device to ensure proper use and to maximize your flying experience.
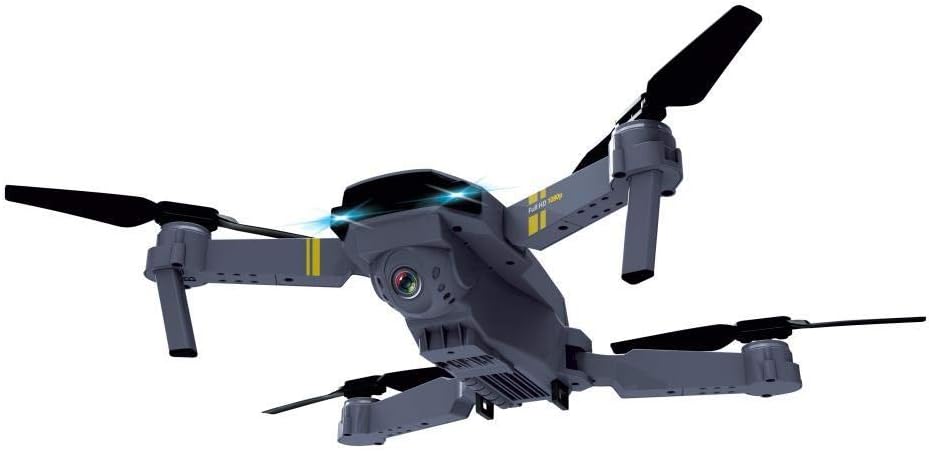
The CX013 features a 1080p camera, a foldable design for portability, and offers a flight time of 7-8 minutes. It is designed for ease of use and an enjoyable aerial experience.
Safety Precautions
Always prioritize safety when operating your drone. Failure to follow these guidelines may result in injury, damage to property, or legal consequences.
- Read the Manual: Fully understand all instructions before flight.
- Environmental Conditions: Fly in open areas, away from people, animals, buildings, and power lines. Avoid flying in strong winds, rain, or snow.
- Battery Safety: Use only approved batteries and chargers. Do not overcharge or puncture batteries. Discontinue use if batteries are damaged or swollen.
- Line of Sight: Always maintain visual line of sight with your drone during flight.
- Age Restriction: This product is not suitable for children under 14 years old. Adult supervision is recommended for all users.
- Propeller Safety: Keep hands, face, and loose clothing away from rotating propellers.
- Local Regulations: Be aware of and comply with all local laws and regulations regarding drone operation.
Package Contents
Verify that all items are present in your package:
- Corby Drones CX013 Zoom Advance Smart Drone
- Remote Control
- USB Charging Cable
- Spare Propellers
- Screwdriver
- User Manual (this document)
- Carrying Case

Setup
1. Unfolding the Drone
Gently unfold the drone arms until they click into place. Ensure all four arms are fully extended and locked.


2. Battery Installation and Charging
- Insert the drone battery into the designated compartment. Ensure it is securely latched.
- Connect the USB charging cable to the drone battery and a suitable USB power source (e.g., computer, USB wall adapter).
- The indicator light on the charging cable will show charging status (e.g., red for charging, green for fully charged).
- Charge the battery fully before first use. Charging time is approximately 60-90 minutes.
- The remote control requires 3x AAA batteries (not included). Open the battery compartment on the back of the remote and insert the batteries, observing polarity.
3. Propeller Installation (if necessary)
If propellers are not pre-installed or need replacement:
- Match the propeller type (A or B) with the corresponding motor arm. Each propeller is marked.
- Securely attach the propellers using the provided screws and screwdriver. Do not overtighten.
Operating Instructions
1. Power On and Pairing
- Place the drone on a flat, level surface.
- Press and hold the power button on the drone until the indicator lights turn on.
- Turn on the remote control. The indicator light on the remote will flash.
- Push the left joystick (throttle) all the way up, then all the way down. The remote will beep, and the drone lights will become solid, indicating successful pairing.
2. Take-off and Landing
- One-Key Take-off: Press the one-key take-off button (usually marked with an upward arrow) on the remote. The drone will automatically ascend to a stable height.
- Manual Take-off: Push both joysticks down and outwards simultaneously to unlock the motors. Then, slowly push the left joystick (throttle) up to ascend.
- One-Key Landing: Press the one-key landing button (usually marked with a downward arrow). The drone will automatically descend and land.
- Manual Landing: Slowly pull the left joystick (throttle) down to descend. Once landed, push both joysticks down and inwards to lock the motors.

3. Flight Controls
Familiarize yourself with the remote control layout:

- Left Joystick (Throttle):
- Up/Down: Ascend/Descend
- Left/Right: Rotate Left/Right (Yaw)
- Right Joystick (Direction):
- Up/Down: Fly Forward/Backward (Pitch)
- Left/Right: Fly Left/Right (Roll)
- Trim Buttons: Use these to fine-tune the drone's stability if it drifts in any direction.
- Speed Modes: Press the speed button to cycle through different flight speeds (e.g., low, medium, high).
- 360° Flip: Press the 360° flip button and then move the right joystick in the desired direction to perform a flip. Ensure sufficient altitude.

4. Camera Operation (1080p)
The Corby CX013 is equipped with a 1080p camera for capturing aerial photos and videos.
- App Connection: Download the official Corby drone app from your smartphone's app store (iOS/Android).
- Wi-Fi Connection: Connect your smartphone to the drone's Wi-Fi network (usually named "Corby_Drone_XXXX").
- Live View: Open the app to see a live feed from the drone's camera.
- Photo/Video: Use the dedicated buttons on the remote control or within the app to take photos or start/stop video recording.
- Storage: Photos and videos are typically saved directly to your smartphone or to a microSD card inserted into the drone (if applicable).
Maintenance
- Cleaning: Use a soft, dry cloth to clean the drone body and camera lens. Avoid using harsh chemicals.
- Propeller Inspection: Regularly check propellers for cracks, bends, or damage. Replace damaged propellers immediately using the provided spare parts.
- Motor Care: Keep motors free from dust and debris. Do not attempt to lubricate motors.
- Battery Storage: Store batteries in a cool, dry place, away from direct sunlight and extreme temperatures. For long-term storage, charge batteries to approximately 50-60%.
- Storage: When not in use, fold the drone and store it in its carrying case to protect it from damage.
Troubleshooting
Drone does not respond to remote control:
- Ensure both drone and remote control are powered on.
- Re-pair the drone and remote control (refer to "Power On and Pairing" section).
- Check remote control batteries and replace if necessary.
- Ensure drone battery is fully charged.
Drone drifts during flight:
- Perform a calibration: Place the drone on a flat surface, then push both joysticks to the bottom-left or bottom-right corners (refer to specific remote instructions for exact calibration method).
- Use the trim buttons on the remote control to adjust for drift.
- Ensure there are no strong air currents or winds affecting the drone.
Camera feed is not working or blurry:
- Ensure your smartphone is connected to the drone's Wi-Fi network.
- Restart the drone, remote, and smartphone app.
- Clean the camera lens gently with a soft cloth.
- Check for app updates.
Short flight time:
- Ensure the battery is fully charged before each flight.
- Battery performance can degrade over time; consider replacing old batteries.
- Flying in strong winds or performing aggressive maneuvers consumes more power.

Specifications
| Feature | Detail |
|---|---|
| Brand | Corby |
| Model Name | Corby Drones CX013 Zoom Advance Smart Drone |
| Model Number | CRB-027 |
| Camera Resolution | 1080p |
| Flight Time | Approx. 7-8 minutes |
| Control Type | Remote Control / Smartphone App |
| Design | Foldable |
| Batteries Included | No (for remote control) |
| ASIN | B08LKRWF81 |
Warranty Information
The Corby Drones CX013 Zoom Advance Smart Drone comes with a 2-year warranty from the date of purchase. This warranty covers manufacturing defects and malfunctions under normal use. It does not cover damage caused by misuse, accidents, unauthorized modifications, or improper maintenance.
Please retain your proof of purchase for warranty claims.
Support
For technical support, troubleshooting assistance, or warranty inquiries, please contact Corby customer service through their official website or the contact information provided with your product packaging.
Website: www.corby.com.tr (Example, actual website may vary)