Introduction
This manual provides detailed instructions for the installation, operation, and maintenance of the CLEAR CL-BC100-KE backup camera, specifically designed for Kenwood MDV-L504 car navigation systems. Please read this manual thoroughly before using the product to ensure safe and correct operation.
Safety Precautions
Before use, be sure to read "Precautions for Use".
Installation of this product should always be performed by a qualified installer or specialist to ensure safety and prevent damage. The company is not responsible for any issues arising from installation by unauthorized personnel or use of non-specified parts.
Important Notes for DC12V Car Use
- Before starting work, always disconnect the battery terminal. Failure to do so may cause fire or malfunction due to short circuits.
- When installing the cord, route it so that it does not interfere with driving, such as with the steering wheel, brake pedal, etc. This can cause traffic accidents.
- After installation, check the operation of the electrical product in the vehicle. Improper operation can cause fire, electric shock, or traffic accidents.
Operation Check After Installation
After installation, perform an operation check. If there is no environment to perform an operation check, perform a simple operation check by connecting to a power source.
Notes on Installation
If the power wiring of the backup camera main unit is thin, reinforce it by soldering or crimping.
Product Contents and Specifications
Product Contents
The CL-BC100-KE backup camera kit includes the following components:
- Camera Main Unit
- Power Cable (1m)
- Video Cable (5m)
- Mounting Screws
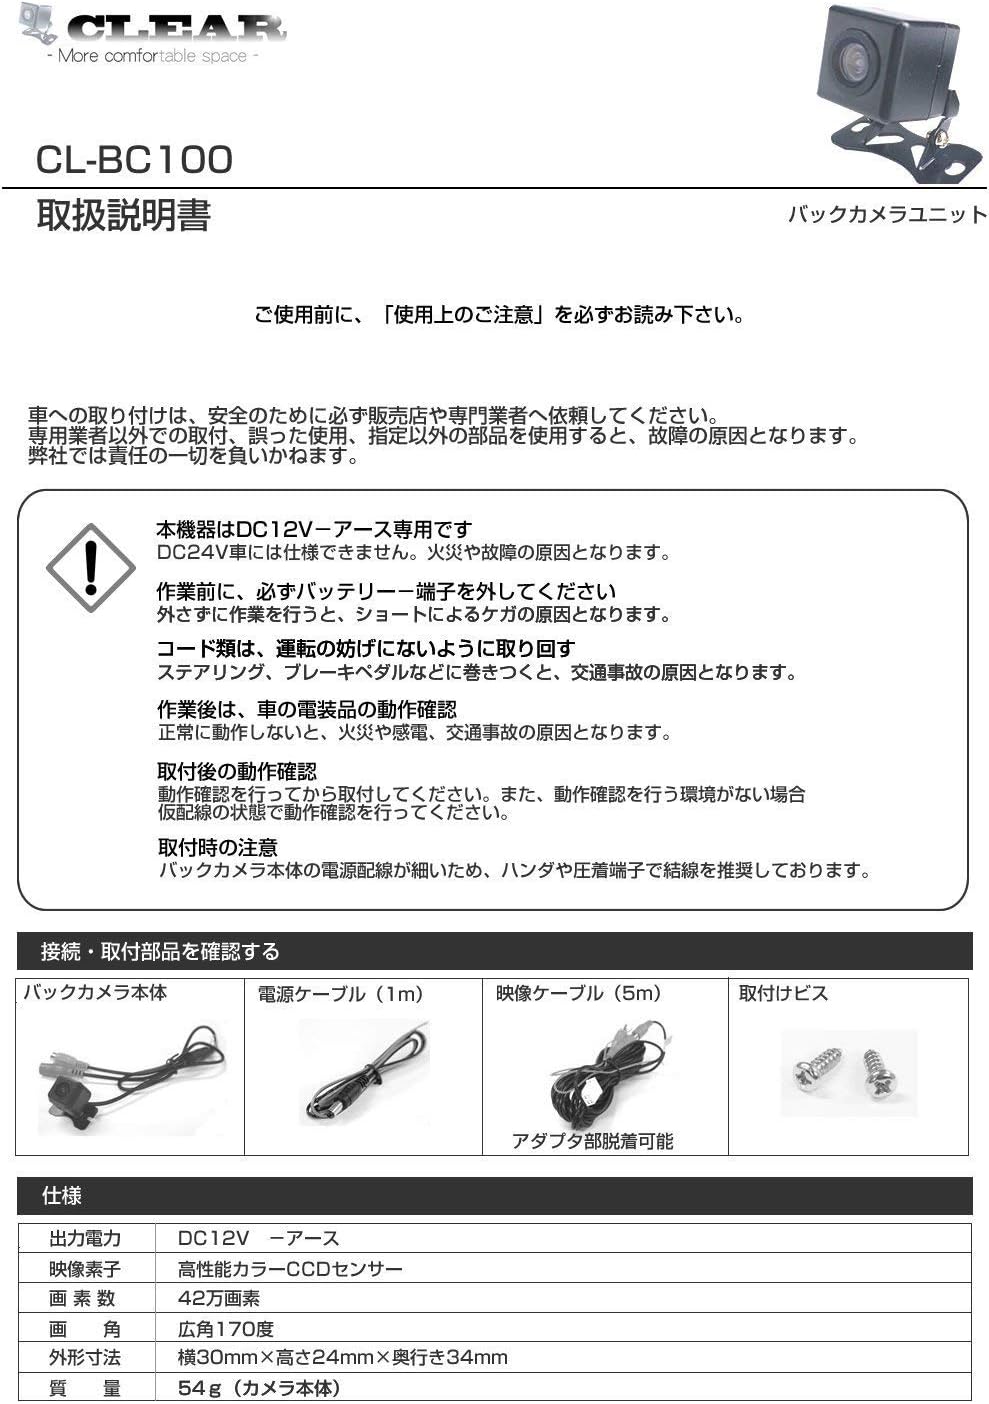
This image illustrates the components included in the CL-BC100-KE backup camera kit: the camera unit, a 1-meter power cable, a 5-meter video cable, and mounting screws. An adapter is not required for direct connection to compatible Kenwood car navigation systems.
Technical Specifications
| Feature | Specification |
|---|---|
| Output Voltage | DC12V - Ground |
| Image Sensor | High-performance CCD Sensor |
| Pixels | 420,000 pixels |
| Viewing Angle | Wide-angle 170° |
| External Dimensions (W×H×D) | 30mm × 24mm × 34mm |
| Weight | Approx. 54g (Camera body) |
| Angle Adjustment | 120° angle adjustment possible |
| Guideline | ON/OFF switchable |
| Other Features | Waterproof, Dustproof |
Installation Guide
Follow these steps to properly install your CLEAR CL-BC100-KE backup camera.

This image provides a visual guide to the installation process, detailing each step from mounting the camera to connecting the power and video cables.
- Mount the Camera:
- 1. Confirm the mounting position and decide on the screw holes before mounting.
- 2. Wipe off any oil, wax, or dust from the mounting surface with a clean cloth.
- 3. Adjust the camera angle after mounting the backup camera.
- Connect the Power Cable:
- Connect the power cable (black terminal) to a 12V power source and the video cable's power part (red terminal).
- 1. Connect the red wire of the power cable to a +12V power source that turns on when the vehicle is in reverse (e.g., backup lamp).
- 2. Route the power cable for the backup camera and the video cable's power part (red terminal).
- 3. Determine if guidelines are displayed. (Green wire inside the camera cable)
- If guidelines are desired, cut the green wire with scissors.
- If no guidelines are desired, do not cut.
- 4. Adjust for normal image or mirror image. (White wire inside the camera cable)
- If mirror image is desired, cut the white wire with scissors.
- If normal image is desired, do not cut.
- Connect the Video Cable:
- Connect the video cable (yellow terminal) to the video cable part (yellow terminal) of the car navigation system.
- Note: When pulling the video cable from the car navigation system to the backup camera, ensure it is not pinched or stretched by the door or other moving parts.
- Connect Camera Connection Adapter to Car Navigation Rear Input:
- Depending on the manufacturer and model, the connection method to the car navigation system may differ. Please check the installation manual for your car navigation system.
- Connect Power Cable Ground Wire (Black) to Vehicle Body:
- Ensure a secure ground connection to the vehicle chassis.
- Perform Operation Check:
- After completing the wiring, perform an operation check. If any abnormalities occur during the operation check, refer to the "Frequently Asked Questions During Installation" section.
Wiring Diagram
This diagram illustrates the correct wiring connections for the CLEAR CL-BC100-KE backup camera.

The diagram shows the connections for the camera, video cable, power cable, and ground, including points for guideline and image reversal settings. It also illustrates recommended camera mounting positions and cable routing.
Key Points for Wiring
- Normal Image / Mirror Image, Guideline ON/OFF:
- White wire: Normal image / Mirror image (cut for mirror image)
- Green wire: Guideline ON/OFF (cut for guideline ON)
- Video Cable Power Supply (Red):
- Can be applied to the following situations:
- 1. If the backup camera power supply is connected to the car navigation system.
- 2. If the backup camera power supply is connected to the backup lamp.
- If not used, insulate the wire.
- Note: Depending on the model, it may not be included or specifications may differ.
- Can be applied to the following situations:
- Backup Camera Mounting Position:
- Mount the camera so that it does not obscure the license plate number.
- Cable Routing Example:
- Cable routing methods vary depending on the vehicle body.
Compatibility
The CLEAR CL-BC100-KE backup camera is designed for specific Kenwood car navigation models. Please refer to the compatibility list below to ensure your car navigation system is supported.

This table lists Kenwood car navigation models compatible with the CL-BC100-KE backup camera, organized by year. Please check your model number against this list.
Compatible Kenwood Car Navigation Models (Example Years)
| Compatibility List: Kenwood Models by Year | ||||
|---|---|---|---|---|
| 2020 | MDV-L407 | MDV-L407W | MDV-S707 | MDV-S707W, MDV-S707L |
| 2019 | MDV-L406 | MDV-L406W | MDV-S706 | MDV-S706W, MDV-S706L, MDV-M906HD, MDV-M906HDW, MDV-M906HDL |
| 2018 | MDV-L405 | MDV-L405W | MDV-L505 | MDV-L505W, MDV-Z905, MDV-Z905W, MDV-M705, MDV-M705W, MDV-M805L |
| 2017 | MDV-L404 | MDV-L404W | MDV-L504 | MDV-L504W, MDV-Z704, MDV-Z704W, MDV-Z904, MDV-Z904W |
| 2016 | MDV-L503 | MDV-L503W | MDV-L403 | MDV-L403W |
Note: For compatibility with models not listed in the table, we cannot guarantee compatibility.
Troubleshooting
If you encounter any issues during installation or operation, refer to the common problems and solutions below.
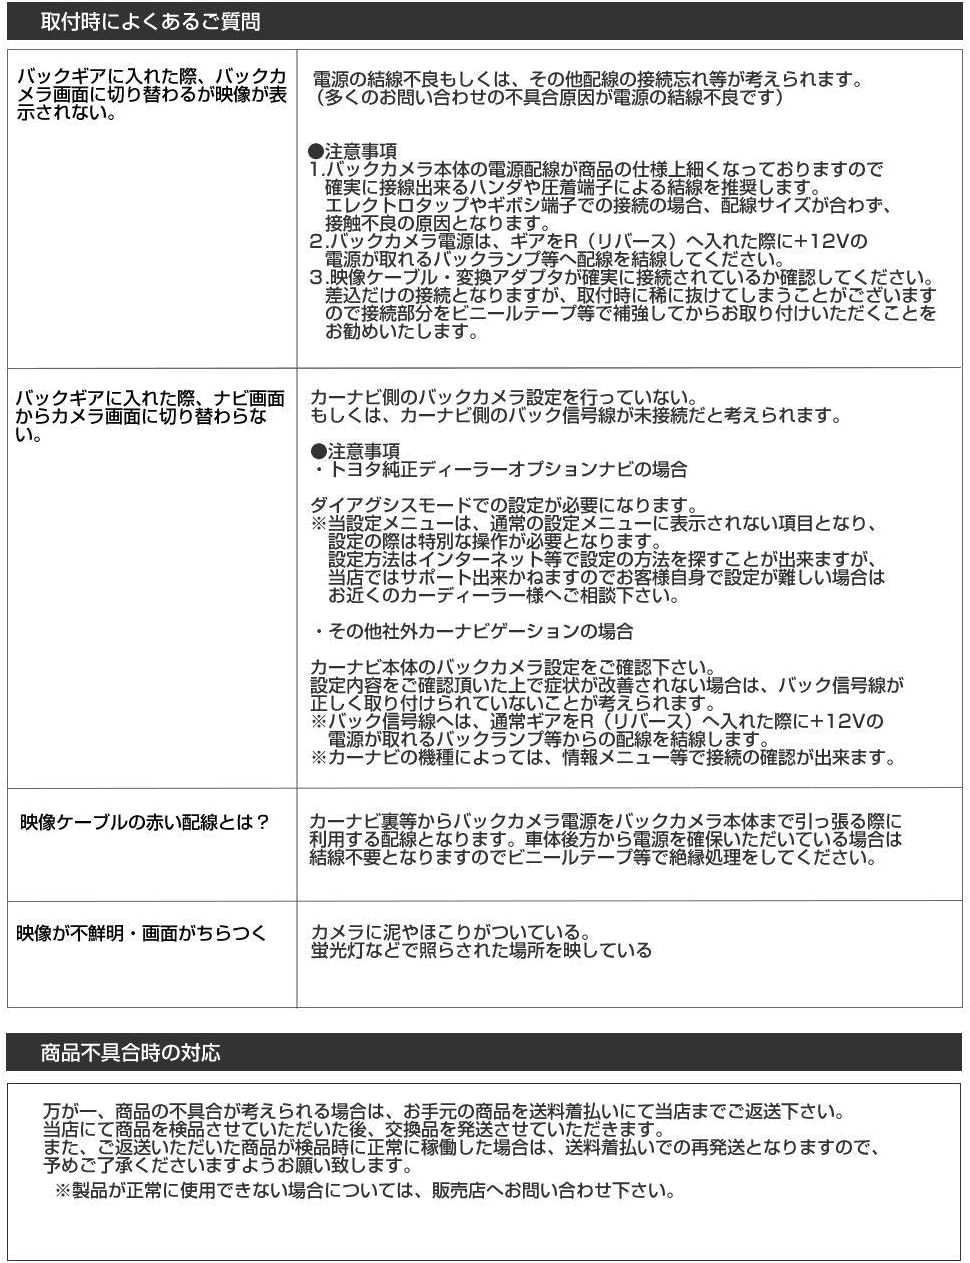
This image provides a list of frequently asked questions and their corresponding answers regarding installation and common issues with the backup camera.
Frequently Asked Questions During Installation
- Q: When putting the car in reverse, the backup camera image does not switch or display.
- A: This could be due to improper power connection or other wiring issues.
- Important Notes:
- 1. The power supply wiring of the backup camera main unit is thin, so if it is pulled or pinched during wiring, it may cause poor contact or disconnection.
- 2. The backup camera power supply should be connected to the +12V power source of the backup lamp when the gear is in reverse.
- 3. Check that the video cable and conversion adapter are securely connected. Although it is a plug-in connection, it may rarely come off during installation. We recommend reinforcing it with video cable tape or similar after installation.
- Important Notes:
- Q: When putting the car in reverse, the navigation screen does not switch to the camera image.
- A: The car navigation system may not be receiving the backup camera signal.
- It is possible that the backup signal line from the car navigation system is not connected.
- Important Note: For Toyota genuine dealer option navigation systems, special operation may be required.
- Settings in the service mode are required.
- The display item in service mode is usually "Camera Settings".
- For setting methods, search online or consult a nearby car accessory store.
- Confirm the backup camera settings on your car navigation system.
- If the backup signal is not detected, the backup image will not be displayed.
- If the backup signal is not detected, connect the backup signal line to the +12V of the reverse lamp.
- For Kenwood navigation systems, check the settings in the menu screen.
- Q: What is the red wire on the video cable for?
- A: This red wire is used to supply power to the backup camera or to detect the reverse signal. It is not always necessary to connect it. If not used, insulate the wire.
- This red wire is used to supply power to the backup camera or to detect the reverse signal.
- It is not always necessary to connect it. If not used, insulate the wire.
- Q: The image is unclear or distorted.
- A: This could be due to dirt on the lens or poor lighting conditions.
- Clean any dirt or dust from the camera lens.
- Ensure the camera is installed in a well-lit area.
Response to Product Defects
If you believe the product is defective, please return it to our store at your expense. If the product is confirmed to be defective by our store, we will send a replacement product at our expense. If the product is not confirmed to be defective, we will return the product at your expense. Please understand this in advance.
If the product cannot be used normally, please contact us.
Maintenance
To ensure the longevity and optimal performance of your CLEAR CL-BC100-KE backup camera, follow these simple maintenance guidelines:
- Cleaning the Lens: Regularly clean the camera lens with a soft, damp cloth to remove dirt, dust, or water spots. Avoid using abrasive cleaners or solvents that could damage the lens.
- Checking Connections: Periodically inspect all cable connections (power and video) to ensure they are secure and free from corrosion. Loose connections can lead to intermittent signal loss or image quality issues.
- Physical Inspection: Check the camera housing and mounting bracket for any signs of damage, cracks, or looseness. Ensure the camera remains firmly in its mounted position.
- Waterproofing: While the camera is waterproof and dustproof, avoid directing high-pressure water jets directly at the camera during car washes, as this could potentially compromise seals over time.
Warranty and Support
For warranty information and customer support, please refer to the seller's policy on Amazon or contact the seller directly. The product description mentions "Response to Product Defects" which implies a form of support.
Seller: CLEAR_車用品 国内商品 スピード配送
For any issues not covered in this manual, please contact the seller for further assistance.


