
1. Introduction
Thank you for purchasing the CCYLEZ A4300 Pro Video Projector. This manual provides essential information for setting up, operating, and maintaining your projector. Please read it thoroughly before use to ensure optimal performance and safety.
The A4300 Pro is a versatile portable projector featuring native 720P resolution with 4K decoding support, 3D playback compatibility, Wi-Fi display for wireless screen mirroring, and Bluetooth 4.0 connectivity. It runs on Android 6.01 OS X, offering a comprehensive home theater experience.
2. Important Safety Instructions
- Do not look directly into the projector lens when the lamp is on.
- Ensure proper ventilation around the projector to prevent overheating. Do not block ventilation openings.
- Use only the power adapter supplied with the projector.
- Keep the projector away from water, moisture, and flammable materials.
- Avoid placing the projector on unstable surfaces.
- Do not attempt to disassemble or repair the projector yourself. Refer all servicing to qualified personnel.
- Keep the remote control batteries out of reach of children.
3. Package Contents
Verify that all items listed below are included in your package:
- 1 x CCYLEZ A4300 Pro Projector
- 1 x Remote Control
- 1 x Power Cable
- 1 x AV Cable
- 1 x HDMI Cable
- 1 x Lens Cleaning Cloth
- 1 x Lens Cap
- 1 x User Manual (this document)

Figure 3.1: Included accessories: remote control, AV cable, HDMI cable, and lens cleaning cloth.
4. Product Overview
4.1 Front View
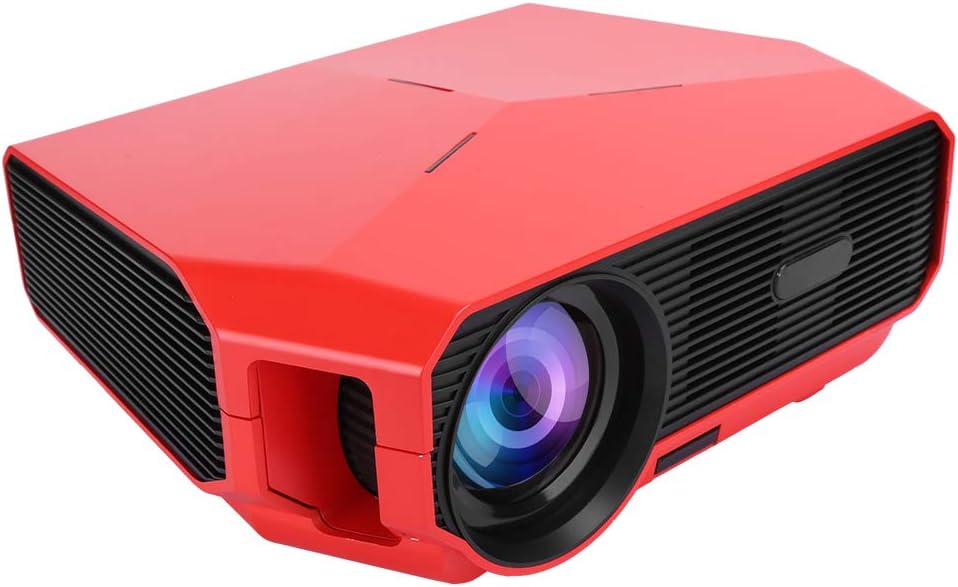
Figure 4.1: Front view of the CCYLEZ A4300 Pro projector, showcasing the lens and front ventilation.
4.2 Rear View and Ports

Figure 4.2: Projector rear view showing various input ports: IR receiver, AV input, Audio Out, two USB ports, VGA input, and power input.
4.3 Side Views

Figure 4.3: Close-up view of one side of the projector, highlighting ventilation grilles.

Figure 4.4: Another close-up view of the projector's side, showing ventilation and part of the lens housing.
5. Setup
5.1 Placement
Position the projector on a stable, flat surface. Ensure there is adequate space around the projector for ventilation. The optimal projection distance ranges from 1.38 to 5.7 meters (4.5 to 18.7 feet), supporting screen sizes from 45 to 200 inches. A recommended screen size is between 60-100 inches for the best viewing experience.

Figure 5.1: Projection distances and screen size examples.
5.2 Power Connection
- Connect the power cable to the projector's power input port.
- Plug the other end of the power cable into a suitable electrical outlet.
5.3 Initial Power On
- Press the power button on the projector or the remote control to turn on the device.
- The projector will boot up and display the home screen.
5.4 Focus and Keystone Correction
- Focus Adjustment: Rotate the focus ring on the projector lens until the projected image is clear and sharp.
- Keystone Correction: If the image appears trapezoidal, use the manual keystone correction dial (usually located near the lens) to adjust the vertical angle until the image is rectangular. The projector supports ±15° vertical keystone correction.
6. Operating Instructions
6.1 Basic Navigation
Use the provided remote control to navigate the projector's interface. The arrow keys allow movement, and the 'OK' button confirms selections. The 'Back' button returns to the previous screen, and the 'Home' button takes you to the main menu.
6.2 Input Source Selection
To switch between different input sources (HDMI, USB, AV, VGA), press the 'Source' button on the remote control and select your desired input from the on-screen menu.
6.3 Wireless Screen Mirroring (Wi-Fi Display)
The projector supports wireless screen mirroring, allowing you to display content from your mobile phone or tablet without data cables. This feature can enlarge your mobile screen up to 100 times.
- Ensure your projector and mobile device are connected to the same Wi-Fi network.
- On the projector's home screen, select the 'Wi-Fi Display' or 'Screen Mirroring' application.
- On your mobile device, activate its screen mirroring function (e.g., 'Smart View' for Samsung, 'Screen Mirroring' for Android, 'AirPlay' for iOS).
- Select the projector's name from the list of available devices on your mobile phone.
- The mobile device's screen will now be mirrored on the projector.
Figure 6.1: Wireless screen mirroring from mobile phone to projector.
6.4 Bluetooth Audio Connection
Connect external Bluetooth speakers or headphones for an enhanced audio experience.
- Go to the projector's settings menu and select 'Bluetooth'.
- Enable Bluetooth and put your external audio device into pairing mode.
- Select your audio device from the list of available devices on the projector to pair.
6.5 3D Playback
The A4300 Pro supports 3D playback, offering a lifelike three-dimensional effect when paired with compatible 3D glasses. Enjoy an IMAX-like cinema experience at home.

Figure 6.2: Immersive 3D playback experience.
6.6 Media Playback (USB/SD)
Insert a USB drive or SD card into the corresponding port on the projector. The projector's media player will allow you to browse and play supported video, audio, and image files.
7. Maintenance
7.1 Cleaning the Lens
Use the provided lens cleaning cloth or a soft, lint-free cloth specifically designed for optical lenses. Gently wipe the lens in a circular motion. Avoid using abrasive cleaners or excessive force.
7.2 Cleaning the Projector Body
Wipe the projector's exterior with a soft, dry cloth. For stubborn dirt, a slightly damp cloth can be used, followed by a dry cloth. Do not use harsh chemicals or solvents.
7.3 Storage
When not in use for extended periods, store the projector in a cool, dry place, away from direct sunlight and extreme temperatures. Use the lens cap to protect the lens from dust and scratches.
8. Troubleshooting
- No Power: Ensure the power cable is securely connected to both the projector and the power outlet. Check if the power outlet is functional.
- No Image: Verify that the correct input source is selected. Check all cable connections (HDMI, AV, VGA). Ensure the lens cap is removed.
- Blurry Image: Adjust the focus ring on the lens. Ensure the projection distance is within the recommended range.
- Trapezoidal Image: Use the manual keystone correction to adjust the image shape.
- No Sound: Check the volume settings on both the projector and the connected source device. If using external speakers, ensure they are properly connected or paired via Bluetooth.
- Remote Control Not Working: Ensure the remote control batteries are correctly inserted and not depleted. Point the remote directly at the projector's IR receiver.
- Wi-Fi Display Issues: Ensure both devices are on the same Wi-Fi network. Restart both the projector and the mobile device.
9. Specifications
| Feature | Specification |
|---|---|
| Model | A4300 Pro |
| Image Technology | BOE4.3 LTPS LCD |
| Native Resolution | 1280 x 720 |
| Max Supported Resolution (Decoding) | 4K (3840 x 2160) |
| Brightness | 4600 ANSI Lumens |
| Contrast Ratio | 4000:1 |
| Light Uniformity | 95% |
| Aspect Ratio | 4:3 / 16:9 |
| Projection Size Range | 45-200 inches |
| Projection Distance Range | 1.38 ~ 5.7 meters (4.5 ~ 18.7 feet) |
| Recommended Screen Size | 60-100 inches |
| Keystone Correction | ±15° Vertical (Manual) |
| Lens Correction | Manual Focus |
| Projection Mode | Front, Rear, Ceiling Front, Ceiling Rear |
| CPU | Mstar6A358 (ARM A35 4-core 64-bit) |
| Operating System | Android 6.01 OS X |
| Memory | 1GB DDR3 SDRAM, 8GB Flash Memory |
| Wi-Fi | High-speed 2.4G Dual-band Wi-Fi |
| Bluetooth | Bluetooth 4.0 |
| Audio Decoding | Dolby Surround 7.1 |
| Operating Voltage | DC 250V Input |
| Connectivity | HDMI, USB (x2), AV, VGA, Audio Out |
| Remote Control Batteries | 2x AAA (not included) |
| Manufacturer | Ccylez |
| Model Number | Ccylezzu42e9dkti-12 |
10. Warranty and Support
The CCYLEZ A4300 Pro Video Projector comes with a standard manufacturer's warranty. Please refer to the warranty card included in your package or contact your retailer for specific warranty terms and conditions.
For technical support, troubleshooting assistance, or inquiries about your product, please contact CCYLEZ customer service through the contact information provided on the product packaging or the official CCYLEZ website.