1. Important Safety Instructions
Always read and understand all safety warnings and instructions before operating the lawnmower. Failure to follow these instructions may result in serious injury or death.
- Personal Protective Equipment: Always wear sturdy footwear, long trousers, and eye protection when operating the lawnmower. Hearing protection is also recommended.
- Fuel Safety: Handle gasoline with extreme care. It is highly flammable. Store fuel in approved containers, in a cool, well-ventilated area, away from sparks or open flames. Never refuel a hot engine.
- Operation Area: Clear the area of objects such as rocks, toys, wires, or other debris that could be thrown by the blade. Keep bystanders, especially children and pets, at a safe distance.
- Slope Operation: Exercise extreme caution when operating on slopes. Mow across the face of slopes, never up and down. Be sure of your footing.
- Blade Safety: Never place hands or feet near rotating parts. Disconnect the spark plug wire before performing any maintenance or clearing blockages.
- Maintenance: Perform regular maintenance as described in this manual. Ensure all guards and safety devices are in place and functioning correctly before each use.
2. Product Overview
The Scheppach MP132-40 is a thermal push lawnmower designed for efficient lawn maintenance. It features a 131cc engine and a 40cm cutting width, suitable for areas up to 600 m².

Figure 2.1: Overall view of the Scheppach MP132-40 Thermal Push Lawnmower. This image displays the complete assembly of the lawnmower, including the engine, cutting deck, wheels, handle, and grass collection bag.

Figure 2.2: Illustration of the lawnmower's primary functions: Mowing and Grass Catching. The diagram shows how the mower cuts grass and how the grass is collected into the rear bag.

Figure 2.3: Key specifications including recommended lawn area (600 m²), cutting height range (30-66 mm), grass box capacity (35 L), and maximum cutting width (400 mm).

Figure 2.4: Close-up view of the axial cutting height adjustment mechanism, showing the three available height settings from 30 mm to 66 mm.

Figure 2.5: Detail of the ergonomic comfort handle designed to absorb vibrations during operation, enhancing user comfort.

Figure 2.6: Visual representation highlighting the 2-in-1 functionality of the lawnmower: Mowing and Grass Catching.

Figure 2.7: A user operating the Scheppach MP132-40 lawnmower on a grassy area, demonstrating typical usage.
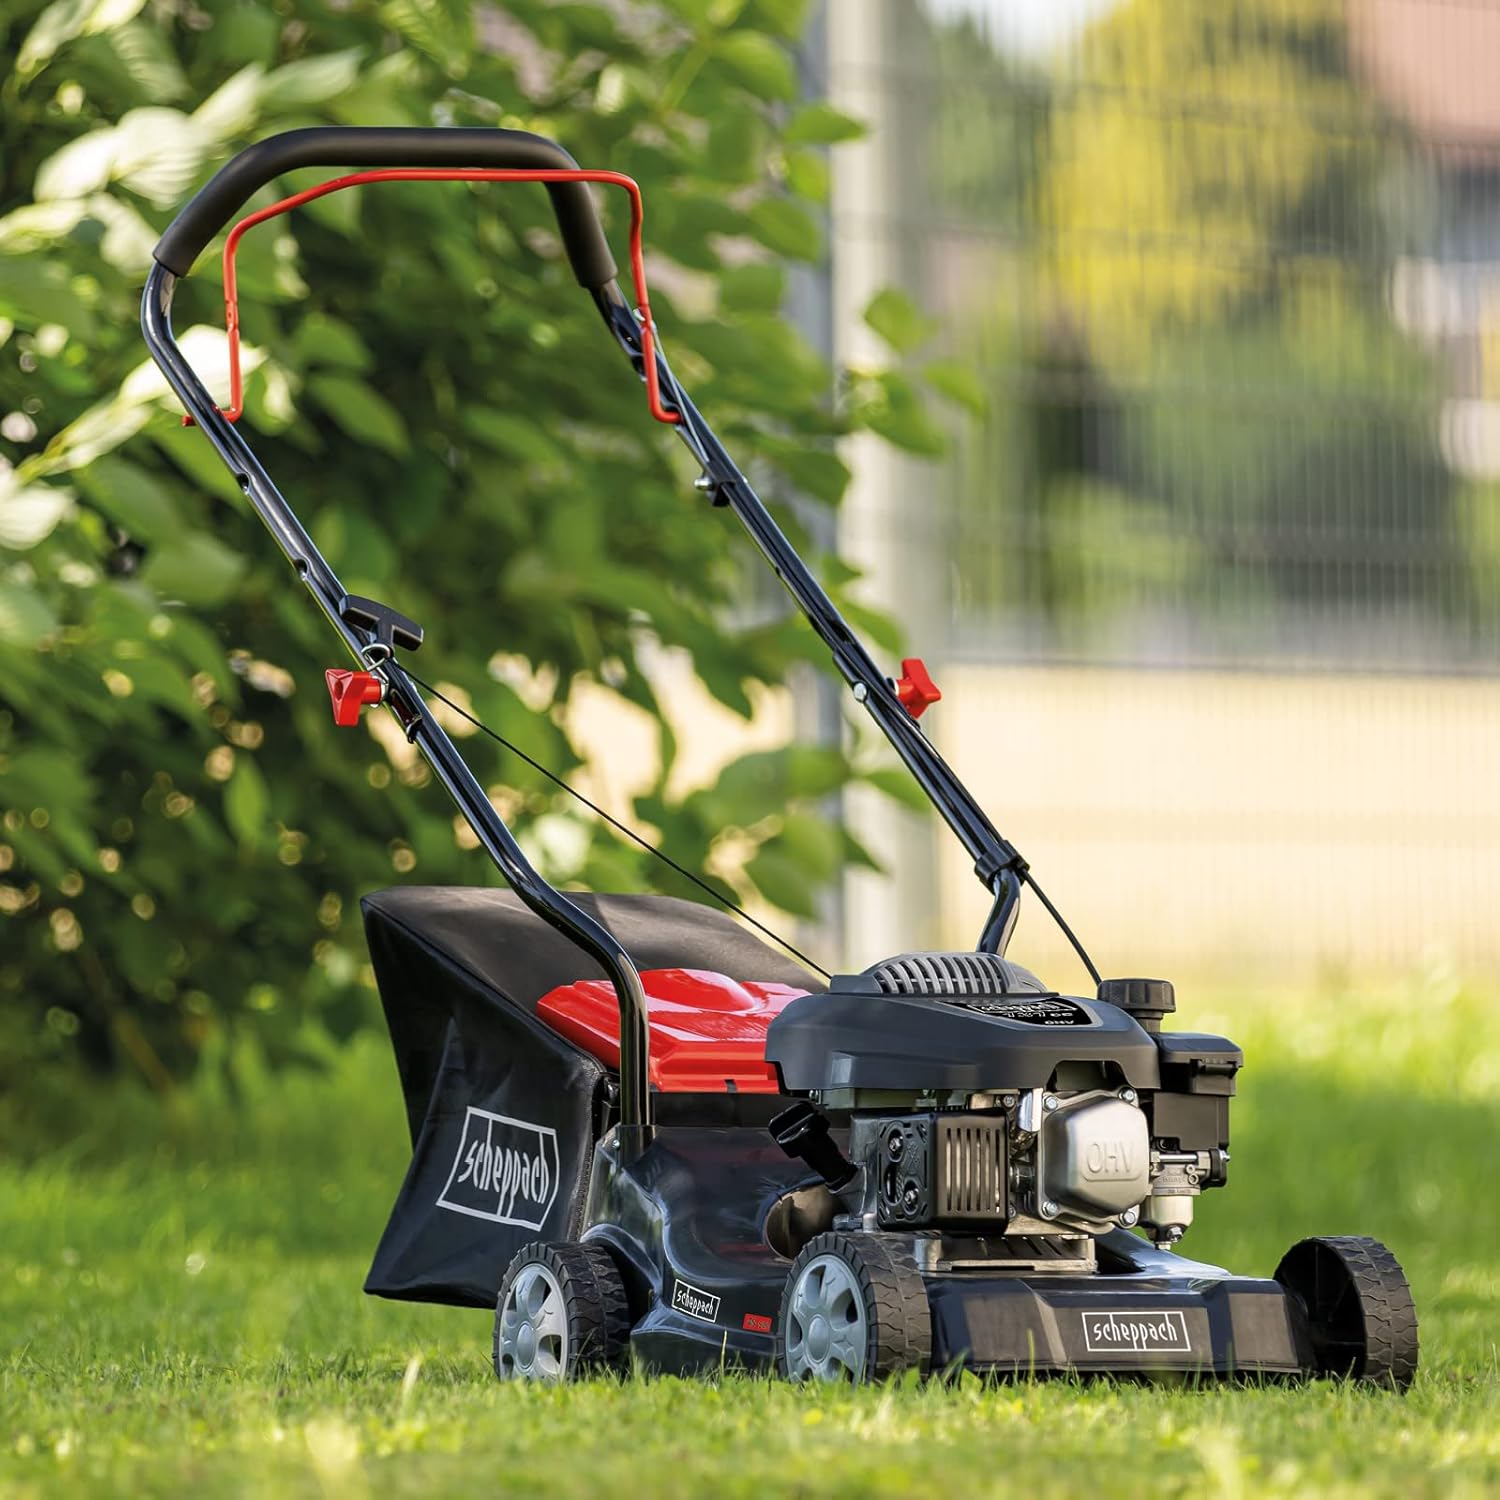
Figure 2.8: The Scheppach MP132-40 lawnmower positioned in a garden, showcasing its design and compact form factor.
3. Setup and Assembly
The Scheppach MP132-40 lawnmower requires minimal assembly before first use. Follow these steps carefully:
- Unpacking: Carefully remove all components from the packaging. Ensure all parts listed in the packing list are present.
- Handle Assembly: Attach the upper handle to the lower handle using the provided bolts and knobs. Ensure the handle is securely fastened.
- Wheel Attachment (if necessary): If the wheels are not pre-attached, secure them to the axle using the appropriate fasteners. Adjust the wheel height to your desired cutting level by screwing them to the correct position.
- Grass Collection Bag Assembly: Assemble the grass collection bag according to the instructions provided with the bag. Attach it securely to the rear of the lawnmower.
- Adding Engine Oil: Before starting the engine for the first time, fill the engine with the recommended type and amount of engine oil. Refer to the engine manual for specific oil requirements and capacity. Do not overfill.
- Adding Fuel: Fill the fuel tank with fresh, unleaded gasoline. Do not use E85 or other ethanol blends not approved for small engines. Ensure the fuel cap is securely tightened after refueling.
Note: The lawnmower blade is pre-sharpened from the factory, allowing for immediate use after assembly and fluid filling.
4. Operating Instructions
Proper operation ensures efficient performance and extends the life of your lawnmower.
4.1 Starting the Engine
- Ensure the fuel tank is filled and the oil level is correct.
- Move the throttle lever (if present) to the "START" or "CHOKE" position.
- Firmly grasp the starter rope handle. Pull the rope with a quick, continuous motion until the engine starts. It may require a few pulls.
- Once the engine starts, gradually move the throttle lever to the "RUN" position.
4.2 Adjusting Cutting Height
The cutting height can be adjusted axially in 3 steps, ranging from 30 mm to 66 mm.
- Turn off the engine and disconnect the spark plug wire before adjusting the cutting height.
- Locate the height adjustment levers on each wheel or axle.
- Move the levers to the desired height setting. Ensure all wheels are set to the same height for an even cut.
4.3 Mowing Techniques
- Mow only in daylight or good artificial light.
- Avoid mowing wet grass, as it can clog the mower and be slippery.
- Overlap cutting swaths slightly to ensure complete coverage.
- For best results, mow at a consistent speed.
- Empty the grass collection bag regularly to maintain optimal performance and prevent clogging.
4.4 Stopping the Engine
To stop the engine, release the engine control lever (bail bar) on the handle. The engine should stop automatically. If it does not, move the throttle lever to the "STOP" position.
5. Maintenance
Regular maintenance is crucial for the longevity and safe operation of your lawnmower. Always ensure the engine is off and the spark plug wire is disconnected before performing any maintenance.
5.1 Cleaning
- After each use, clean the underside of the cutting deck to remove grass clippings and debris. This prevents rust and maintains cutting efficiency.
- Wipe down the exterior of the mower with a damp cloth. Do not use a high-pressure washer directly on the engine or electrical components.
5.2 Blade Care
- Inspect the blade regularly for sharpness, cracks, or damage. A dull blade tears grass, leading to an unhealthy lawn.
- If the blade is dull, it can be sharpened by a qualified service technician or replaced with a genuine Scheppach replacement blade.
- Ensure the blade is balanced after sharpening to prevent excessive vibration.
5.3 Engine Maintenance
- Oil Change: Change the engine oil after the first 5 hours of operation, then every 25-50 hours or annually, whichever comes first. Refer to the engine manual for the correct procedure and oil type.
- Air Filter: Clean or replace the air filter regularly, especially when operating in dusty conditions. A clogged air filter reduces engine performance.
- Spark Plug: Inspect and clean the spark plug annually or every 50 hours. Replace if worn or fouled.
5.4 Storage
- Before storing for extended periods, drain the fuel tank or add a fuel stabilizer to prevent fuel degradation.
- Clean the entire lawnmower thoroughly.
- Store the lawnmower in a clean, dry, and well-ventilated area, away from direct sunlight and extreme temperatures.
6. Troubleshooting
This section provides solutions to common operational issues. For problems not listed here, contact customer support.
| Problem | Possible Cause | Solution |
|---|---|---|
| Engine won't start | No fuel, old fuel, spark plug issue, clogged air filter, engine control lever not engaged. | Check fuel level, use fresh fuel, inspect/clean/replace spark plug, clean/replace air filter, ensure engine control lever is fully engaged. |
| Engine runs rough or lacks power | Clogged air filter, old fuel, dirty spark plug, incorrect oil level. | Clean/replace air filter, drain old fuel and add fresh, clean/replace spark plug, check oil level and adjust. |
| Uneven cut | Blade dull or bent, cutting height not set evenly, wheels damaged. | Sharpen or replace blade, ensure all wheels are at the same cutting height, inspect wheels for damage. |
| Excessive vibration | Bent or unbalanced blade, loose components, engine issue. | Inspect blade for damage and balance, check all bolts and fasteners for tightness, consult a service technician if vibration persists. |
| Grass not collecting properly | Grass bag full, discharge chute clogged, blade dull, mowing wet grass. | Empty grass bag, clear any blockages in the chute, sharpen blade, avoid mowing wet grass. |
7. Specifications
| Feature | Detail |
|---|---|
| Model Number | MP132-40 |
| Engine Displacement | 131 cc |
| Cutting Width | 40 cm (400 mm) |
| Cutting Height Adjustment | Axial, 3 steps (30 - 66 mm) |
| Grass Box Capacity | 35 Liters |
| Recommended Lawn Area | Up to 600 m² |
| Power Type | Gasoline |
| Material | Alloy Steel (Chassis) |
| Product Dimensions (L x W x H) | Approx. 131 x 47 x 97 cm |
| Item Weight | 16.3 kg |
| Manufacturer | SCHEPPACH |
8. Warranty and Support
Scheppach products are manufactured to high quality standards and are subject to strict quality controls. This product is covered by a manufacturer's warranty against defects in materials and workmanship.
- Warranty Period: Please refer to your purchase documentation or the official Scheppach website for specific warranty terms and duration applicable to your region.
- Claim Procedure: In the event of a warranty claim, please contact your retailer or the authorized Scheppach service center with your proof of purchase.
- Customer Support: For technical assistance, spare parts, or service inquiries, please visit the official Scheppach website or contact their customer service department.
Note: The warranty does not cover damage caused by improper use, neglect, unauthorized repairs, or normal wear and tear.


