
Silvercrest SFM 850 A5
Silvercrest Mini Fryer SFM 850 A5 Instruction Manual
Model: SFM 850 A5
1. Important Safety Instructions
Please read these safety instructions carefully before using the appliance. Failure to follow these instructions may result in electric shock, fire, or serious injury.
- Always ensure the appliance is placed on a stable, heat-resistant surface, away from walls and flammable materials.
- Do not immerse the appliance, cord, or plug in water or other liquids.
- Keep children and pets away from the appliance during operation and cooling. Hot oil can cause severe burns.
- Do not touch hot surfaces. Use handles and knobs.
- Always unplug the appliance from the power outlet when not in use and before cleaning. Allow it to cool completely before handling or cleaning.
- Do not operate any appliance with a damaged cord or plug, or after the appliance malfunctions or has been damaged in any manner.
- Never leave the appliance unattended while in use.
- Use only recommended accessories and attachments.
- Ensure the oil level is between the MIN and MAX marks to prevent overflow or insufficient heating.
- Do not mix different types of oil or old and new oil.
- Be cautious when frying foods with high moisture content, as they can cause oil to splatter.
- Ensure adequate ventilation when operating the fryer.
2. Product Overview
The Silvercrest Mini Fryer SFM 850 A5 is designed for convenient home frying. Familiarize yourself with its components:

Figure 2.1: Overall view of the Silvercrest Mini Fryer SFM 850 A5, showing the stainless steel body, open lid, and frying basket.
- Stainless Steel Housing: Durable and easy to clean exterior.
- Lid with Viewing Window and Fat Filter: Allows monitoring of food during frying and helps reduce odors.
- Non-stick Oil Container: Removable for easy cleaning.
- Frying Basket: Dishwasher-safe, with a removable handle for safe food handling.
- Control Panel: Includes power switch, indicator lights, and temperature control knob.
- Indicator Lights: Red light for power (in operation), green light for temperature reached.
- Temperature Control Knob: Stepless adjustment up to 190°C.
- Cable Winding: For neat storage of the power cord.
- Transport Handles: For safe movement of the appliance when cool.

Figure 2.2: Front panel of the fryer, displaying the power switch, indicator lights, and temperature control knob with temperature markings.

Figure 2.3: The wire mesh frying basket, designed for holding food during frying.
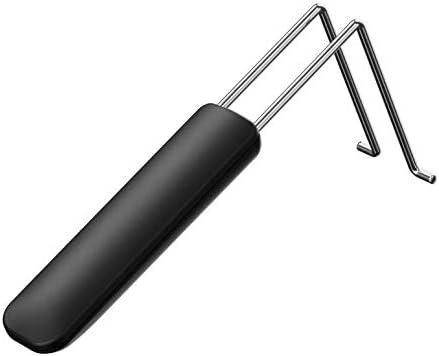
Figure 2.4: The black, removable handle for the frying basket, allowing for safe immersion and removal of food.
3. Setup and Initial Use
Before using your mini fryer for the first time, follow these steps:
- Unpack: Remove all packaging materials and promotional stickers from the appliance.
- Clean: Wash the frying basket and the removable oil container with warm soapy water. Rinse thoroughly and dry completely. Wipe the exterior of the appliance with a damp cloth.
- Assemble Handle: Attach the removable handle securely to the frying basket. Ensure it clicks into place.
- Place Container: Insert the clean, dry non-stick oil container into the fryer housing.
- Fill Oil: Pour frying oil (suitable for deep frying) into the container. Ensure the oil level is between the MIN and MAX markings (maximum 1.2 liters). Do not overfill.
- Position Basket: Place the empty frying basket into the oil container.
- Close Lid: Close the lid securely.
4. Operating Instructions
Follow these steps to operate your Silvercrest Mini Fryer:
- Connect Power: Plug the power cord into a grounded electrical outlet. The red "Power" indicator light will illuminate.
- Set Temperature: Turn the temperature control knob to your desired frying temperature (up to 190°C). Refer to food packaging for recommended temperatures.
- Preheat Oil: The fryer will begin heating the oil. The green "Ready" indicator light will illuminate once the set temperature is reached. This may take several minutes.
- Prepare Food: While the oil is preheating, prepare your food. Ensure food is dry to minimize splattering. Do not overload the basket.
- Lower Food: Once the green "Ready" light is on, carefully open the lid. Slowly lower the frying basket with the food into the hot oil. Close the lid.
- Frying: Fry for the recommended time. The green "Ready" light may cycle on and off as the fryer maintains the temperature.
- Remove Food: When frying is complete, carefully open the lid. Lift the frying basket and hook it onto the edge of the oil container to allow excess oil to drain.
- Serve: Carefully transfer the fried food to a serving dish lined with paper towels to absorb any remaining oil.
- Switch Off: After use, turn the temperature control knob to the "OFF" position and unplug the appliance from the power outlet.
5. Maintenance and Cleaning
Regular cleaning ensures optimal performance and extends the life of your fryer. Always ensure the appliance is unplugged and completely cool before cleaning.
- Cool Down: Allow the oil and the appliance to cool down completely (at least 2-3 hours, or overnight).
- Drain Oil: Carefully pour the cooled oil into a suitable container for disposal or reuse (if filtered and still clean).
- Clean Oil Container: Remove the non-stick oil container. Wash it with warm soapy water and a non-abrasive sponge. Rinse thoroughly and dry completely.
- Clean Frying Basket: The frying basket is dishwasher-safe. Alternatively, wash it by hand with warm soapy water, rinse, and dry. Remove the handle before washing if desired.
- Clean Lid: The lid with the viewing window and fat filter can be wiped clean with a damp cloth. The fat filter may be removable for cleaning or replacement (refer to specific product details if available).
- Clean Exterior: Wipe the exterior stainless steel housing with a damp cloth and mild detergent. Do not use abrasive cleaners or scourers. Never immerse the main unit in water.
- Storage: Once all parts are clean and dry, reassemble the fryer. Use the cable winding feature for neat storage of the power cord. Store in a dry place.
6. Troubleshooting
If you encounter issues with your fryer, consult the following table:
| Problem | Possible Cause | Solution |
|---|---|---|
| Fryer does not turn on. | Not plugged in; power switch off; no power from outlet. | Ensure the power cord is securely plugged in. Turn the power switch to ON. Check the wall outlet with another appliance. |
| Oil is not heating. | Temperature knob set too low or to OFF; appliance not receiving power. | Ensure the temperature knob is set to a desired temperature. Verify the appliance is powered on (red light illuminated). |
| Green "Ready" light does not illuminate. | Oil has not reached the set temperature; faulty sensor. | Allow more time for preheating. If the issue persists after sufficient time, contact customer support. |
| Excessive splattering during frying. | Food is too wet; too much food in the basket. | Ensure food is thoroughly dry before placing it in the basket. Fry smaller batches. |
If the problem persists after attempting these solutions, please contact Silvercrest customer support.
7. Technical Specifications
Detailed specifications for the Silvercrest Mini Fryer SFM 850 A5:
- Model: SFM 850 A5
- Power: 850 W
- Oil Volume: Max. 1.2 L
- Frying Basket Volume: Approx. 0.89 L (at max. mark)
- Temperature Control: Stepless, up to 190°C
- Dimensions (W x H x D): Approx. 24.3 cm x 20.9 cm x 25.5 cm
- Cable Length: Approx. 100 cm
- Weight (Appliance incl. accessories): Approx. 1804 g
- Frying Basket Weight: Approx. 179 g
- Material: High-quality stainless steel design
- Features: Removable lid with viewing window and fat filter, non-stick oil container, dishwasher-safe frying basket with removable handle, 2 indicator lights (power, temperature ready), practical cable winding, transport handles.

Figure 7.1: Visual representation of the frying basket dimensions, indicating width, height, and depth.
8. Warranty and Support
This Silvercrest appliance comes with a standard manufacturer's warranty. Please refer to the warranty card included with your purchase for specific terms and conditions.
For technical support, spare parts, or warranty claims, please contact Silvercrest customer service. Contact information can typically be found on the product packaging or the official Silvercrest website.
When contacting support, please have your model number (SFM 850 A5) and date of purchase ready.
Related documentsSFM 850 A5


Ask a question about this manual
Ask about setup, troubleshooting, compatibility, parts, safety, or missing instructions. Manuals+ will review the question and use this page’s manual context to help answer it.