
1. Introduction
This manual provides detailed instructions for the installation, operation, maintenance, and troubleshooting of your Gigabyte B550 AORUS Elite V2 Gaming Motherboard. Please read this manual thoroughly before using the product to ensure proper setup and optimal performance. Keep this manual for future reference.
2. Product Overview
2.1 Motherboard and Packaging
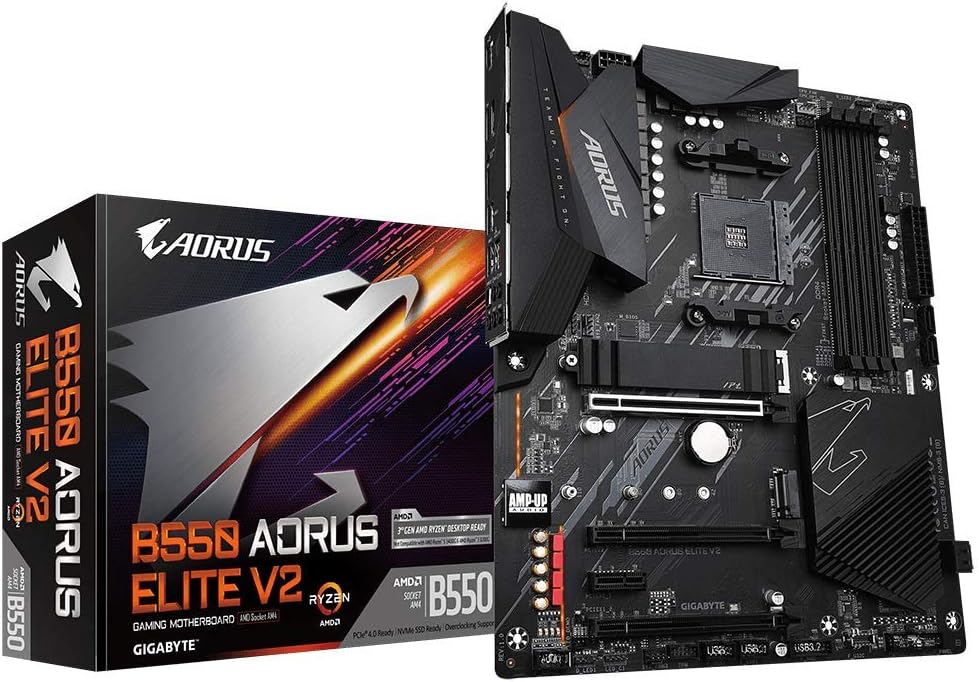
Figure 2.1: The Gigabyte B550 AORUS Elite V2 Motherboard alongside its retail packaging. This image provides a general view of the product and its branding.
2.2 Key Components Layout

Figure 2.2: A detailed top-down view of the motherboard, showcasing the CPU socket (AM4), DDR4 DIMM slots, PCIe slots, M.2 slots with thermal guards, and various headers and connectors.
2.3 Rear I/O Panel

Figure 2.3: The rear I/O panel features multiple USB 3.2 ports, HDMI, DisplayPort, 2.5GbE LAN, audio jacks, and a Q-Flash Plus button for convenient BIOS updates.
3. Key Features
The Gigabyte B550 AORUS Elite V2 Motherboard is designed with advanced features to support high-performance computing:
- Supports 3rd Gen AMD Ryzen Processors
- Dual Channel ECC/ Non-ECC Unbuffered DDR4, 4 DIMMs
- 12+2 Phases Digital Twin Power Design with 50A DrMOS
- Advanced Thermal Design with Enlarged Surface Heatsinks
- Ultra Durable PCIe 4.0 x16 Slot
- Dual Ultra-Fast NVMe PCIe 4.0/3.0 x4 M.2 with One Thermal Guard
- AMP-UP Audio with ALC1200 and WIMA Capacitors
- Blazing Fast 2.5GbE LAN with Bandwidth Management
- Front USB 3.2 Gen1 Type-C and DisplayPort & HDMI for Multiple Display
- RGB FUSION 2.0 Supports Addressable LED & RGB LED Strips
4. Setup Guide
4.1 Before You Begin
Ensure you have the following before starting the installation:
- An anti-static wrist strap or ensure you discharge static electricity regularly.
- Appropriate screwdriver (Phillips head recommended).
- Sufficient workspace with good lighting.
- All necessary components: CPU, RAM, storage devices, power supply, graphics card (if not using integrated graphics), and PC case.
4.2 Installation Steps
- Prepare the Case: Install the I/O shield into the case's rear opening.
- Install the CPU: Carefully open the CPU socket lever, align the CPU with the triangle marker on the socket, gently place the CPU, and close the lever.
- Install the CPU Cooler: Follow the cooler manufacturer's instructions to install the CPU cooler and connect its fan cable to the CPU_FAN header.
- Install RAM: Open the clips on the DIMM slots, align the RAM modules with the notch, and press firmly until the clips snap into place. For dual-channel, refer to the motherboard's silkscreen for recommended slots (usually A2 and B2).
- Install M.2 SSDs: Insert the M.2 SSD into the M.2 slot at an angle, then gently push it down and secure it with the provided screw or standoff. If applicable, install the M.2 thermal guard.
- Mount the Motherboard: Carefully place the motherboard into the PC case, aligning it with the standoffs. Secure it with screws.
- Connect Power Cables: Connect the 24-pin ATX power cable and the 8-pin (or 4+4-pin) CPU power cable from your power supply to the motherboard.
- Install Graphics Card: Insert the graphics card into the primary PCIe x16 slot until it clicks into place. Secure it with the case screw and connect any necessary PCIe power cables from the power supply.
- Connect Storage Devices: Connect SATA data cables from your SATA SSDs/HDDs to the SATA ports on the motherboard, and connect their power cables from the power supply.
- Connect Front Panel Headers: Connect the power button, reset button, USB ports, audio jacks, and LED indicators from your PC case to the corresponding headers on the motherboard. Refer to the motherboard's manual for exact pin layouts.
For more detailed visual guides, please refer to the official Installation Manual (PDF) and User Guide (PDF).
5. Operating Instructions
5.1 First Boot and BIOS/UEFI Setup
After assembling your system, connect a monitor, keyboard, and mouse. Power on the system. During the boot process, repeatedly press the DEL key to enter the BIOS/UEFI setup utility. Here you can configure boot order, system time, fan speeds, and other advanced settings. Save and exit to proceed with operating system installation.
5.2 Driver and Software Installation
After installing your operating system, it is crucial to install the latest drivers for your motherboard's components. You can find these on the GIGABYTE official website for your specific model. Key drivers include:
- Chipset Drivers
- LAN Drivers (for 2.5GbE Ethernet)
- Audio Drivers (Realtek ALC1200)
- SATA/NVMe RAID Drivers (if applicable)
- USB Drivers
Additionally, GIGABYTE provides utility software such as RGB FUSION 2.0 for controlling RGB lighting and Smart Fan 5 for fan control and monitoring.
6. Maintenance
6.1 Cleaning
Regularly clean your PC to prevent dust buildup, which can lead to overheating and reduced performance. Use compressed air to clear dust from fans, heatsinks, and other components. Ensure the system is powered off and unplugged before cleaning.
6.2 BIOS Updates
GIGABYTE periodically releases BIOS updates to improve compatibility, stability, and performance. The B550 AORUS Elite V2 features Q-Flash Plus, allowing you to update the BIOS without installing the CPU, memory, or graphics card. Download the latest BIOS version from the GIGABYTE website, rename it as instructed, and follow the Q-Flash Plus procedure outlined in the user manual.
7. Troubleshooting
If you encounter issues with your motherboard, consider the following common troubleshooting steps:
- No Power/No Boot: Double-check all power connections (24-pin ATX, 8-pin CPU, PCIe for GPU). Ensure the power supply is switched on.
- No Display: Verify monitor connection, ensure graphics card is seated correctly, and try reseating RAM modules. Test with one RAM stick if multiple are installed.
- System Instability/Crashes: Check CPU and GPU temperatures. Ensure RAM is compatible and correctly installed. Update drivers and BIOS to the latest versions.
- Component Not Detected: Reseat the component (e.g., M.2 SSD, SATA drive, PCIe card). Check BIOS settings to ensure the port/slot is enabled.
- BIOS Reset: If you've made incorrect BIOS settings, clear the CMOS by either removing the CMOS battery for a few minutes (with power off) or using the CLR_CMOS jumper on the motherboard (refer to the user guide for location).
For more comprehensive troubleshooting, refer to the User Guide (PDF) provided by GIGABYTE.
8. Technical Specifications
| Feature | Specification |
|---|---|
| Brand | GIGABYTE |
| Model Name | B550 AORUS Elite V2 |
| CPU Socket | Socket AM4 |
| Compatible Processors | AMD 3rd Generation Ryzen |
| Chipset Type | AMD B550 |
| RAM Memory Technology | DDR4 |
| Memory Clock Speed | 2133 MHz (Base) |
| Max Memory Storage Capacity | 128 GB |
| Product Dimensions (LxWxH) | 13.18 x 10.62 x 3.14 inches |
| Item Weight | 3.44 pounds |
| LAN | 2.5GbE LAN |
| Audio | Realtek ALC1200 |
| PCIe Slots | PCIe 4.0 x16 |
| M.2 Slots | Dual NVMe PCIe 4.0/3.0 x4 |
9. Warranty and Support
GIGABYTE products are covered by a limited warranty. For detailed warranty terms, conditions, and duration, please refer to the warranty card included with your product or visit the official GIGABYTE website. For technical support, driver downloads, and further assistance, please visit the GIGABYTE support page or contact their customer service directly.
Official GIGABYTE Website: www.gigabyte.com


